
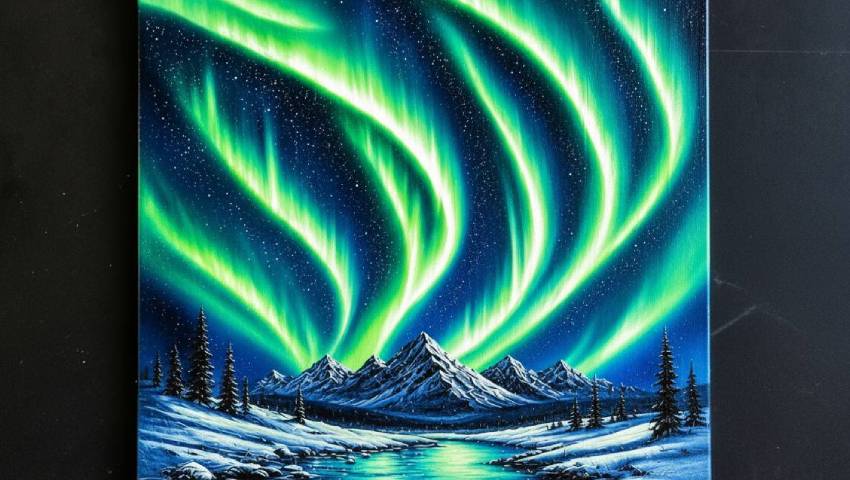
Learn how to paint the Northern Lights with acrylic in this step by step tutorial.
Step 1: Paint the Sky Background
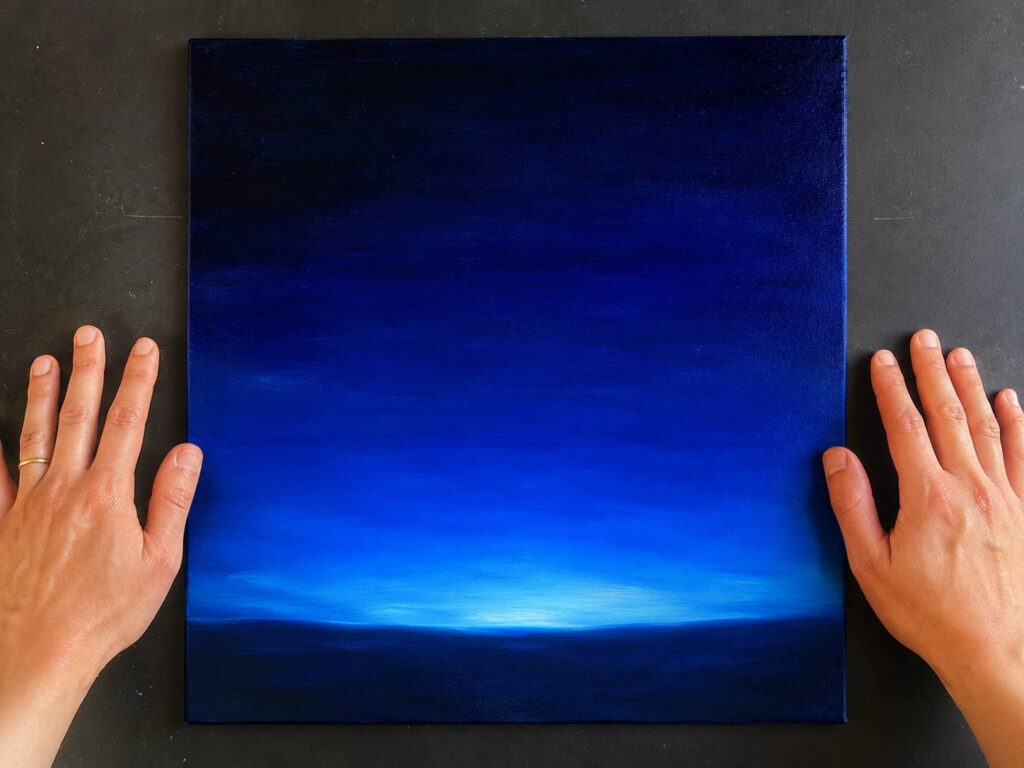
Using a large flat brush, cover your entire canvas with a rich cobalt or Prussian blue. Blend the color slightly lighter toward the center horizon, leaving a deeper, darker blue at the top. Work quickly while the paint is wet to keep the transitions smooth. Allow this base layer to dry completely before moving on.
Step 2: Block In the Aurora & Landscape
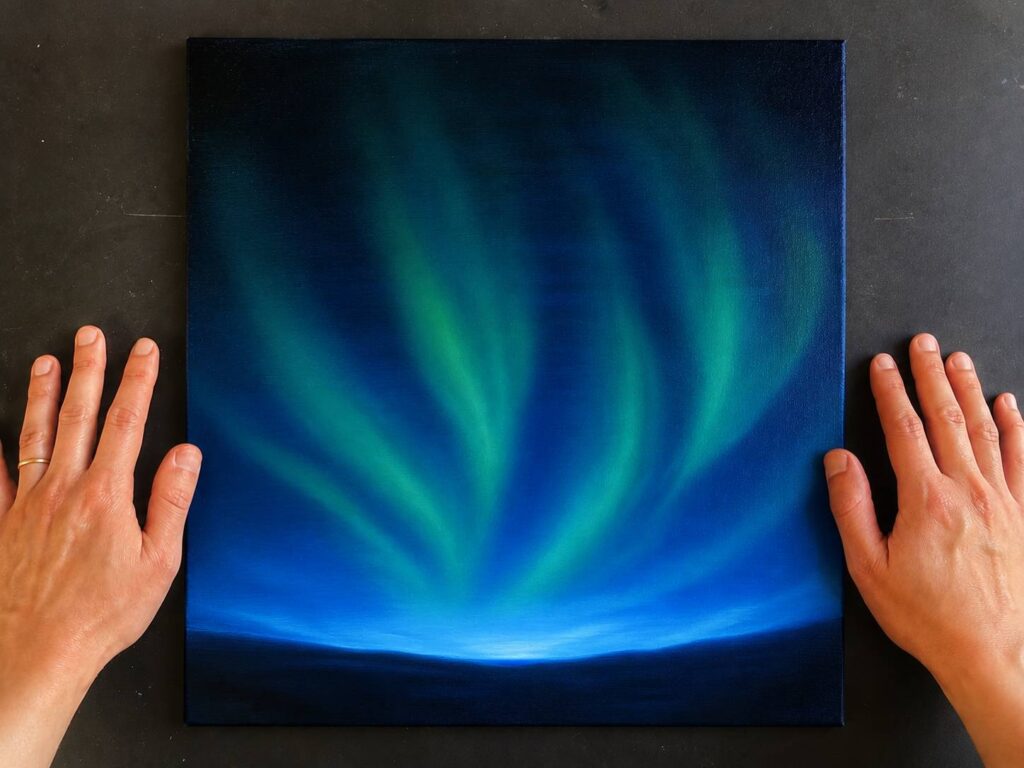
Using a fan brush or filbert brush, sweep broad, sweeping strokes of bright neon green and teal across the upper two-thirds of the canvas, fanning upward and outward from the center. Then, using dark navy and black, paint in the mountain silhouette, pine tree line, and a flat reflective water surface at the bottom of the canvas. Add loose white-blue strokes for snow on the mountain peaks.
Step 3: Build Up the Aurora Bands
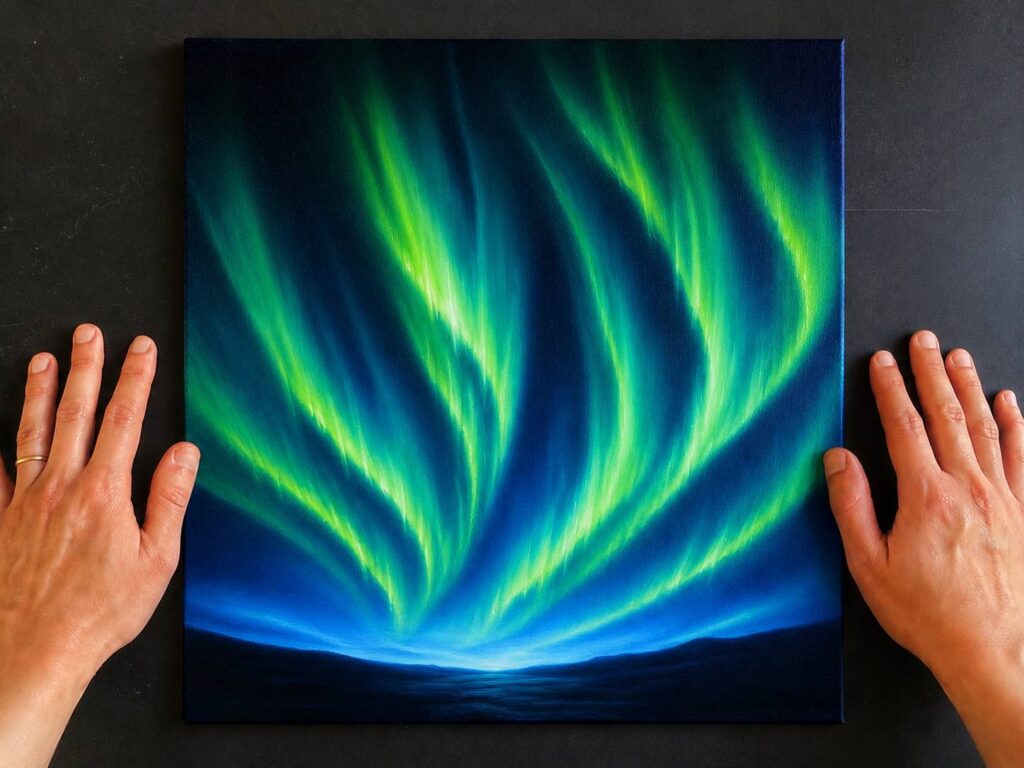
Add a second layer of aurora streaks, this time concentrating on creating flowing, curved ribbon shapes. Mix yellow-green and bright cyan for the most luminous parts of each band. Use a dry-brush technique to feather the edges outward, so the lights appear to glow softly against the night sky. Reinforce the reflection of the lights in the water below.
Step 4: Add Depth & Layering to the Aurora
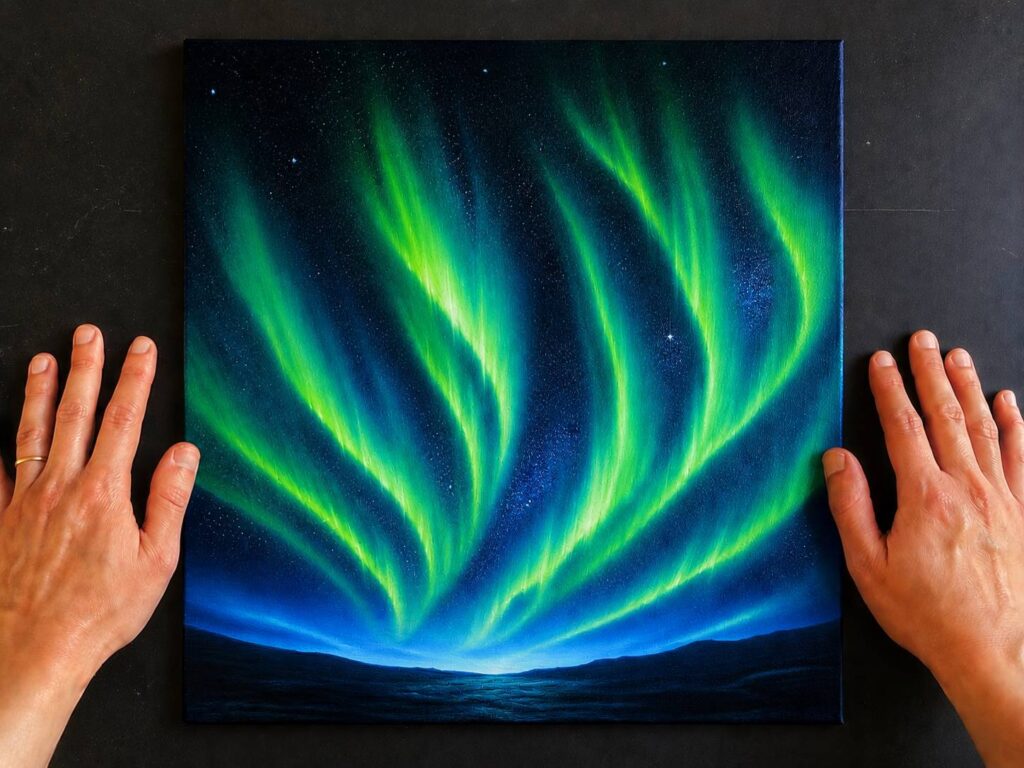
Zoom in your focus to the individual aurora bands. Deepen the teal and blue-green tones in the shadowed areas between each ribbon. Use a thin liner brush to add crisp, bright green lines along the center of each band to create a sense of inner light. This contrast between the dark gaps and the glowing ribbons gives the aurora its signature electric look.
Step 5: Blend the Atmospheric Glow

Using a soft blending brush or your fingertip, lightly blend the edges of the aurora bands into the surrounding blue sky. Add a soft wash of teal and cerulean blue to the lower portion of the sky to create a warm atmospheric glow near the horizon. This step ties the aurora into the overall painting and creates a dreamy, immersive feel.
Step 6: Final Dark Details & Finishing Touches
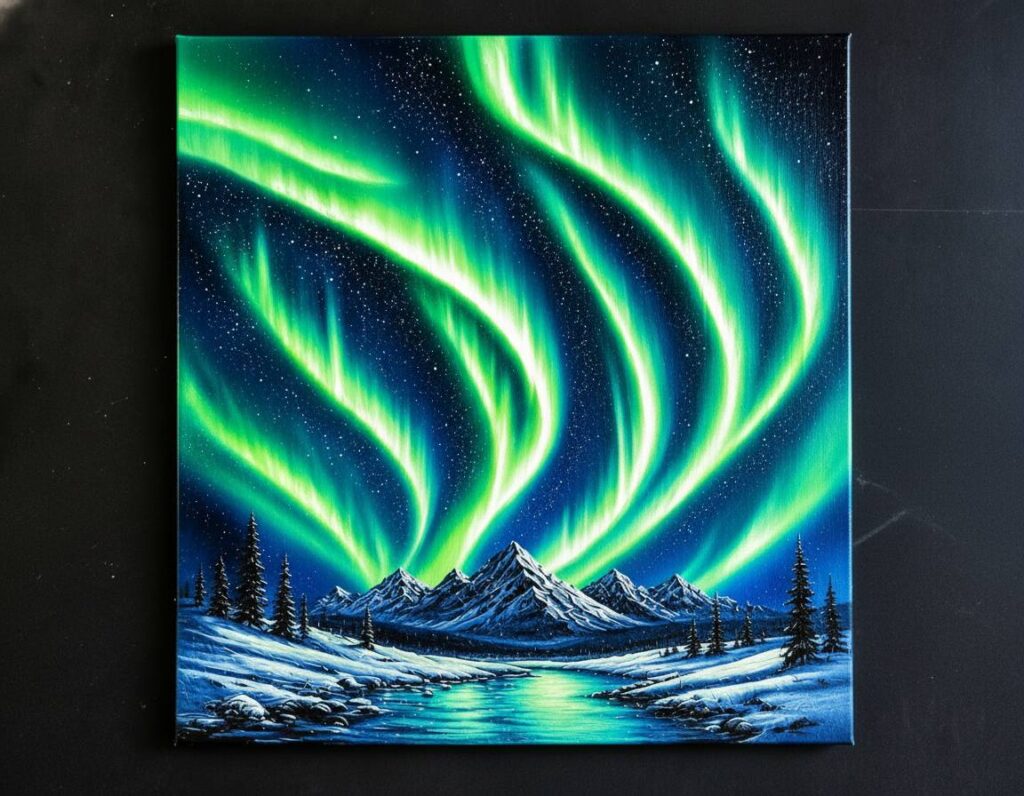
Deepen the very top and outer edges of the canvas with black or very dark navy, vignetting the edges to draw the eye toward the lights. Use a small round brush to flick tiny white dots across the dark sky for stars. Add final highlights of pure white or bright yellow-green to the most intense parts of the aurora bands. Let everything dry, then step back and admire your glowing night sky!