
Learn how to paint a pet portrait of your dog with acrylic paints in this step by step tutorial.
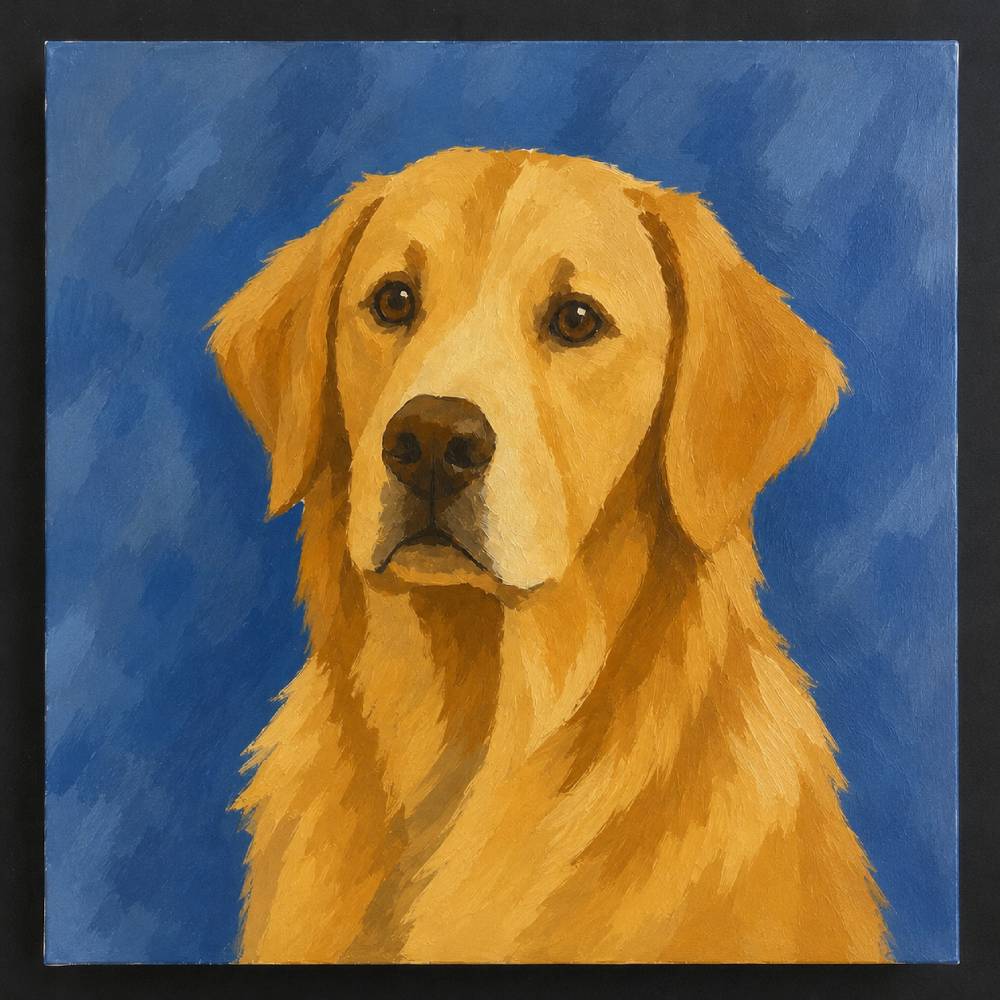
Step 1: Block In the Base Shape
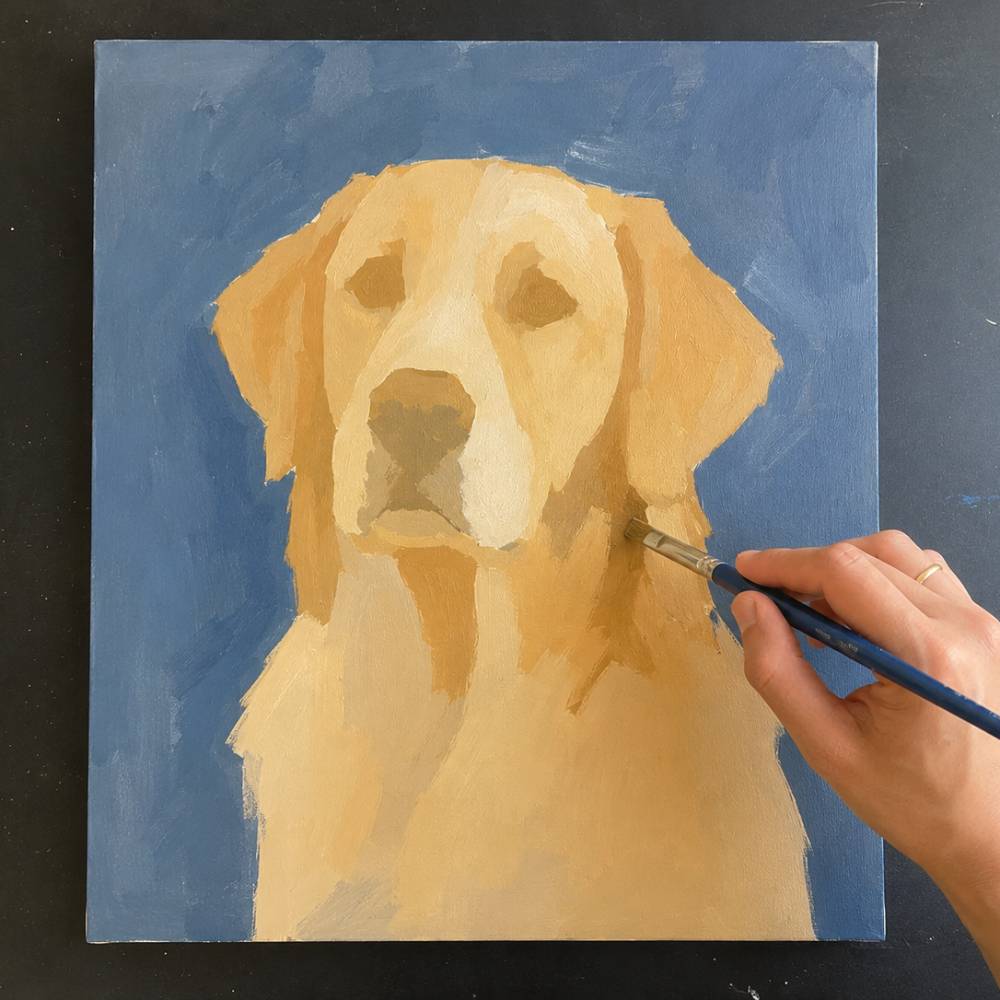
Start by painting the overall shape of your dog using flat, simplified blocks of color. Don’t worry about detail yet — focus on getting the basic form and proportions right. Use a medium flat brush and a warm golden-yellow mix (yellow ochre + white + a touch of burnt sienna) to fill in the head, ears, and body. Paint the background in a solid mid-tone blue. Keep your paint opaque but your shapes loose and geometric. This is your foundation layer, so it doesn’t need to be perfect.
Colors used: Yellow ochre, titanium white, burnt sienna, cerulean blue
Step 2: Define the Face & Add Light and Shadow
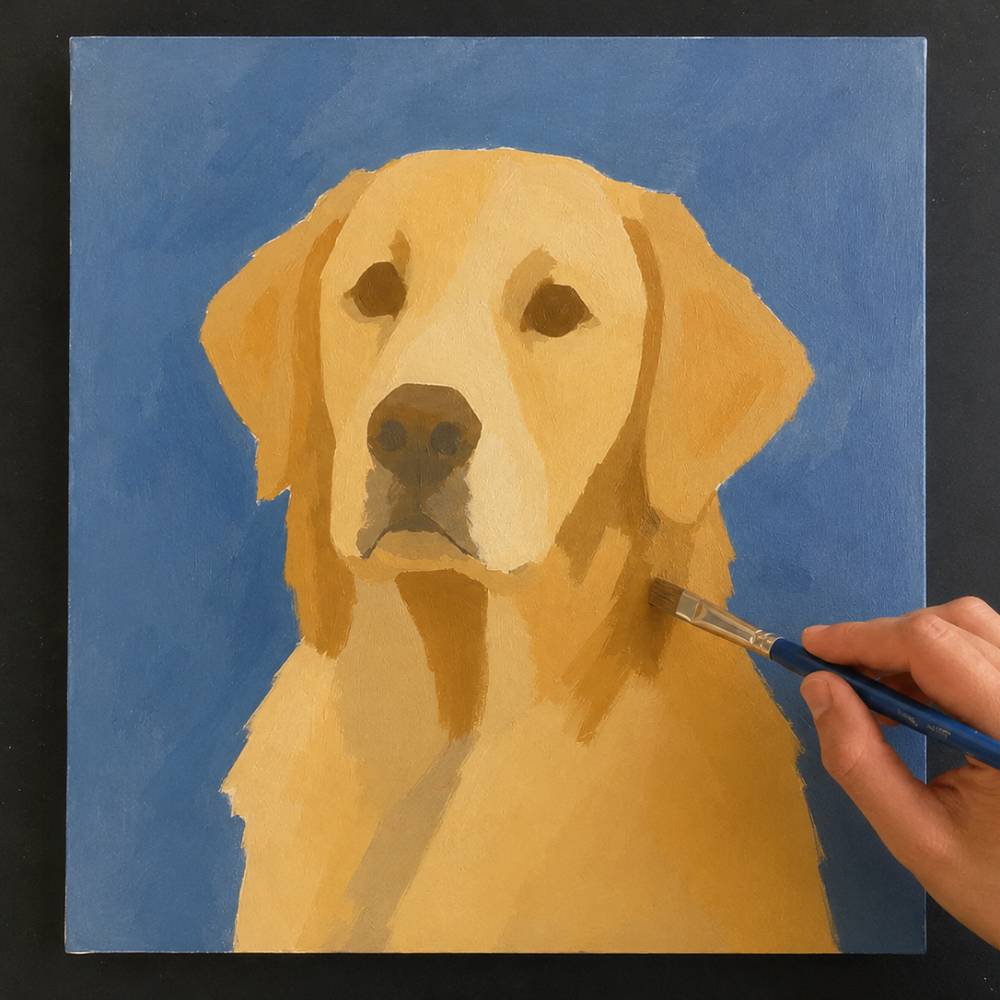
Begin refining the face by adding simple planes of light and shadow. Use a slightly darker golden-brown mix (burnt sienna + yellow ochre) to suggest the shadows around the muzzle, under the ears, and along the sides of the head. Add a lighter mix (yellow ochre + white) to the top of the head and the bridge of the nose where light hits. Keep your brushstrokes flat and deliberate — you’re sculpting with color, not detail. Block in the nose as a dark shape and hint at the eye placement.
Colors used: Burnt sienna, yellow ochre, titanium white, raw umber
Step 3: Build Up the Body & Add Depth
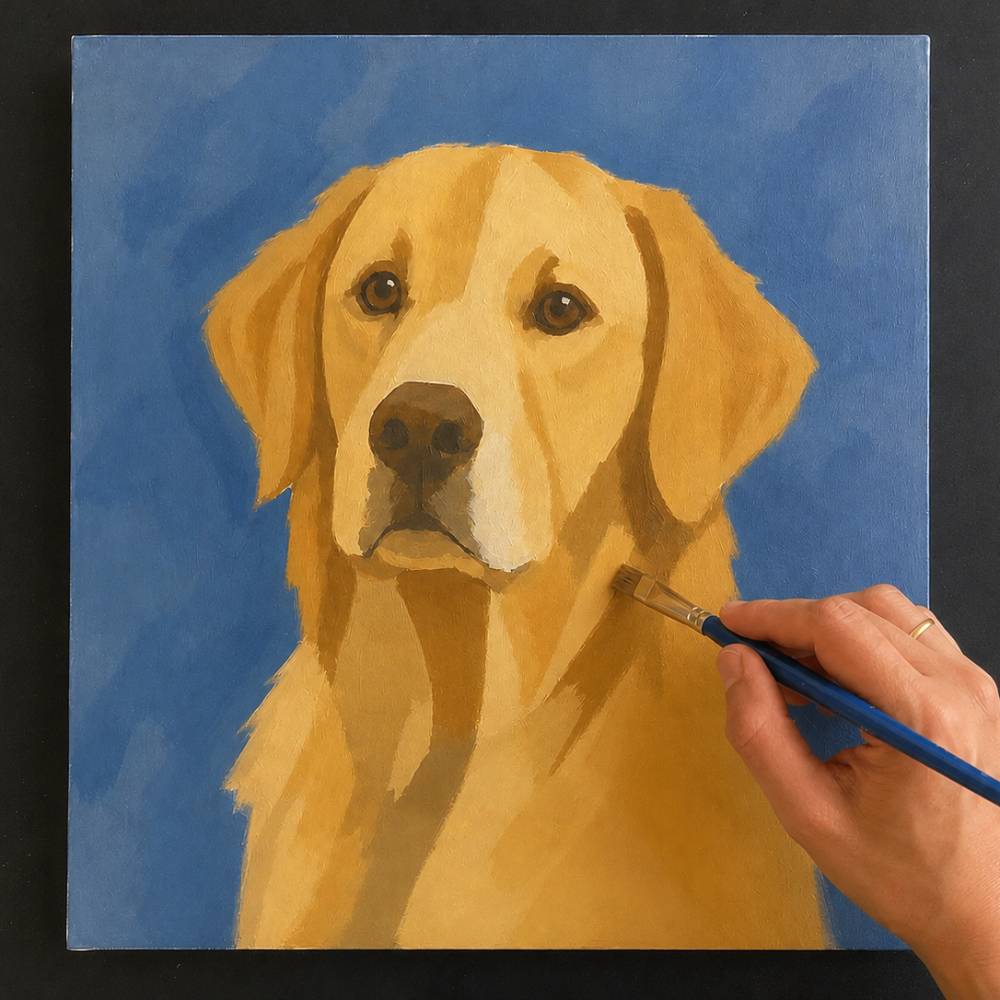
Shift your focus to the chest and body. Use your shadow mix to define where the chest meets the neck and add dimension to the fur direction. Begin blending transitions between your light and dark areas using a clean dry brush or soft blending strokes. At this stage, your dog should start to feel three-dimensional. Add a darker tone under the chin and around the ear flap. You can also begin loosening up the background with varied blue brushstrokes to add energy.
Colors used: Burnt sienna, yellow ochre, raw umber, titanium white
Step 4: Refine Details & Add Texture
Now the painting really comes to life. Switch to a smaller round brush and start adding fur texture using short, directional strokes that follow the natural flow of the dog’s coat. Build up layers of light and dark to create depth. Add realistic eyes using a dark brown base, a black pupil, and a small white highlight dot. Refine the nose with a dark mix and add a subtle shine highlight. Work the background with expressive, varied blue brushstrokes to create an impressionistic feel that makes the dog pop.
Colors used: Burnt umber, raw umber, titanium white, ivory black, cerulean + ultramarine blue mix
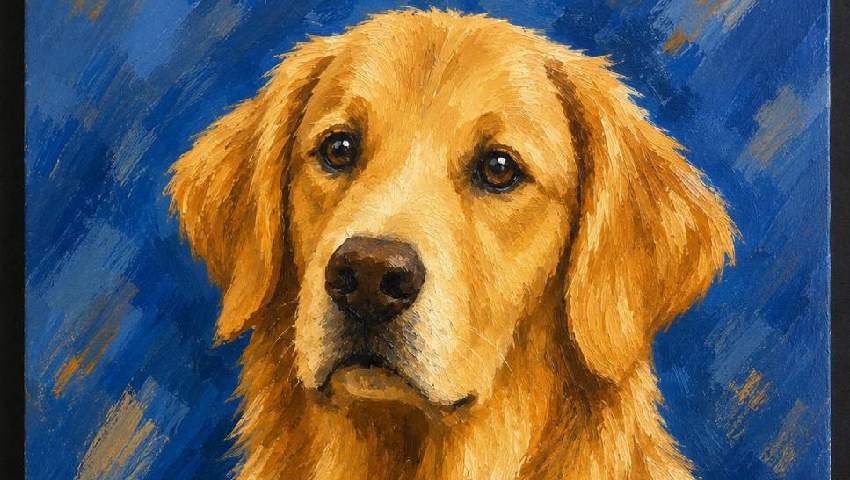
Step 5: Final Details & Finishing Touches
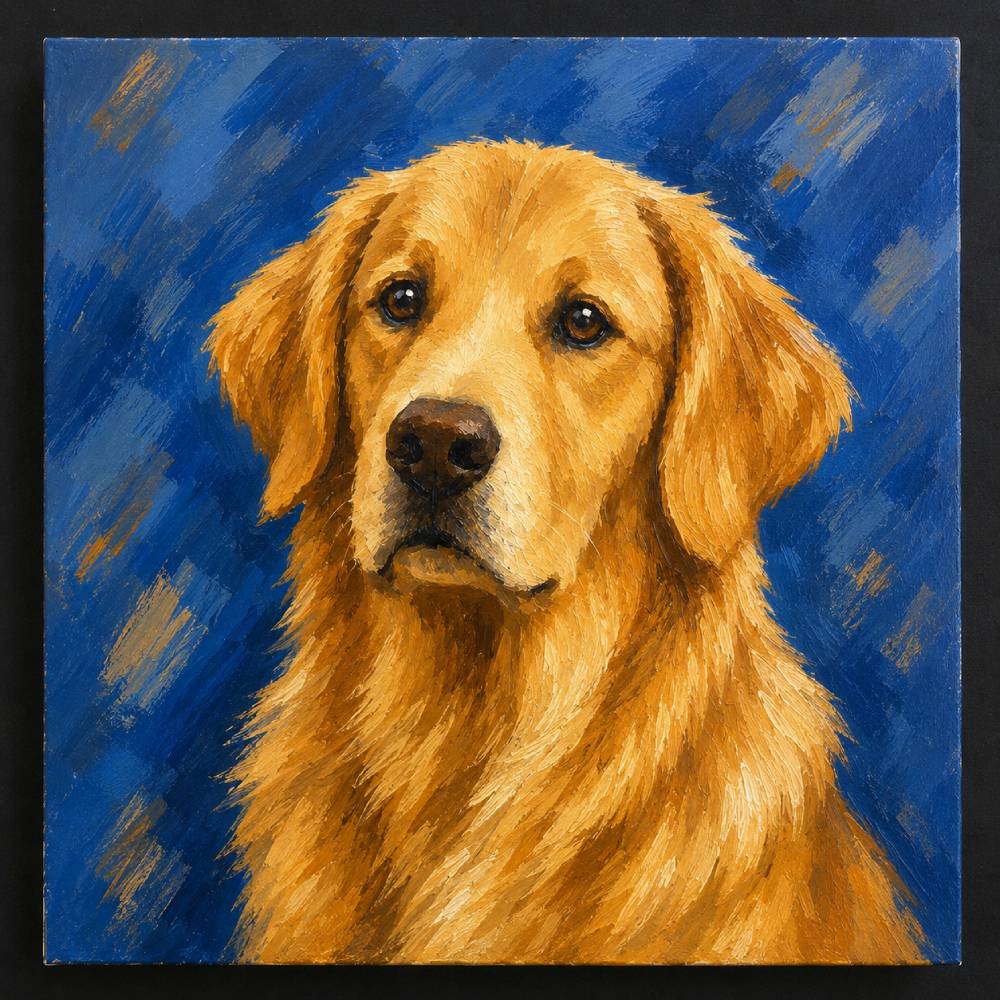
In the final step, add the finishing strokes that bring everything together. Use a fine detail brush to paint individual fur hairs, especially around the face, ears, and chest. Brighten the lightest highlights on the top of the head and along the fur with pure titanium white or a very light yellow mix. Deepen any shadows that need more contrast. Step back and assess — adjust any proportions, punch up the contrast, and make sure the eyes feel alive and connected. Sign your painting and let it dry completely.
Colors used: Titanium white, yellow ochre, burnt sienna, ivory black