
Learn how to paint a misty foggy forest in acrylics.
Step 1 – Paint the Background Sky and Mist
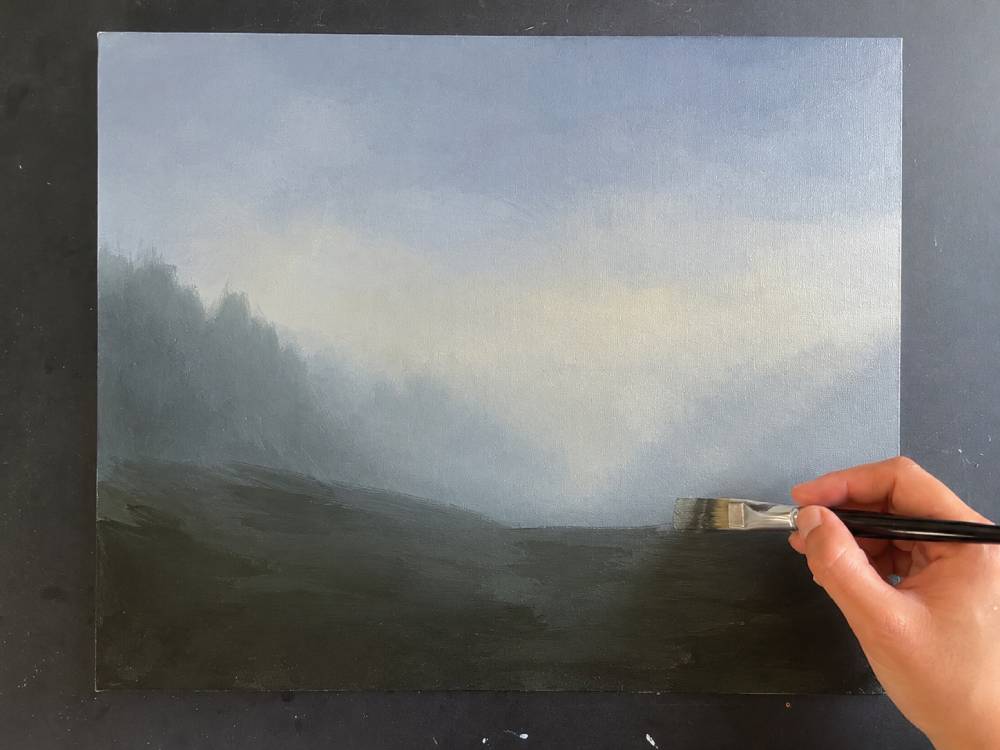
Start by covering your canvas with a base layer of blue-gray tones for the sky. Use a large flat brush to blend a soft, creamy white or pale yellow into the center of the canvas — this will become your light source. Darken the lower edges and corners with a deep dark brown or black mix to establish the shadowy hillside. While the paint is still wet, blend the transitions so the sky fades seamlessly into the dark ground. This wet-on-wet technique is key to achieving the dreamy, misty look in this misty forest acrylic painting.
Step 2 – Build Up the Foggy Mid-Ground Layers
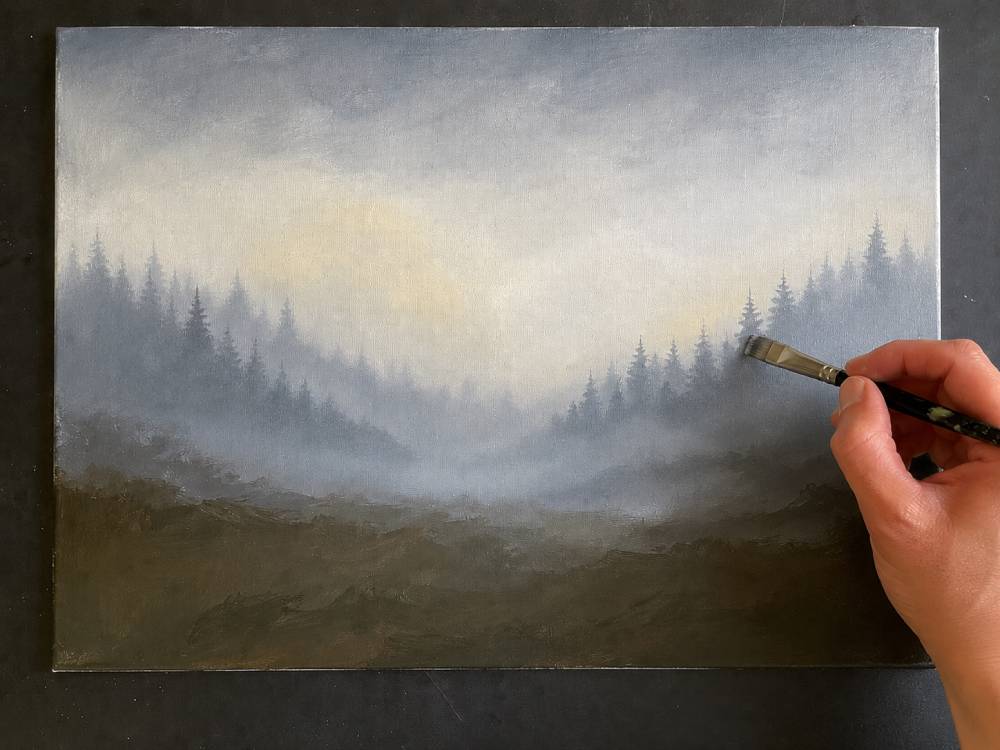
Using a soft, dry brush or a fan brush, add horizontal layers of muted blue-gray and white across the mid-ground to create the illusion of rolling fog. Work in light, feathery strokes and blend upward into the sky. Begin hinting at distant tree lines in the background using diluted dark paint — keep these shapes soft and undefined to mimic depth and atmosphere. Add more of the warm glow in the center by dabbing soft yellow-white tones into the mist.
Step 3 – Add the Silhouetted Tree Line

Using a small detail brush or a liner brush, paint tall pine tree silhouettes along both sides of the canvas. Start with the trees furthest in the distance — make them lighter and less defined. Gradually paint taller, darker, and more detailed trees as they come forward in the composition. Use a stippling or dabbing motion for the pine needle branches. Leave the glowing center area open to preserve the misty light effect. Vary the height and spacing of the trees to create a natural, organic feel.
Step 4 – Add Foreground Details and Ground Texture
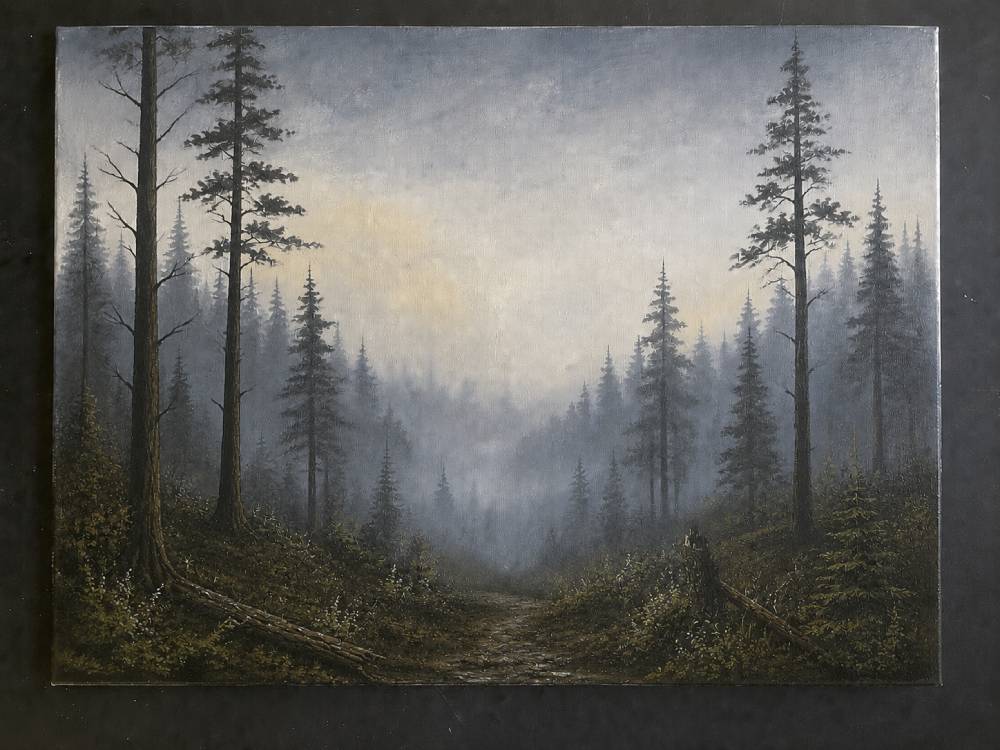
Bring the painting to life by adding texture to the forest floor. Use a small brush to paint rocks, roots, scattered foliage, and low ground cover using dark greens, browns, and blacks. Define a subtle pathway or clearing in the center of the canvas that leads the viewer’s eye toward the glowing light in the distance. Add highlights to the edges of rocks and plants with a dry-brush technique using lighter tones to create dimension. This is also a great stage to refine your tree trunks and add more branch detail to the foreground trees.
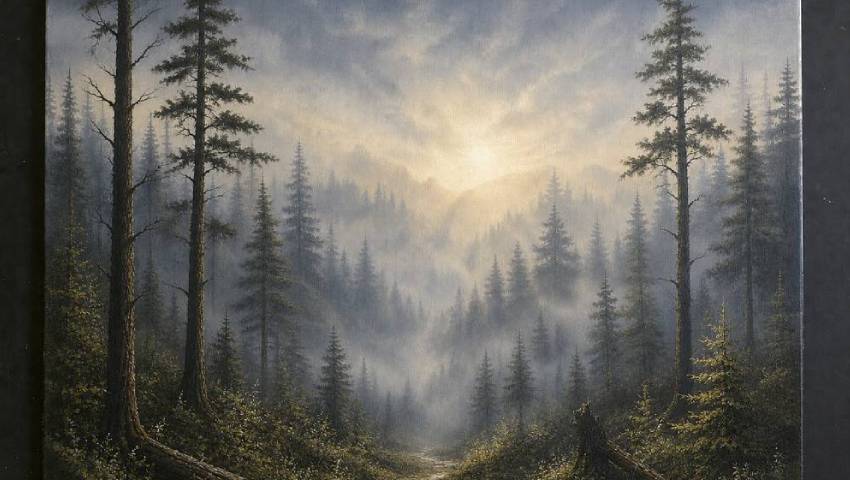
Step 5 – Paint the Glowing Light and Final Details
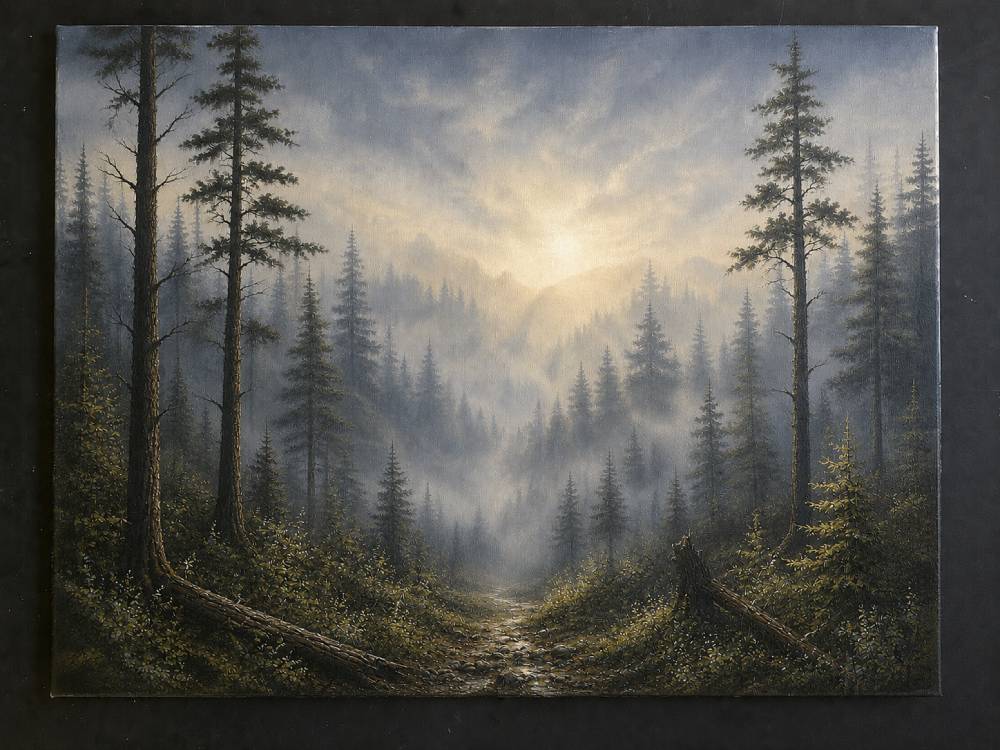
This is the most magical step. Using a soft brush, paint a bright glowing orb of warm white and pale yellow at the center horizon line. Gently feather the glow outward in all directions with light, circular blending strokes. Add subtle rays of light streaking upward through the trees by dragging thin, translucent strokes of white toward the top of the canvas. Soften any harsh edges throughout the painting with a clean, dry blending brush. Add any final highlights to your trees, ground, and mist to complete your misty forest acrylic painting.