
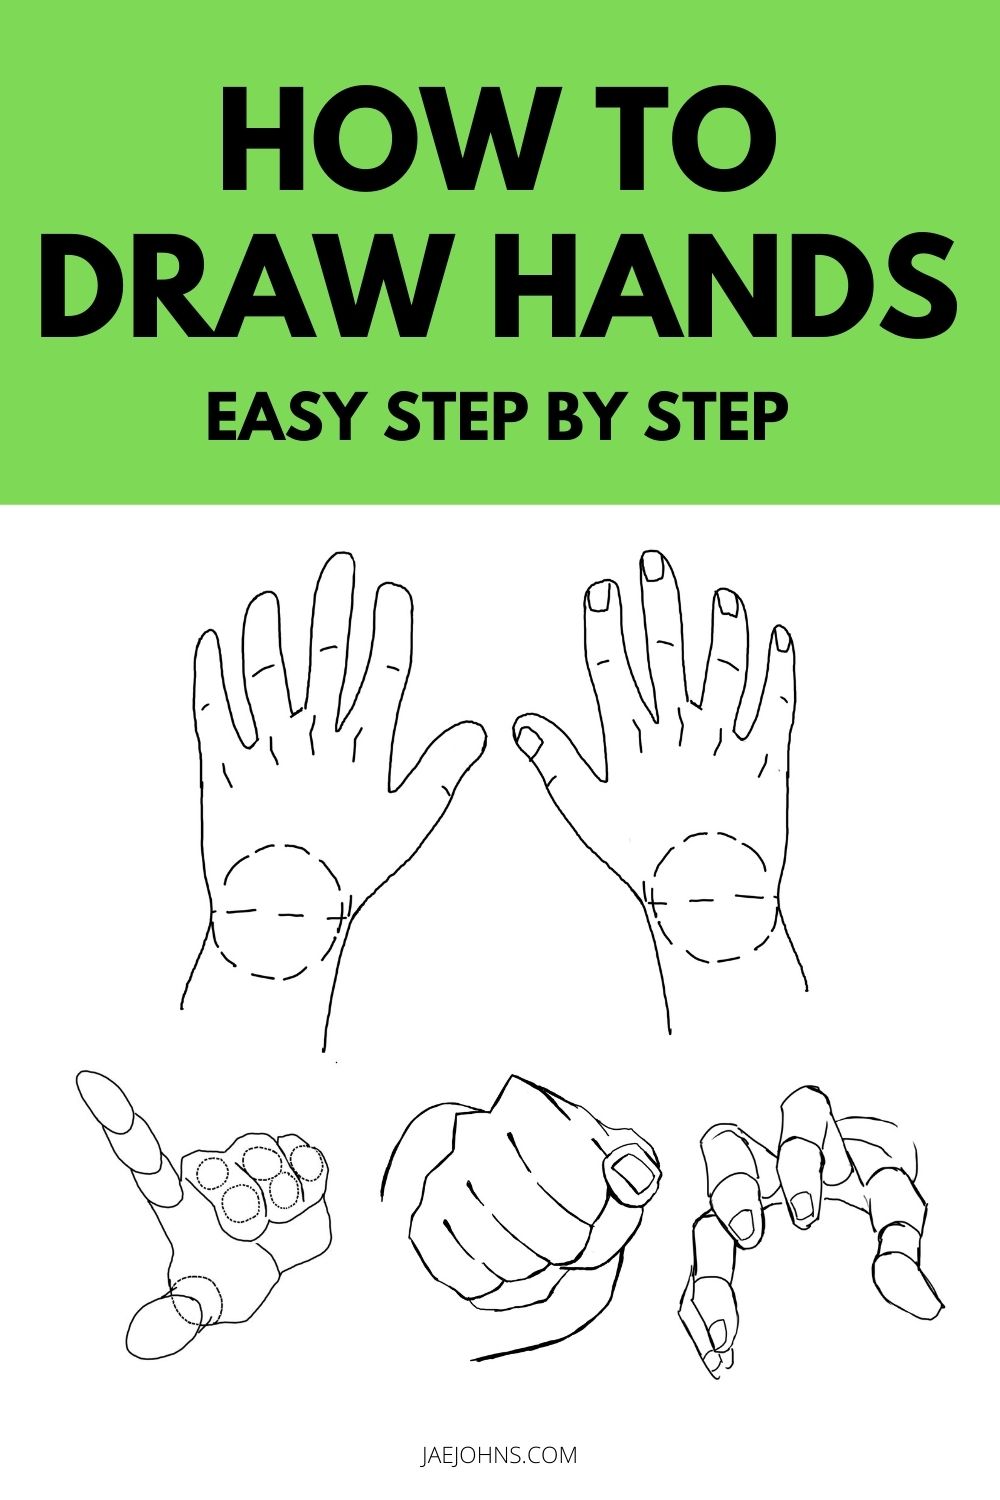
Hands are one of the most expressive parts of the body, making it difficult to learn how to draw hands for some artists.
Therefore, I’m going to show you some easy step-by-step instructions and a series of tips and tricks to drawing hands.
The anatomical details of the hand provide many different possibilities for a dynamic hand position.
However, the broad shapes of the hand can be expressed with a few simple forms.
In this guide, you’ll learn
- Step by step instructions on how to draw hands at different angles
- How to draw the basic shape of a hand
- Learn how to draw a foreshortened hand
- Tips to drawing hands
- Things to avoid when drawing hands
- and more

The Basic Shape of How to Draw Hands
If you want to master how to draw hands then you’ll need to know the fundamental form.
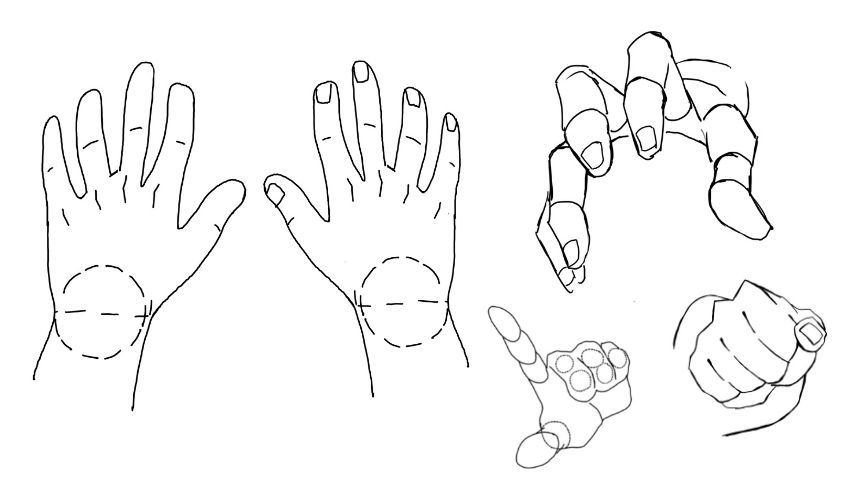
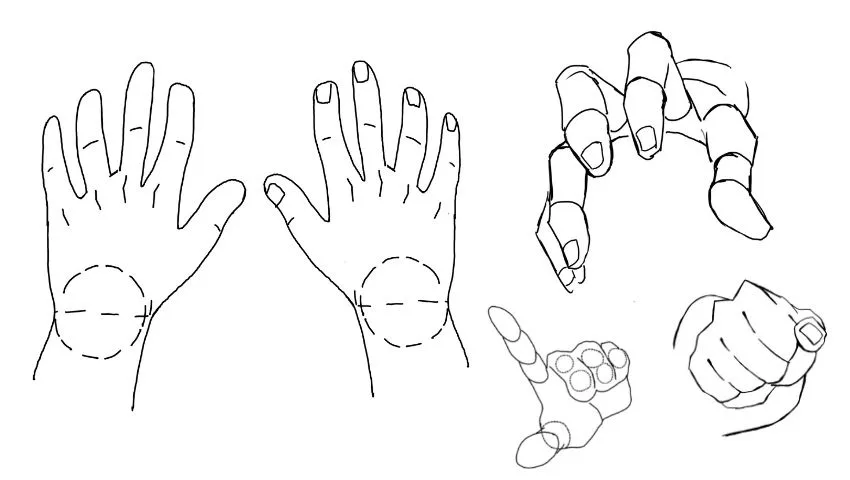
The fundamental drawable forms of the hand are offset pentagons.
These will form the base unit upon which the simpler forms of the fingers and thumb will extend out.
In the illustrations above, do you see how the hand is a pentagon shape with the peak a bit more to the side?
This is because the palm is drawn as an offset pentagon, with the wrist drawn as a circle. (An offset pentagon is when the peak of the pentagon is shifted towards one side of the pentagon).
When you’re learning how to draw a hand step by step, keep in mind that every step is simplified to a basic shape.
We can get a better idea of how to get started with a step by step guide:
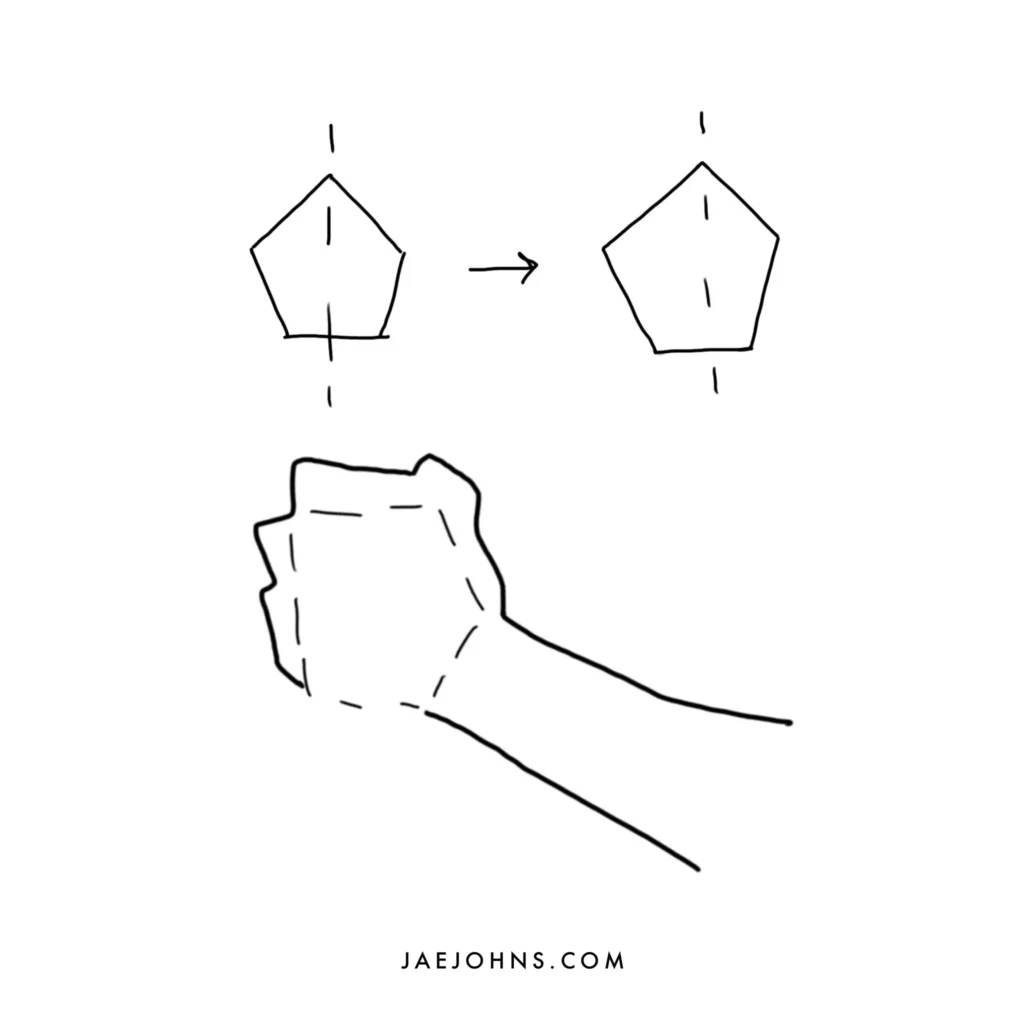
Step 1
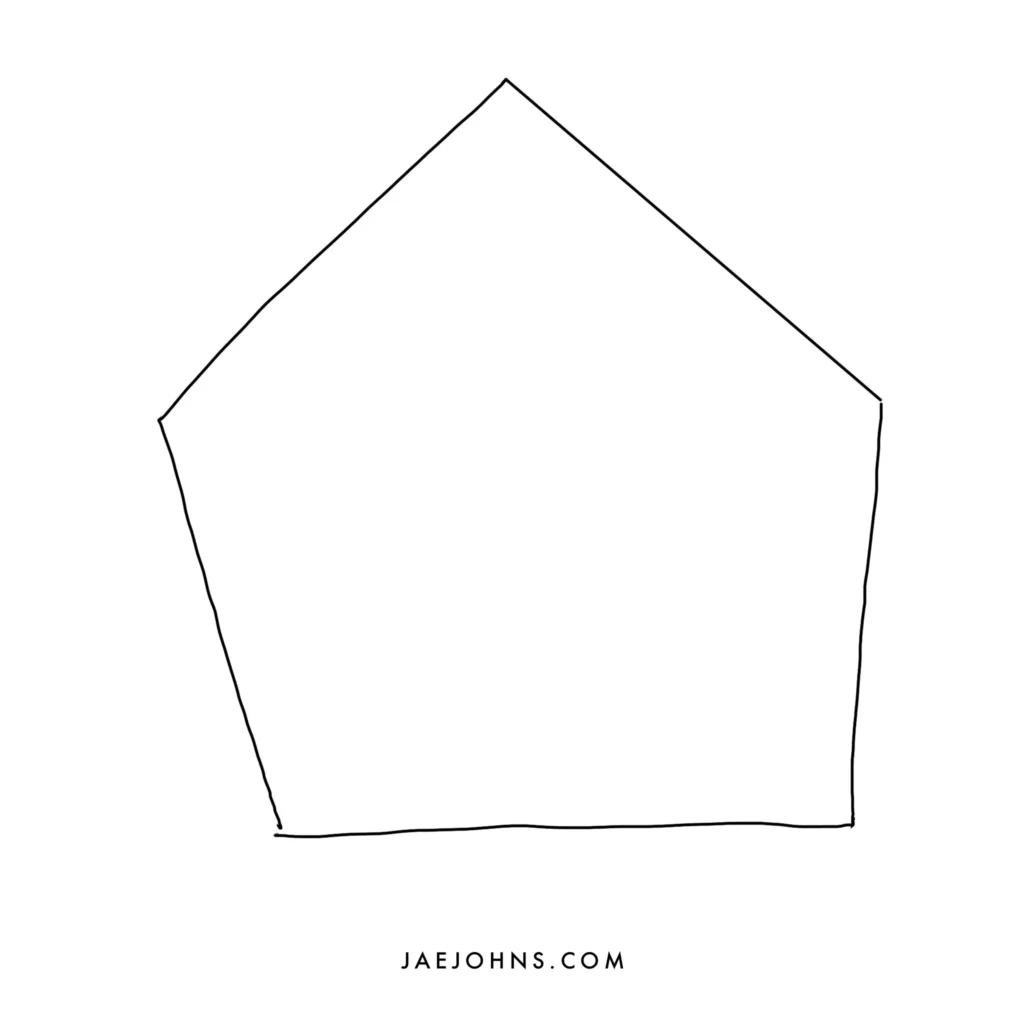
First, draw a pentagon.
Drawing a pentagon is a crucial step in how to draw hands.
Step 2
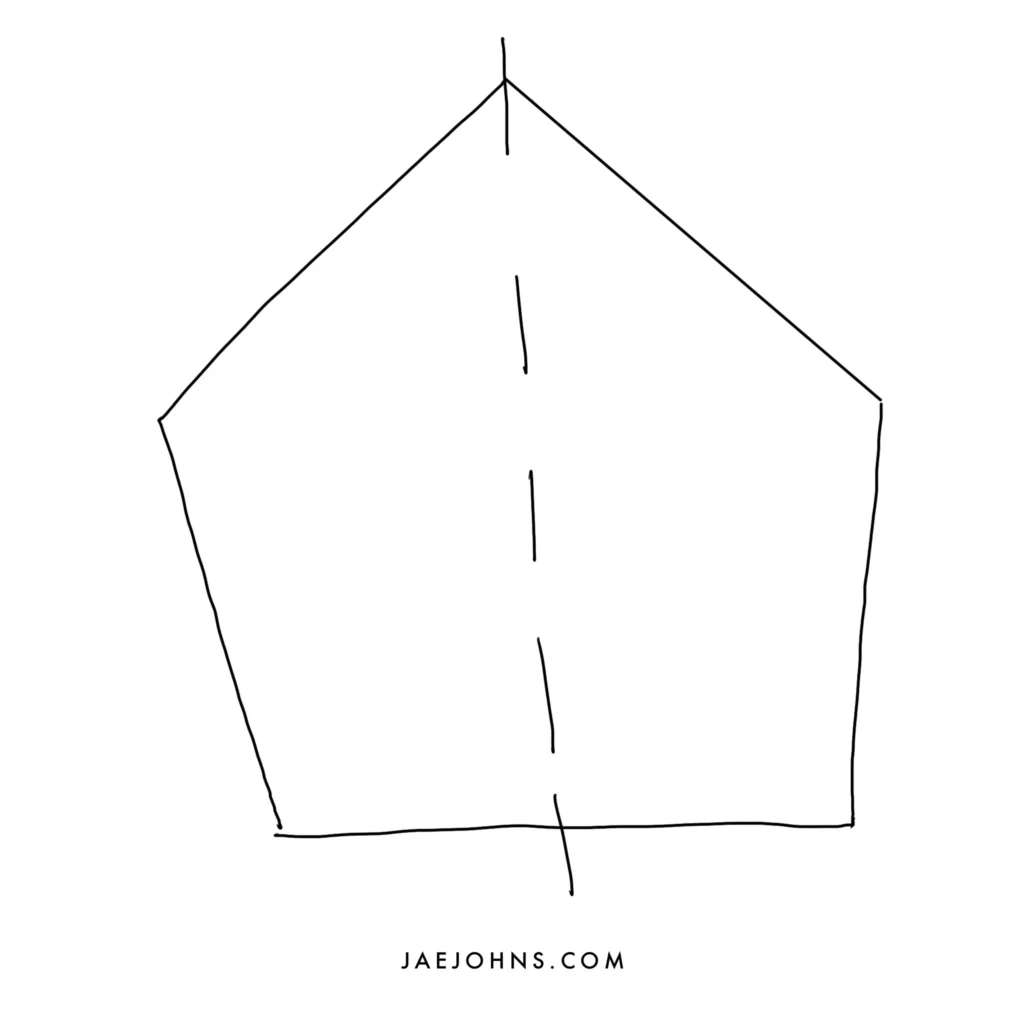
Then, draw a centerline running through the middle point of the pentagon.
Step 3
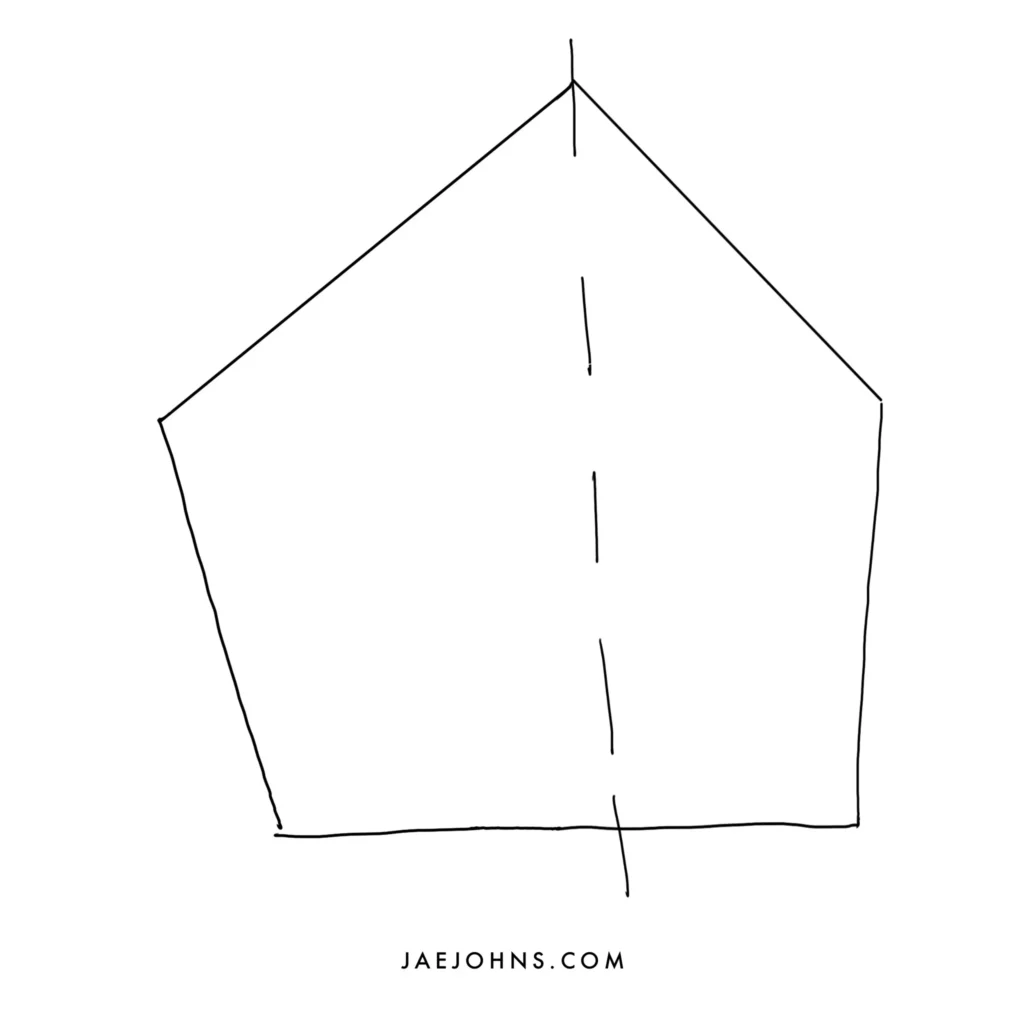
Placing the centerline correctly on the form is an important step in learning how to draw hands.
Thinking from the centerline, push the pentagon to offset a little to the right for a left hand, or a little to the left for a right hand.
These two forms of offset pentagon will form the basic shapes of each hand.
We’ll do a left hand to get started, so draw the right offset pentagon.
Step 4
Look at the back of your left hand.
You should be able to tell that the offset pentagon shape is the shape of the back of your palm, with its peak landing around the middle finger’s knuckle.
On the left hand, the thumb will come out from the lower right side of the pentagon.
The pointer finger in relation to the thumb should have a gap.
The index and middle fingers will come out from the upper right side, while the ring and pinky fingers from the upper left.
These should each have slightly curved, cylindrical forms.
Step 5
Finally, draw the wrist as a ball joint circling the bottom of the pentagon.
Pay attention to the overall basic forms at this stage.
These should be simple shapes to build from as you build confidence.
When you’re learning how to draw a hand step by step, then the overall basic forms are important.
How to Draw a Hand Step by Step
Learning how to draw hands easily all comes down to knowing the basic shapes and also using your own hands as a reference.
Following the look of your own hand, you should be able to draw the basic shape of the hand using the instructions above together with your own drawing skills.
The middle finger will come out from the highest point of the pentagon, while the thumb will take some study to understand how it emerges from the lower right side.
For a simple step by step of how to draw hands easy, here is how to proceed:
Step 1
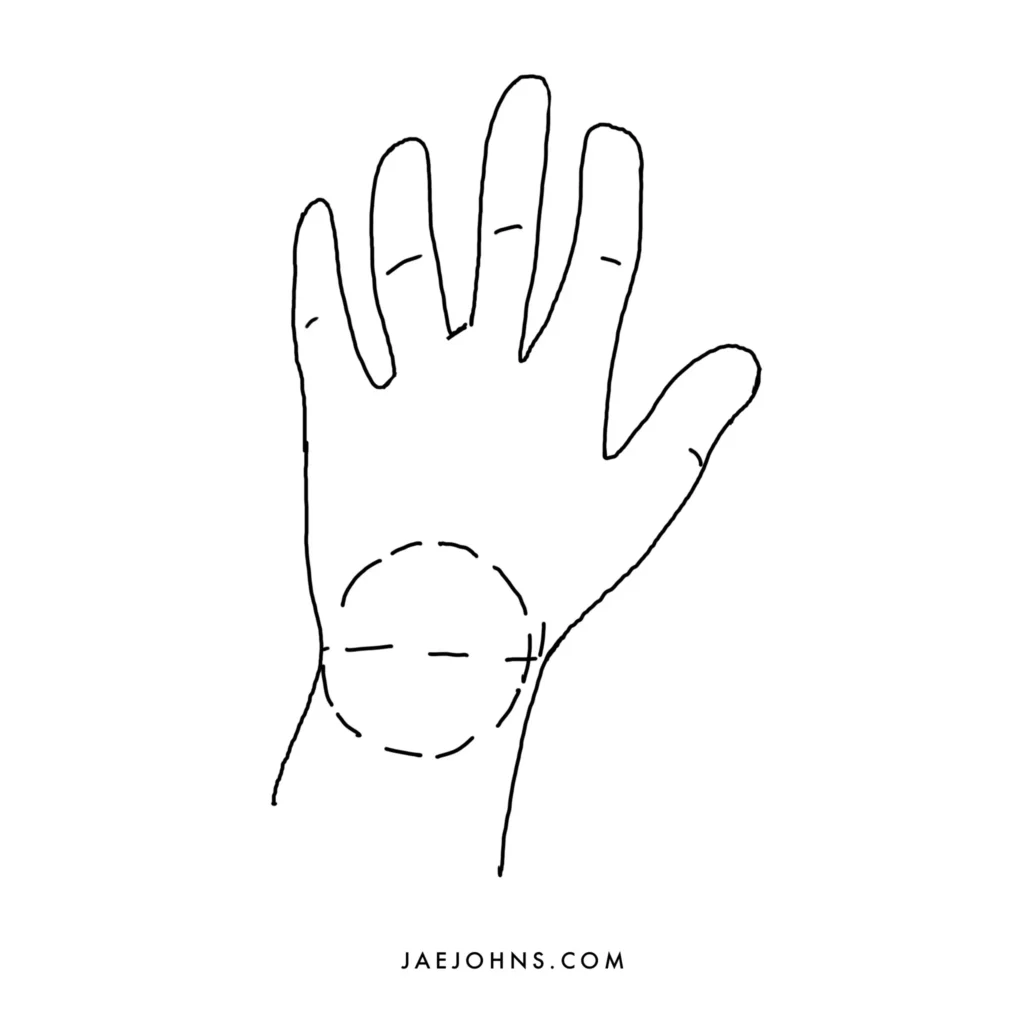
Once the extended finger and thumb shapes are done, place a joint line on each of them where the middle joint would be.
It should be about one-third of the way up the finger.
Step 2
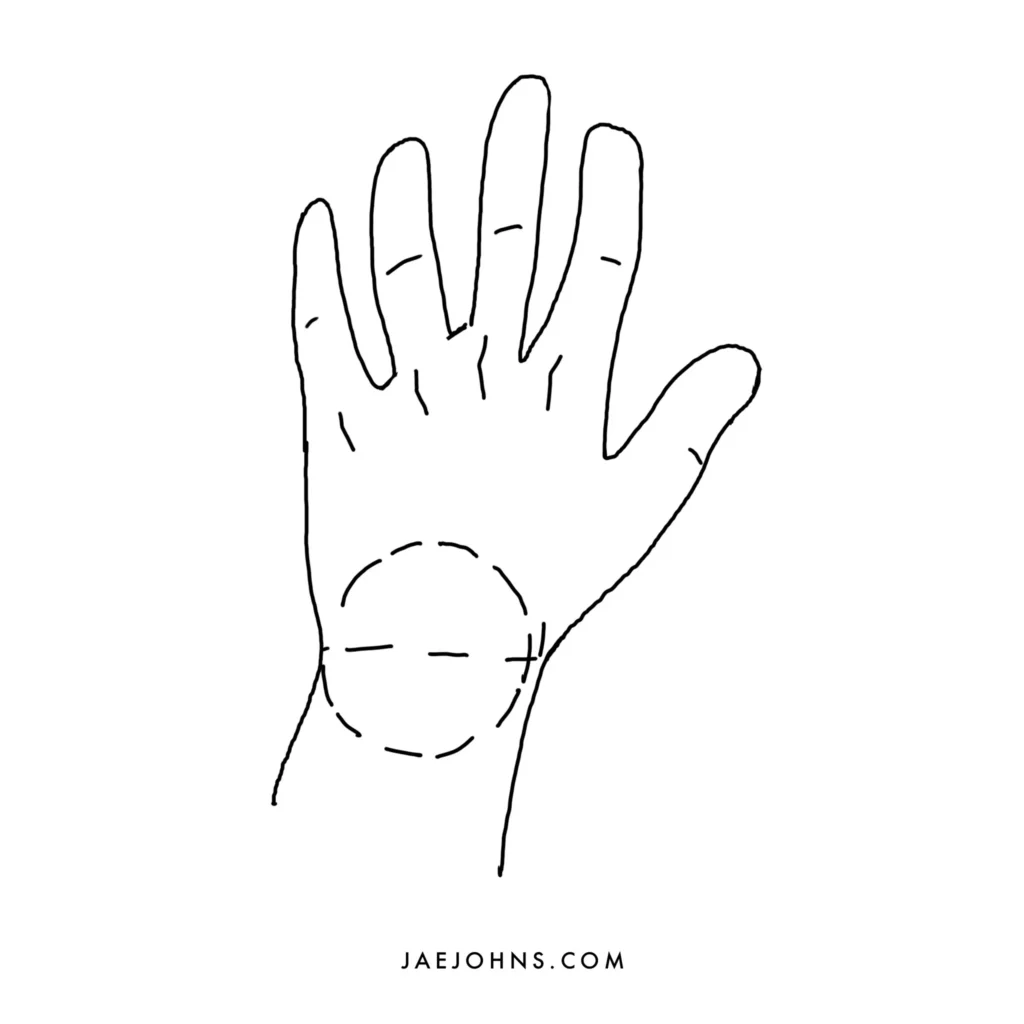
Draw marks for each knuckle joint, like swallow mountains.
Details aren’t necessary at this stage, but this should indicate where each joint and part is.
Focus on the largest forms and prominent forms of the hand and practice getting these right.
Only then consider the more detailed aspects of the hand.
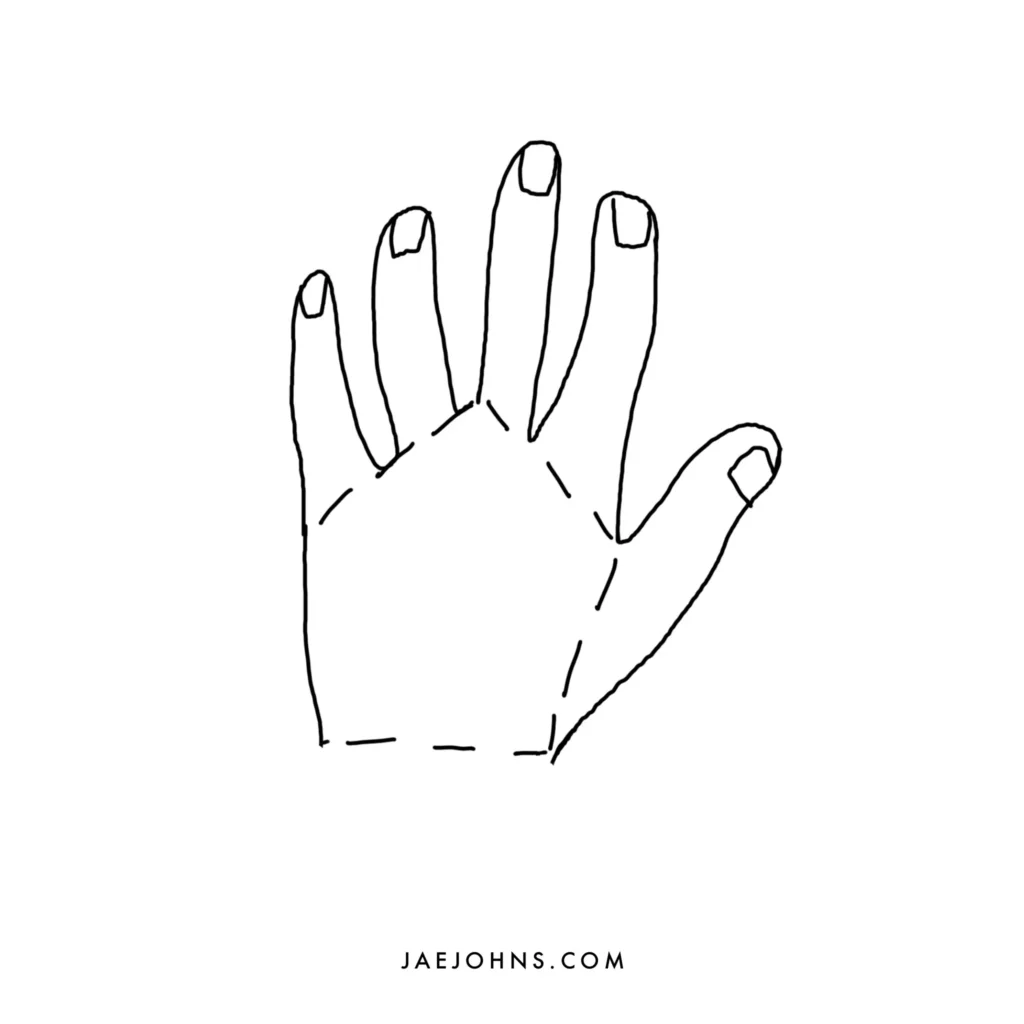
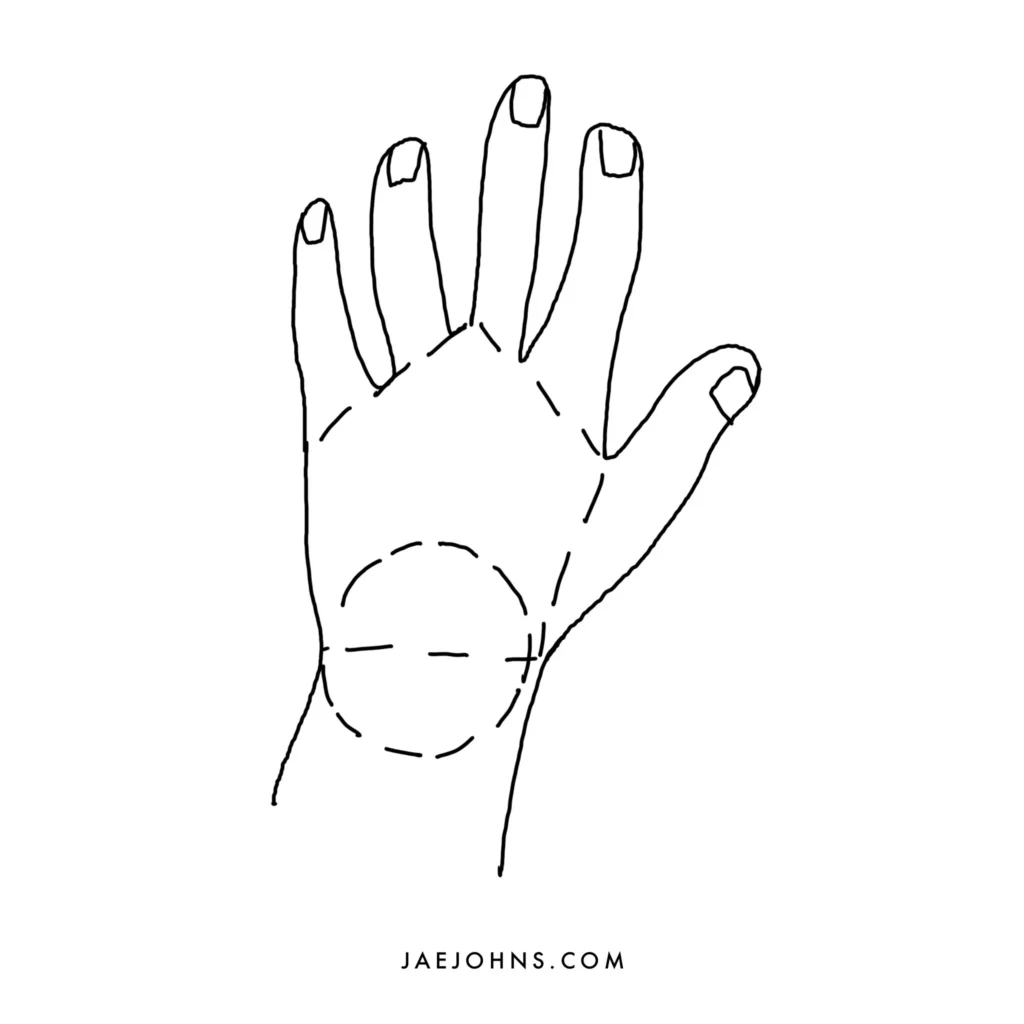
Step 3
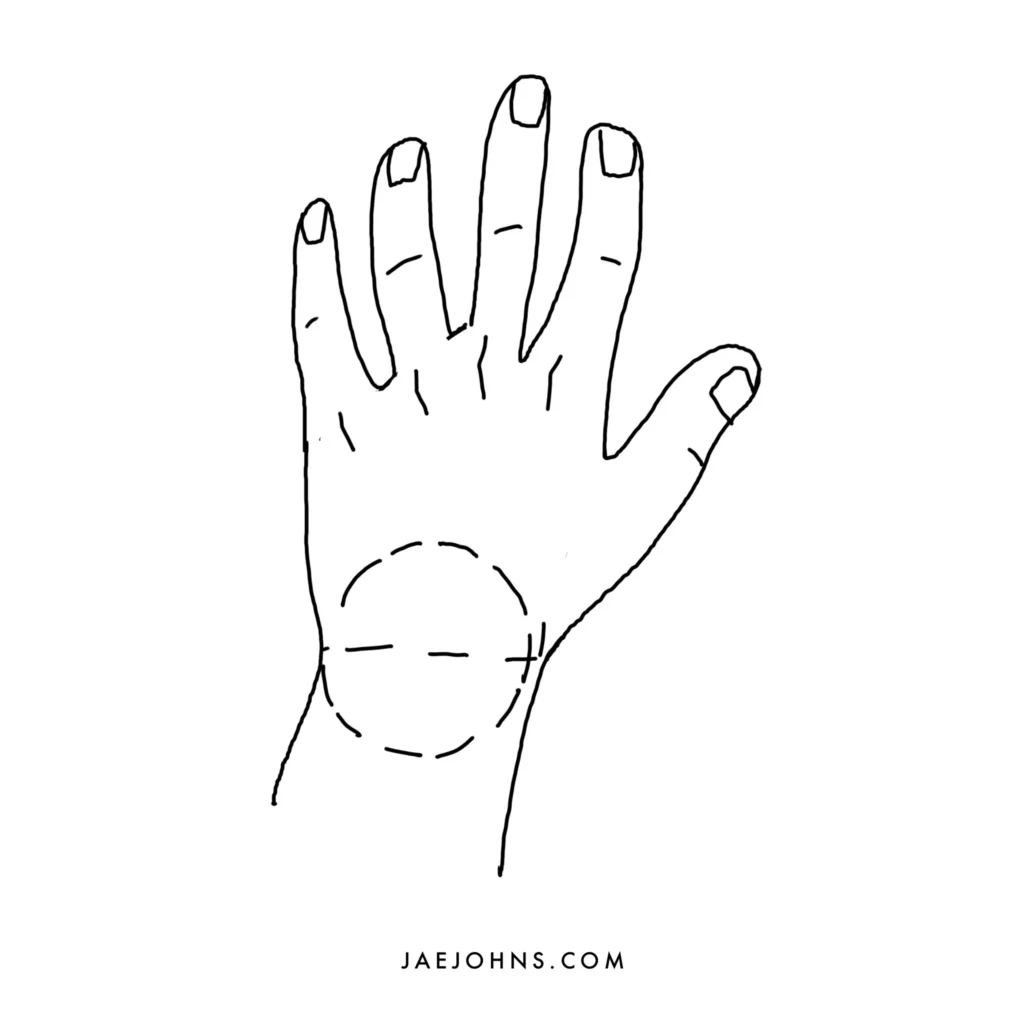
Use square shapes for each fingernail.
Again, these are simple shapes being used to build upon eventually.
Once you get the hang of the basic hand from one perspective, you can proceed to different hand positions and gestures.
Again, gesture drawing can help with this to feel the natural position a hand will take when pointing, making a fist, and so on.
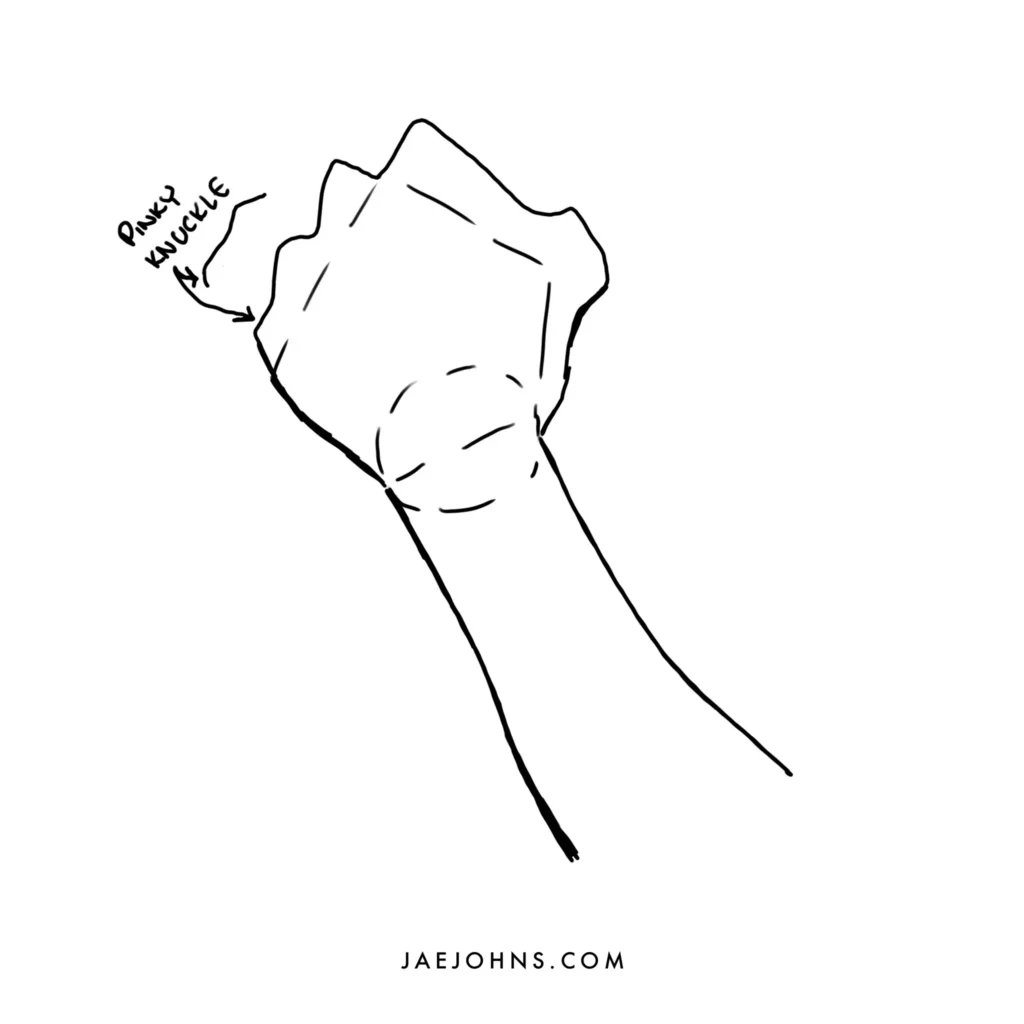
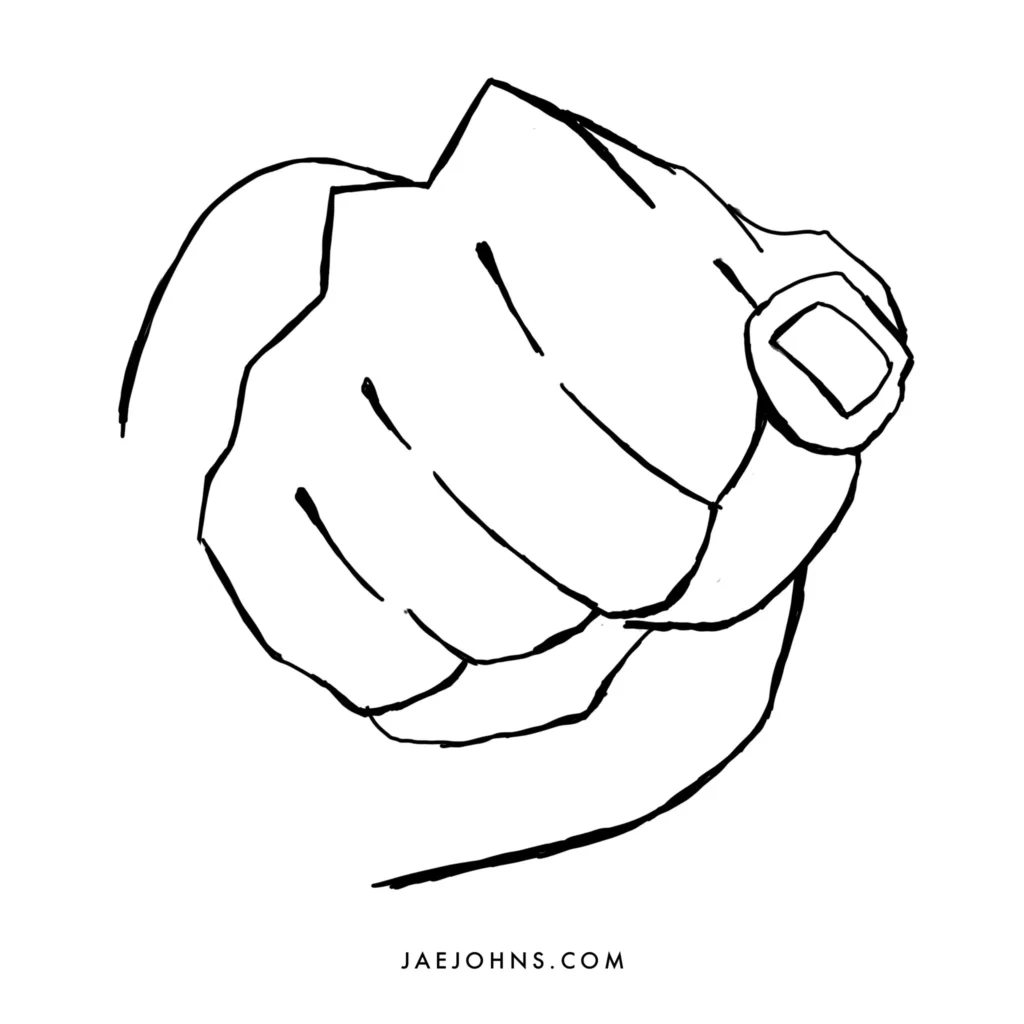
How to Draw a Closed Fist
The pentagon shape will help you when you’re learning how to draw hands easily, especially when you’re drawing a closed fist.
The illusion of form becomes more important with a closed fist, as you’ll have to imagine where the fingers are curled in but won’t have visible lines.
Step 1
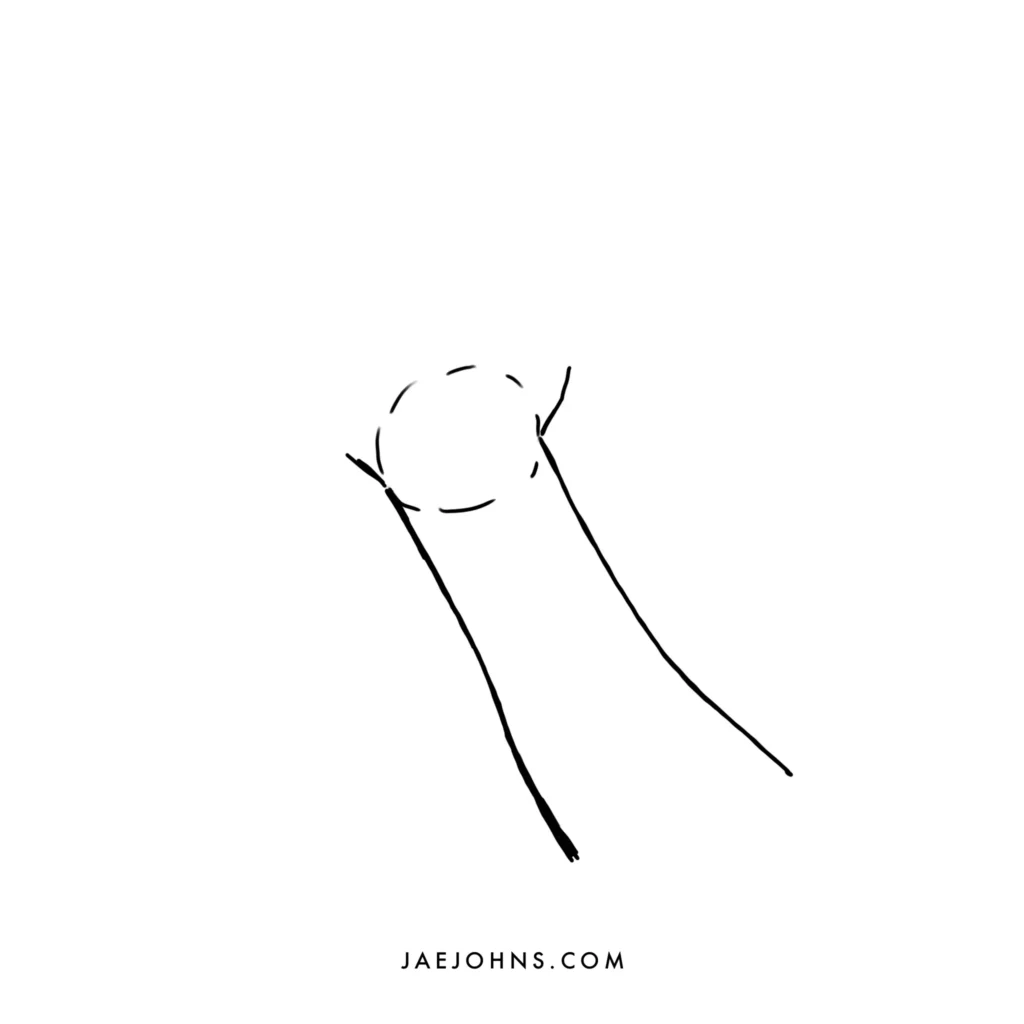
First, draw the arm shape leading to the hand. The 3D forms of the arm and hand will be attached at the actual base of the wrist.
Step 2
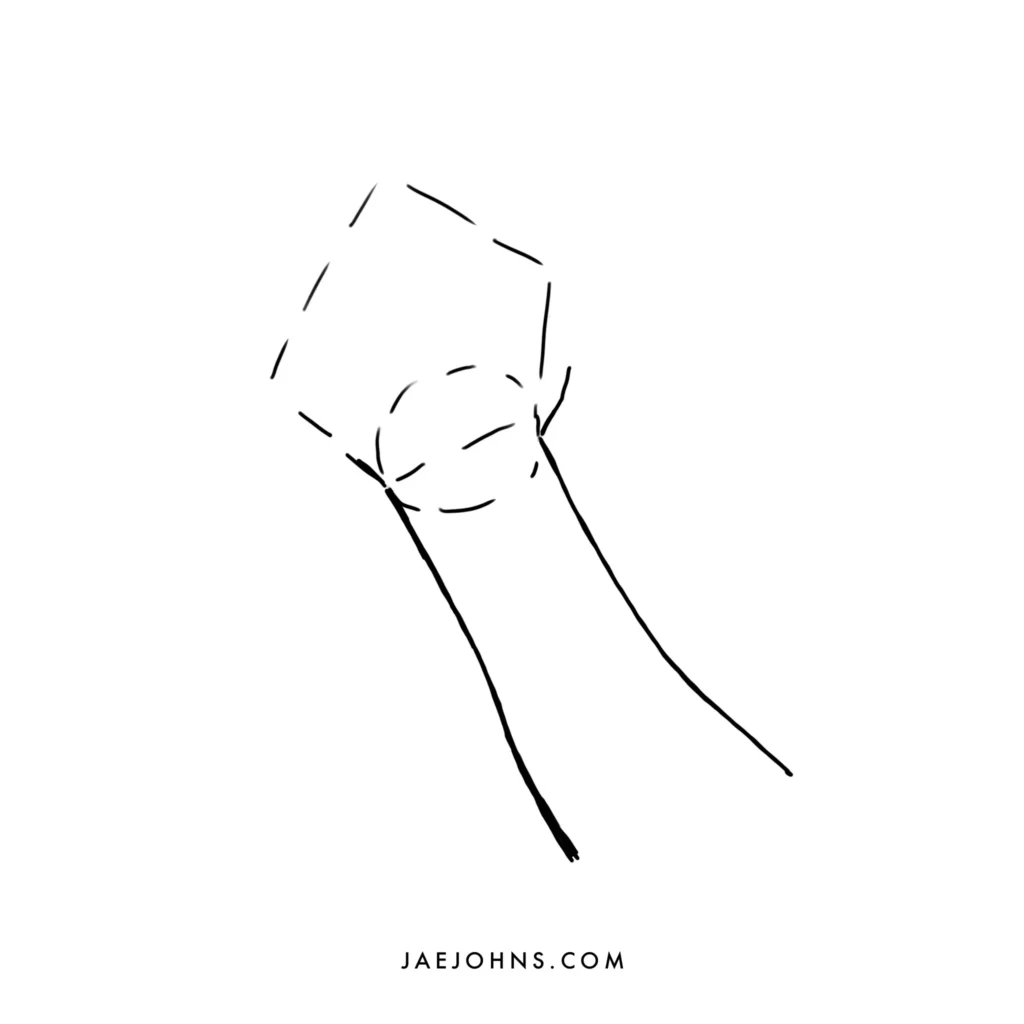
Draw the appropriate offset pentagon from the arm depending on whether it’s the right or left hand.
Step 3
With closed fingers, only the pointer finger will be a bump on the upper right side, with a short gap, then a bump for the thumb knuckle near the point between the upper and lower right sides.
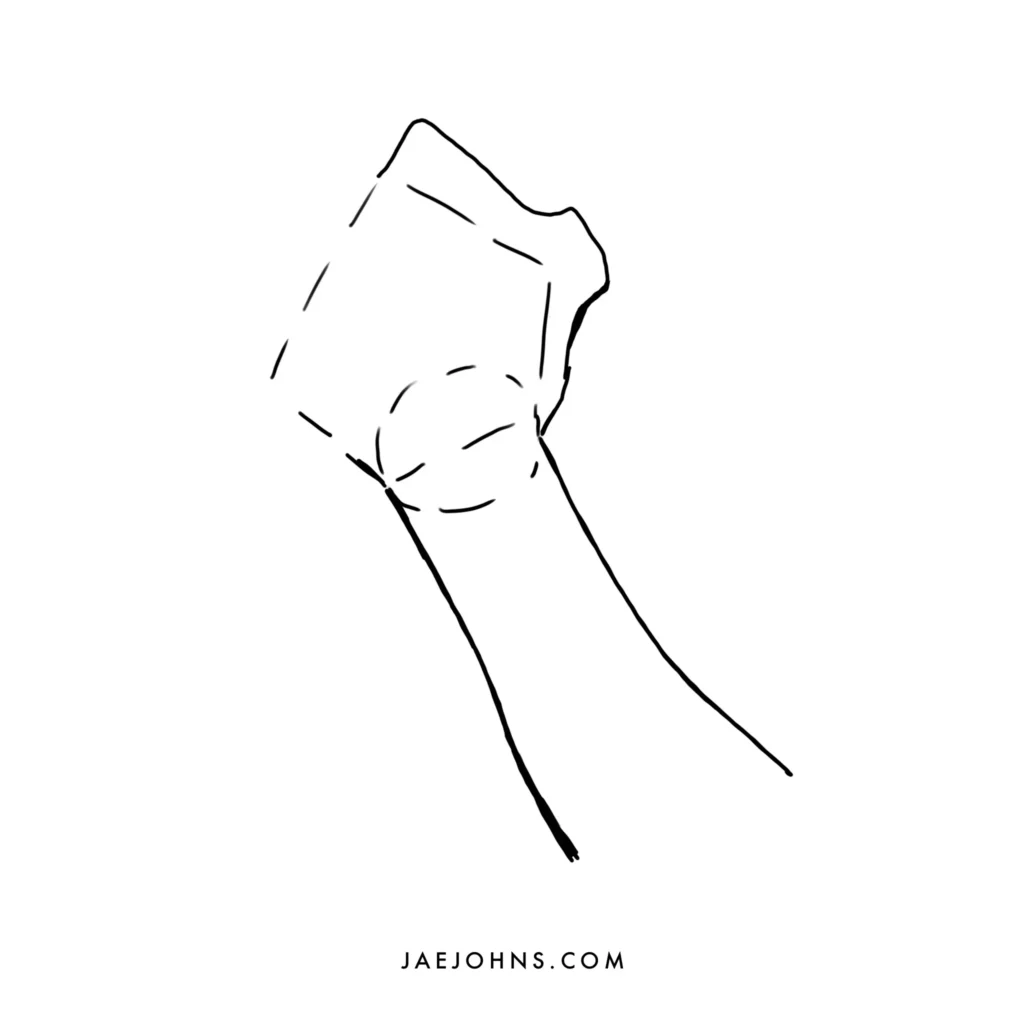
Step 4
The pinky, ring, and middle finger knuckle bumps will be lined up across the upper left side.
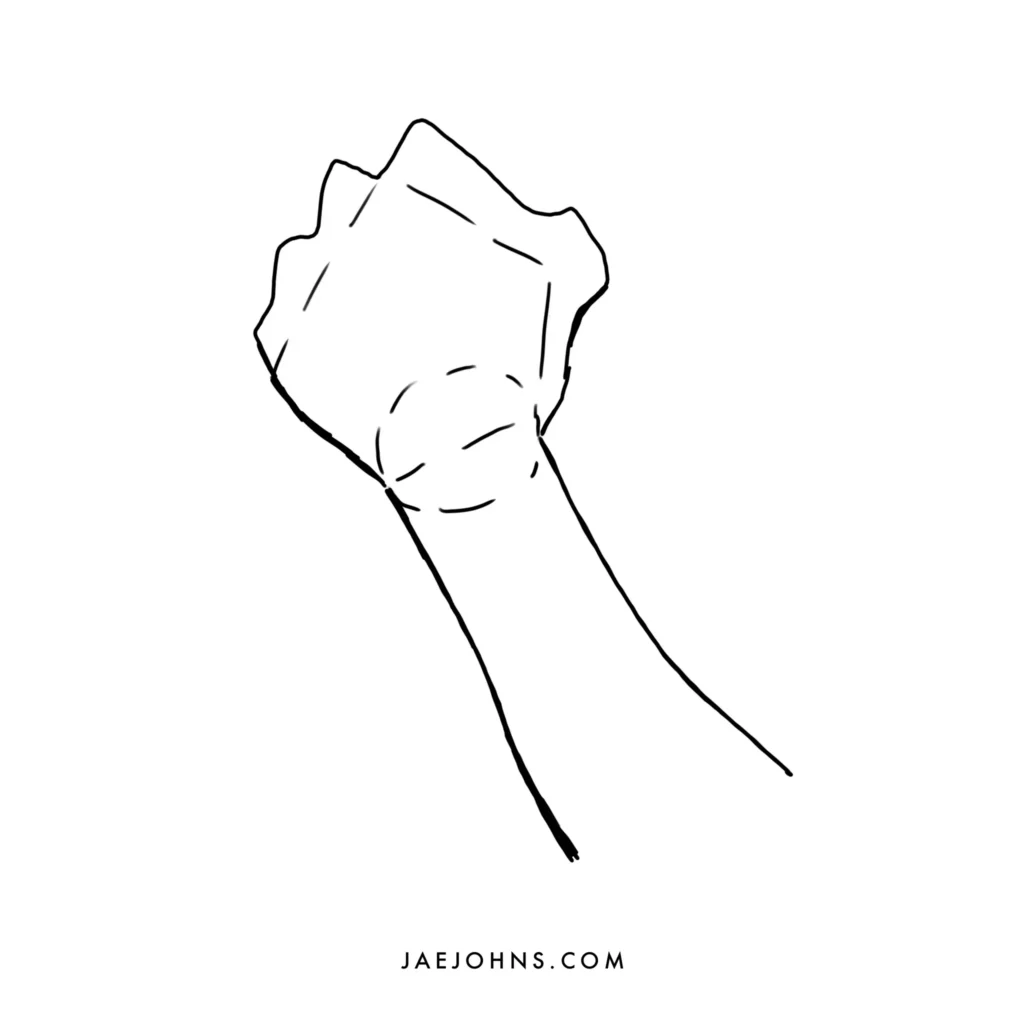
Step 5
The knuckles are more pronounced for the index and middle fingers, then drop off for the other two.
Note: You can add just the first portion of each finger protruding out to make a hand grasp an object or weapon from that same position. This works well for holding swords, handguns, and tools of all sorts. Take a look at the s-curve tip in the later section for more tips.
How to Draw a Head-on View Closed fist
Different angles and positions of the first or hand can radically change your approach.
This is one of the reasons hands are considered one of the most complex parts to draw.
We’ll still be using the offset pentagon, but now it will be from an entirely different perspective.
This is when the 3D shapes of the hand will have to be kept in mind.
Step 1
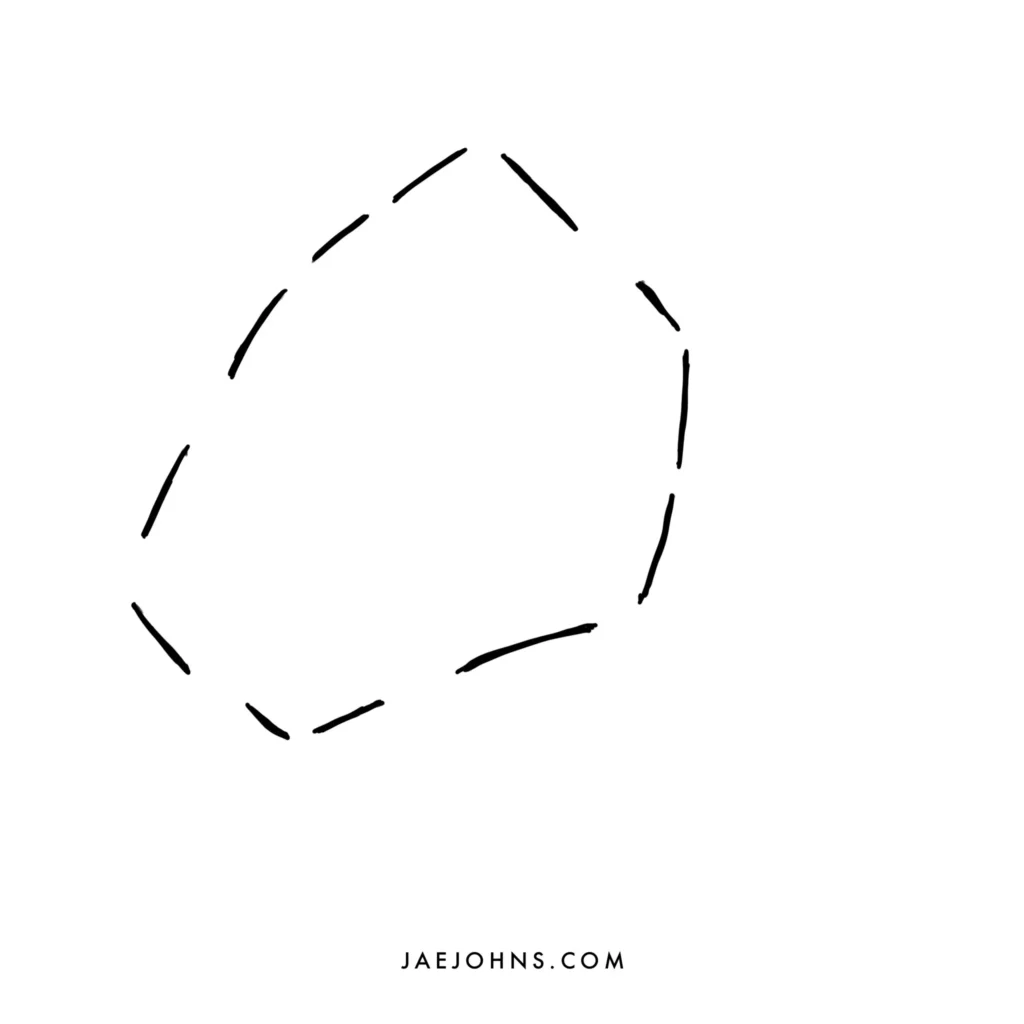
Draw an offset pentagon.
In the head-on view, you are looking at just the four fingers.
Step 2
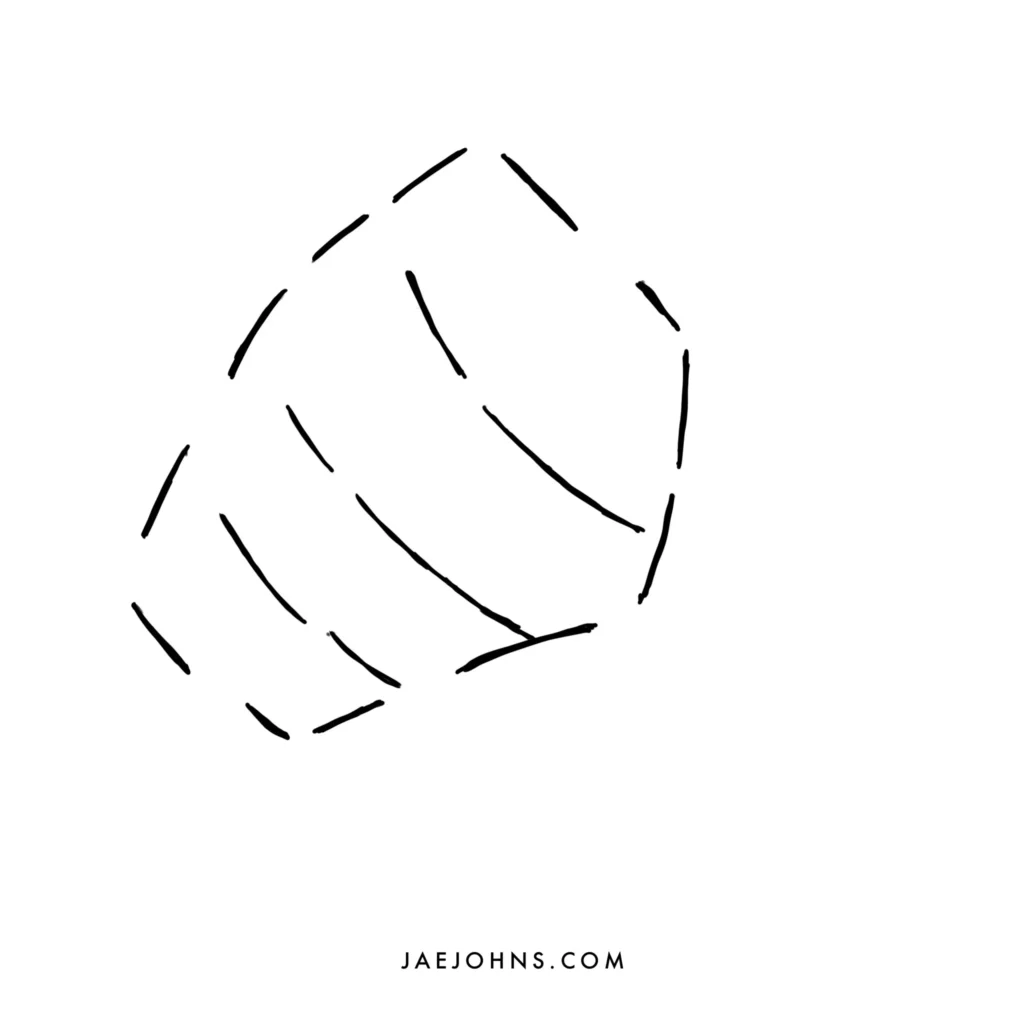
Draw a line separating each finger around one-quarter of the pentagon, starting from the top as the index finger and going down.
Step 3
For the right hand, the knuckles will appear as bumps in the upper left side of the offset pentagon.
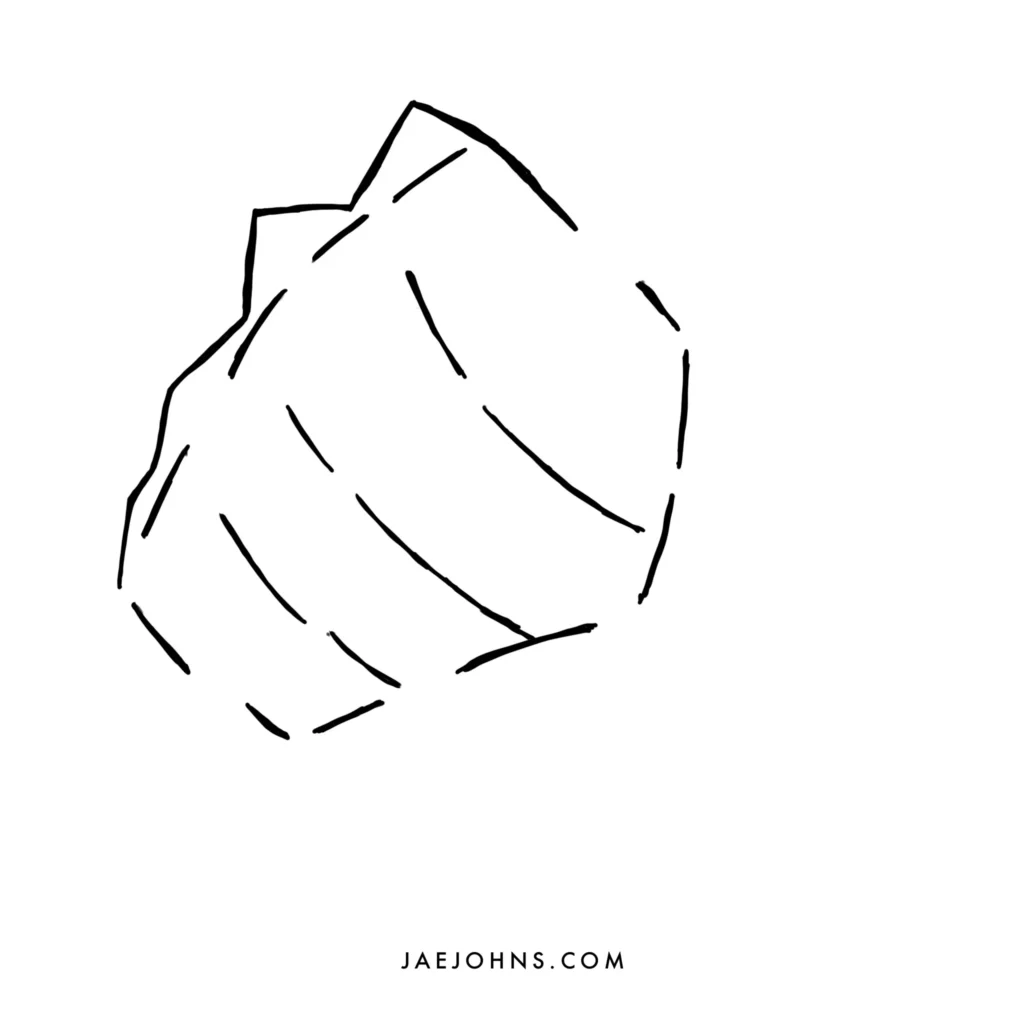
Step 4
The thumb appears as a big square over the smaller upper side of the pentagon, on the right hand the right side.
Then connect it with a small bridge into the pentagon.
Read Also:
- 21 Brilliant Tips to Practice Gesture Drawing
- 11 Tips on How to Draw People for Beginners
- How to Draw a Face like a Pro Step by Step
How to Draw Fingers
The movement of the fingers has a specific curvature that has the fingers each pull towards the curve of the thumb base at the palm base.
Their natural closure is in a ‘fan’ formation on this incline.
The fingers will tend towards the ‘fan’ shape in a relaxed position.
A forced position can move the fingers more independently, but this is rarely necessary.
You can try it out yourself by opening and closing your hand and watching how the fingers move.
This shape means that you’re going to get that ‘fan’ shape of the independent fingers on a curve from multiple angles.
Pay special attention to the different angles between pairs of fingers as they bend towards the palm.
For the most part, people don’t move each finger independently, so focusing on how the natural opening and closure of the parallel fingers of the hand looks will serve you well in most situations.
Foreshortening the Hand
When you draw a hand or any body part that looks like it is coming toward you or going away from you, it is called foreshortening.
Of course, foreshortening could be a whole lesson in itself, but I want to share a couple of things to help you draw foreshortened hands.
Why learn how to draw foreshortened hands?
Drawing foreshortened hands help attract the viewer’s eyes.
It creates a more dynamic and interesting visual.
For a foreshortened hand, we’re going to look at a completely different way of thinking about drawing hands that starts at the fingers.
The proportion of fingers becomes especially important in foreshortening.
The palm becomes a more flattened wedge-like shape that becomes the realm base of the foreshortened fingers.
Draw the part of the hand that is closest to the viewer first.
In the above illustration, these are the fingertips.
Next, you want to work backward and draw the parts that connect to the tips.
Again, you’ll want to pay attention to finger proportions.
Then, continue with this process until you’ve drawn the entire hand.
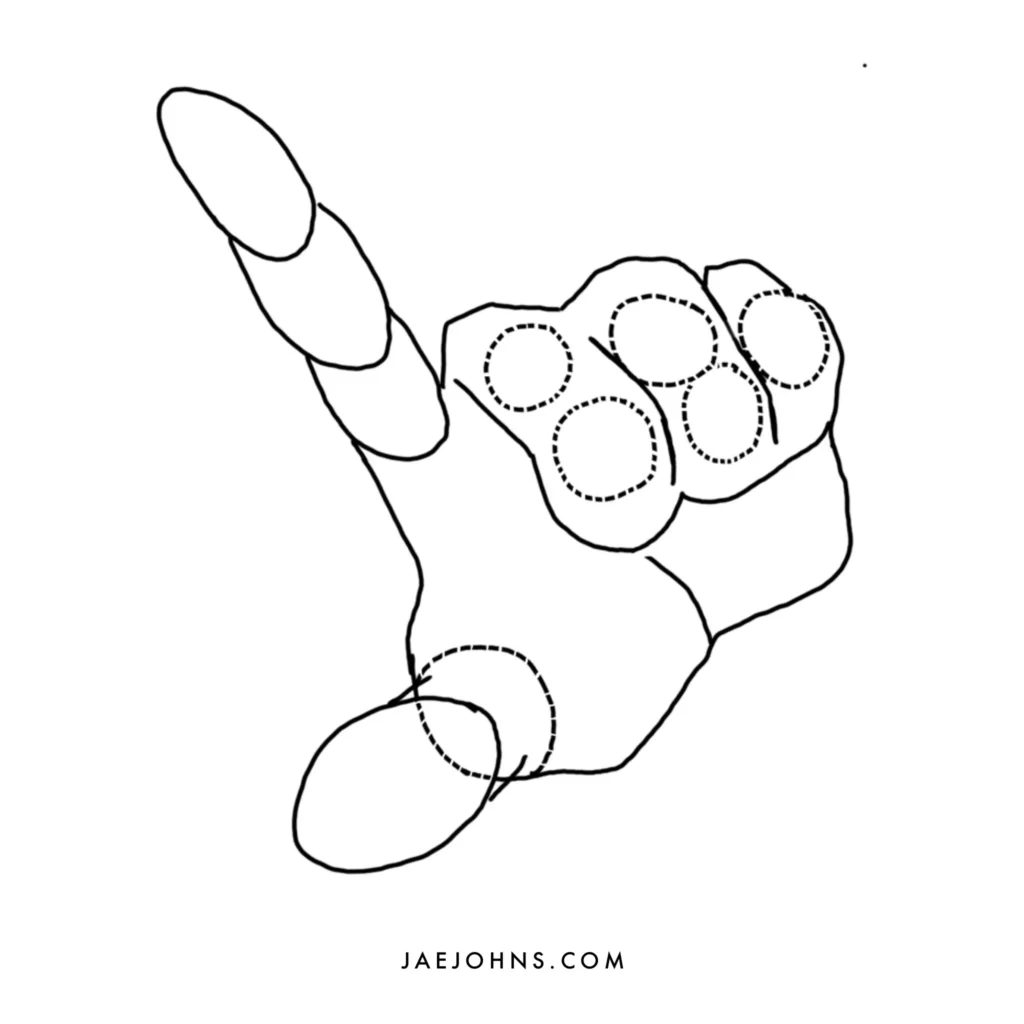
Here’s a more step by step process for a hand that’s pointing slightly towards the viewer:
Step 1
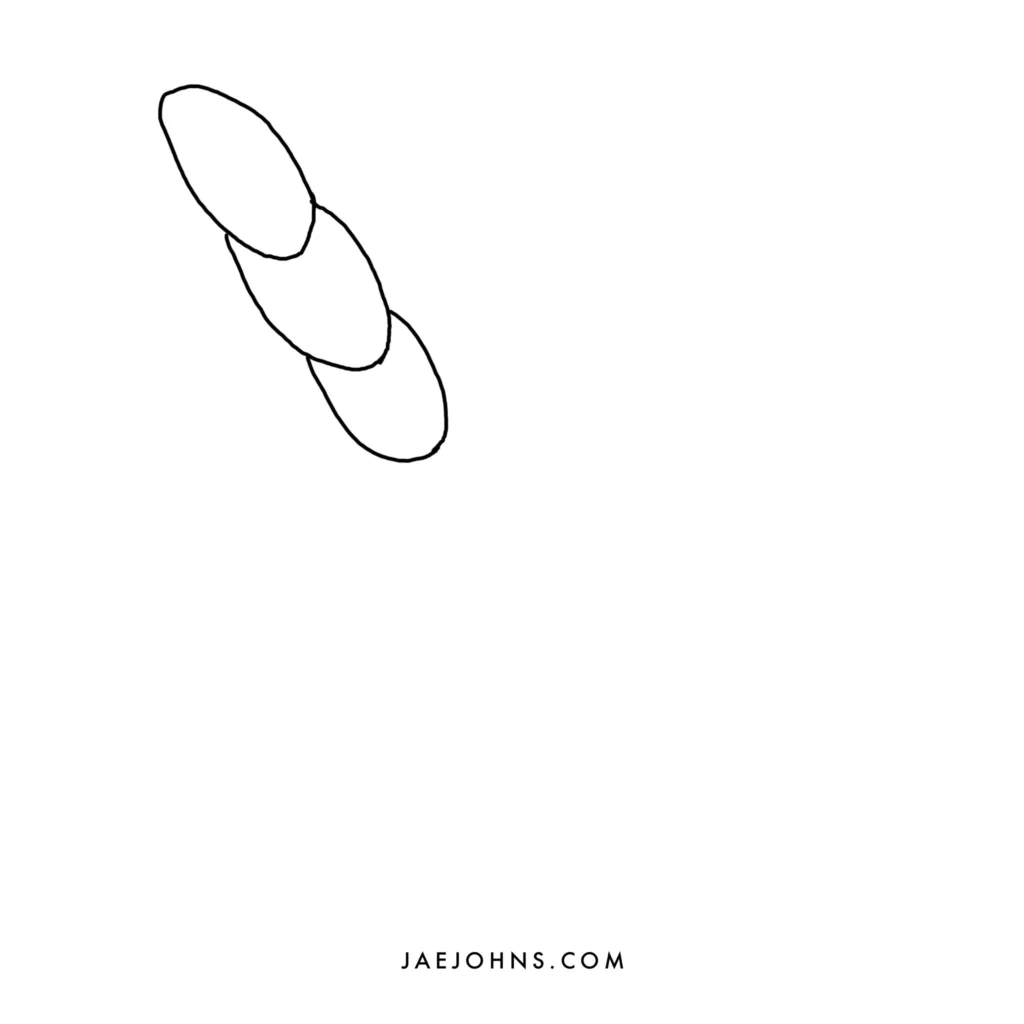
Draw an oval, then draw a piece below the oval and another below that. This represents the index finger.
Step 2
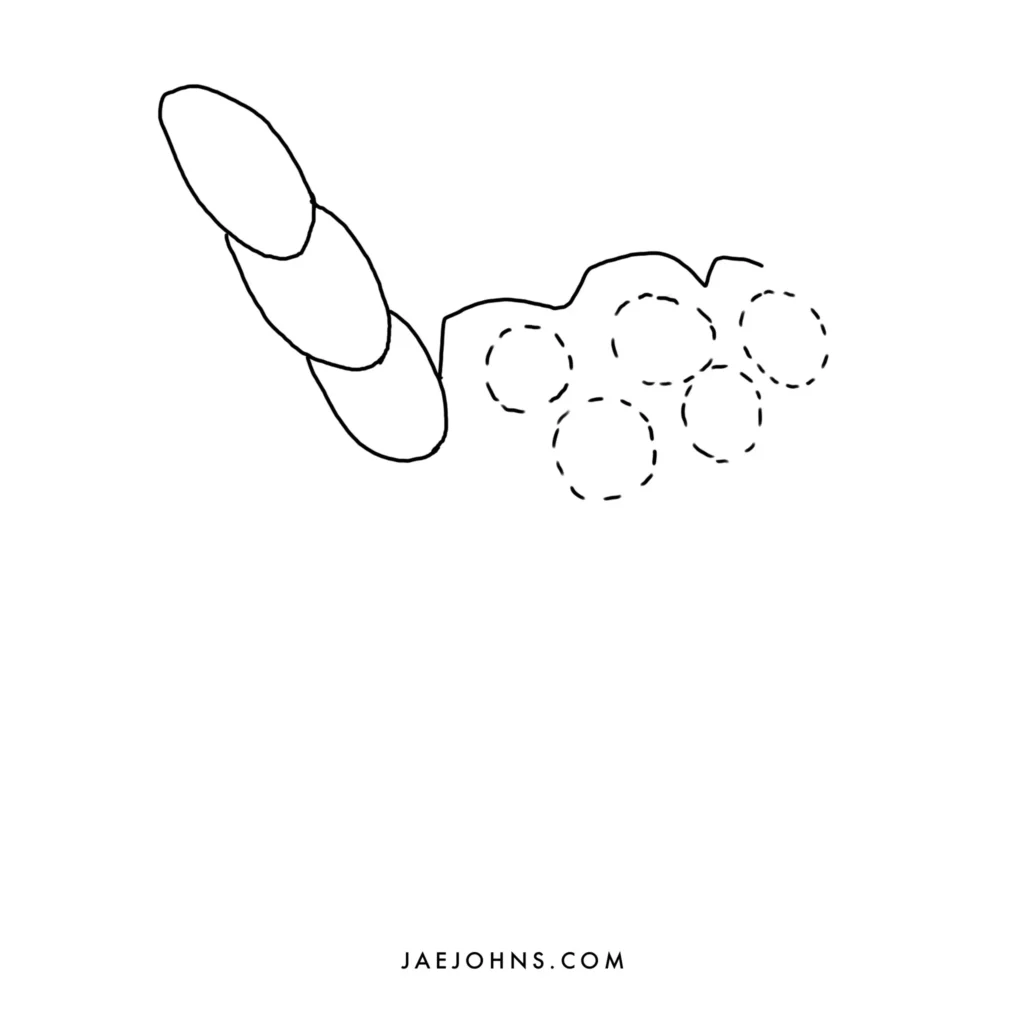
Draw the bases of the other three nearest fingers in the shape of the hand’s natural curve as little circles.
Step 3
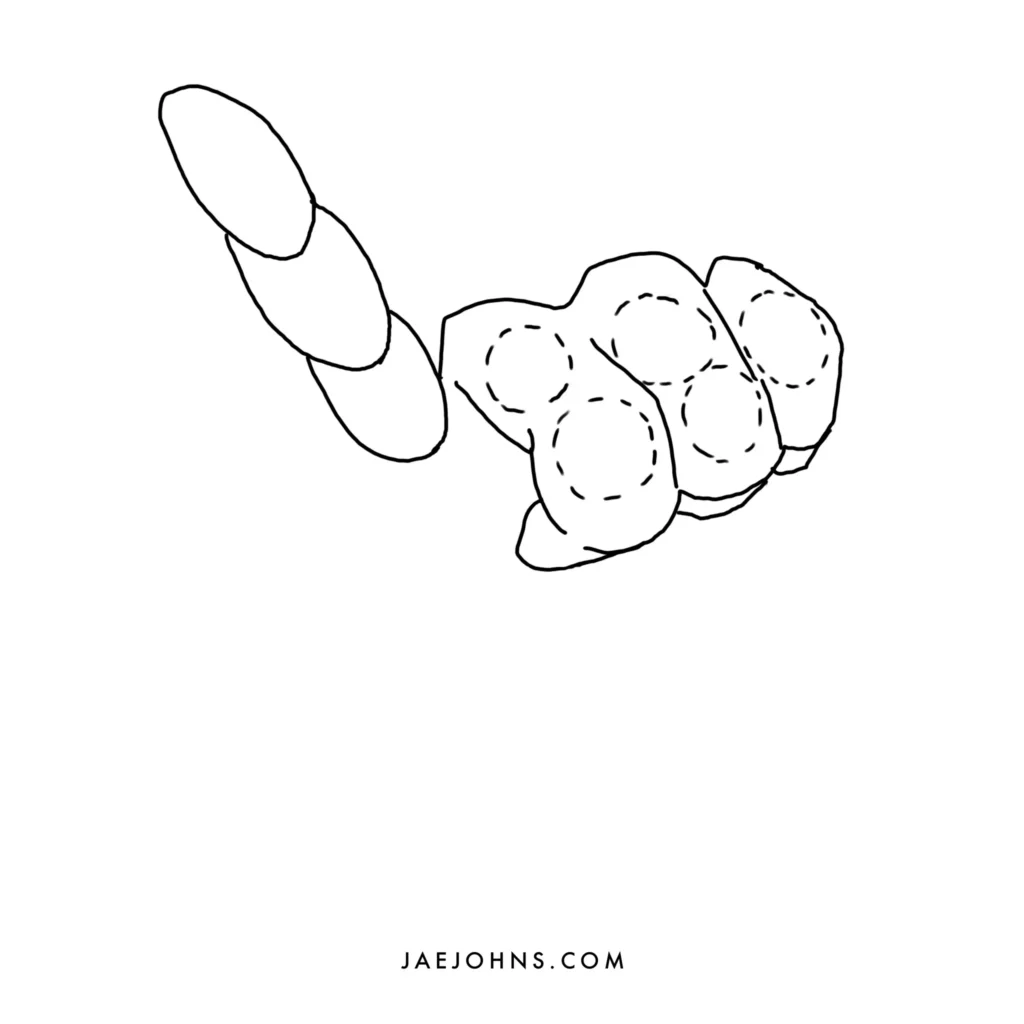
The lower sections of each finger should be drawn shorter making the hand more foreshortened.
Step 4
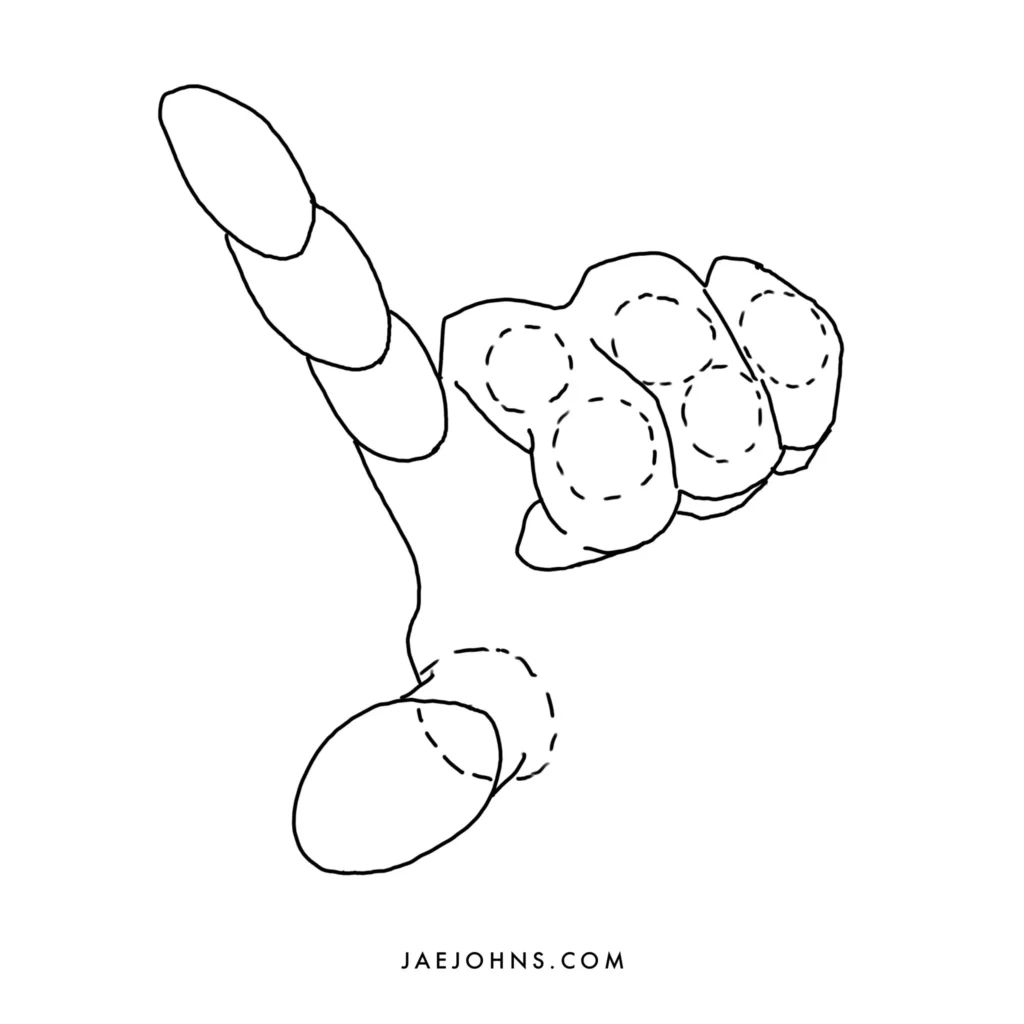
Place a gap between the index finger and the thumb, and then make a wider base.
Step 5
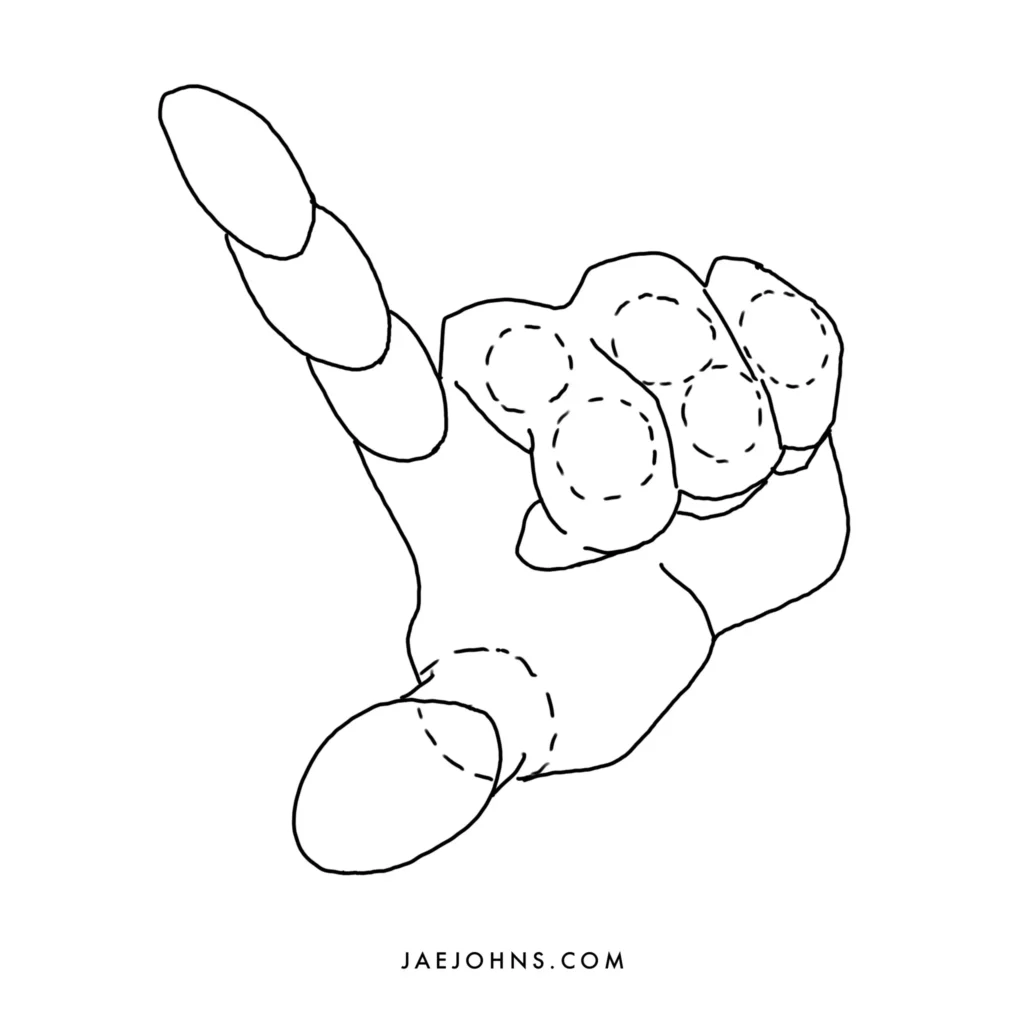
The overall palm shape should be a rounded rectangle with a portion jutting out in one corner for the thumb.
Tips for How to Draw Hands
We now have some more specific tips for understanding different aspects and shapes of the hand.
For example, the drawing process can differ radically depending on the angle and position of the hand.
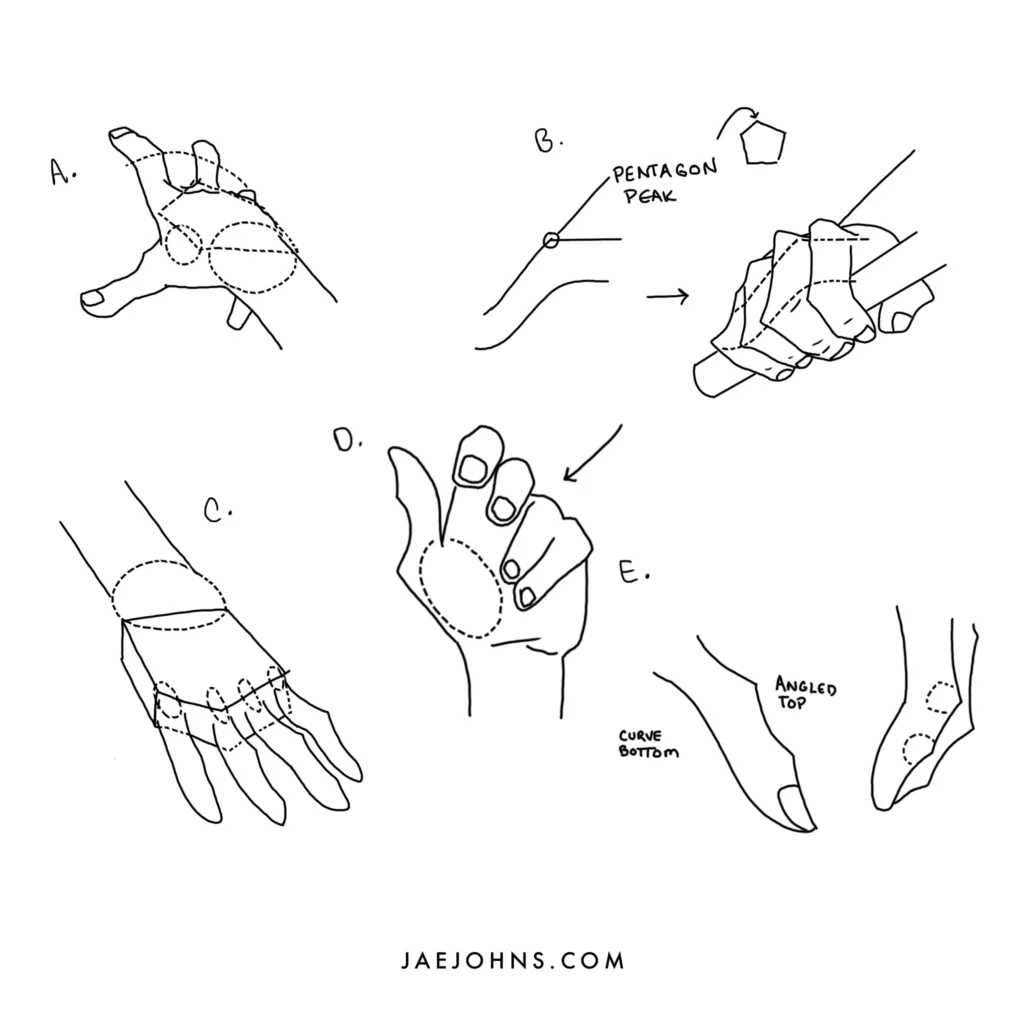
Figure A – The joints of the fingers follow along a curve when the fingers are extended.
You can get a feel for the natural bend of the curve by moving the fingers on your hand and tracing the curve with your eyes.
Figure B – The finger joints follow an s-shaped curve when grabbing something.
The s-shape doesn’t have to be too exaggerated but gives a more realistic feel to the shape of the knuckles.
For example, if you just do a balled fist for grasping an object, the hand tends to look like it’s not gripping onto anything.
Figure C – Notice how the fingers connect to the box-like form of the palm on an incline. This incline is the webbing of the hand.
The knuckles of the hand are at the top of the incline.
The incline is relatively subtle but can add distinction to the hand.
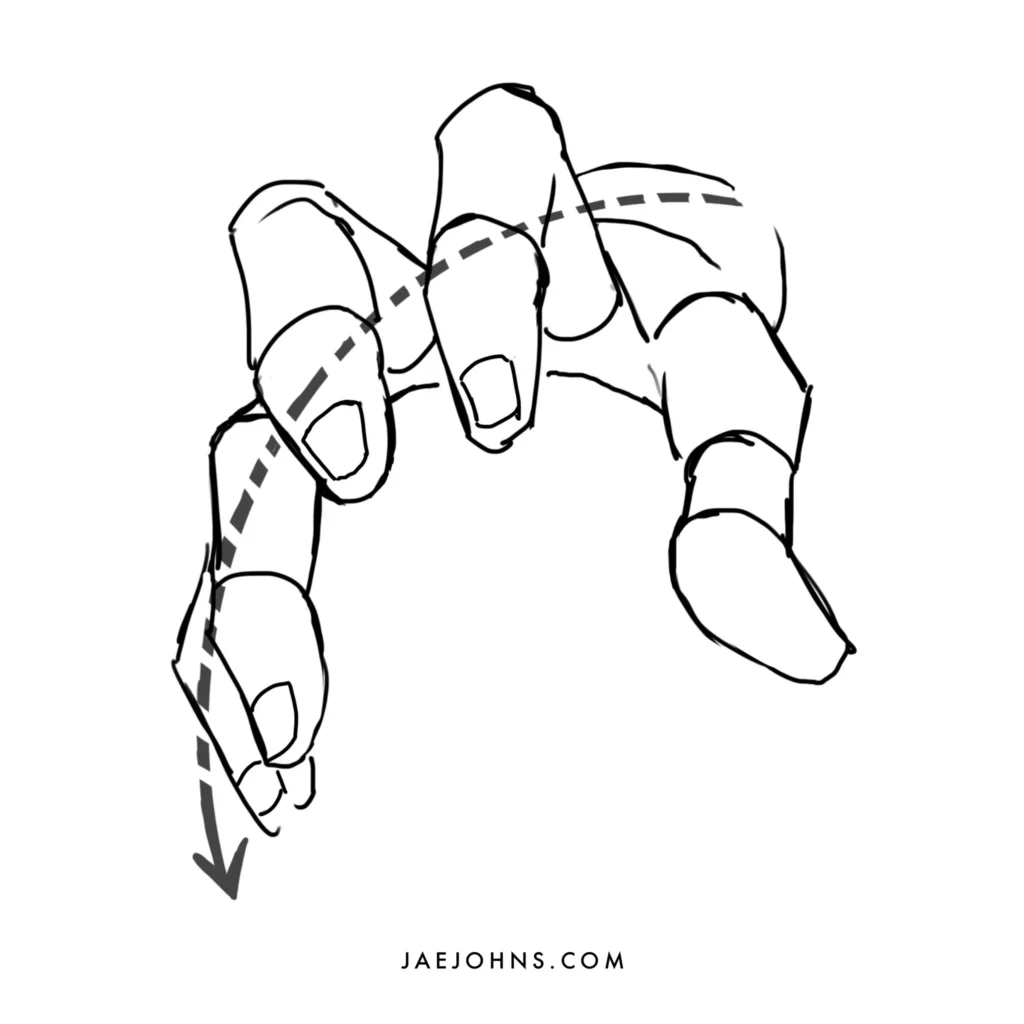
Figure D – Remember the ‘fan’ formation we discussed above?
When the fingers bend, they bend towards the palm area beneath the thumb and above the wrist.
Always have them bending on a curve towards that area for a more realistic arc to the fingers.
Also to note is that the pinky tends to drop faster than the ring finger, the ring finger faster than the middle finger, and the middle finger faster than the pointer finger.
This overall ‘claw’ or ‘fan’ shape is important to remember.
Figure E – When drawing the fingers, draw one side with angled lines and the other side with smooth curves.
This helps to emphasize the joints of the finger, making them more visually apparent.
Avoid These Things When Drawing Hands
Avoid these common mistakes if you want to have confident drawings of your hands.
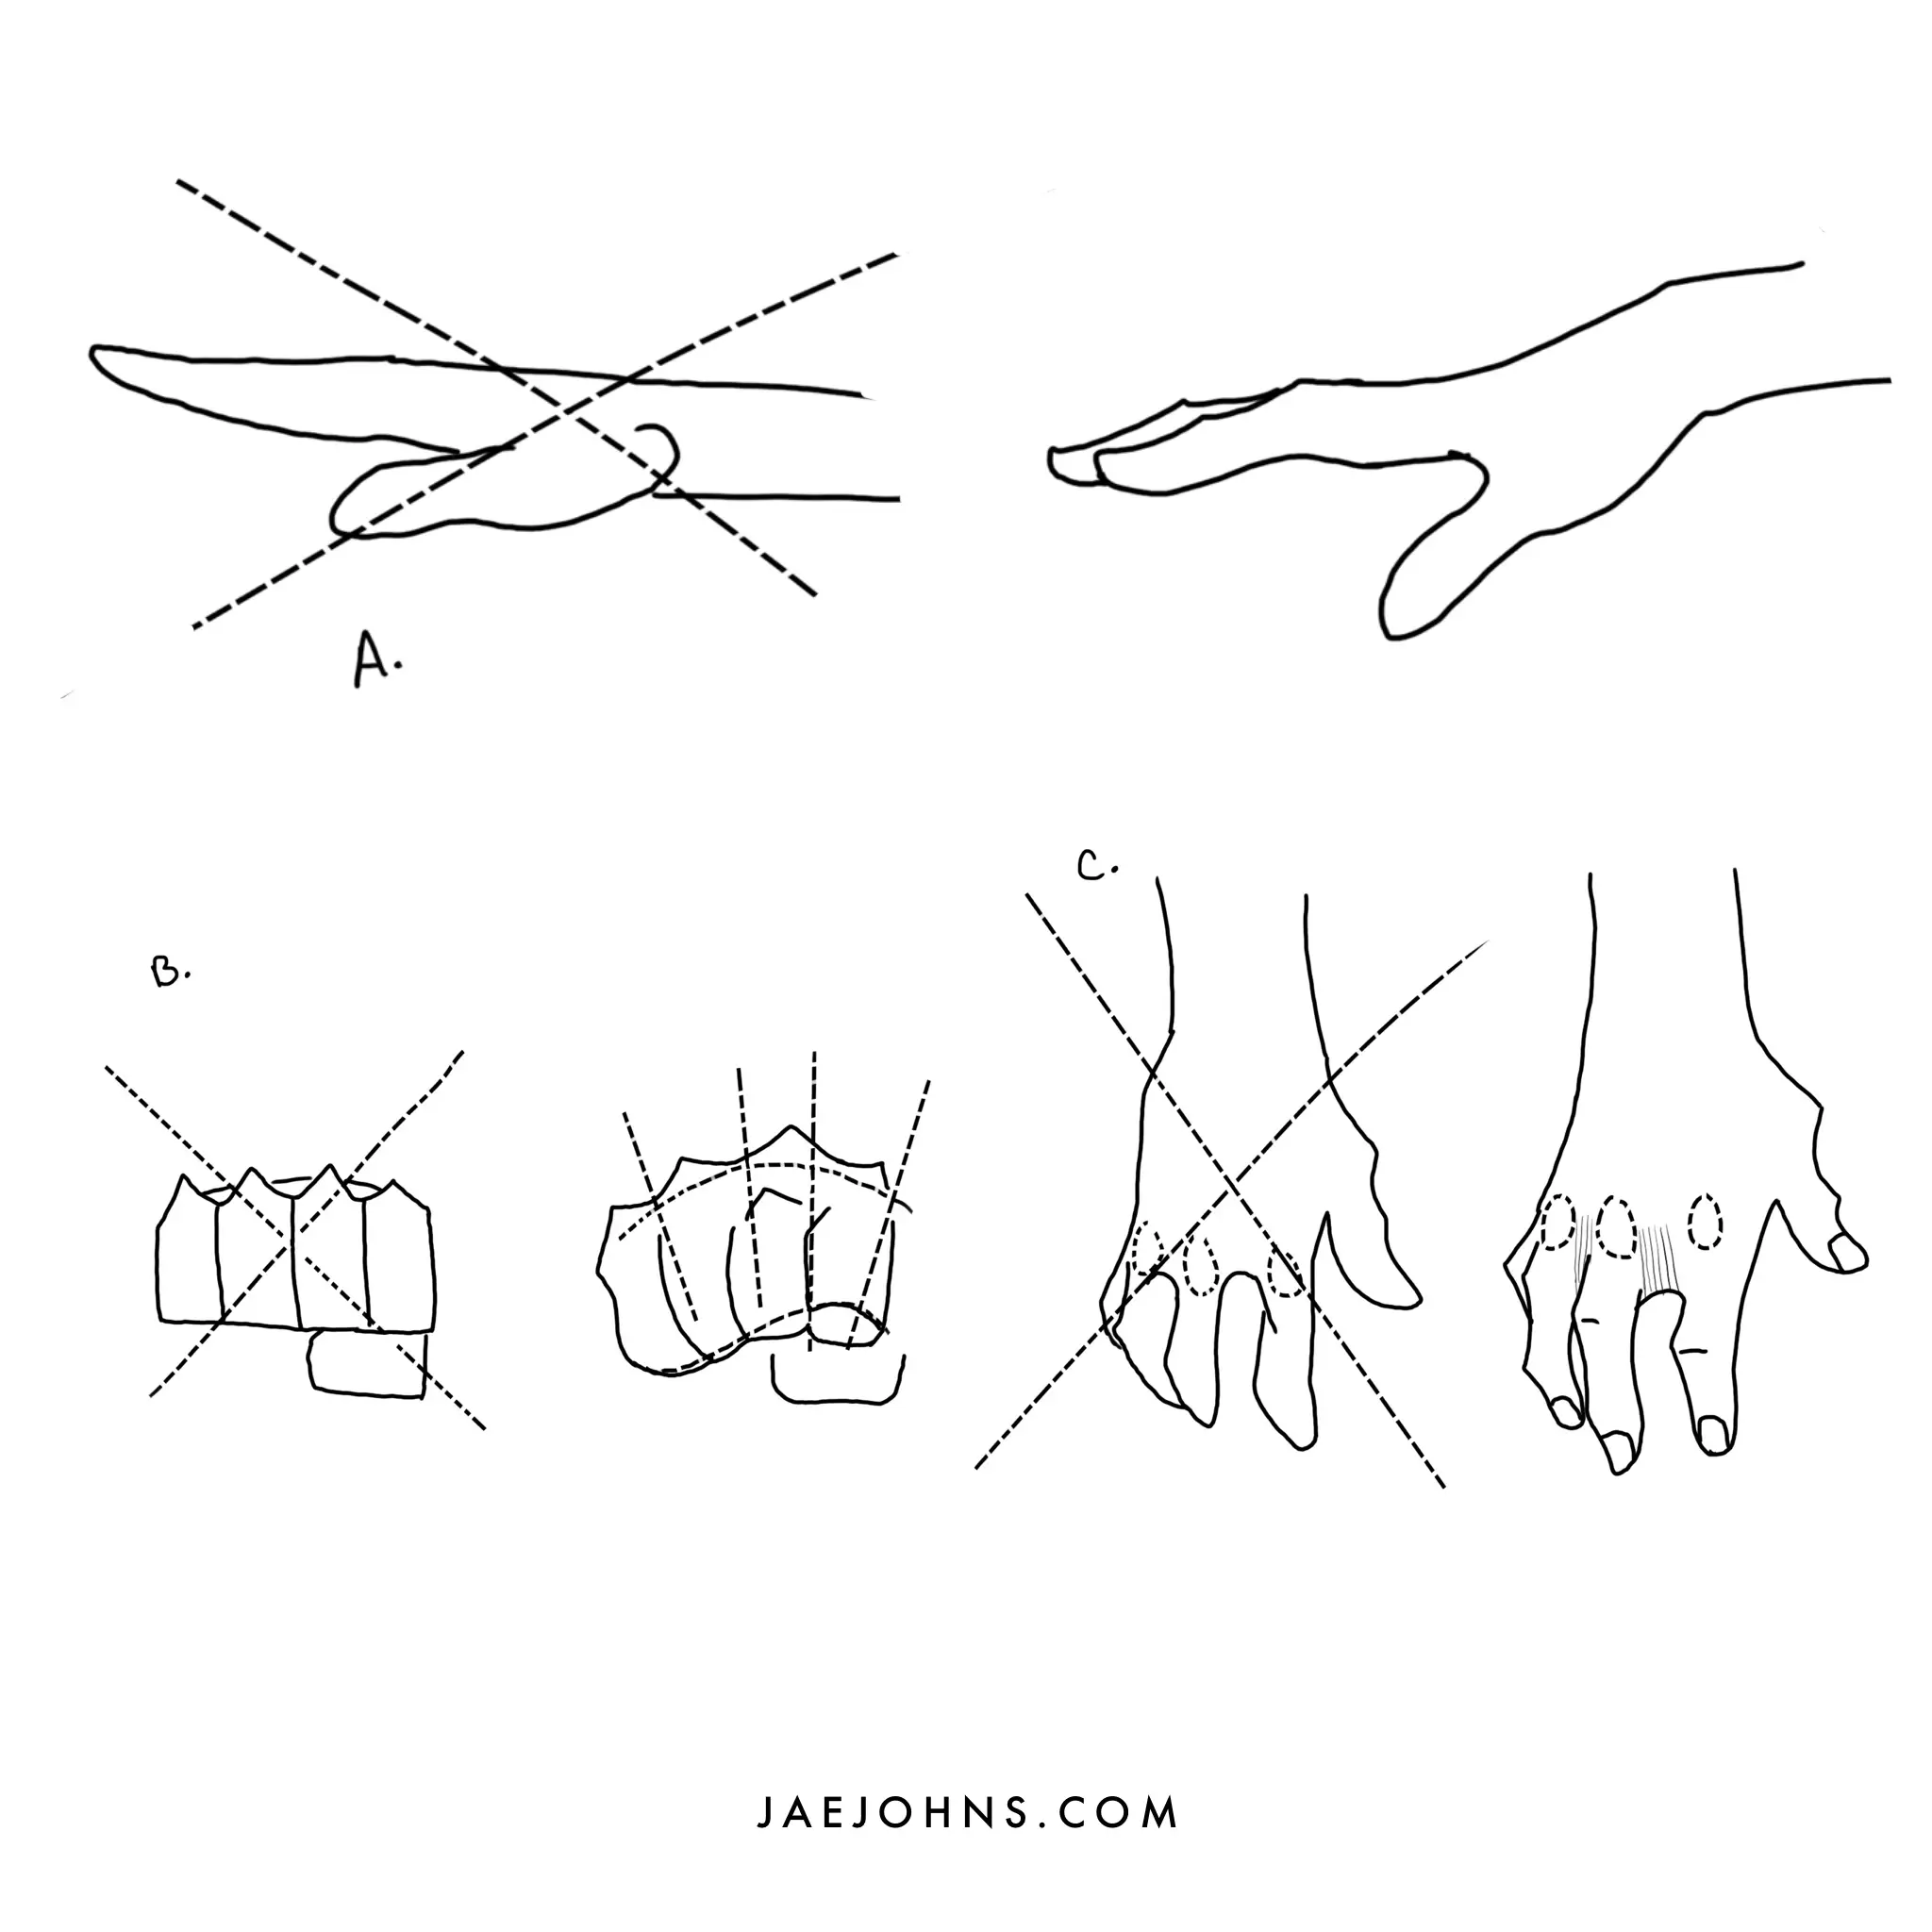
Figure A – When drawing the hand and arm extended out, don’t draw the hand and wrist flat.
There is an angle from the point of the wrist bone to the knuckles.
For your hand to be flat, you actually have to bend your hand upward a bit.
This dip forms a much more natural-looking hand and wrist.
Notice how the middle finger lifts a bit higher than the index finger, which is how a relaxed, natural hand positions itself.
Figure B – To add more life to your hand, don’t draw each finger aligned straight up and down.
Instead, the fingers follow a curve and actually bend inward.
Therefore, straight lines won’t work in most cases.
This connects to the philosophy of the offset pentagon, which you can still see forms of the basis of a closed fist.
Figure C – Your knuckles sit on top of an inclined plane and within that incline is the webbing of your hand.
Avoid drawing the knuckles at the same level as your fingers connect to your palm, as this doesn’t take the webbing into consideration.
Conclusion
Learning how to draw hands is a complex technique with no shortcut that works for every angle and position of the hand.
Therefore, the how to draw a hand step by step tutorials and tips above can only help guide you to overall successful hand drawing.
You might also want to consider trying out drawing challenges to step up your game.
You’ll learn different drawing techniques with the quick drawings these push for.
You don’t need the exact measurement details to draw a good hand, but you do need to get an intuitive grasp of its basic shapes and movements.
Once you have these down from a few angles, you’ll become a natural.