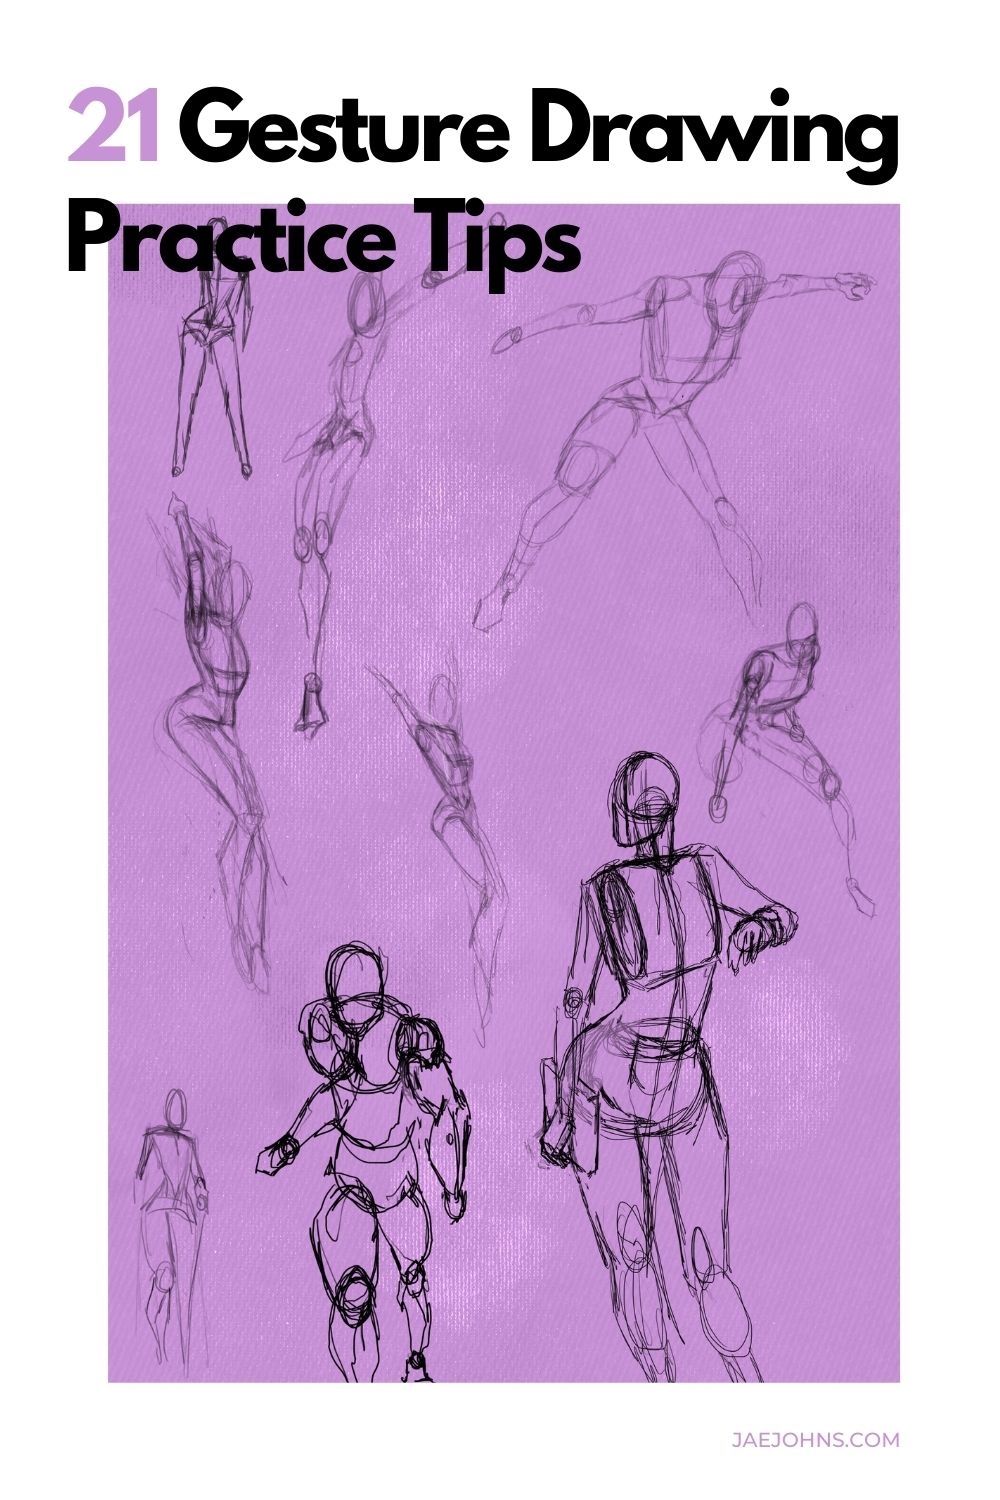
Are you looking for ways to practice gesture drawing? I have assembled many tips to help you improve your gesture drawing.
Gesture drawing is the art of sketching or drawing the pose, action, and form of a subject on a medium. The medium mostly used for gesture drawing is a piece of paper, and the tools used to draw are but are not restricted to pencils, pens, markers, and brushes.
While every artist has his own technique, some master tricks and tips can help anyone, even a layman or beginner can improve their gesture drawing many folds. The tips will start from the basics of gesture drawing and will move towards advanced tricks as we progress.
21 Tips to Master Gesture Drawing:
Gesture drawing involves a lot more than a fine stroke and involves many senses other than sight and touch.
I will take you through a step-by-step guide to master gesture drawing.
1. Experiment with Medium and Tools:
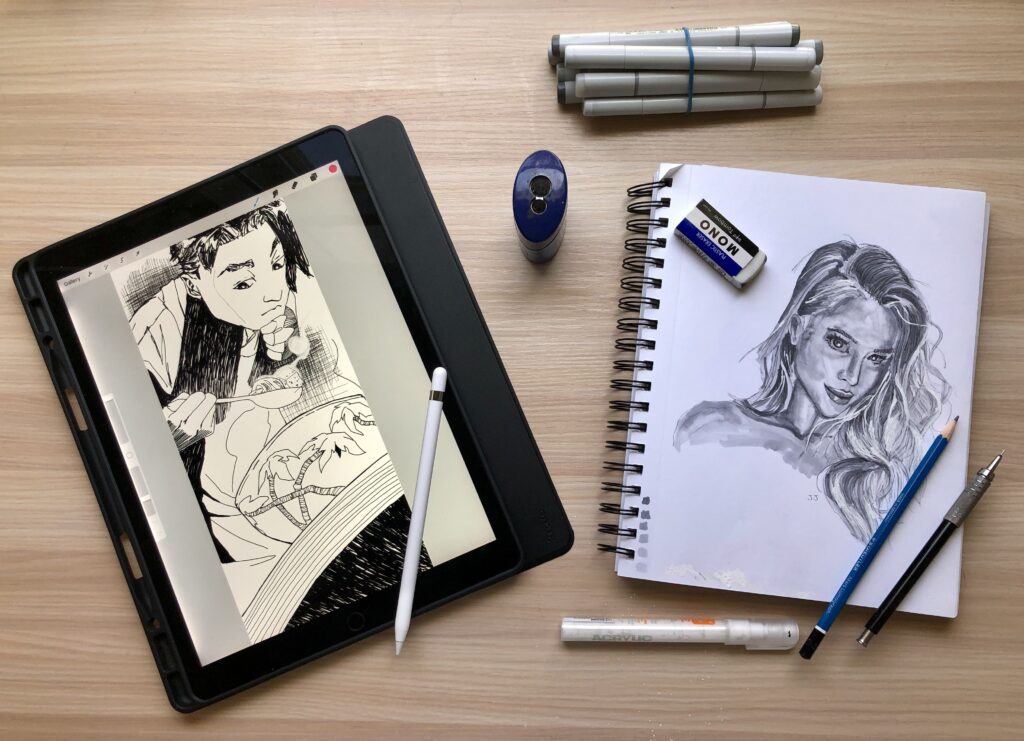

As mentioned earlier, you can use different mediums and tools for gesture drawing.
While I practice gesture drawing, I take some liberty and experiment with different mediums and tools.
Different mediums capture details differently. Similarly, different tools draw details differently.
For example, a pen can be a good choice for sketching the outlines as it has a sharp and clean stroke.
Similarly, a pencil can add details to your gesture drawing because it can shade well. And a brush can be a great choice if you want some bold strokes.
Experimenting with different mediums and tools will better hold on to your skill and make you more comfortable and confident when you draw.
Needless to say that having a grip of different tools and mediums will further refine your gesture drawing skills.
Related: 25 Must-Have Drawing Tools for Beginners
2. Get the Feel:
Gesture drawing is more than just drawing. To be a fine gesture drawing artist, I suggest you learn to feel the subject.
Doing this will add the required details and expression to your gesture drawing.
What works for me is that before I start drawing, I take my time to feel the pose of the subject quickly. You should also notice all the curves, edges, pinches, and bends.
Moreover, you should also be aware of the movement of major bones and the points where the bones make a joint.
In this way, you will better capture the details of the subject, which will reflect the body posture of your subject to somebody who sees your gesture drawing.
3. Extract the Essence:
I make sure that I extract out the essence of my subject’s pose before you start with my gesture drawing.
Every posture has an essence to it. There are one to two points that make a posture attractive and noticeable. You should take some time to notice those points.
Noticing those points will set you on the track you need to capture the essence of your subject.
Doing this will make your gesture drawing more accurate, but it will also add that realistic feel to your gesture drawing, giving a feel of the posture to anybody who sees your drawing.
4. Choose a Starting and Centre Point:
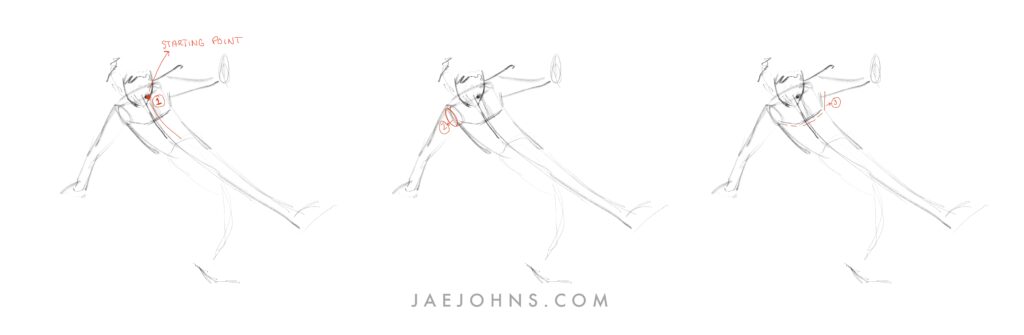

As gesture drawing is time-sensitive, you might not have much time to capture it if you are drawing a live subject.
For this reason, I start with one point and make it my center point so that I can draw around it even if my subject moves.
Also, the starting point should be something small that can be drawn quickly to not lose all your time drawing it. It should also be central enough to give you an idea about the rest of the pose; otherwise, it would not be of much use.
For example, the head is a great starting point. It is small and can be captured quickly. It also gives you enough idea regarding the rest of the body that you can manage to draw with it.
If you’re drawing a jacket, a shirt, or a sweater, then the collar could be a starting point.
5. Make a Reference Point:
After you have captured a good starting and center point in your gesture drawing, your next priority should be to draw a reference point through which you can keep track of the posture.
For me, having a reference point keeps my gesture drawing more focused and reduces the chances of me going astray in my drawing.
A good reference point is something that has a significant role in defining the posture. It should also be big enough to give an idea about the rest of the pose.
For example, if you are capturing a full body, a spine is a great choice as a reference point.
It defines the posture well, it covers most of your subjects for you, and it is hard to stray if you have drawn a spine.
6. Make Points:
There are certain points in every pose which define the action of your subject. Make sure to notice those points and pin them down on your medium.
For me, these points will help me conserve my subject’s movements, and I am able to draw the pose more accurately.
For reference, these points can be the joints. You can also take notes in your head regarding the pinches or how the body parts are turning. Are they bent towards you or away from you.
These points will keep your gesture drawing more accurate and close to reality while making you efficient and smart.
7. Draw Contour Lines:
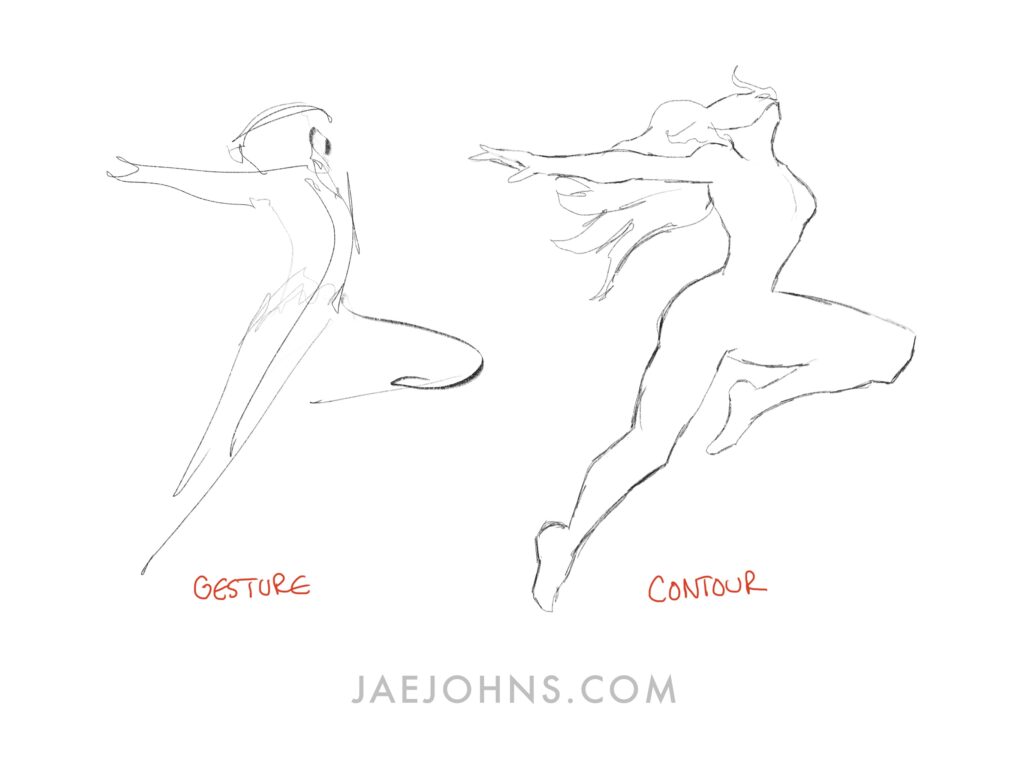

My center and reference points give me enough of the required detail to anchor my gesture drawing, and my reference points preserve enough details of the movements and actions.
Once you have laid the basis of your gesture drawing, the next thing is to preserve the basic details.
Start drawing the basic contour lines on your subject, which will at least clarify the exact pose of your subject.
While I draw the contour lines, I am careful of the straight lines and curves. One wrong straight line or curve can alter the beauty of your gesture drawing.
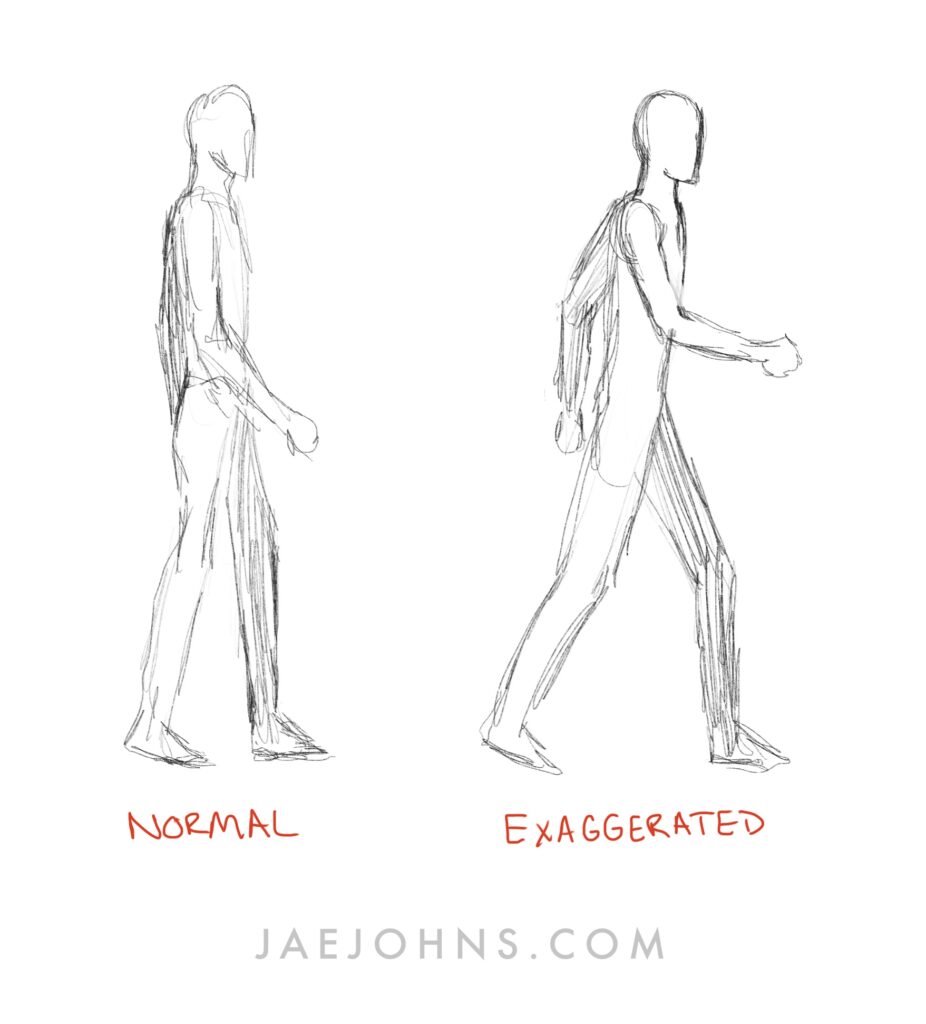
If you want your gesture drawing to be realistic, make sure you accurately use straight lines and curves.
You can have the otherwise liberty if you want to exaggerate. For example, a gesture drawing with too many straight lines still looks great, but it might make a human seem like a robot.
8. Add Details:
Now that I have the basic structure or sketch of my gesture drawing ready, I am all set to start adding the details.
The details you add to your gesture drawing depend on two things. One is the anatomy of your subject that you have no control over, and the second is the feel and essence that you captured.
As a gesture drawing artist, you can choose to take realistic details from the anatomy and combine it with what you felt to be the essence of your subject’s pose.
You can portray anatomy only, your imagination, or both.
9. Breakdown for Enhancement and Exaggeration:

Once I have my basic picture, I break it down into different parts.
For example, focus on the arm only and use your imagination and the details from the subject.
Then I focus on adding life into that one part only. You can also go on to exaggerate your gesture drawing from here on.
But do not get too carried away. Be aware of justifying the complete drawing as a whole in the end. No part should look separate from the drawing.
10. Express Through Details:
As you would know, a gesture drawing does not focus on capturing any expressions. But like every other piece of art, a gesture drawing also has to convey something to others.
In the case of gesture drawing, the expression is in detail. What your drawing expresses depends on the details you add to it. So be careful and give proper thought to adding details because you are communicating through your drawing.
It does not mean that adding more details will make your drawing more expressive. You can keep your drawing as raw and basic as you want or make it as loaded as you can, depending on what you want your message to be.
11. Be Efficient But Don’t Rush:
As mentioned earlier, live gesture drawings are time-sensitive. It means that you have to be efficient with your drawing.
But it is necessary to understand the difference between being efficient and rushing through things.
It would be best if you were efficient in making decisions and observations. It would be best if you were quick in deciding what you want to convey through the subject and how you will do it.
For me, my strokes can be as slow as they need to be to portray the drawing as neatly and accurately as possible.
So train your mind to be efficient but let your hands be free to draw.
12. Add Meaning, Avoid Noise:
When you start with your gesture drawing, take your time. Make sure that each stroke adds meaning to your drawing and is not just a random line.
Those random lines will add noise to your gesture drawing, compromising its beauty and attraction. Not just that, it will also reduce the meaning and make it harder to understand.
A simple tip for adding meaningful lines and avoiding noise is that I try the stroke in the air without reaching the paper.
While doing this, my mind imagines how the stroke will look on the paper and how it will make my drawing look.
Once sure, go on with the stroke.
13. Work on Straight Lines, Slopes, and Curves:

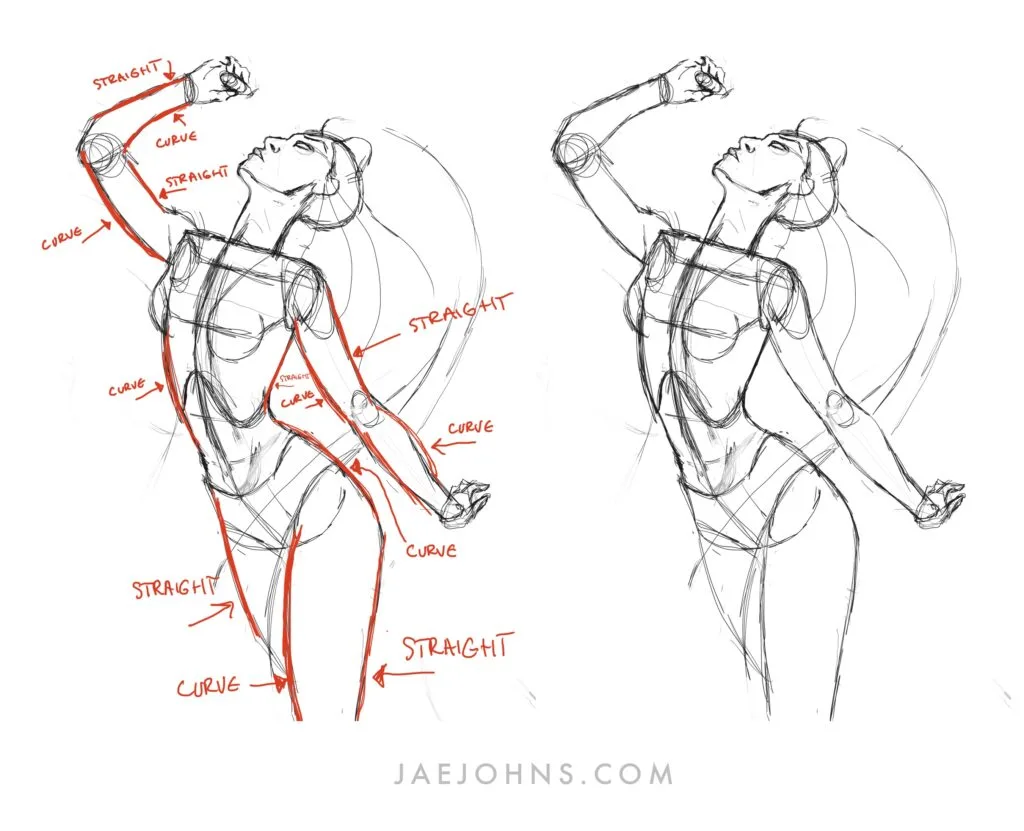
Whether you aim for realism or exaggeration in your gesture drawing, there are certain particulars about the strokes that you should be careful about.
You want to avoid too many straight lines. If you go for a lot of straight lines, it will kill the feel of the pose. So try noticing the curves as there always are and try to capture those. But the problem is that you can get a slope in a pursuit to go from a straight line to a curve.
It helps when I avoid unnecessary slopes as it keeps my drawing neat.
14. Practice Every Day:
You cannot expect yourself to master straight lines, slops, and curves overnight. Neither is it fair to expect that you will be able to convey what you see and feel on your medium?
It is natural to lose some details while drawing. It is also normal to make a figure look abnormal if you add too many details.
These things sit in their place with practice. So, I practice every day, even if it is for a few minutes, and trust the process.
15. Avoid a Stiff Wrist:
Most people use their wrists in their gesture drawings, resulting in stiff strokes, whereas a natural body is not stiff.
To have more natural strokes, I use my shoulder to draw. I use my hand to hold the tool, but when I stroke, I move my shoulder. It gets a more realistic drawing.
16. Memorize Proportions:
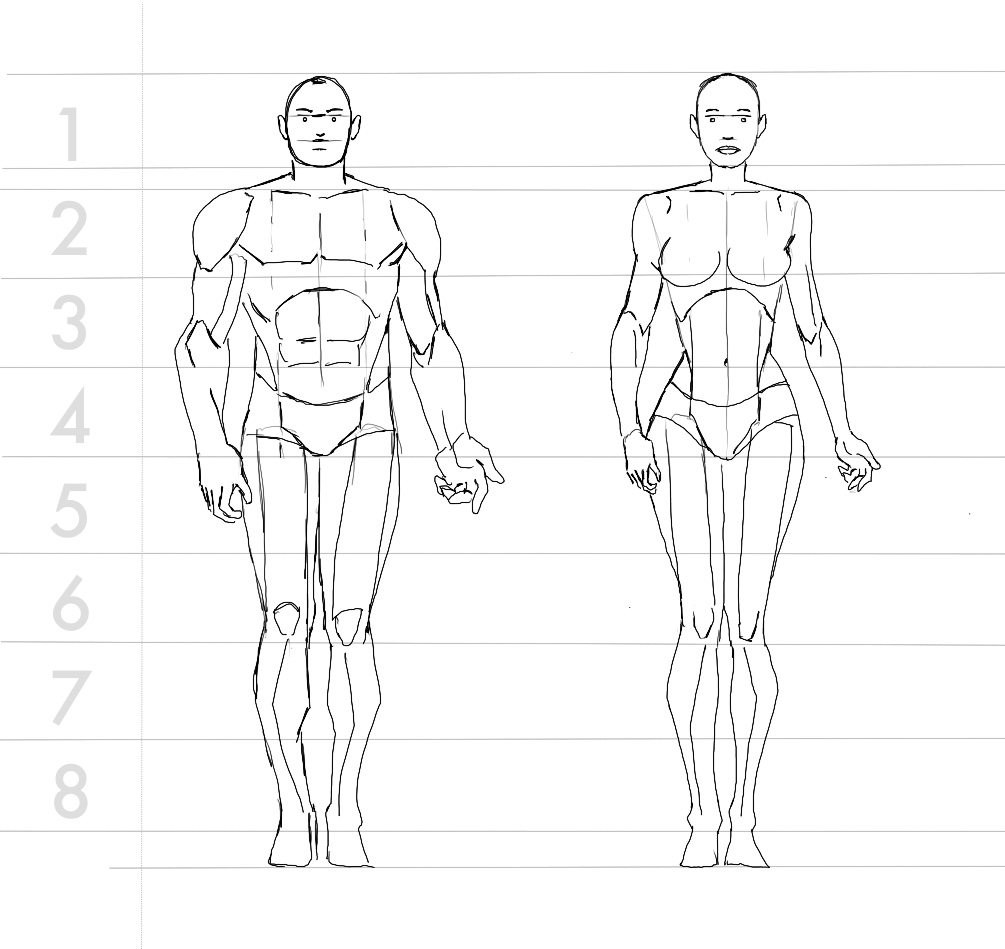
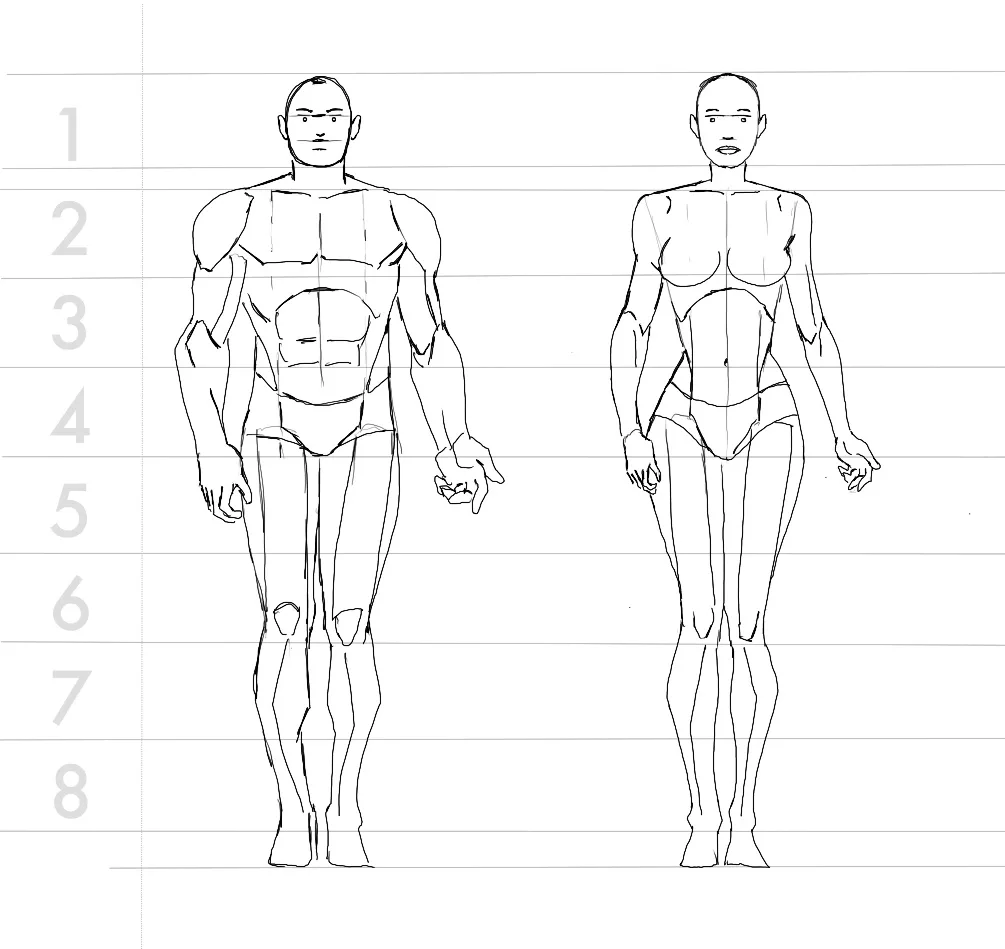
A great tip for better gesture drawing is to memorize the natural proportions of an average body.
Memorizing proportions like height, width, and depth of various body parts and their ratio to each other will help you add accuracy to your gesture drawing.
Personally, I have a hard time memorizing so I like to make some notes on a paper and keep it with me.
17. Learn Anatomy:
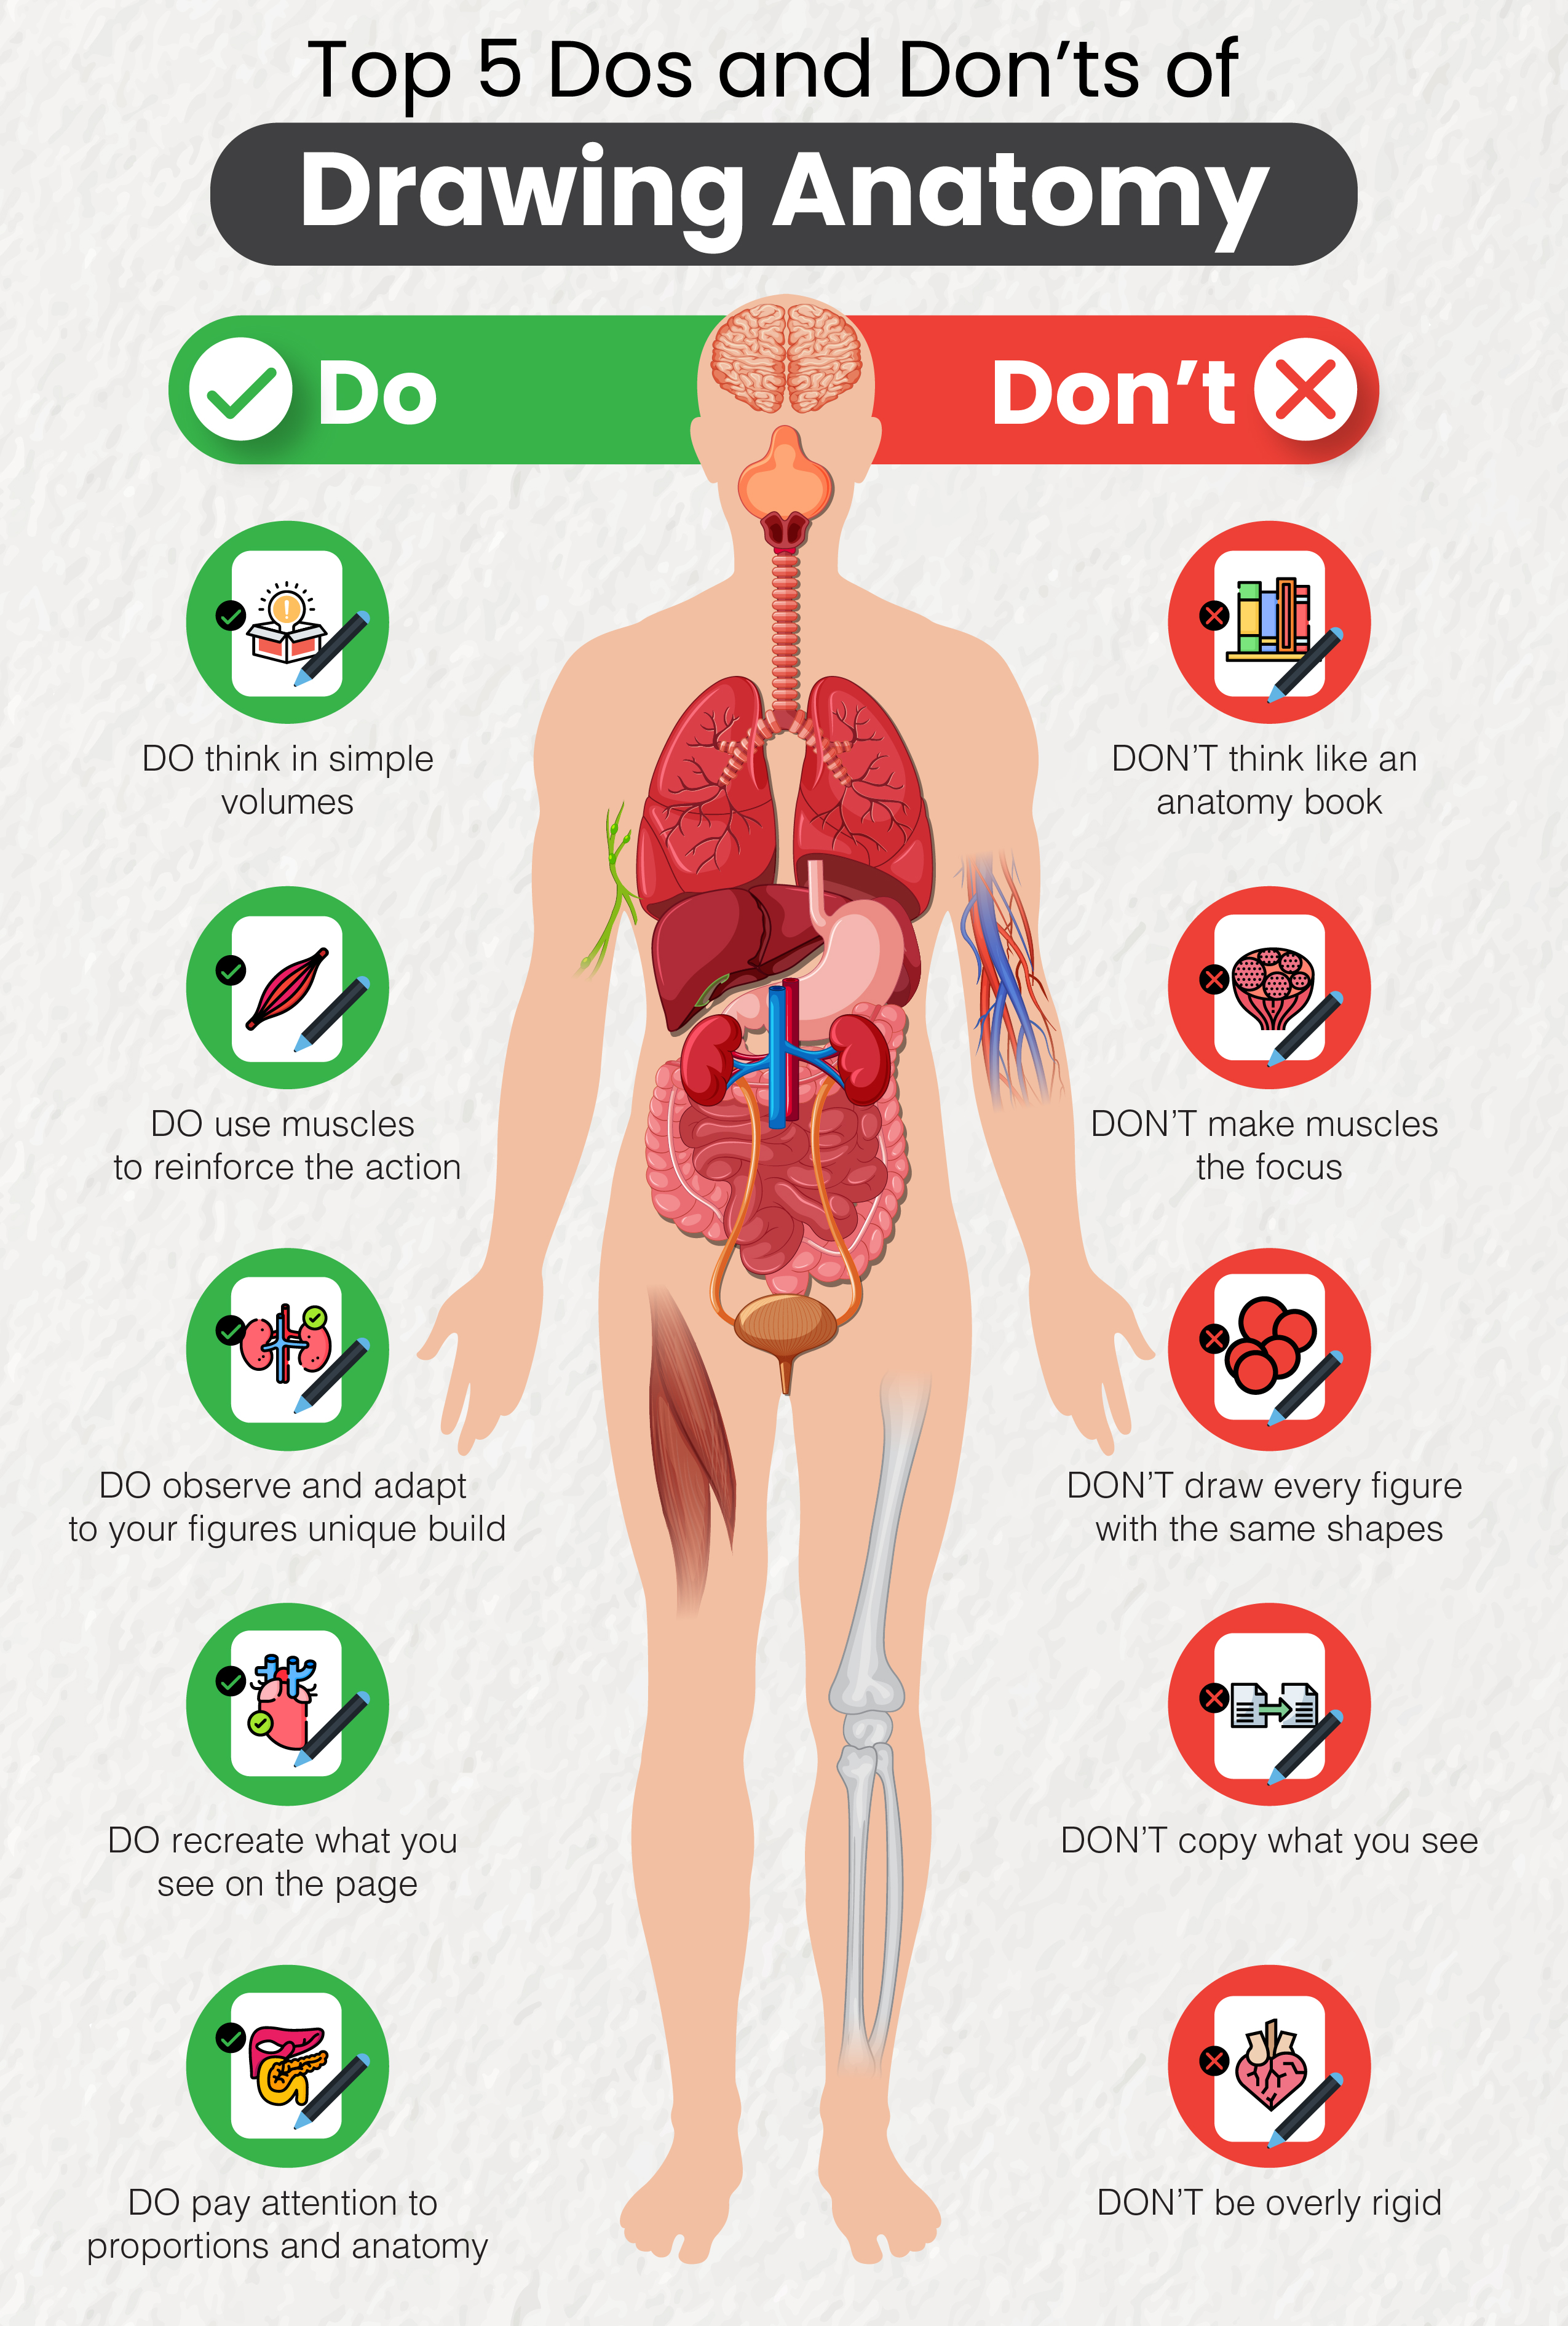

You are representing through your gesture drawing is the anatomy, and anatomy is what drives your gesture drawing.
The tip is that you learn the basic anatomy of a body so that your brain can better pick up the details of your subject.
You don’t have to be an expert as I only know all the major bones, joints, and muscles. You should also know how a bone bends or a muscle flexes or contracts.
Related: Free Course to Learn Anatomy
18. Focus on Lines of Action:
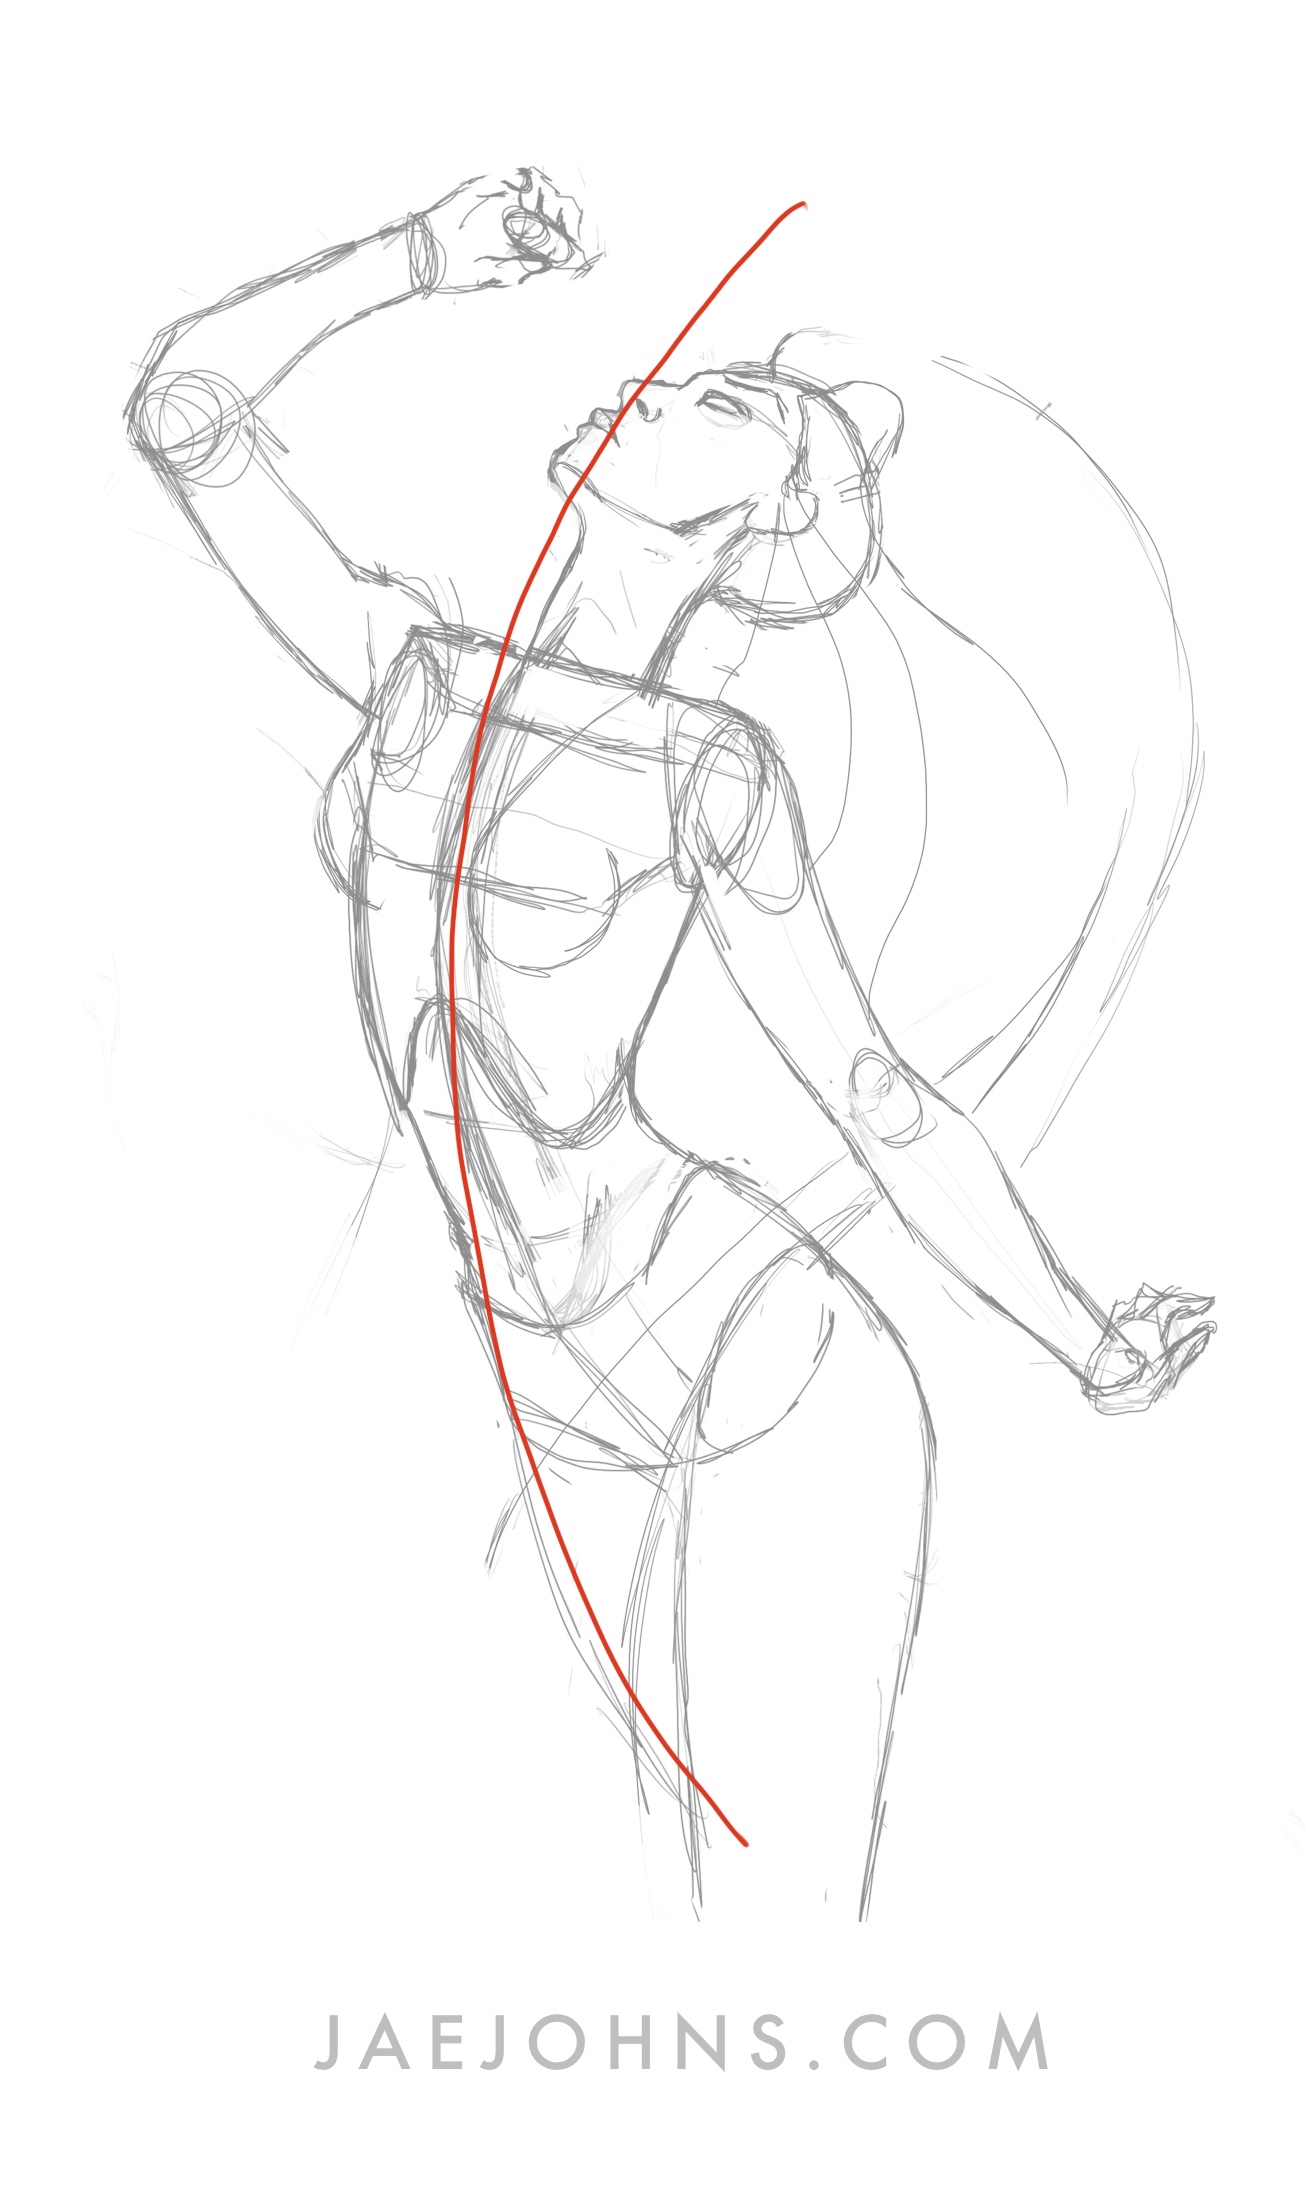

Take a moment to notice the line of actions of the subject that you are drawing.
Lines of action are important to understand the direction of the movements of your subject. These are the lines along with the points where you might seem to be tugged in a direction. That apparent tug can represent the tension of a muscle.
19. Focus on Lines of Rhythm:
As the lines of action are important in gesture drawing, similarly are the lines of rhythm.
Lines of rhythm will specify how your subject is moving, which will help you capture the details and be accurate with your strokes.
20. Light to Bold Strokes:
When I start with my gesture drawing, I make sure to begin with, light strokes.
Light strokes mean to use gentle pressure when you stroke. If you start with bold strokes in your gesture drawing, the chances are that you will restrict yourself, and that is what you don’t want in a gesture drawing.
21. CSI:
While you practice your strokes to be relaxed and natural and not too sloppy, here is a format that you can follow for a better gesture drawing.
Ensure that most of your strokes are in the form of a C curve, S curve, or a straight line like an I.
How to Practice Gesture Drawing
I’m going to share some steps you can do for figure drawing practice.
With these steps, you’ll learn how to gesture draw and hopefully learn some additional gesture drawing tips.
This is the exact process I use to practice gesture drawing.
Below you’ll be able to watch process videos of the figure drawing sessions.
You can sign up below.
How to Improve Gesture Drawing Step by Step
1. Use a Figure Drawing Tool
When you first start gesture drawing, you’ll need to build your knowledge of the human anatomy.
You don’t need to study all the names of body parts or muscles.
Looking at and studying the overall shapes of the body is more important.
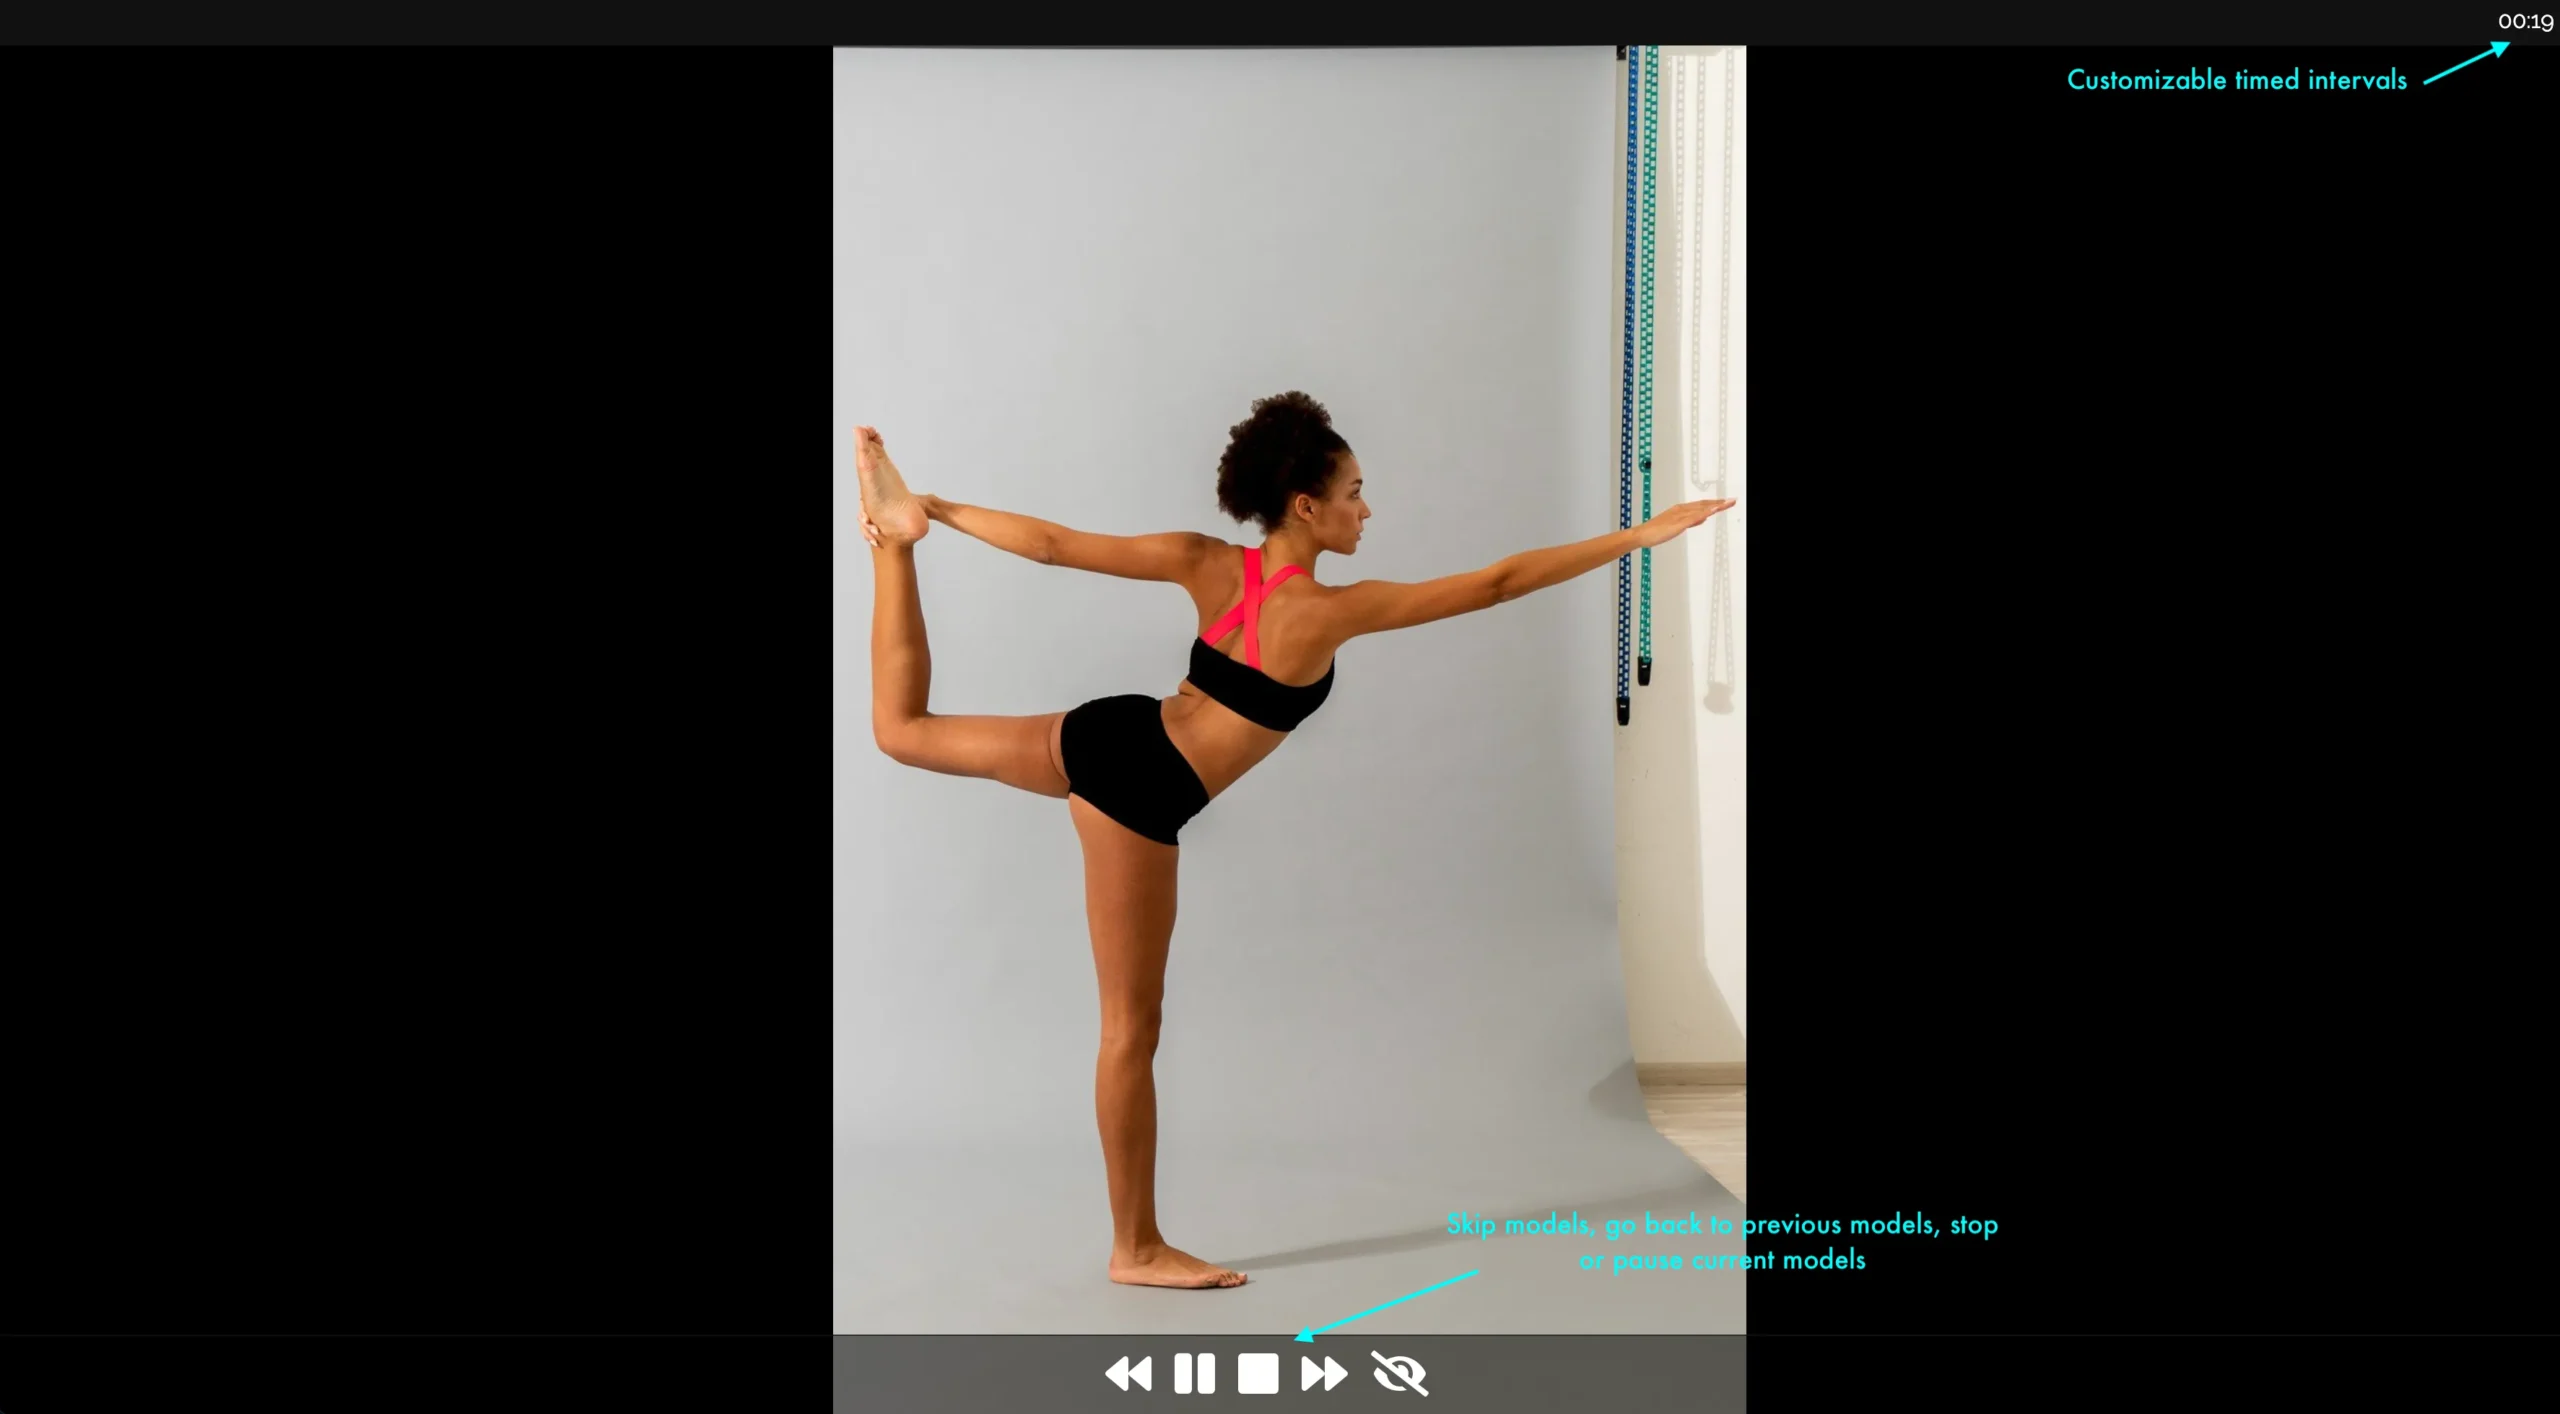
That’s why I recommend using a pose reference site that displays different people in different poses at custom time intervals.
The site I recommend is this figure drawing tool.
You can also go to a life drawing class; however, sometimes you won’t get a good model in a class.
These figure drawing tools let you have more control over choosing really good poses.
2. Customize your Settings for the Best Gesture Drawing Practice

When you use a pose reference site for gesture drawing practice, you’ll see settings you can customize.
Almost all these types of sites are similar.
You’ll be able to choose if the models are nude or clothed, the gender of the models, and the time interval.
If you choose a time interval of fewer than 5 minutes then I recommend not trying to draw every little detail in the image.
When you choose a setting above 5 minutes, it allows you to work in more details and focus more on drawing shadows and lighting.
3. Figure Out Where the Line of Action is in the Pose
Getting your line of action down is the most important part of gesture drawing for beginners.
30 seconds is not a lot of time and you want to stay away from adding details.
Focus on simplifying the model’s pose into a visually appealing shape, and that starts with the line of action.

As you do more gesture drawing practice, you’ll want to draw shapes that are easy to read on paper.
When you finish drawing your pose, it helps to imagine your pose as an all-black silhouette.
If a stranger can understand what is going on by looking at the silhouette, then you have a great pose.
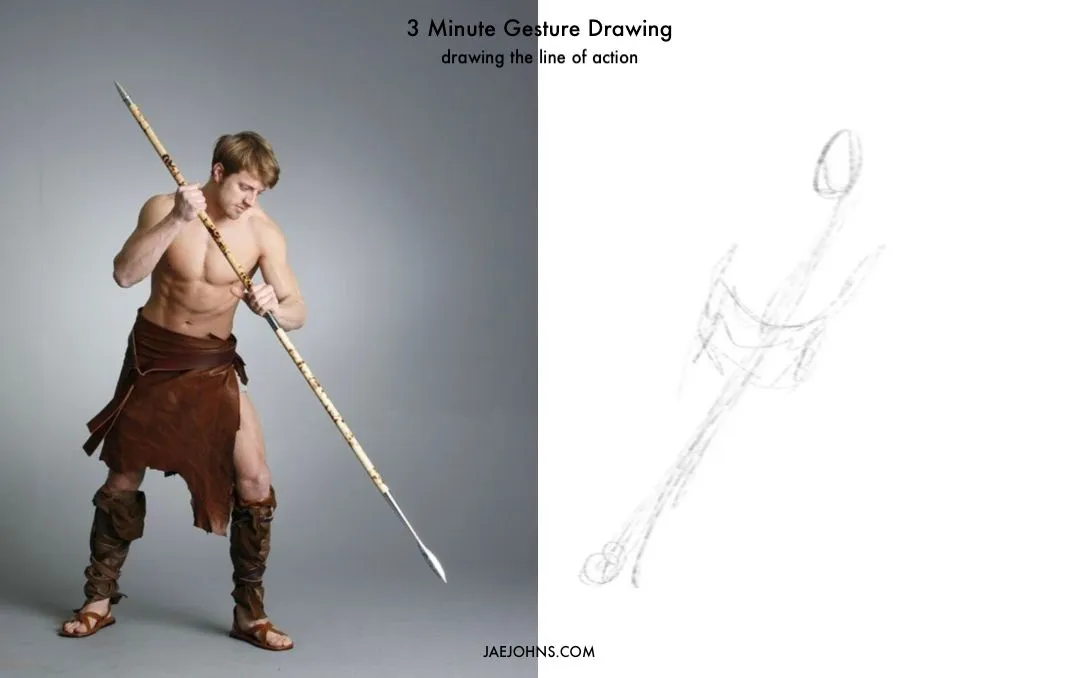
This time we’re going to focus on gesture drawing practice of a 3-minute pose.
With a few extra minutes, we can add a bit more detail, but we should still focus on drawing that line of action first.
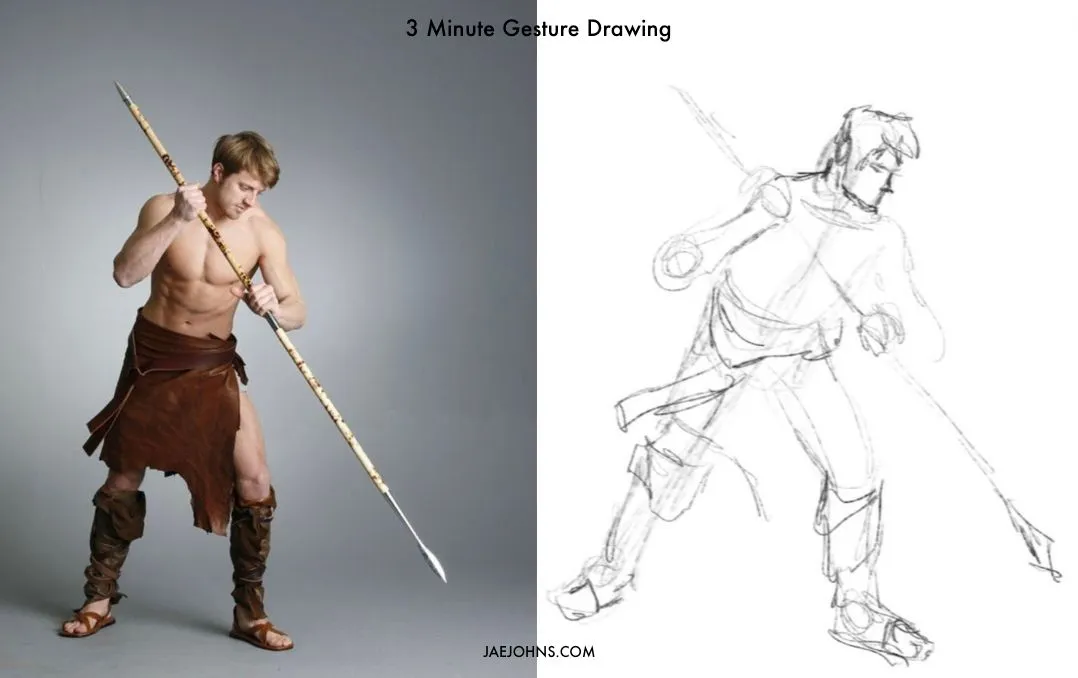
A gesture drawing tip I’d suggest is to focus on drawing the overall big shapes of the person.
Something I wished I knew sooner is how important the harmony of the big shapes you draw is.
Your anatomy knowledge is important, but the shape design of your figure is equally as important.
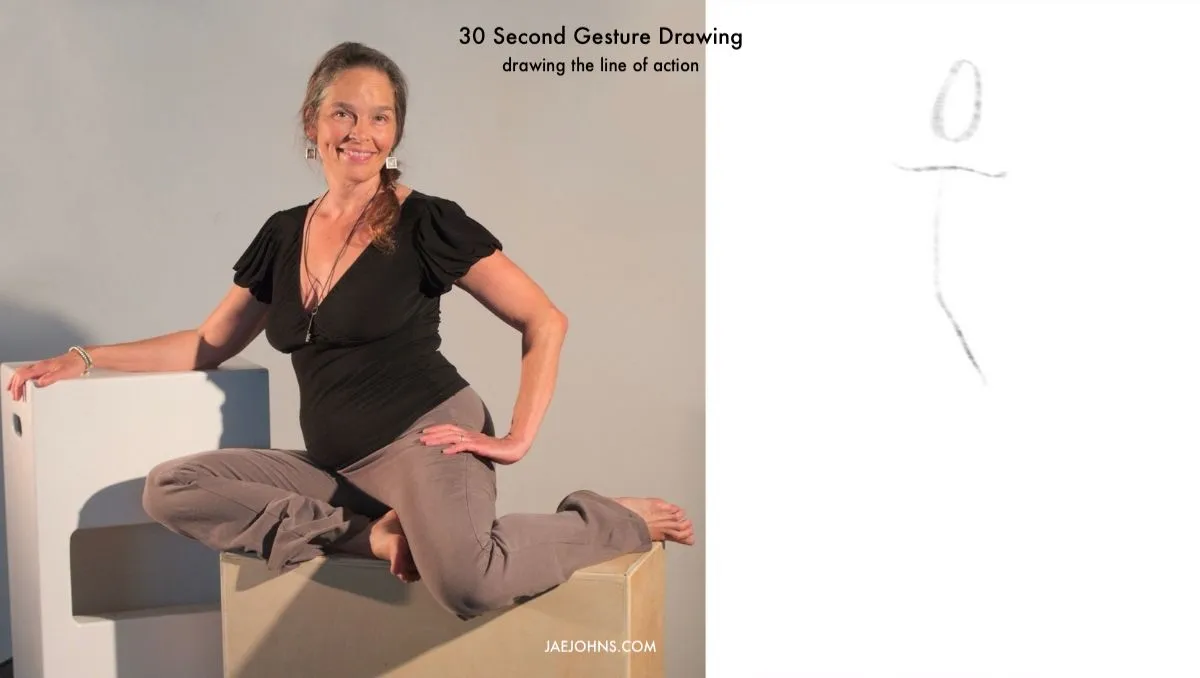
Gesture Drawing Practice Process Video
Below is a gesture drawing practice video that shows every little step in how to improve gesture drawing.
This is a process video of the above 30-second drawing session.