
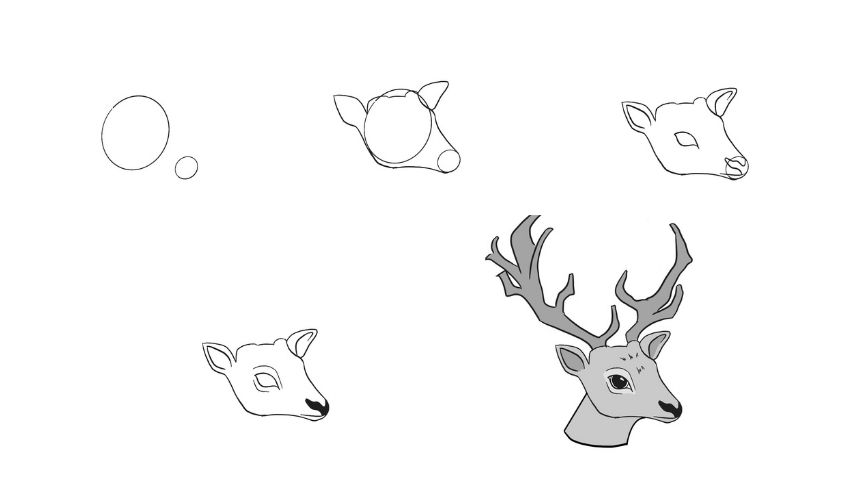

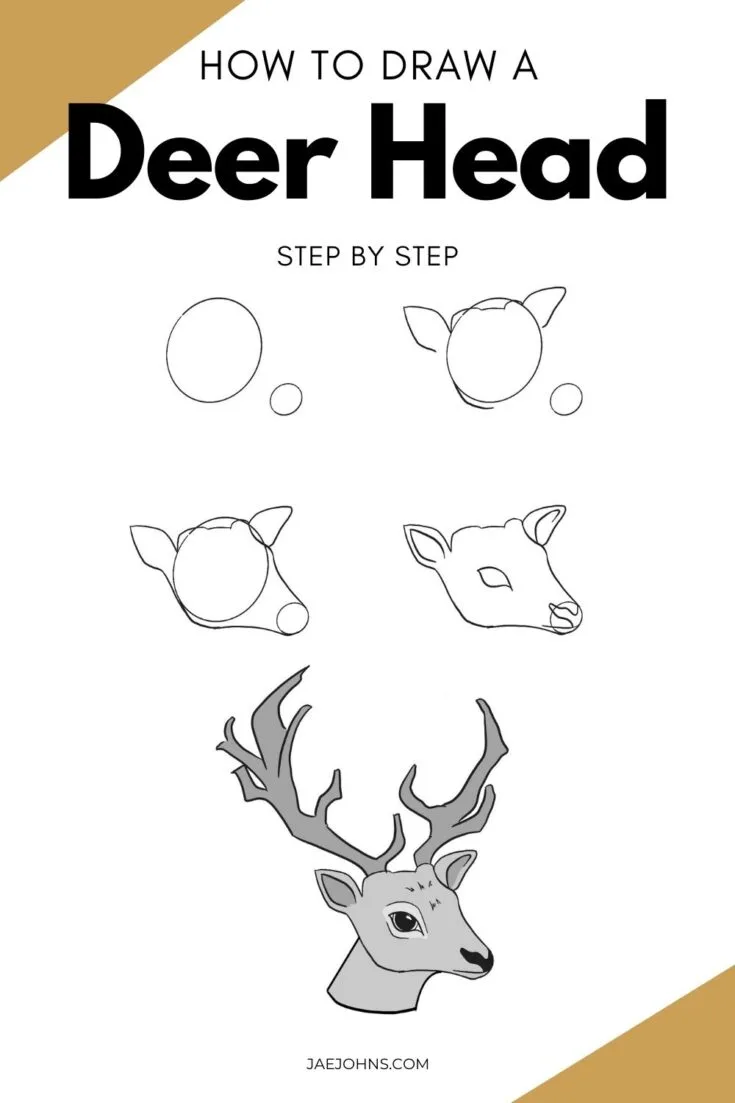
Want to make a deer head drawing? I’ll be showing you how to draw a deer head with step-by-step images that make it easy.
These images will be a great outline for you to draw a cartoon deer head in a matter of minutes.
Let’s get started!
Drawing Supplies Needed
You can use any drawing supplies to make a deer sketch, but here are the best tools for drawing.
If you want to learn how to draw a deer, here’s a tutorial to draw full-sized deer.
Step 1:


Start with two circles, one large and one small.
Step 2:
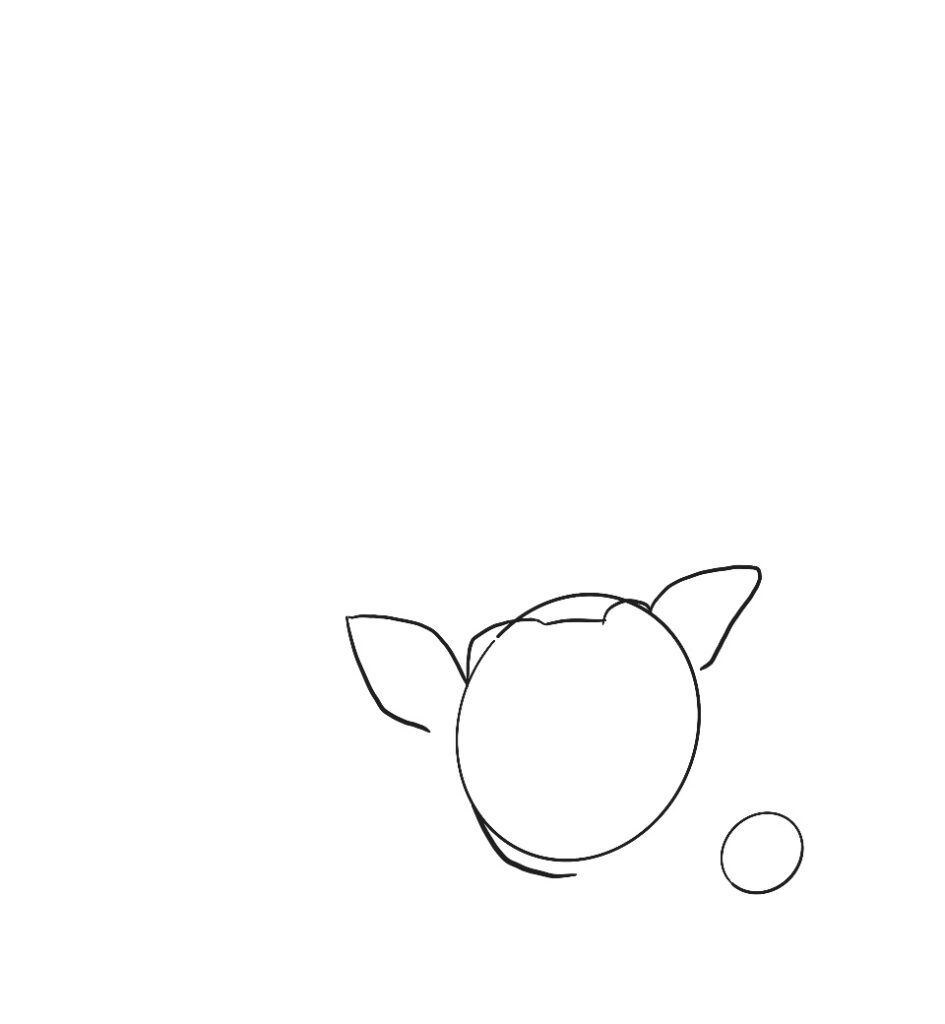

Starting from the bigger circle we’re going to make two round bumps on either side, make sure they extend a bit into the circle and the left one comes OUT of the circle.
At the end of these bumps we’ll make 2 soft triangles of the ears, and finally at the bottom left of the circle, extend a curved line just a bit along the bottom.
Step 3:

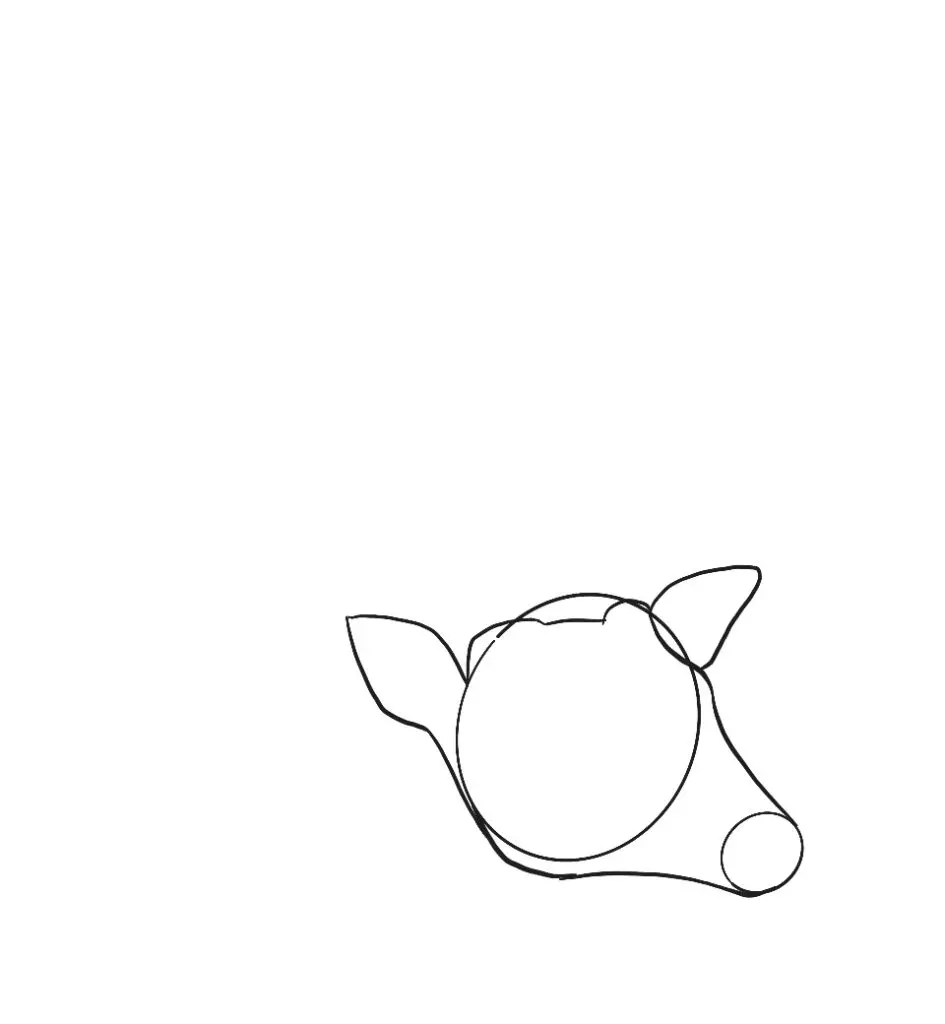
Connect the soft triangle on the left to this last curved line we made by adding another line.
On the right side, take the smaller bump down in a dip before adding a bump at the base of the ear. Finally connect all these lines to the smaller circle with a slight curve inwards.
Step 4:
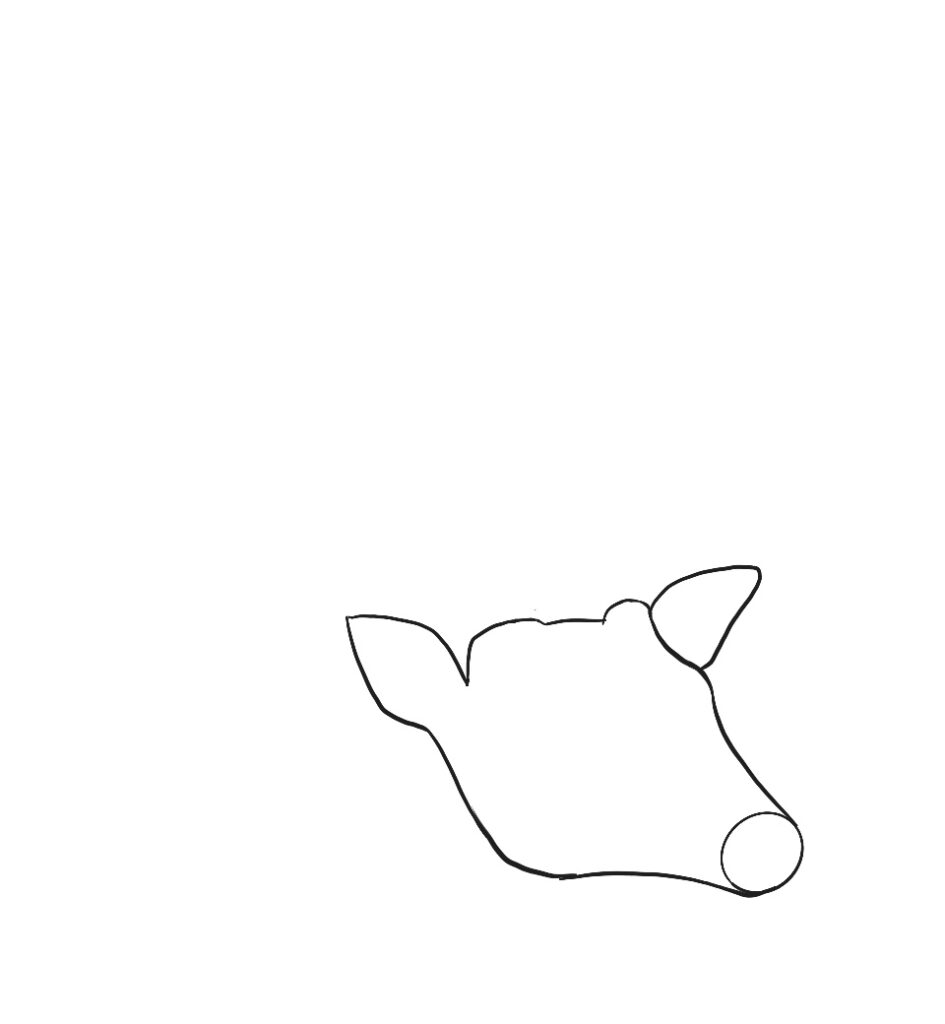

Erase all your overlapping lines!
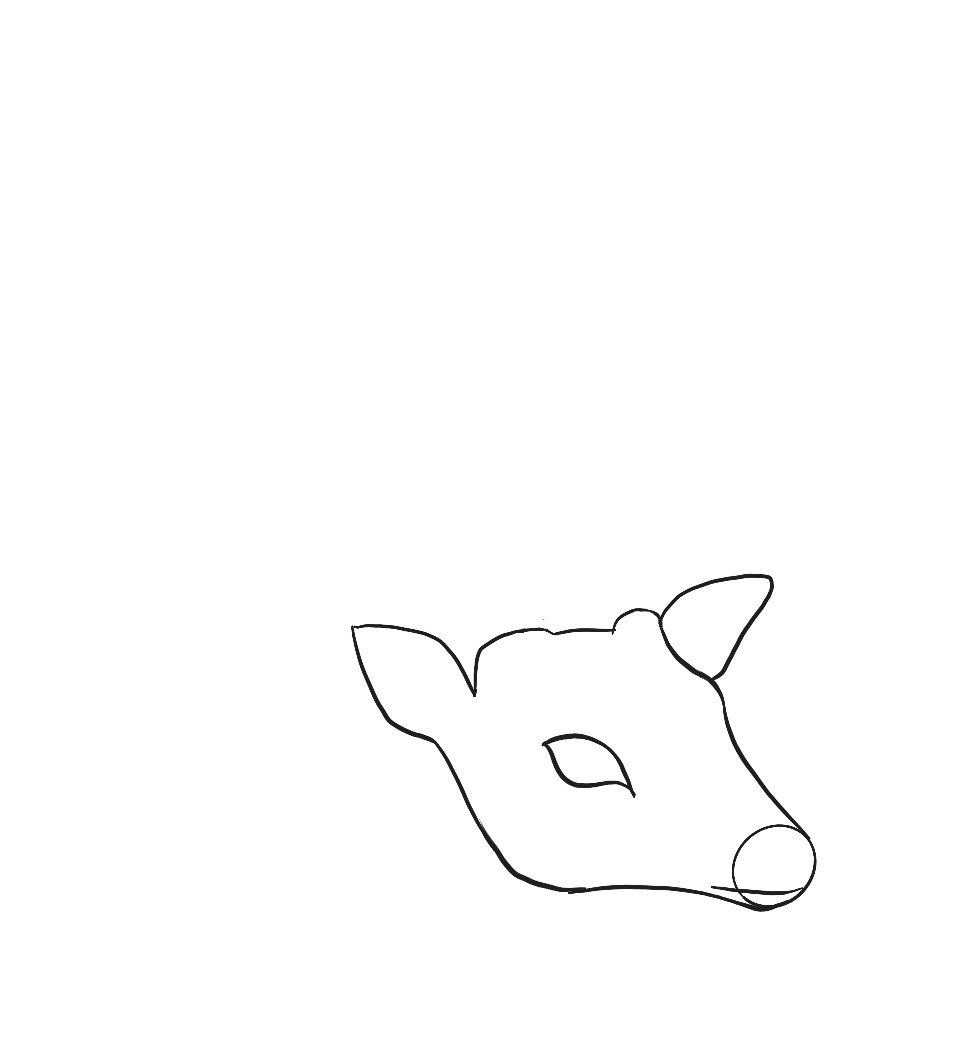
Step 5:

At the small circle make a slightly curved line through the bottom 1/3. Further back we’ll make an almond shape for the eye, but make it very curved!
Make sure it extends a bit on the inside (the side closer to the snout!)
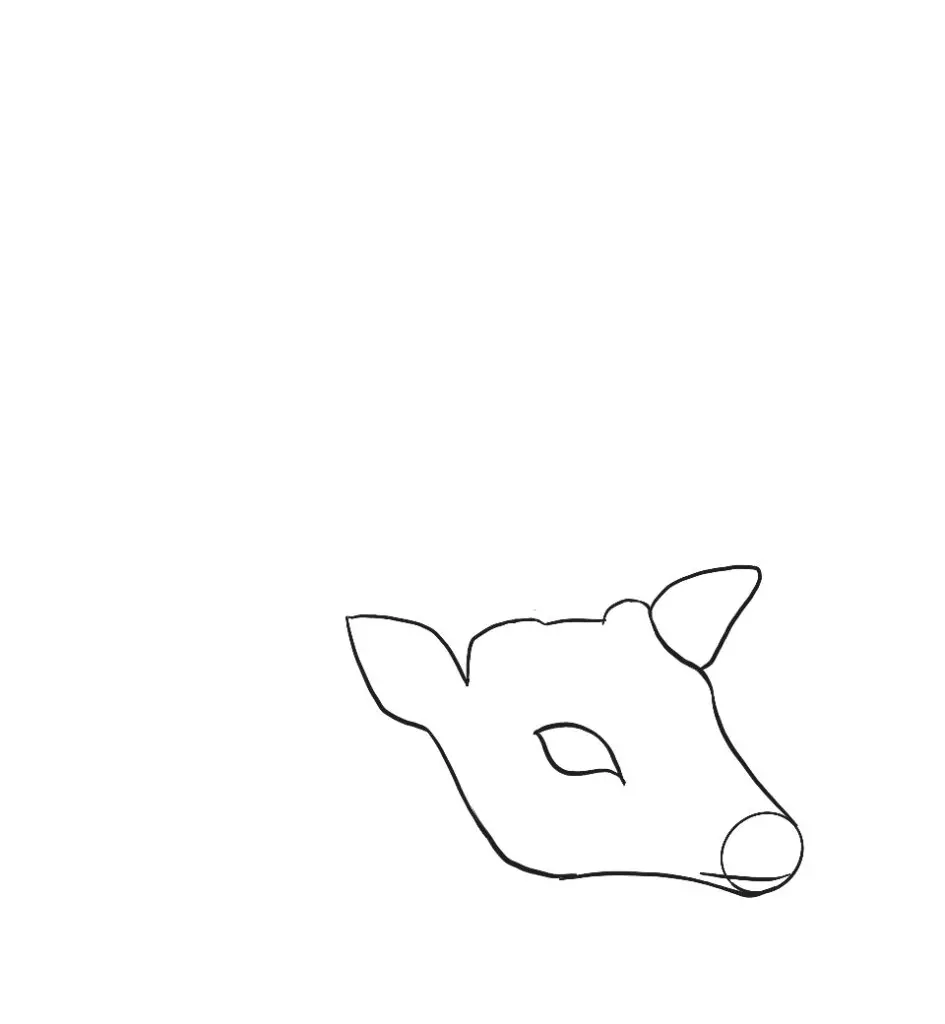
Step 6:


Let’s outline the inner ears, and add the nose! The nose should look like a whale tale but one of the fins can’t be seen.
Step 7:


Now fill in the nose, erase the circle overlapping lines, and add lids to the eye! Next we’re going to do details!
Step 8:
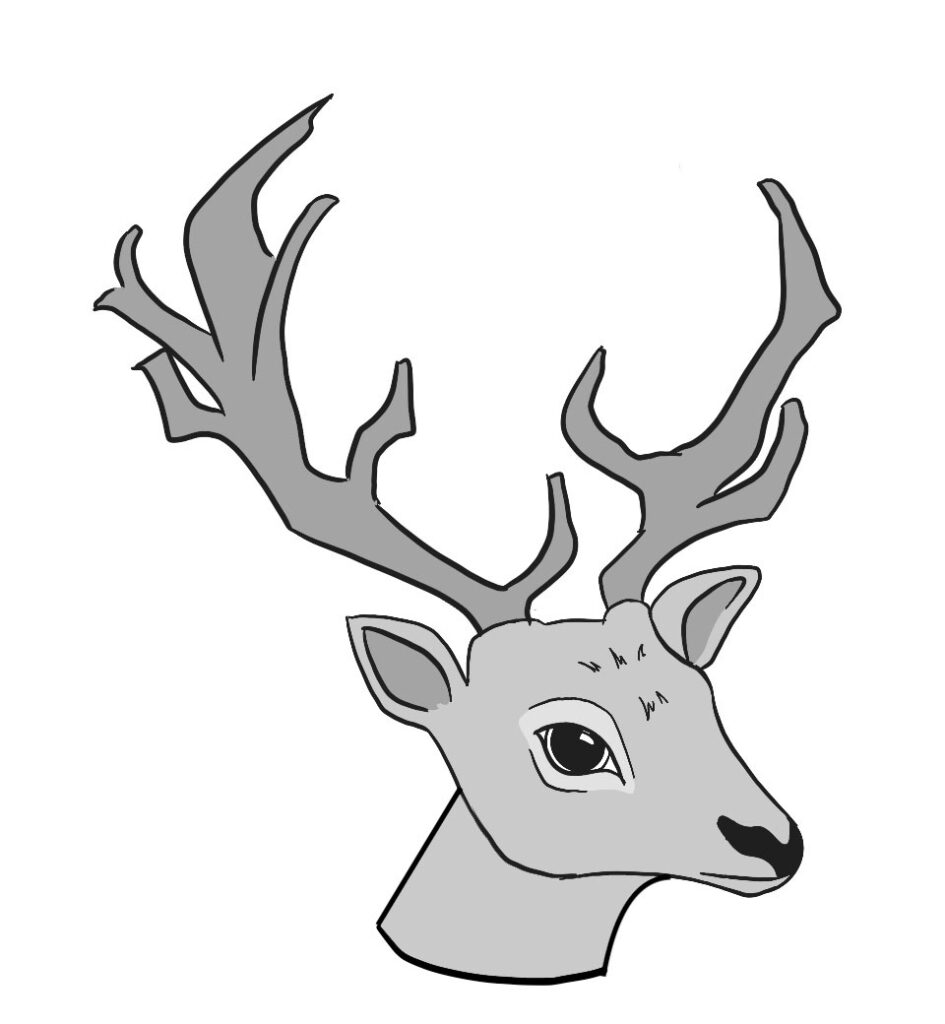

First, let’s do the antlers. You can do them the same way you’d do tree branches, just be sure you keep in mind that we have one side closer to us so we’ll see more of it!
Make sure none of your lines are perfectly round, as the angular lines will help give the antlers some shape.
For the eye, make a half circle in the almond shape and fill in almost all of it – leaving a small bit on the outer ring uncolored. Erase a bit of the black fill towards the top for the highlight.
Now let’s draw the neck! At the point of the head where the snout is coming into the cheek, extend a curved line down.
Right behind the cheek, about 1/2 way to the ear, make a straighter (but not fully straight) line also extending down and connecting the two with a curve.
Finally color in your deer head! Maybe add a few little fur lines and you’re done.
Other related topics to help you draw animals:
- How to Draw Dogs – Easy Step by Step Tutorial for Cute Dogs
- How to Draw a Dolphin (9 Easy Steps with Pictures)
- Draw a Cat in a Box in Quick and Easy Steps
- How to Draw a Realistic Gorilla in 6 Steps
- How to Draw a Dragon (Step by Step with Pictures)
Thank you Carolyn for this amazing step-by-step process. You can view her social @ClazDesig if you enjoyed her illustrations. Check out her shop where she has amazing illustrations.


How to Draw a Deer Head Printable Guide

How to draw a dear head.
Materials
- Pencil
- Paper
- Or tablet and stylus
Tools
- Pencil
- Paper
- Or tablet and stylus
Instructions
- Step 1:
Start with two circles, one large and one small.

- Step 2:
Starting from the bigger circle we're going to make two round bumps on either side, make sure they extend a bit into the circle and the left one comes OUT of the circle.
At the end of these bumps we'll make 2 soft triangles of the ears, and finally, at the bottom left of the circle, extend a curved line just a bit along the bottom.

- Step 3:
Connect the soft triangle on the left to this last curved line we made by adding another line.
On the right side, take the smaller bump down in a dip before adding a bump at the base of the ear. Finally, connect all these lines to the smaller circle with a slight curve inwards.

- Step 4:
Erase all your overlapping lines!

- Step 5:
At the small circle make a slightly curved line through the bottom 1/3. Further back we'll make an almond shape for the eye, but make it very curved!
Make sure it extends a bit on the inside (the side closer to the snout!)
- Step 6:
Let's outline the inner ears, and add the nose! The nose should look like a whale tale but one of the fins can't be seen.

- Step 7:
Now fill in the nose, erase the circle overlapping lines, and add lids to the eye! Next, we're going to do details!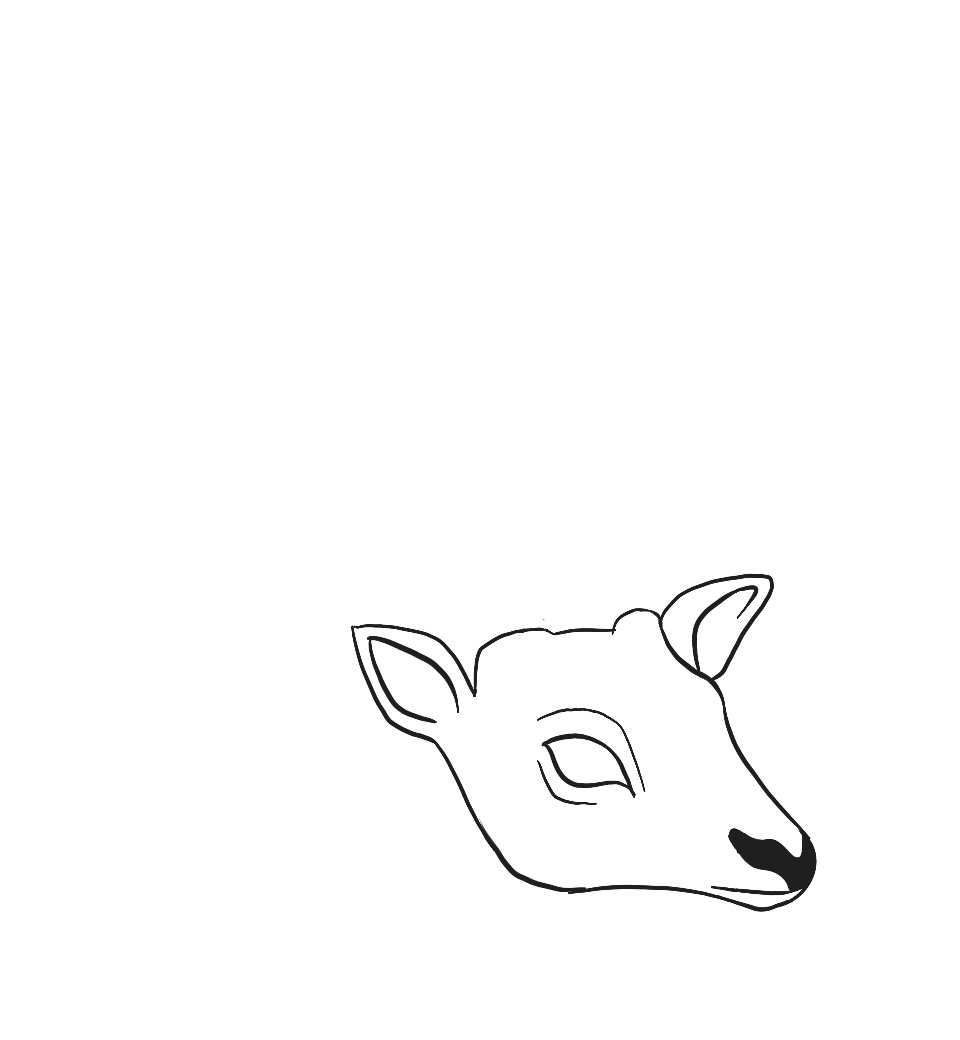

- Step 8:
First, let's do the antlers. You can do them the same way you'd do tree branches, just be sure you keep in mind that we have one side closer to us so we'll see more of it!
Make sure none of your lines are perfectly round, as the angular lines will help give the antlers some shape.
For the eye, make a half-circle in the almond shape and fill in almost all of it - leaving a small bit on the outer ring uncolored. Erase a bit of the black fill towards the top for the highlight.
Now let's draw the neck! At the point of the head where the snout is coming into the cheek, extend a curved line down. Right behind the cheek, about 1/2 way to the ear, make a straighter (but not fully straight) line also extending down and connecting the two with a curve.
Finally color in your deer head! Maybe add a few little fur lines and you're done
