

Over 30% of people try to learn how to draw a dolphin and think it can be easy.
And if you have a step-by-step with pictures then learning how to draw a dolphin is easy even for beginners.
So if you’re an artist that wants to know how to draw animals or if you’re an adult in your 30s, 40s, or 50s and want to be able to draw a cute dolphin with your kid, then you’ve come to the right place.
Other how-to-draw topics:
- How to Draw a Cute Bunny (12 Easy Steps)
- How to Draw a Dragon (Step by Step with Pictures)
- How to Draw a Rose (7 Easy Steps)
- How to Draw Realistic Trees Like a Pro
- How to Draw Dogs – Easy Step by Step Tutorial for Cute Dogs
- How to Draw Curly Hair Like a Master
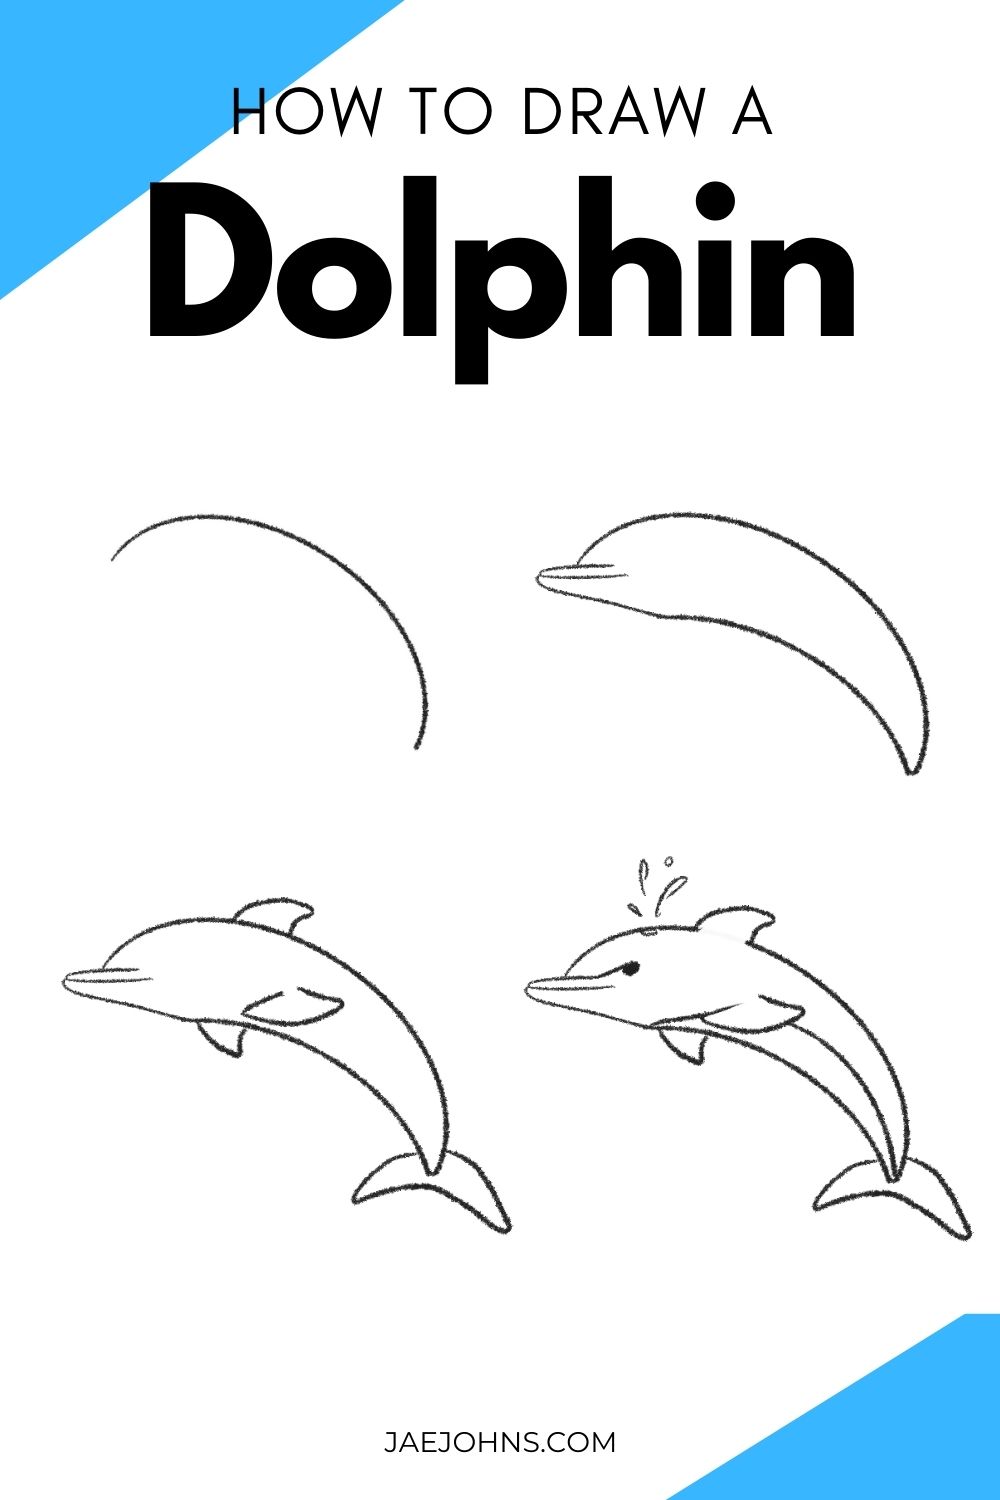
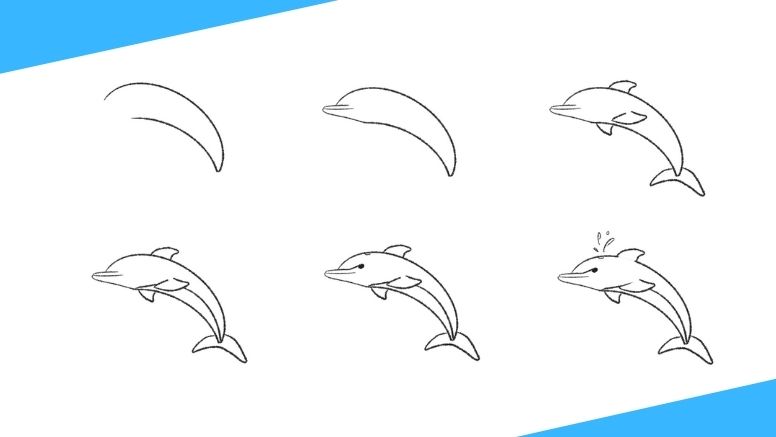
In this step-by-step process, you’ll learn how to draw a dolphin that is swimming out of water. Make sure you have the right tools for drawing before you start.
Step 1: Draw an arc
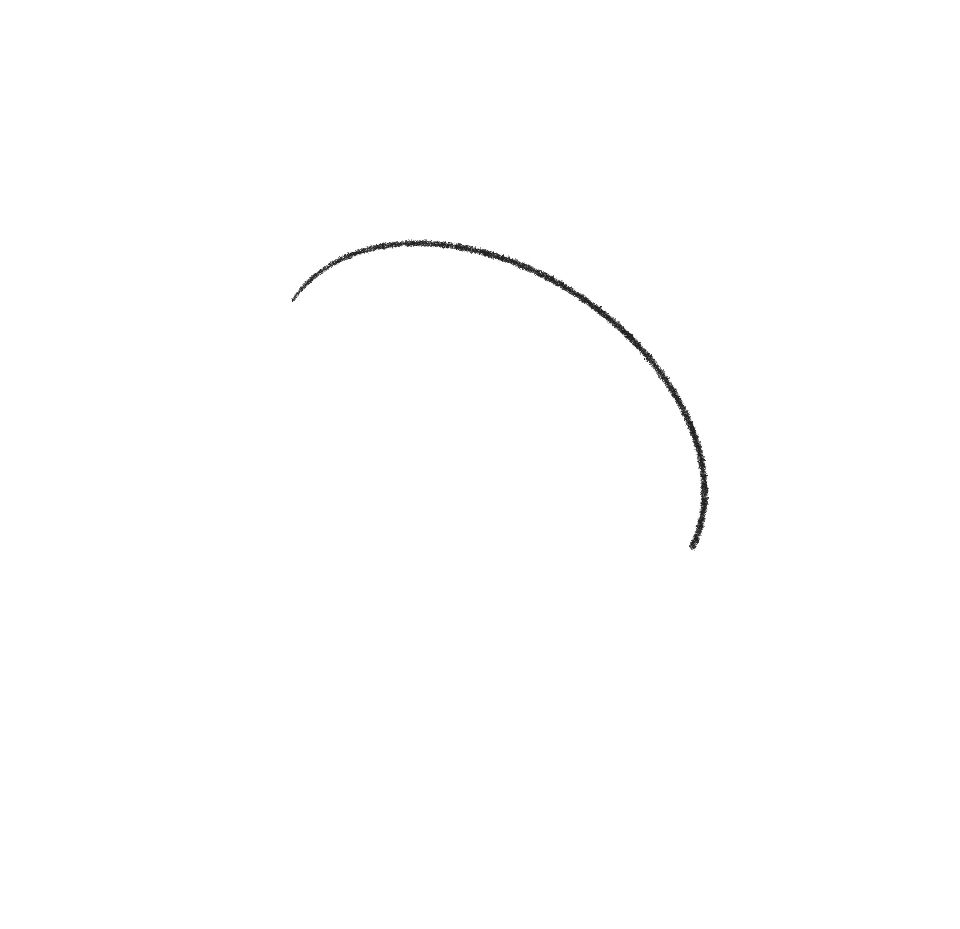
 Start with a large line in an arc pointing downwards
Step 2: Draw a matching arc
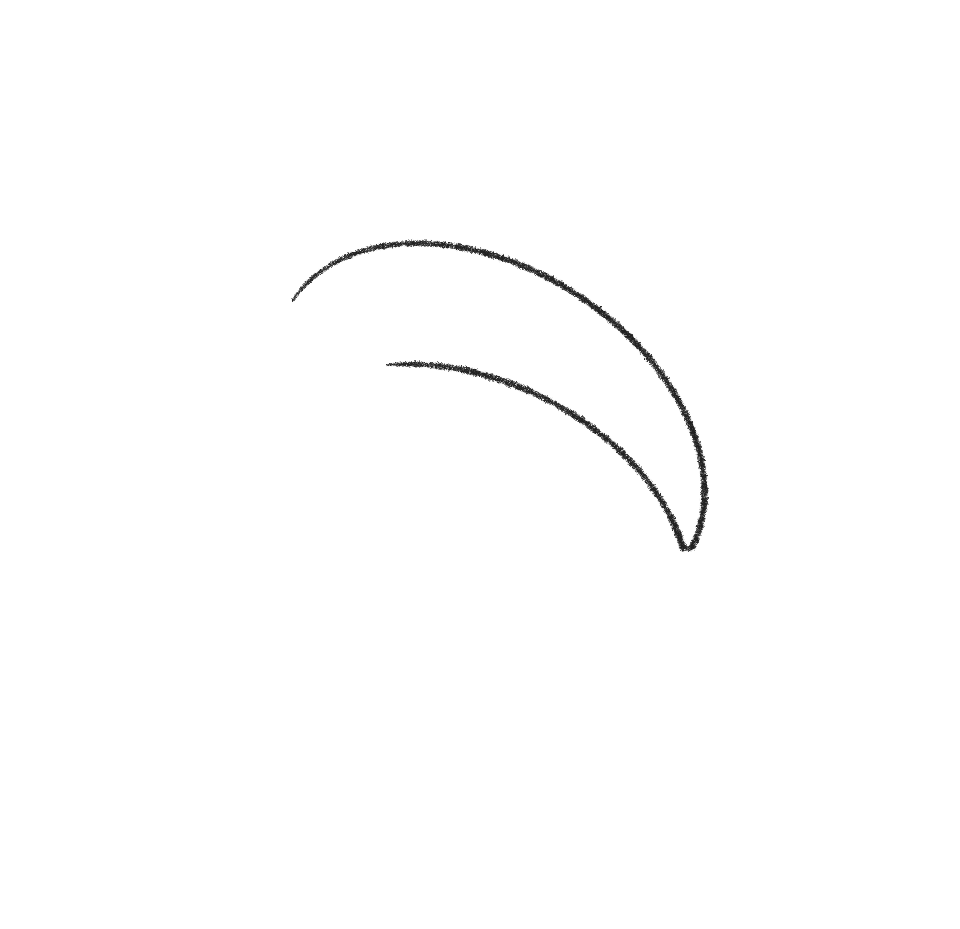
 Add another line, shorter, and joined at the tip in a matching arc.
Step 3: Draw dolphin snout
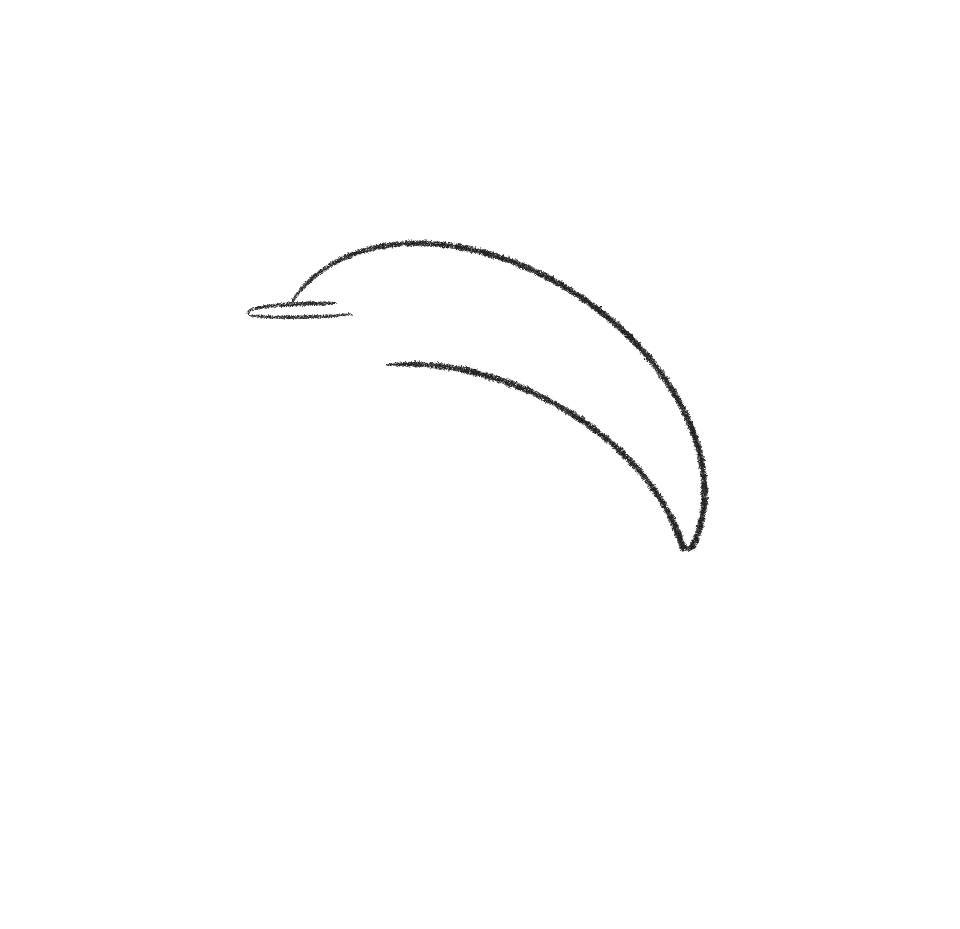
 At the open space create a small, skinny “U” with the rounded peak facing left.
Step 4: Draw dolphin jaw

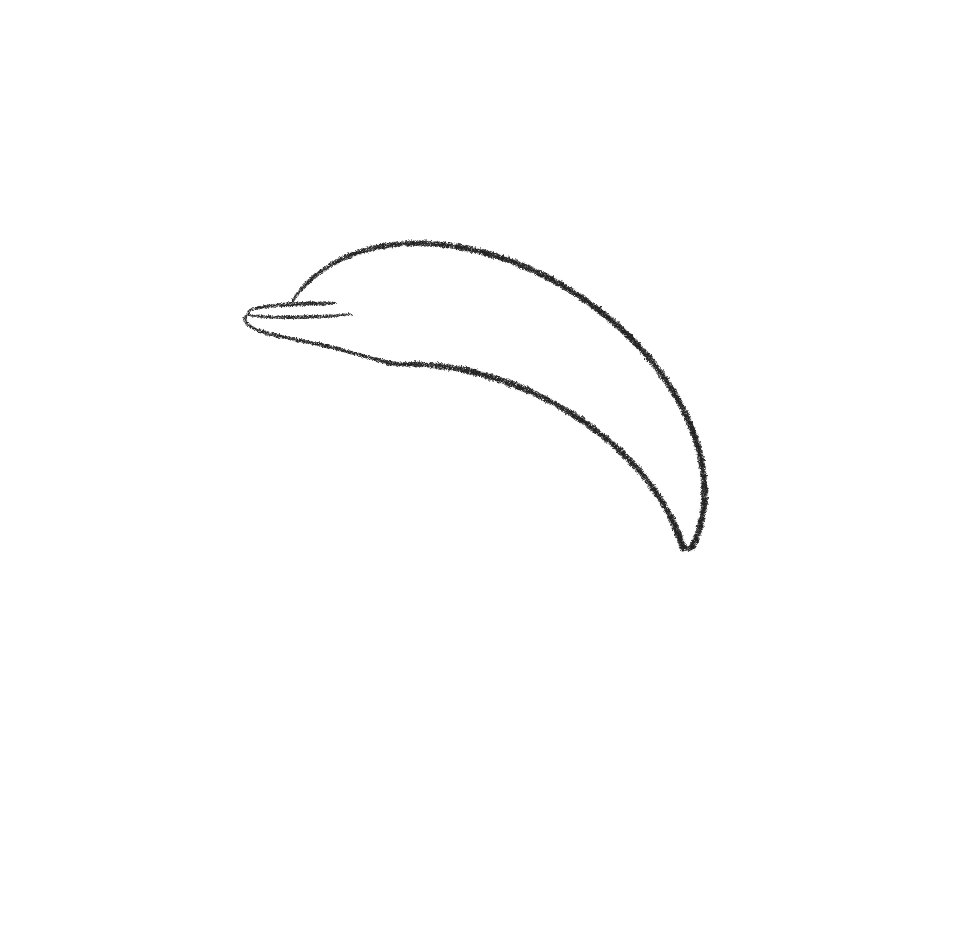 Under that loop create a thicker one that extends a little past the first loop. If you look at Dolphins their lower jaw juts out further than their upper! Connect the jaw to the lower body with a slight bump at the bottom.
Step 5: Draw dolphin fins

 Time to add fins! Add the top fin the way you usually would for a dolphin, a soft triangle! Add a clam shape to the body a little bit above the lower line.
Now add an upside-down triangle to the bottom of the arc, connecting with the lower arc. This triangle should be outside the space between arcs.
We will also be adding the tail fin in a boomerang shape. (Or a banana shape if that is easier)
Step 6: Draw arc for dolphin belly
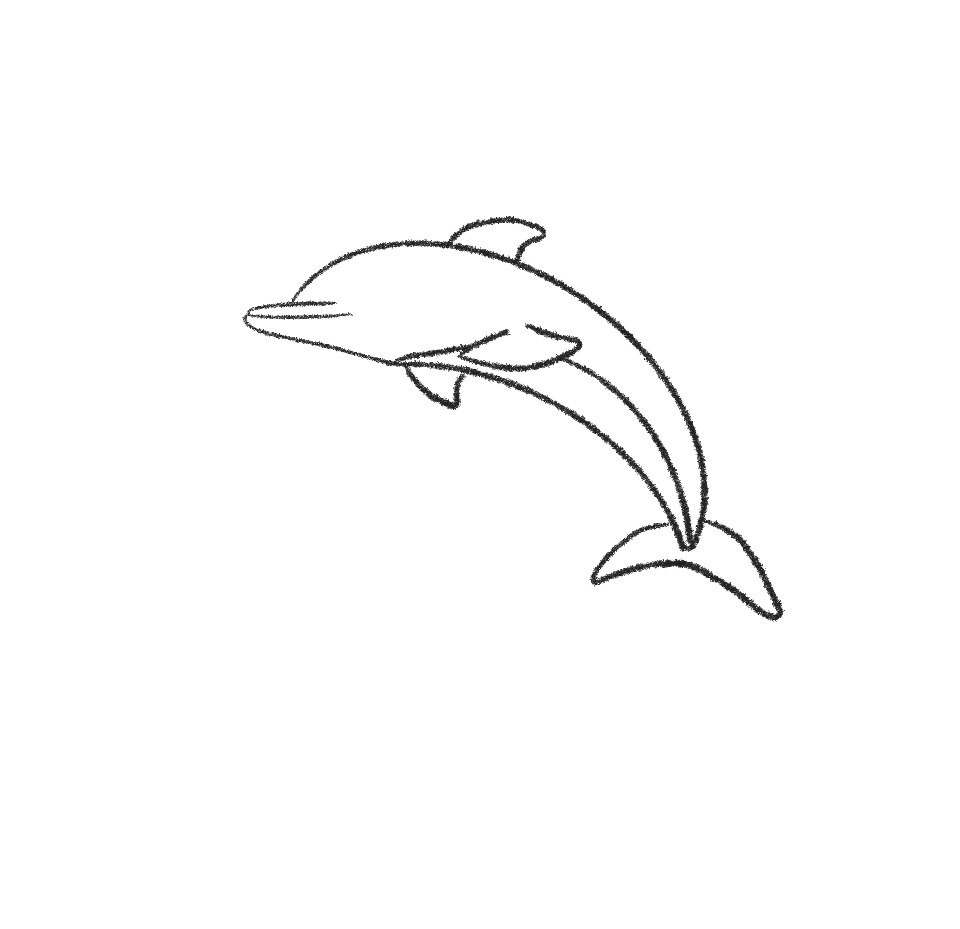
 From the little space on the head where the bottom jaw meets the body (that little extra bump) create a third arc that that will be the belly!
Step 7: Draw dolphin eye and blowhole
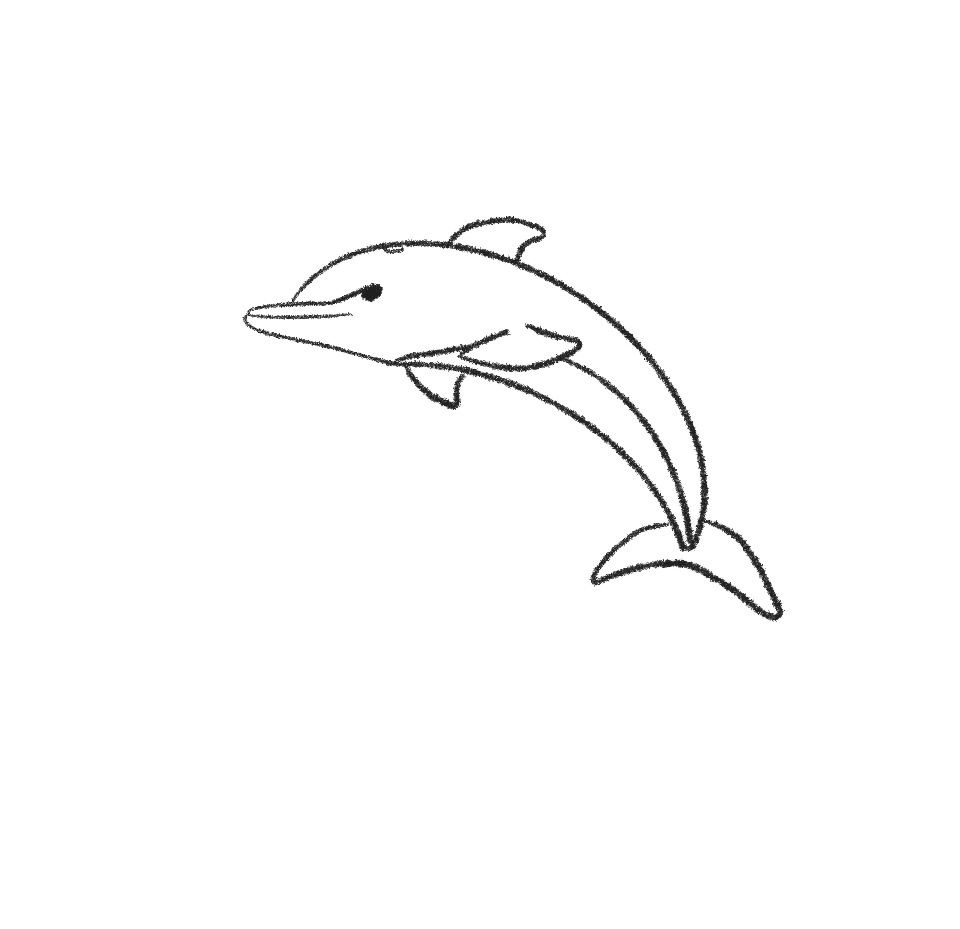
 Details time. From the top jaw (the skinny U we drew) extend the line upwards just a little bit and then under it draw a black circle. This is your eye! Now a little bit in front of the dorsal fin make a small circle up against the top arc of the body – this is the blowhole!
Step 8: Add water droplets

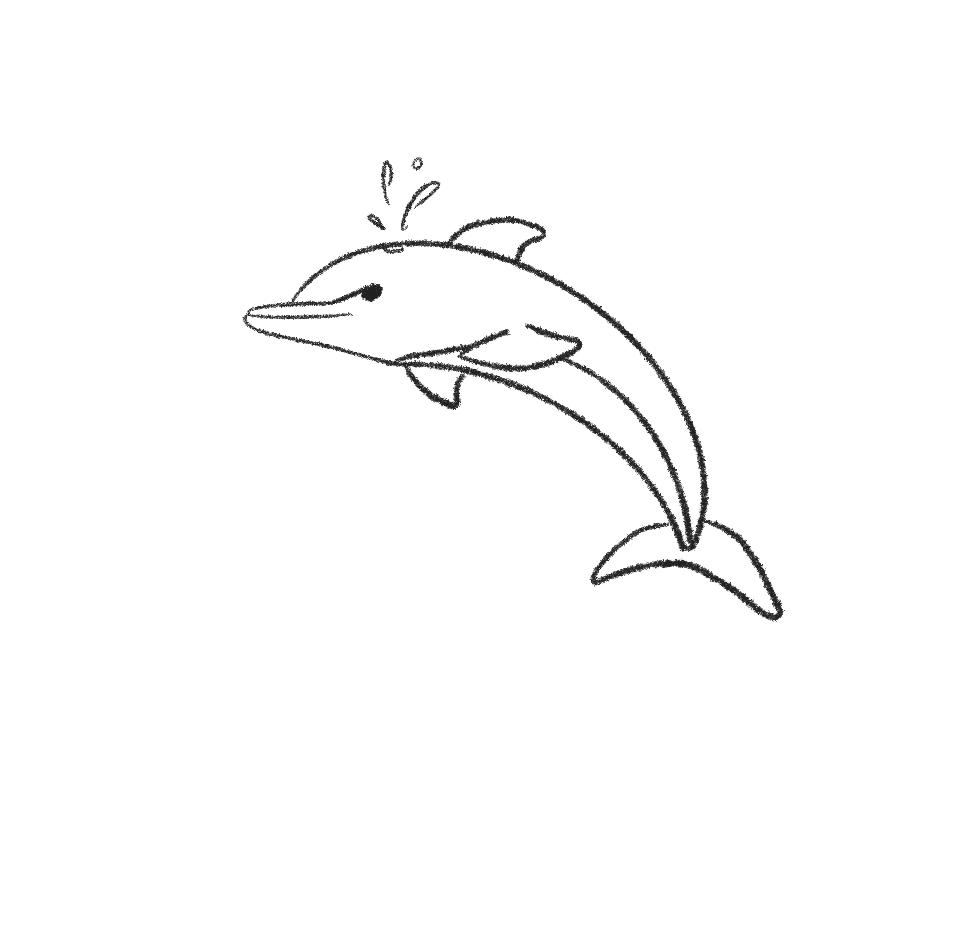 Add some water droplets coming out of the blowhole!
Step 9: Erase minor details and finish
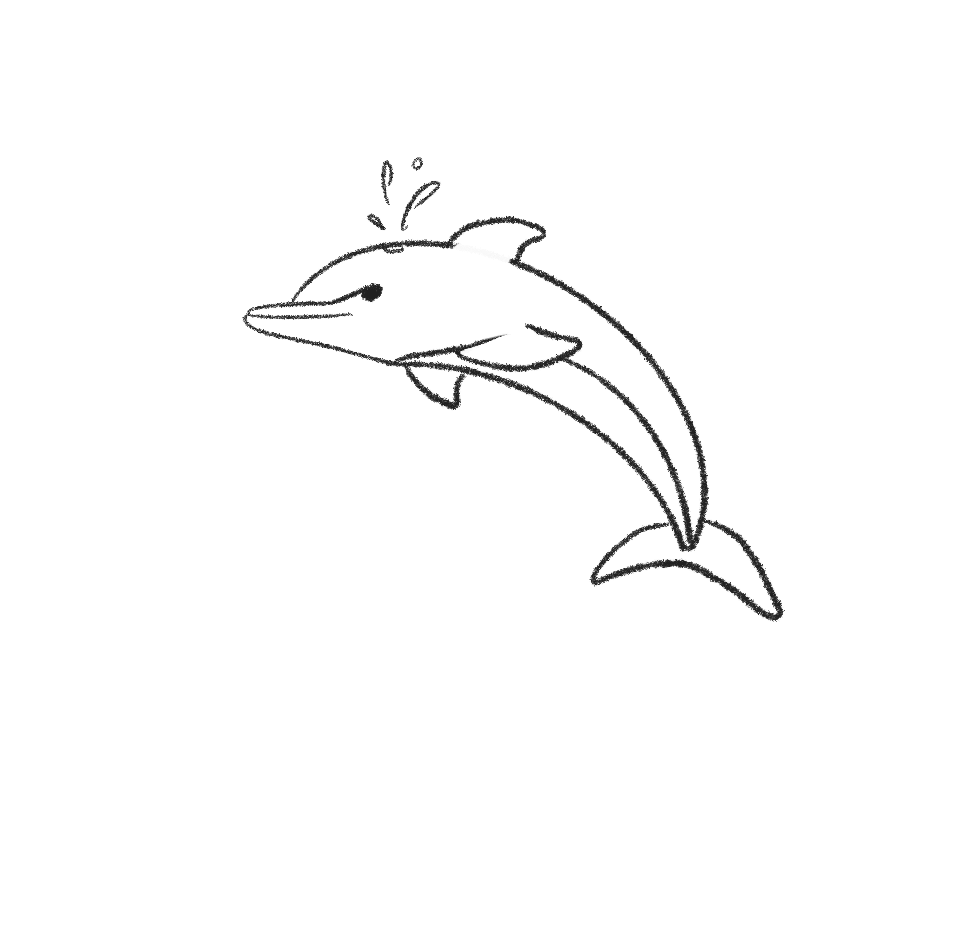
 Now erase the line cutting the dorsal fin off from the body and you’re done!
This dolphin step-by-step tutorial is shared by Carolyn. I’d like to thank Carolyn for sharing her process. If you want to see more of her illustrations, you can visit @ClazDesign. You can also visit her shop, which has some amazing prints.
Yield: How to Draw a Dolphin
How to Draw a Dolphin


Step-by-step instructions on how to draw a dolphin.
Active Time
10 minutes
Total Time
10 minutes
Difficulty
Easy
Estimated Cost
$0
Materials
- Pencil
- Paper
- Or tablet and stylus
Tools
- Pencil
- Paper
- Or tablet and stylus
Instructions
- Step 1: Draw an arc. Start with a large line in an arc pointing downwards
- Step 2: Draw a matching arc. Add another line, shorter, and joined at the tip in a matching arc.
- Step 3: Draw dolphin snout. At the open space create a small, skinny "U" with the rounded peak facing left.
- Step 4: Draw dolphin jaw. Under that loop create a thicker one that extends a little past the first loop. If you look at Dolphins their lower jaw juts out further than their upper! Connect the jaw to the lower body with a slight bump at the bottom.
- Step 5: Draw dolphin fins. Time to add fins! Add the top fin the way you usually would for a dolphin, a soft triangle! Add a clam shape to the body a little bit above the lower line.
Now add an upside-down triangle to the bottom of the arc, connecting with the lower arc. This triangle should be outside the space between arcs.
We will also be adding the tail fin in a boomerang shape. (Or a banana shape if that is easier) - Step 6: Draw arc for dolphin belly. From the little space on the head where the bottom jaw meets the body (that little extra bump) create a third arc that that will be the belly!
- Step 7: Draw dolphin eye and blowhole. Details time. From the top jaw (the skinny U we drew) extend the line upwards just a little bit and then under it draw a black circle. This is your eye! Now a little bit in front of the dorsal fin make a small circle up against the top arc of the body - this is the blowhole.
- Step 8: Add water droplets. Add some water droplets coming out of the blowhole!
- Step 9: Erase minor details and finish. Now erase the line cutting the dorsal fin off from the body and you're done!