

Do you want to know how to draw a rose in an easy way? Knowing how to draw a rose can be easily achieved by anyone of any skill level.
By using some simple lines, spirals, and shapes you can become a master at drawing a rose in seconds!
You can make your backgrounds more interesting by drawing roses, add more life to your drawings or paintings, make your lettering compositions by adding roses, and many other things to help improve your illustrations.
Let’s get started!


When you’re drawing, you want to make sure you use the right tools for drawing.
Having the right tools will help you draw anything you want with less struggle.
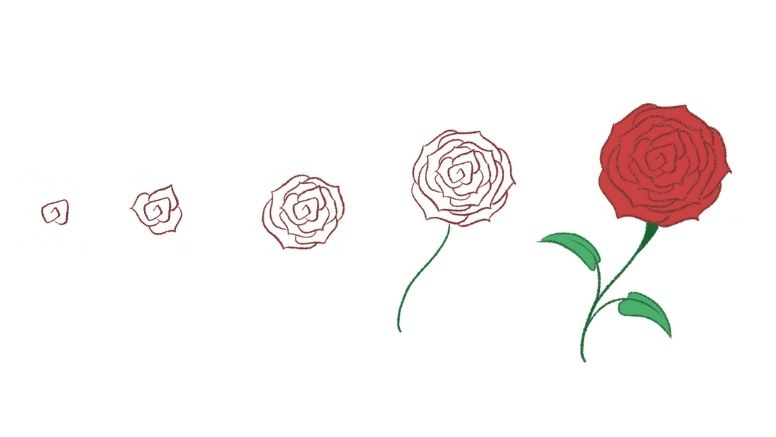
Step 1 – Start drawing rose with spiral


You will want to start with a spiral, but don’t make it completely round like a circle.
Flowers have organic shapes and are not perfect, so we want to mimic that and embrace imperfection here.
This is going to be the center of your bloom.
Step 2 – Drawing rose petals


Start adding petals in the loose shape of a fancy parenthesis (remember embrace imperfection!) around the spiral.
3 is usually a good number to go with.
This is going to show how your rose is opening up and act as the building blocks for the rest of the petals!
Step 3 – Draw more rose petals


Start to add more petals in that loose parenthesis shape in the spaces between the peaks of the other ones you’ve already laid down.
This staggering of petals makes your rose look more natural.
Step 4 – Draw more rose petals blooming outward


Continue to add petals getting larger with each row.
If you look at a rose you’ll notice that as it blooms outwards the petals further from the center are much larger – that is what we’re going for here.
step 5 – Draw rose stem

When you’ve added enough petals that it feels done (There is no perfect number, it’s up to you!) it’s time to add the step.
Now steps are rather sturdy and don’t have t his kind of curvature normally, but this is a more stylized rose that we’re making so if you want to add a curve then you can like we did here.
If you’d rather it be more like stems out in nature that’s fine too!
But do keep in mind the direction of your spiral, as that is where your bloom is facing.
Wherever your bloom is facing you want to balance that out with the stem underneath.
Step 6 – Draw rose leaves
When adding the leaves you want to create the stem of the leaves as coming from the natural curvature of the stem and follow that direction with the leaf itself.
Keep in mind the perspective, you won’t see the whole leaf face in this perspective so you need to keep in mind the behavior and weight of leaves.
Leaves aren’t stiff, they are just as pliable as the petals so use that as your direction for how to place them.


Also, add the bulb beneath the rose, this bulb is where the rose used to live before it bloomed, so it acts as the base of the rose and is larger than the stem usually in a U shape.
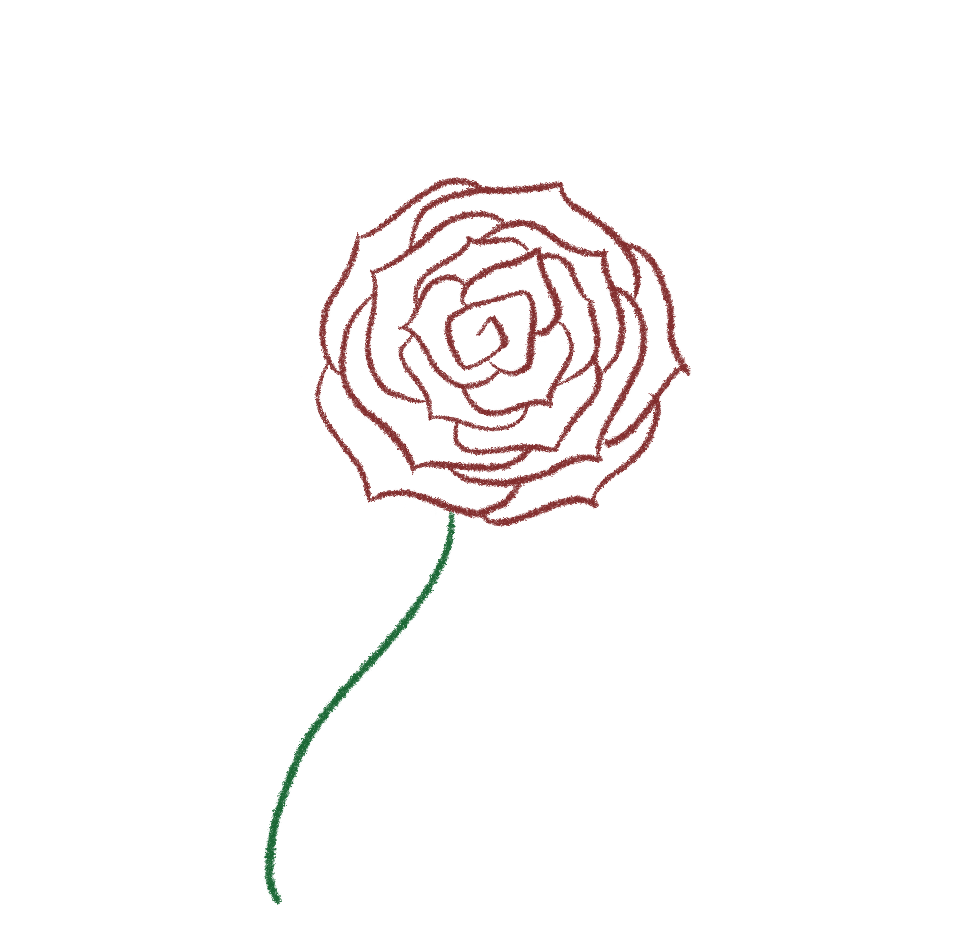
Step 7 – Final rose drawing


Color it in and you’re done! You can go into shading or detail from here!
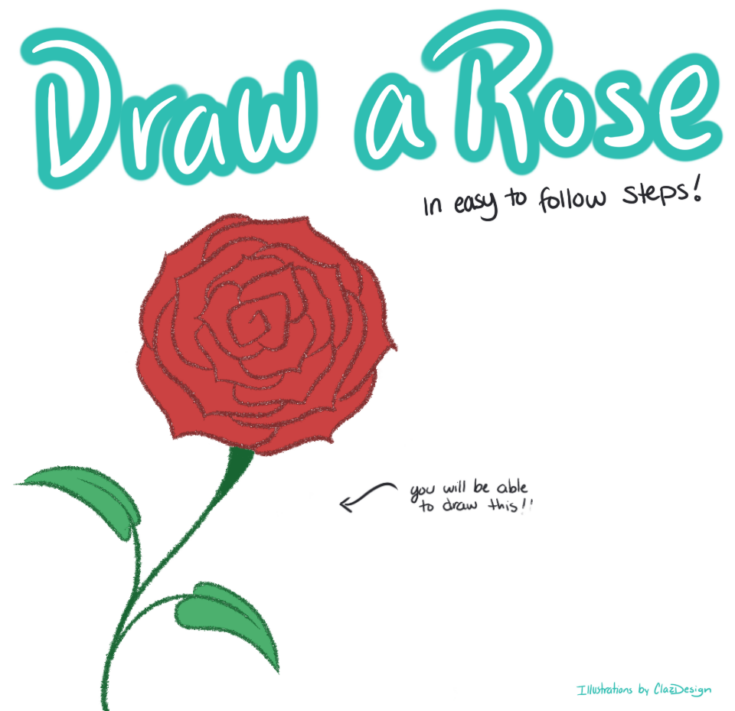
I’d like to thank Carolyn for sharing her process.
Be sure to check out her social @ClazDesign if you enjoyed her illustrations.
She also has some amazing prints and illustrations available in her shop.
How to Draw a Rose Guide

How to draw a rose
Materials
- Pencil
- Paper
- or Stylus & Drawing Tablet
Tools
- Pencil
- Paper
- or Stylus & Drawing Tablet
Instructions
- Step 1 – Start drawing rose with spiral You will want to start with a spiral, but don’t make it completely round like a circle. Flowers have organic shapes and are not perfect, so we want to mimic that and embrace imperfection here. This is going to be the center of your bloom.
- Step 2 – Drawing rose petals Start adding petals in the loose shape of a fancy parenthesis (remember to embrace imperfection!) around the spiral. 3 is usually a good number to go with. This is going to show how your rose is opening up and act as the building blocks for the rest of the petals!
- Step 3 – Draw more rose petals
Start to add more petals in that loose parenthesis shape in the spaces between the peaks of the other ones you’ve already laid down. This staggering of petals makes your rose look more natural. - Step 4 – Draw more rose petals blooming outward
Continue to add petals getting larger with each row. If you look at a rose you’ll notice that as it blooms outwards the petals further from the center are much larger – that is what we’re going for here. - step 5 – Draw rose stem
When you’ve added enough petals that it feels done (There is no perfect number, it’s up to you!) it’s time to add the step. Now steps are rather sturdy and don’t have t his kind of curvature normally, but this is a more stylized rose that we’re making so if you want to add a curve then you can like we did here. If you’d rather it be more like stems out in nature that’s fine too! But do keep in mind the direction of your spiral, as that is where your bloom is facing. Wherever your bloom is facing you want to balance that out with the stem underneath. - Step 6 – Draw rose leaves
When adding the leaves you want to create the stem of the leaves as coming from the natural curvature of the stem and follow that direction with the leaf itself. Keep in mind the perspective, you won’t see the whole leaf face in this perspective so you need to keep in mind the behavior and weight of leaves. Leaves aren’t stiff, they are just as pliable as the petals so use that as your direction for how to place them. - Step 7 – Final rose drawing