
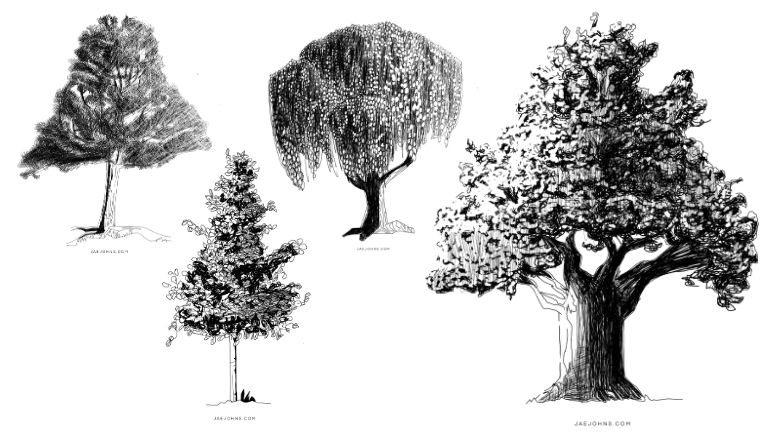

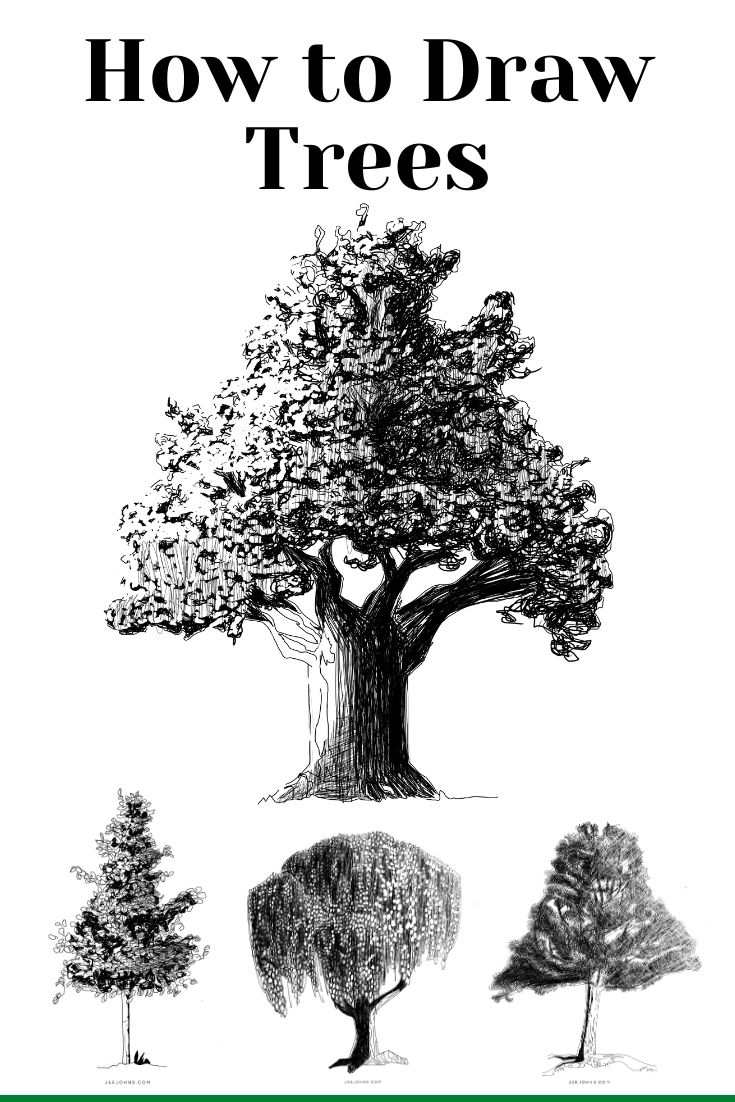
Drawing trees is easier than you think!
When you add trees to your drawings or paintings, it helps make your scenes more interesting and adds more realism.
As long as you’re using the right drawing tools and follow along with these easy step by step tutorial, you will be able to draw realistic trees in a short amount of time.

How to Draw a Pine Tree
Step 1

Start by drawing the tree trunk.
Step 2

Draw two branches.
One branch goes to the left and one to the right.
Leave the ends of the branches open.
Step 3

Continue to draw more branches.
When you draw the branches, it’s best to make sure the branches aren’t symmetrical.
This helps the tree look more organic.
Step 4

Keep adding more branches.
You can even make a branch split into other branches.
Step 5

Now we’ll start adding the “pines” of the pine tree.
Start by adding short almost parallel lines.
These lines may not look like much right now, but when we draw a bunch of them, they will look like a real Pine tree.
Step 6

Draw another set of lines that go in an opposite direction from the ones we drew earlier.
Step 7

Repeat drawing another set of short lines.
Step 8

Repeat the previous steps of drawing short lines around the branch.
It is perfectly fine to draw the short lines over the previous ones you drew, as long as the lines go in an opposing direction.
Step 9

Draw more lines.
Step 10

Continue with drawing more short lines.
Step 11

Now go to a different area of the branch and start drawing short lines there.
Step 12

Repeat what you did earlier and draw more short lines.
Step 13

Add more short lines. Our clump of pines is starting to get bigger.
Step 14


Keep drawing more short lines that cover the branch.
Step 15


Repeat drawing more short lines in the same way as the previous steps but on the branch on the left.
Step 16


Keep drawing short lines on the branch above.
Step 17


You can do it.
Keep drawing more short lines and continue to keep in mind that each set of lines should be drawn in an opposing direction.
Step 18


Keep drawing sets of short lines throughout the branches.
Step 19


As we draw more sets of short lines, we can see it’s starting to look more like a pine tree.
If we want to darken some areas of the pines on a branch, we can draw more short lines over the lines we drew before.
Step 20


Keep drawing sets of short lines to cover the empty areas of branches.
Step 21


Add some black branches that connect from one area of pines to the above branch.
Step 22


Draw the roots of the tree and some grass blades.
Step 23


Draw some lines on the tree trunk.
These lines will help add texture to the trunk.
Step 24


The light is coming from the right side in this drawing, so let’s add a shadow that goes down the left side of the tree trunk.
Step 25


Lighten the right side of the tree.
The combination of our shadow from the previous step and lightening the right side helps give our pine tree a realistic effect and make it look 3D.
How to Draw a Weeping Willow
Step 1


Start by drawing the right side of the tree trunk.
Step 2


Next, draw a tree branch.
Step 3


Then, let’s draw the middle branch of our tree.
Step 4


Draw the left branch.
To help make your tree branches look more organic, draw one side of the branch with a curved line and the other side with a zigzag line.
If you look at our branch on the left side, you can see the furthest left line as a curve and the right side of the left branch as a zigzag line.
Step 5


Draw the left side of the trunk and the roots of our tree trunk.
Step 6


Draw a curved line with some small zigzags and curves coming out of the curve.
This line will represent the top part of our leaves.
Step 7


Draw several lines that come from the top curved line and flow downward.
These black lines will be the start of our willow branches.
Step 8


Continue to draw more lines from the top curved line.
Step 9


Start drawing small circles over the lines we drew earlier.
Step 10


Fill the entire area with small circles.
The combination of the black lines and circles will resemble the texture and look of our willow branch.
Step 11


Start filling in the small circles with white or erase the lines that are in the circle.
We don’t have to do this to all the small circles, but we should do this to at least 50% of them.
Step 12


Draw a curved line as we did in step 6, but let’s draw it on the left side.
This will be another section of willow branches.
Step 13


Draw black lines flowing down from the top.
Step 14


Draw more small circles as we did in our earlier step.
Step 15


Repeat step 11 and erase the lines within the small circles or add white in the circles.
Remember, we don’t have to do this to every circle.
Step 16


Draw a curved line again for another willow branch section.
This will be the last willow branch section we draw.
Step 17


Repeat the step we did earlier of drawing black flowing lines.
Step 18


Repeat the step of drawing circles.
Step 19


Repeat the step of erasing the lines within the small circles.
Step 20


Draw a shadow on the left side of the tree trunk.
We’ll have the sunlight coming from the top right side, so that’s why we’ll have the shadow on the left side.
Shadows always go on the opposite side of where light is coming.
Step 21


Draw some lines on the tree trunk.
These will help show the texture of the trunk.
Step 22


Draw more black lines over the left section of the willow branches.
It’s perfectly okay to draw these lines over the circles we drew.
By doing this, we’re adding more dark values.
Step 23


Choose some circles and erase some of the lines within the circles.
Step 24


Repeat step 22 with the middle section of our willow branches.
Step 25


Again, erase some details within some of the circles or add white to the inside of the circles.
Step 26


Erase the top curved lines of the willow branch sections.
Step 27


Make the shadow on the tree trunk a little bit thicker.
Also, we can add more dark areas to separate the front willow branch sections from the willow branch section in the back.
Step 28


When we drew the black area in step 27, it doesn’t look natural if we leave it like that.
So let’s add some more white circles on top of the black area.
After we do this, we’ll need to add more depth to our tree.
We will do a trick to give our tree a more 3D effect in our next step!
Step 29


To give our tree a more realistic effect, let’s draw a bunch of black lines on the left side of the willow sections.
If we squint at our tree, we can see the left side has more dark values than the right side.
This is what we want.
Step 30


Our final step to add more realism to our Weeping Willow is to lighten up the right side of the tree.
Remember, sunlight is coming from the top right, so when we do this, it makes it look like sunlight is hitting the right side of our tree.
How to Draw a Maple Tree
Step 1


Lets start drawing our tree by lightly drawing the overall shape.
Step 2


Draw the right side of the tree trunk.
Step 3


Draw the right side of the tree trunk.
Step 4


Draw the ground and a few blades of grass.
We can darken the grass, so it looks like the grass is behind the tree.
Step 5


Now, let’s draw some leaves.
When we’re drawing the leaves try to draw them in leaf-like shapes. In this, the leaf-like shapes are similar to small elongated triangles.
Step 6


Keep drawing leaves along the lightly drawn line we drew in step 1.
Step 7


Draw some black leaf-like shapes inside the leaves we drew earlier.
Step 8


Keep drawing black leaves.
Step 9


Draw more leaves along the light sketch line we drew in step 1.
Step 10


Erase the light sketch line.
Step 11


Fill in the inside of our tree with black leaf shapes.
It’s important to fill the area with black leaf shapes instead of just a black silhouette because the black leaf-like shapes will help add texture and realism to the drawing.
Step 12


Draw some white leaf-like shapes on top of the black.
Our goal is to connect the leaves on the out edges with these inner white leaves.
Step 13


There were some empty areas, so we should fill in these areas with black leaf-like shapes.
Step 14


Draw more white leaf-like shapes.
Step 15


Fill in the white leaf-like shapes with lines that resemble a leaf pattern.
Step 16


Sunlight will shine on the top left, so we need to add a shadow on the right side of our tree trunk.
Then let’s add a few lines near the shadow to help give our tree trunk some detail.
Step 17


To help make our tree more realistic let us add some thin black lines in the direction the tree leaves are going on the right side of the tree.
When we squint at our tree, we notice the right side of the tree is a bit darker than the left side of the tree.
How to Draw an Oak Tree
Step 1


Draw the overall shape of our Oak tree.
Step 2


Draw the trunk of our tree.
We can draw a few blades of grass in front of the tree roots.
By adding in the grass, it helps the tree feel like it’s growing out of the ground.
Step 3


An Oaktree is known for its thick trunk and branches, so let us draw some pretty thick branches that come out of the tree trunk.
A good tip for drawing organic-looking tree branches is to draw one side of the branch with a zigzag line and the opposing side with a smoother curve.
Step 4


Draw more tree branches towards the middle of the tree leaf section.
These branches don’t have to be perfect because they will be hidden by the leaves we add in later.
Step 5


Add in a few smaller branches towards the top.
Step 6


Start drawing a cluster of leaves.
We should try to keep our arms relaxed as we draw the leaves.
Step 7


Draw more leaves on top of the leaves we drew earlier.
Step 8


Let’s finish drawing our last section of leaves.
Step 9


Erase the light sketch we started with.
Step 10


Now we’re going to literally scribble lines inside the cluster of leaves we drew earlier.
Step 11


Add more scribbles.
The entire cluster of leaves should be filled with scribbles.
Step 12


Now we’re going to darken some areas of the leaf cluster.
Make sure to not darken the entire area.
We should try to avoid darkening the top parts of the leaf cluster for now.
Step 13


Let’s draw more scribbles in other areas.
Step 14


Let’s darken in more areas.
Step 15


Scribble lines inside the remaining cluster of leaves.
Step 16


Darken in more areas. Notice how the black areas aren’t completely black.
There are bits of white showing.
These bits of white will add a wonderful texture effect to the final drawing.
Step 17


The sunlight will be coming in from the left, so let’s add a shadow on the right side of the tree trunk.
The shadow is created by drawing several lines together.
This will help add texture to the trunk.
Step 18


Draw some lines coming out of the shadow.
Step 19


Now let’s add some white leaf-like shapes on the left side of the tree.
This can be done by either adding white on top of the black or erasing the black using leaf-like shapes.
When we squint at our drawing it should look like sunlight is illuminating the left side of our tree.
Step 20


There’s one more thing we can do to add a bit more realism to our trees.
Do you know what that is?
Shadows! Let’s draw several thin dark lines on the right side of our tree and some on the bottom side of the left side.
Notice how more shadows are also added to the bottom left side of the tree trunk.
That wraps up our tutorial on drawing trees. You now know how to draw a Pine, Weeping Willow, Maple, and Oaktree.
If you enjoyed this, you may enjoy the tutorial on how to draw dogs and how to draw cars.
Below are some printable guides you can use to help you draw trees.
How to Draw a Pine Tree Printable Guide


How to draw a Pine Tree
Materials
- Paper or anything to draw on
Tools
- Pencil or Pen
- (Optional) iPad Pro, Procreate, Pen and Ink brushes
Instructions
- Step 1:
Start by drawing the tree trunk.

- Step 2:
Draw two branches. One branch goes to the left and one to the right. Leave the ends of the branches open.

- Step 3:
Continue to draw more branches. When you draw the branches, it’s best to make sure the branches aren’t symmetrical. This helps the tree look more organic.

- Step 4:
Keep adding more branches. You can even make a branch split into other branches.

- Step 5:
Now we’ll start adding the “pines” of the pine tree. Start by adding short almost parallel lines. These lines may not look like much right now, but when we draw a bunch of them, they will look like a real Pine tree.

- Step 6:
Draw another set of lines that go in an opposite direction from the ones we drew earlier.

- Step 7:
Repeat drawing another set of short lines.

- Step 8:
Repeat the previous steps of drawing short lines around the branch. It is perfectly fine to draw the short lines over the previous ones you drew, as long as the lines go in an opposing direction.

- Step 9:
Draw more lines.

- Step 10:
Continue with drawing more short lines.

- Step 11:
Now go to a different area of the branch and start drawing short lines there.

- Step 12:
Repeat what you did earlier and draw more short lines.

- Step 13:
Add more short lines. Our clump of pines is starting to get bigger.

- Step 14:
Keep drawing more short lines that cover the branch.

- Step 15:
Repeat drawing more short lines in the same way as the previous steps but on the branch on the left.

- Step 16:
Keep drawing short lines on the branch above.

- Step 17:
You can do it. Keep drawing more short lines and continue to keep in mind that each set of lines should be drawn in an opposing direction.

- Step 18:
Keep drawing sets of short lines throughout the branches.

- Step 19:
As we draw more sets of short lines, we can see it’s starting to look more like a pine tree. If we want to darken some areas of the pines on a branch, we can draw more short lines over the lines we drew before.

- Step 20:
Keep drawing sets of short lines to cover the empty areas of branches.

- Step 21:
Add some black branches that connect from one area of pines to the above branch.

- Step 22:
Draw the roots of the tree and some grass blades.

- Step 23:
Draw some lines on the tree trunk. These lines will help add texture to the trunk.

- Step 24:
The light is coming from the right side in this drawing, so let's add a shadow that goes down the left side of the tree trunk.

- Step 25:
Lighten the right side of the tree. The combination of our shadow from the previous step and lightening the right side helps give our pine tree a realistic effect and make it look 3D.

How to Draw a Weeping Willow Printable Guide


How to draw a Weeping Willow
Tools
- Paper or anything to draw on
- Pencil or Pen
- (Optional) iPad Pro, Procreate, Pen and Ink brushes
Instructions
Step 1:
Start by drawing the right side of the tree trunk. 

Step 2:
Next, draw a tree branch. 

Step 3:
Then, let's draw the middle branch of our tree. 

Step 4:
Draw the left branch. To help make your tree branches look more organic, draw one side of the branch with a curved line and the other side with a zigzag line.
If you look at our branch on the left side, you can see the furthest left line as a curve and the right side of the left branch as a zigzag line. 

Step 5:
Draw the left side of the trunk and the roots of our tree trunk. 

Step 6:
Draw a curved line with some small zigzags and curves coming out of the curve. This line will represent the top part of our leaves. 

Step 7:
Draw several lines that come from the top curved line and flow downward. These black lines will be the start of our willow branches. 

Step 8:
Continue to draw more lines from the top curved line. 

Step 9:
Start drawing small circles over the lines we drew earlier. 

Step 10:
Fill the entire area with small circles. The combination of the black lines and circles will resemble the texture and look of our willow branch. 

Step 11:
Start filling in the small circles with white or erase the lines that are in the circle. We don’t have to do this to all the small circles, but we should do this to at least 50% of them. 

Step 12:
Draw a curved line as we did in step 6, but let's draw it on the left side. This will be another section of willow branches. 

Step 13:
Draw black lines flowing down from the top. 

Step 14:
Draw more small circles as we did in our earlier step. 

Step 15:
Repeat step 11 and erase the lines within the small circles or add white in the circles. Remember, we don’t have to this to every circle. 

Step 16:
Draw a curved line again for another willow branch section. This will be the last willow branch section we draw. 

Step 17:
Repeat the step we did earlier of drawing black flowing lines. 

Step 18:
Repeat the step of drawing circles. 

Step 19:
Repeat the step of erasing the lines within the small circles. 

Step 20:
Draw a shadow on the left side of the tree trunk. We’ll have the sunlight coming from the top right side, so that’s why we’ll have the shadow on the left side. Shadows always go on the opposite side of where light is coming. 

Step 21:
Draw some lines on the tree trunk. These will help show the texture of the trunk. 

Step 22:
Draw more black lines over the left section of the willow branches. It’s perfectly okay to draw these lines over the circles we drew. By doing this, we’re adding more dark values. 

Step 23:
Choose some circles and erase some of the lines within the circles. 

Step 24:
Repeat step 22 with the middle section of our willow branches. 

Step 25:
Again, erase some details within some of the circles or add white to the inside of the circles. 

Step 26:
Erase the top curved lines of the willow branch sections. 

Step 27:
Make the shadow on the tree trunk a little bit thicker. Also, we can add more dark areas to separate the front willow branch sections from the willow branch section in the back. 

Step 28:
When we drew the black area in step 27, it doesn’t look natural if we leave it like that. So let's add some more white circles on top of the black area.
After we do this, we’ll need to add more depth to our tree. We will do a trick to give our tree a more 3D effect in our next step! 

Step 29:
To give our tree a more realistic effect, let's draw a bunch of black lines on the left side of the willow sections.
If we squint at our tree, we can see the left side has more dark values than the right side. This is what we want. 

Step 30:
Our final step to add more realism to our Weeping Willow is to lighten up the right side of the tree. Remember, sunlight is coming from the top right, so when we do this, it makes it look like sunlight is hitting the right side of our tree. 

How to Draw Maple Tree Printable Guide


How to draw a Maple tree
Tools
- Paper or anything to draw on
- Pencil or pen
- (Optional): iPad Pro, stylus, Procreate, pen and ink brushes
Instructions
Step 1:
Let's start drawing our tree by lightly drawing the overall shape. 

Step 2:
Draw the right side of the tree trunk.

Step 3:
Draw the right side of the tree trunk.

Step 4:
Draw the ground and a few blades of grass. We can darken the grass, so it looks like the grass is behind the tree.

Step 5:
Now let's draw some leaves. When we’re drawing the leaves try to draw them in leaf-like shapes. In this, the leaf-like shapes are similar to small elongated triangles.

Step 6:
Keep drawing leaves along the lightly drawn line we drew in step 1.

Step 7:
Draw some black leaf-like shapes inside the leaves we drew earlier.

Step 8:
Keep drawing black leaves.

Step 9:
Draw more leaves along the light sketch line we drew in step 1.

Step 10:
Erase the light sketch line.

Step 11:
Fill in the inside of our tree with black leaf shapes. It’s important to fill the area with black leaf shapes instead of just a black silhouette because the black leaf-like shapes will help add texture and realism to the drawing.

Step 12:
Draw some white leaf-like shapes on top of the black. Our goal is to connect the leaves on the out edges with these inner white leaves.

Step 13:
There were some empty areas, so we should fill in these areas with black leaf-like shapes.

Step 14:
Draw more white leaf-like shapes.

Step 15:
Fill in the white leaf-like shapes with lines that resemble a leaf pattern.

Step 16:
Sunlight will shine on the top left, so we need to add a shadow on the right side of our tree trunk. Then let's add a few lines near the shadow to help give our tree trunk some detail.

Step 17:
To help make our tree more realistic let's add some thin black lines in the direction the tree leaves are going on the right side of the tree.

How to Draw an Oak Tree Printable Guide


How to draw an Oak Tree
Tools
- Paper or anything you can draw on
- Pen or pencil
- (Optional): iPad Pro, stylus, Procreate, and pen and ink brushes
Instructions
Step 1:
Draw the overall shape of our Oaktree. 

Step 2:
Draw the trunk of our tree. We can draw a few blades of grass in front of the tree roots.
By adding in the grass, it helps the tree feel like it’s growing out of the ground. 

Step 3:
An Oaktree is known for its thick trunk and branches, so let us draw some pretty thick branches that come out of the tree trunk.
A good tip to drawing organic-looking tree branches is to draw one side of the branch with a zigzag line and the opposing side with a smoother curve. 

Step 4:
Draw more tree branches towards the middle of the tree leaf section.
These branches don’t have to be perfect because they will be hidden by the leaves we add in later. 

Step 5:
Add in a few smaller branches towards the top. 

Step 6:
Start drawing a cluster of leaves. We should try to keep our arms relaxed as we draw the leaves. 

Step 7:
Draw more leaves on top of the leaves we drew earlier. 

Step 8:
Let's finish drawing our last section of leaves. 

Step 9:
Erase the light sketch we started with. 

Step 10:
Now we’re going to literally scribble lines insides the cluster of leaves we drew earlier. 

Step 11:
Add more scribbles. The entire cluster of leaves should be filled with scribbles. 

Step 12:
Now we’re going to darken in some areas of the leaf cluster. Make sure to not darken the entire area. We should try to avoid darkening the top parts of the leaf cluster for now. 

Step 13:
Let's draw more scribbles in other areas. 

Step 14:
Let’s darken in more areas. 

Step 15:
Scribble lines inside the remaining cluster of leaves. 

Step 16:
Darken in more areas. Notice how the black areas aren’t completely black. There are bits of white showing. These bits of white will add a wonderful texture effect to the final drawing. 

Step 17:
The sunlight will be coming in from the left, so let’s add a shadow on the right side of the tree trunk. The shadow is created by drawing several lines together. This will help add texture to the trunk. 

Step 18:
Draw some lines coming out of the shadow. 

Step 19:
Now let's add some white leaf-like shapes on the left side of the tree.
This can be done by either adding white on top of the black or erasing the black using leaf-like shapes.
When we squint at our drawing it should look like sunlight is illuminating the left side of our tree. 

Step 20:
There’s one more thing we can do to add a bit more realism to our trees.
Do you know what that is?
Shadows! Let’s draw several thin dark lines on the right side of our tree and some on the bottom side of the left side.
Notice how more shadows are also added to the bottom left side of the tree trunk. 
