
Staring at a blank canvas can be intimidating. This can cause a mental block in starting your painting. It can be especially difficult for a new painter, and that’s why I want to share easy acrylic painting ideas on canvas for beginners.
A common thing I see is that new painters can let the blank canvas be daunting.
Have you ever felt the pressure of a blank page?
Maybe you even felt the pressure of needing to create a masterpiece.
Well, by starting with an easy painting idea, you’ll make the process much easier.
Here’s a quick guide to learning how to setup your workspace and start acrylic painting.
Acrylic Basics Refresher
Understand Your Paint:
- Opacity vs. Transparency
- Opaque colors (e.g., titanium white, cadmium red) cover underlying layers quickly—great for bold shapes and corrections.
- Transparent colors (e.g., phthalo blue, alizarin crimson) shine in glazes and color‑mixing because light passes through the layer and bounces off what’s beneath.
- The “Blending Window”
Acrylics stay workable for roughly 5–10 minutes on the canvas (longer with retarder or misting). Blend edges during this wet phase; once tacky, switch to layering rather than smearing. - Layering Order
- Block in large shapes with mid‑tones.
- Add darker shadows and value shifts.
- Build highlights and fine details last.
Each dry layer becomes water‑resistant, so you can glaze or completely repaint without lifting what’s underneath.
- Preventing Muddy Colors
- Clean your brush between color families (cool vs. warm).
- Mix complementary colors sparingly; a touch desaturates, too much turns brown‑gray.
- If a mixture starts looking dull, pause—let it dry—and glaze fresh color on top instead of over‑mixing.
- Thinning vs. Glazing
- Water thins paint for loose under‑paintings or watercolor‑like washes—but keep it under 30 % to avoid adhesion issues.
- Acrylic medium (gloss or matte) keeps pigment strength while increasing flow and transparency—perfect for rich, luminous glazes.
- Keeping Edges Clean
Use masking tape for razor‑sharp graphic shapes, or wield a flat brush’s corner for crisp lines. Lift mistakes quickly with a damp cloth before the paint cures.
Mastering these basics sets the stage for smoother blends, cleaner hues, and confident layering—skills that make every project on your ideas list shine.
Acrylic Painting Exercises (5 Minutes Each)
Here are some simple acrylic painting exercises and beginner friendly techniques to help you build up confidence, build brush control, and improve your painting skills.
There is an invisible resistance when you first start any creative project, so it’s a great idea to start with easy canvas paintings.
There are many creative ideas that are so much fun.
How to Paint Northern Lights with Acrylic Paints

If you’re looking for easy acrylic painting ideas for beginners that deliver stunning results, this northern lights tutorial is the perfect place to start. You don’t need advanced skills — just a handful of acrylic paints in blues, greens, and black, a few basic brushes, and a canvas. The flowing, forgiving nature of aurora borealis paintings means that every brushstroke adds to the magic rather than needing to be perfect. Whether you’re picking up a paintbrush for the very first time or looking for a relaxing creative project, this glowing night sky painting will leave you feeling like a true artist. Follow the six simple steps in this tutorial to paint the Northern Lights to create your own breathtaking northern lights masterpiece!
How to Paint Cottagecore Mushrooms
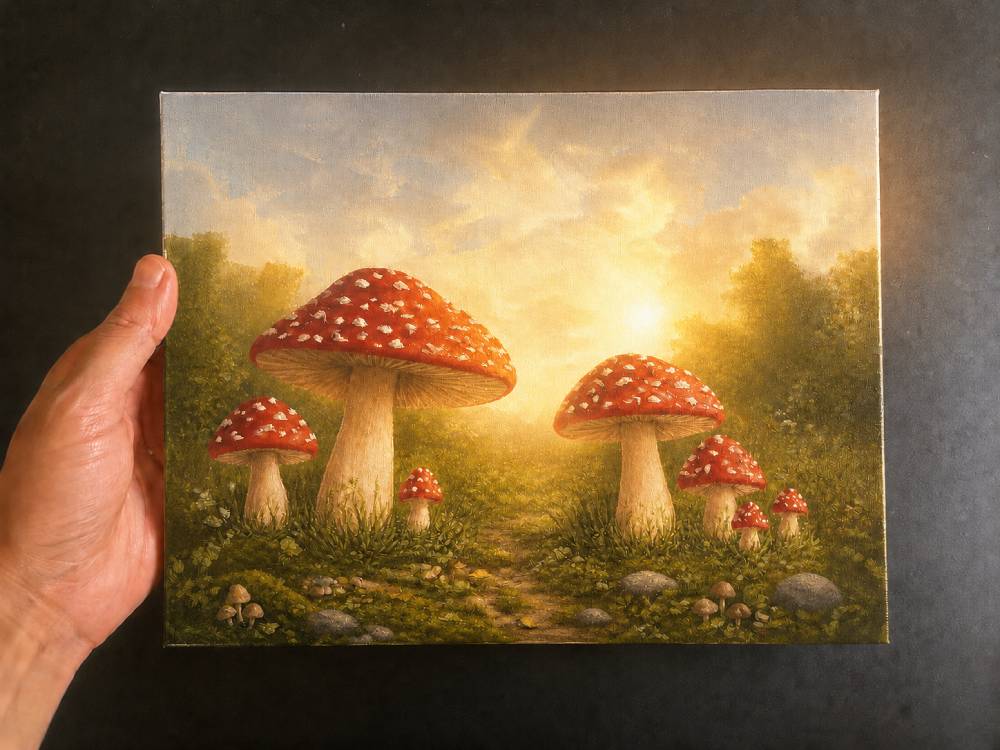
This whimsical mushroom meadow painting is an easy acrylic painting ideas for beginners that look stunning but don’t require years of experience? With just a few basic colors and simple techniques like blocking in shapes, layering, and dry-brushing, you can create a beautiful piece that looks like it came straight from a fairytale. Whether you’re picking up a paintbrush for the very first time or looking to build your skills in a fun and relaxed way, this beginner-friendly tutorial on how to paint cottagecore mushrooms walks you through every stage — from the first background wash all the way to a dreamy golden sunset glow. No special tools required, just your acrylics, a canvas, and a little creativity. Easy acrylic painting ideas for beginners don’t get more magical than this!
How to Paint a Misty/Foggy Forest
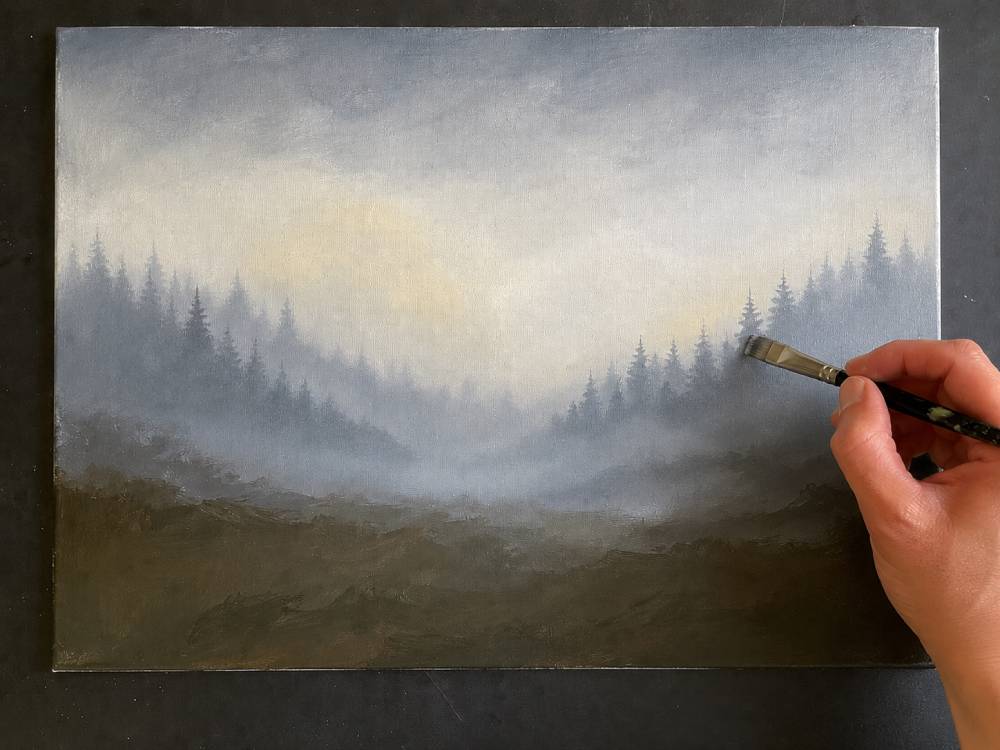
This misty forest tutorial is the perfect idea for acrylic painting. This dreamy, atmospheric landscape uses simple techniques — wet-on-wet blending, dry brushing, and basic silhouette shapes — that are surprisingly beginner-friendly and incredibly satisfying to paint. No complex details or advanced skills are needed; just a few brushes, a limited palette of blue-grays, blacks, and warm whites, and a willingness to layer and blend. Step by step, you’ll build up a glowing, foggy forest scene complete with towering pine trees, moody mist, and a breathtaking light source that makes the whole painting feel alive. Whether you’re picking up a brush for the first time or looking to expand your skills, this is one of those easy acrylic painting ideas for beginners that you’ll be proud to hang on your wall.
How to Paint a Cherry Blossom Tree
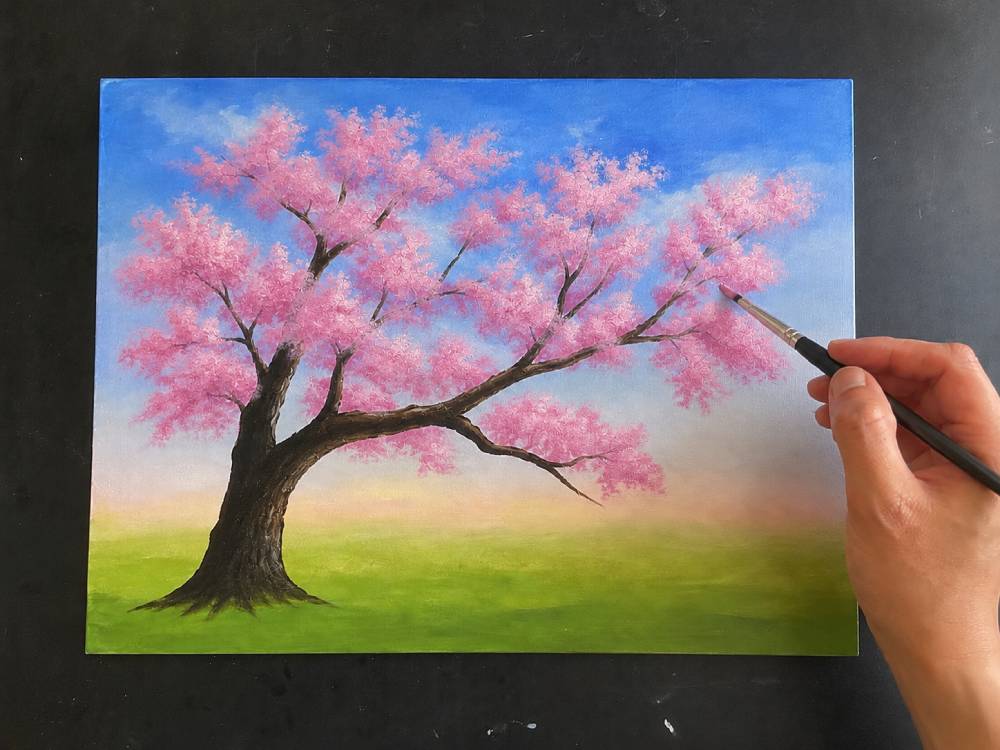
This cherry blossom tree tutorial is another great acrylic painting idea. With just a few basic brushes and a handful of pink, blue, and green tones, you can create a stunning, gallery-worthy painting in just four simple steps. No prior experience needed — this guide walks you through blending a soft dreamy sky, building a realistic tree structure, and layering delicate blossoms that look breathtaking on any wall. Easy acrylic painting ideas for beginners don’t get more satisfying than this. Whether you’re picking up a brush for the very first time or looking to grow your skills, this cherry blossom painting will leave you feeling proud, inspired, and ready to create more.
How to Paint a Hokusai-style Ocean Waves
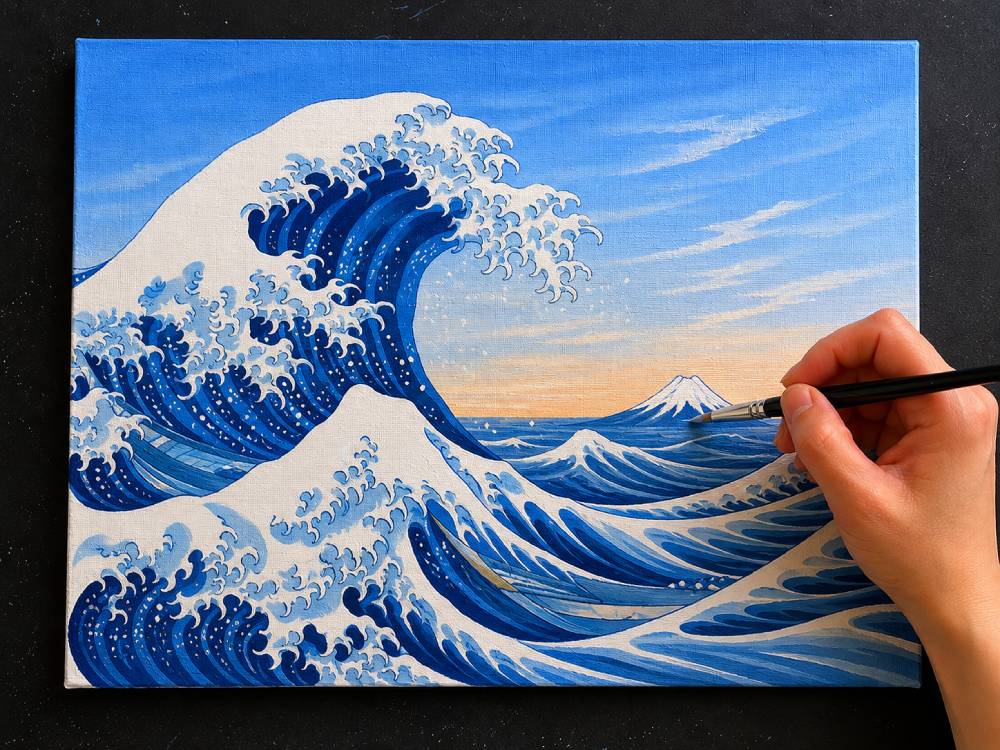
This Great Wave-inspired ocean painting is the perfect acrylic painting idea you can put on your wall. Despite its impressive results, each step breaks the process down into simple, manageable layers — from a basic pencil sketch to bold blue washes, detailed foam, and a peaceful Mount Fuji backdrop. No experience needed, just a few brushes, a canvas, and some blue and white acrylic paint. Whether you’re picking up a brush for the first time or looking for a satisfying weekend project, this wave tutorial proves that beautiful art is closer than you think. Grab your paints and dive in!
How to Paint a Winter Cabin in a Hygge Style
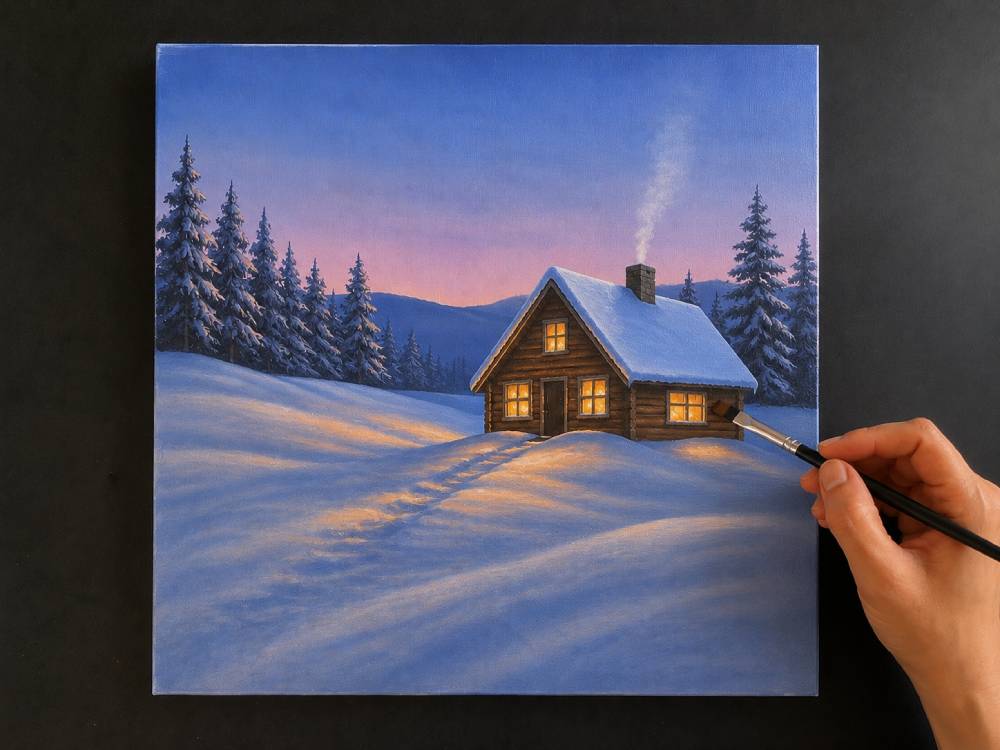
Looking for easy acrylic painting ideas for beginners that feel impressive without being overwhelming? This cozy winter cabin tutorial is the perfect place to start. Using just a handful of basic brushes and a simple acrylic palette, you’ll learn how to build a beautiful layered landscape from scratch — starting with a soft twilight sky, adding a charming snow-covered cabin, lush pine trees, and finishing with the most satisfying part: warm, glowing light spilling from the cabin windows onto the snow. Each step is broken down so that even first-time painters can follow along with confidence. Among all the easy acrylic painting ideas for beginners out there, winter scenes are especially forgiving — soft blended skies hide imperfections, and the snowy landscape requires nothing more than loose, sweeping brushstrokes. Whether you’re picking up a paintbrush for the very first time or looking to grow your skills, this tutorial will leave you with a stunning piece of art you’ll actually want to hang on your wall.
How to Paint a Glowing Jellyfish
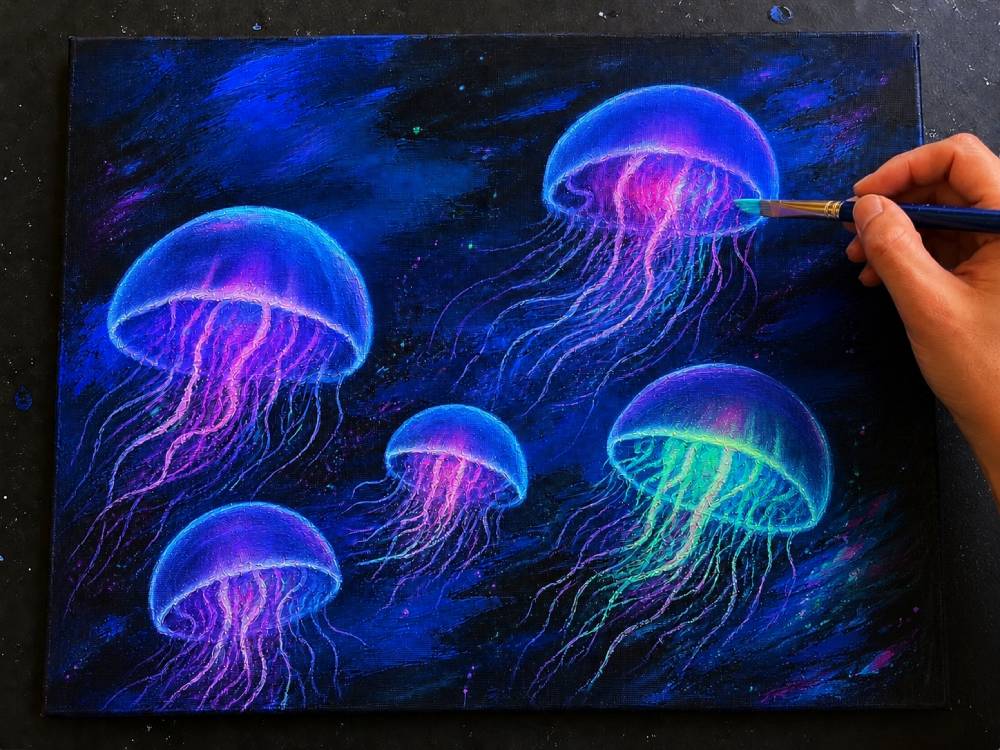
This glowing jellyfish tutorial is the perfect place to start if you want an easy painting idea. A black canvas eliminates the need for a complicated background — the dark surface does all the heavy lifting, instantly creating a dramatic, deep-sea atmosphere with minimal effort. Using just a handful of blue, white, and neon acrylic colors, you’ll paint a scene that looks incredibly professional but is completely beginner-friendly. Each step builds naturally on the last, teaching you foundational techniques like blending, layering, and detail work — all skills you’ll use again and again. Whether you’re picking up a brush for the very first time or looking for a fun weekend project, this luminous jellyfish painting is guaranteed to impress and inspire.
How to Paint a Lavender Field During Golden Hour
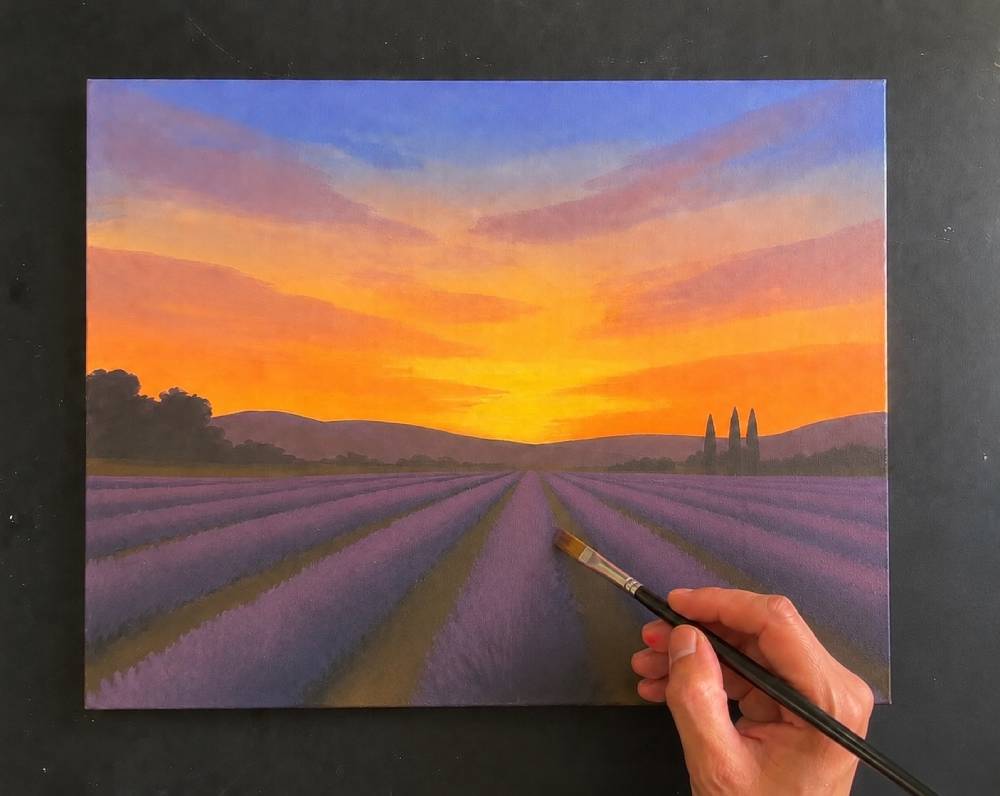
This dreamy lavender field sunset is another amazing acrylic painting idea. Painted on a black canvas, this step-by-step tutorial on how to paint a lavender field walks you through creating a stunning Provençal landscape — from blending a glowing golden sky to painting rows of purple lavender flowers using simple brush techniques anyone can master. No experience needed! The black background does the hard work for you, making every color appear vivid and rich from the very first brushstroke. Whether you’re picking up a paintbrush for the first time or looking for a relaxing creative project, this lavender field tutorial proves that beautiful results are absolutely within reach. Grab your acrylics, put on some music, and let’s paint something gorgeous together.
How to Paint a Cute Frog
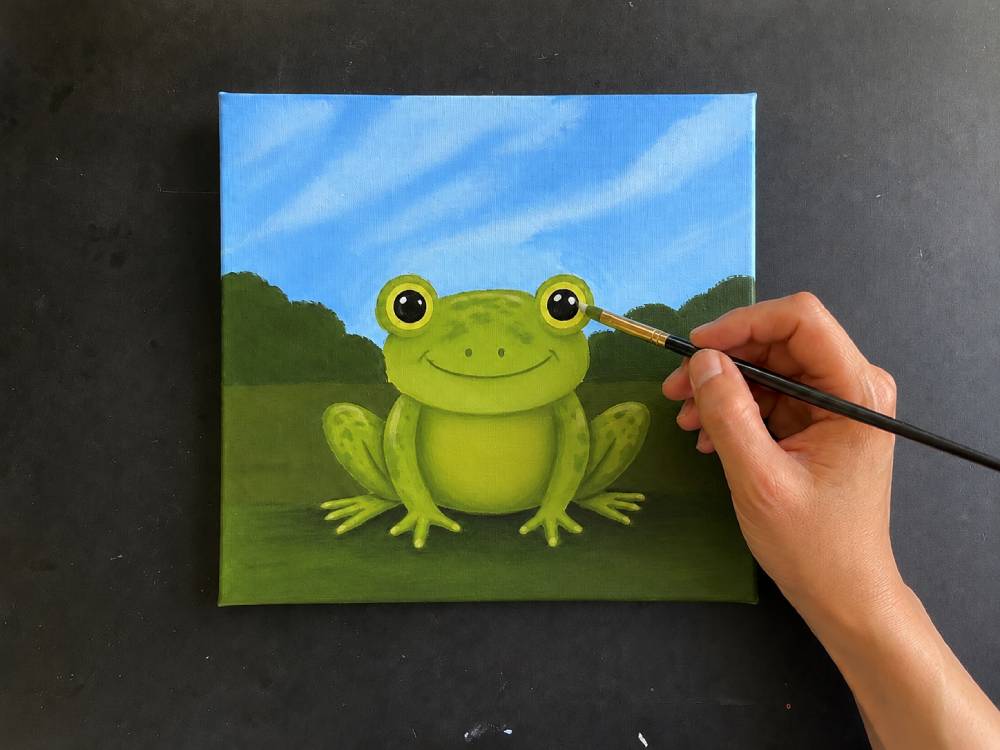
If you’re searching for an acrylic painting idea that a beginner can paint, this adorable frog tutorial is the perfect place to start. With just a few basic brushes and a small canvas, you can create a charming, cartoon-style frog painting in three simple steps — no experience required. This project walks you through painting a colorful background first, building up a base coat, and then layering in fun details like expressive eyes and cute spots. The loose, forgiving style means imperfections only add to the charm, making it one of the most beginner-friendly acrylic painting ideas out there. Whether you’re picking up a brush for the first time or looking for a relaxing weekend project, this frog painting is a wonderful way to build confidence and fall in love with painting.
How to Paint a Dog Portrait
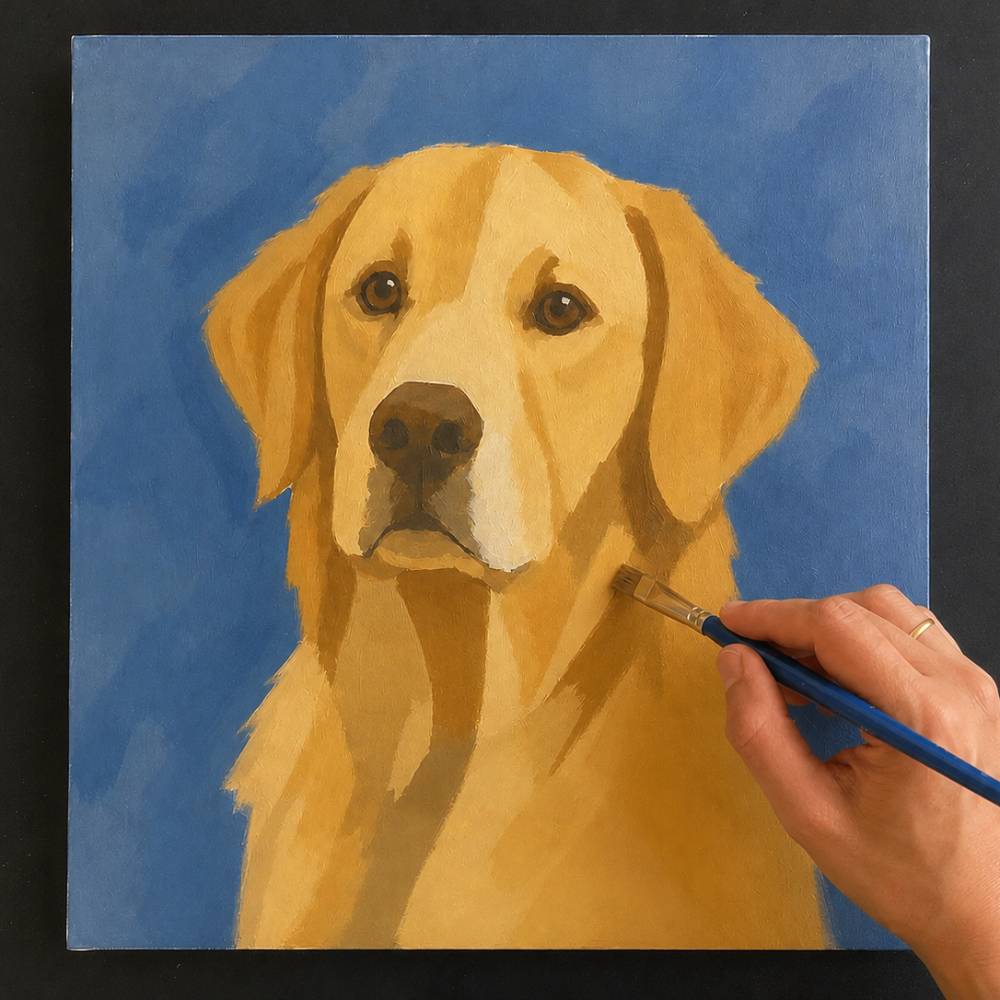
If you’ve ever wanted to paint your pet but didn’t know where to start, this easy pet portrait acrylic tutorial is exactly what you need. Using a simple 5-step approach, you’ll learn how to break down a golden retriever portrait into manageable layers — starting with bold color blocking and gradually building up fur texture, depth, and detail. No advanced skills required! This beginner-friendly method focuses on working with basic acrylic colors, building confidence with each layer, and achieving a realistic, heartfelt result you’ll be proud to display or gift. Whether you’re painting your own dog or a friend’s beloved pup, this easy pet portrait acrylic technique makes the process approachable, fun, and incredibly rewarding.
Abstract Painting with Black Background
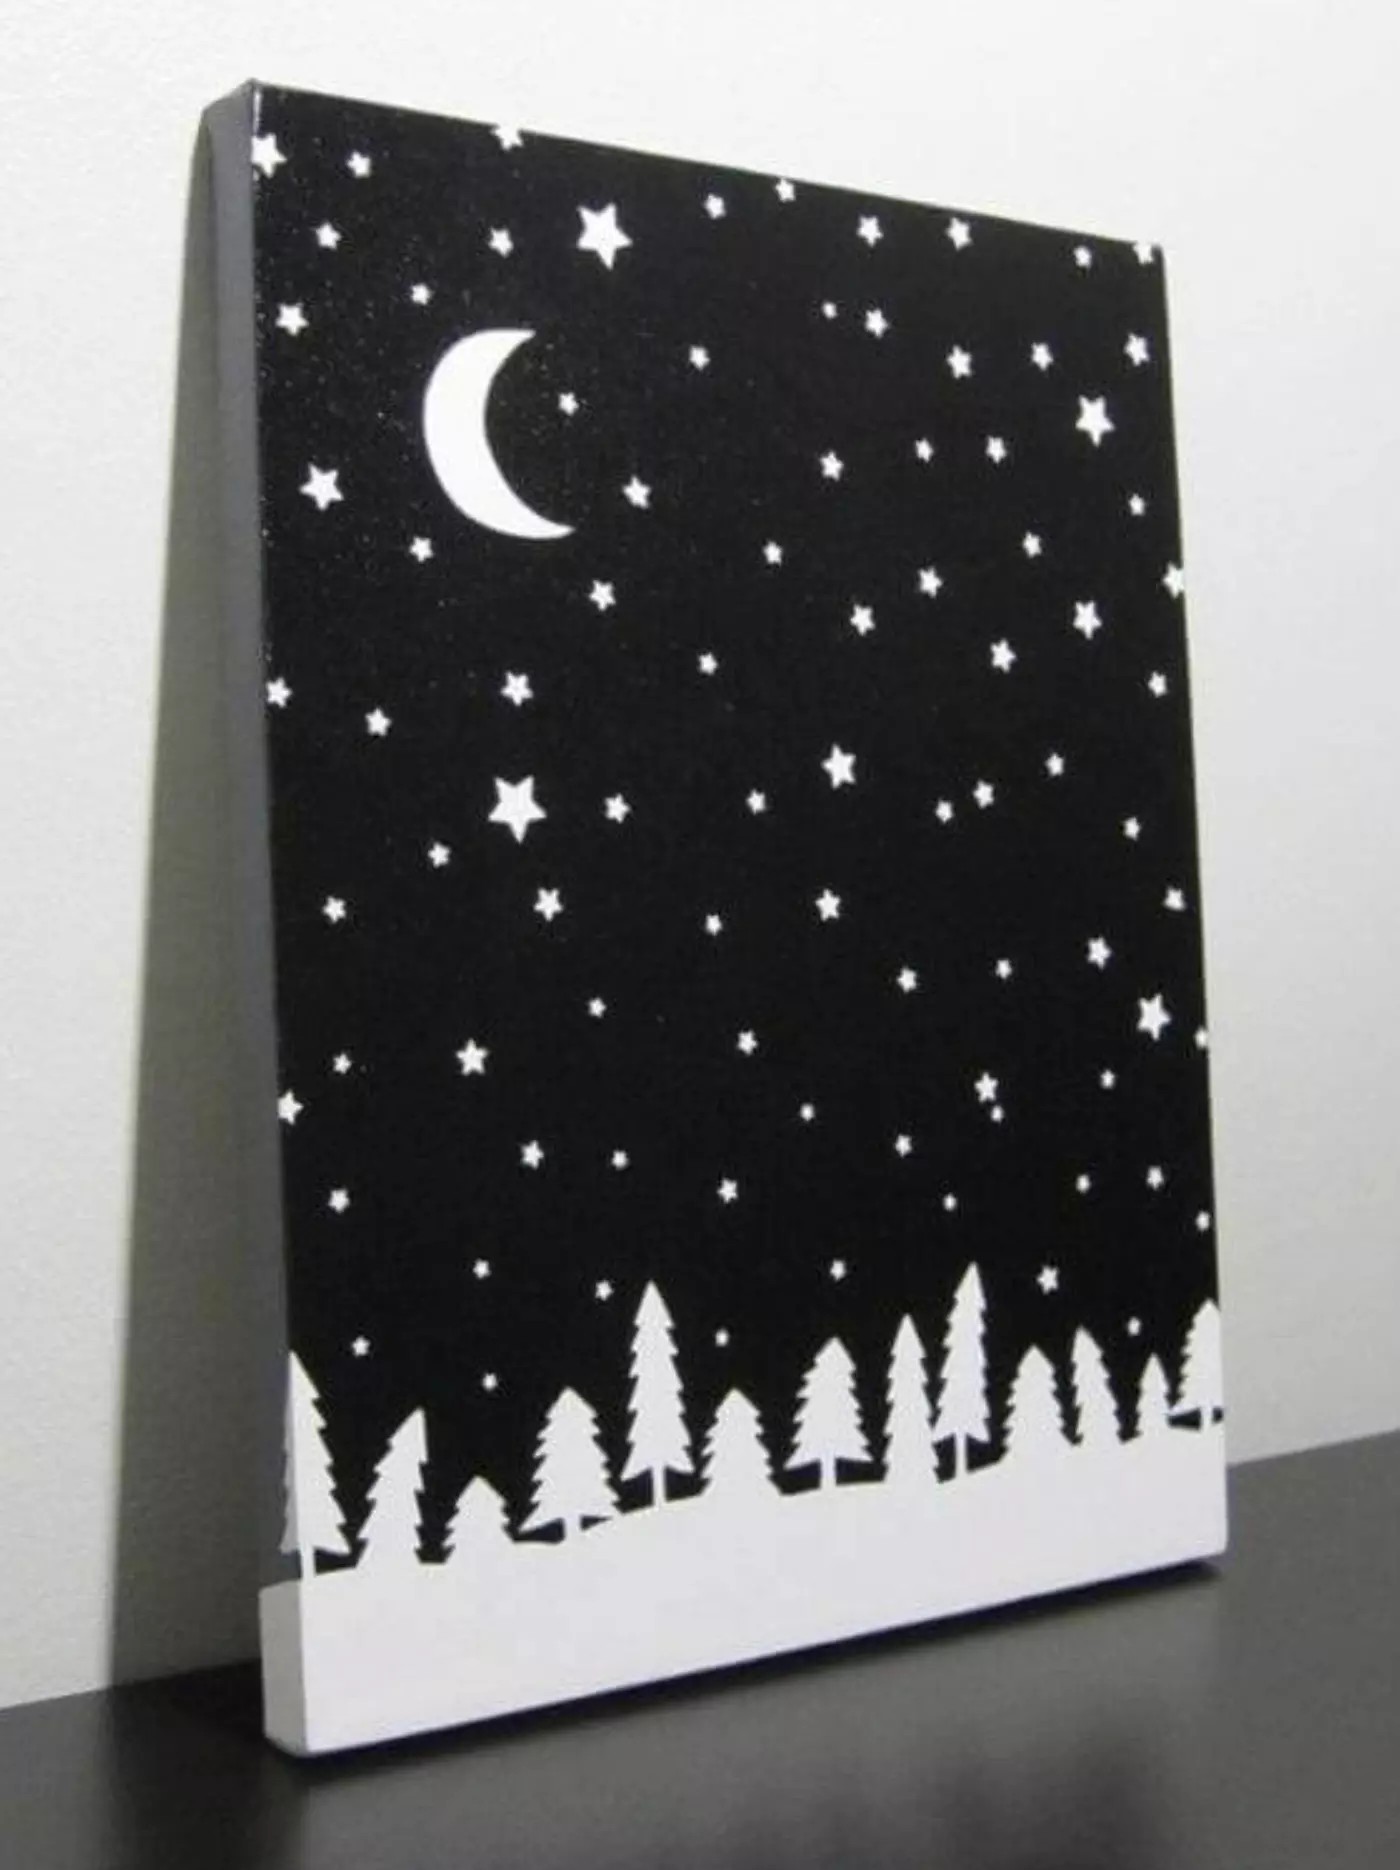
It is among the simplest and easiest painting ideas for absolute beginners in which black canvas is used to create a painting with a selective color palette.
You can draw some stars, a moon, and few trees with white acrylic paint on a black canvas.
Read also:
- What Colors Make Brown (How to Mix Brown The Right Way)
- 18 Awesome Acrylic Painting Techniques on Canvas
- How to Remove Acrylic Paint Easily
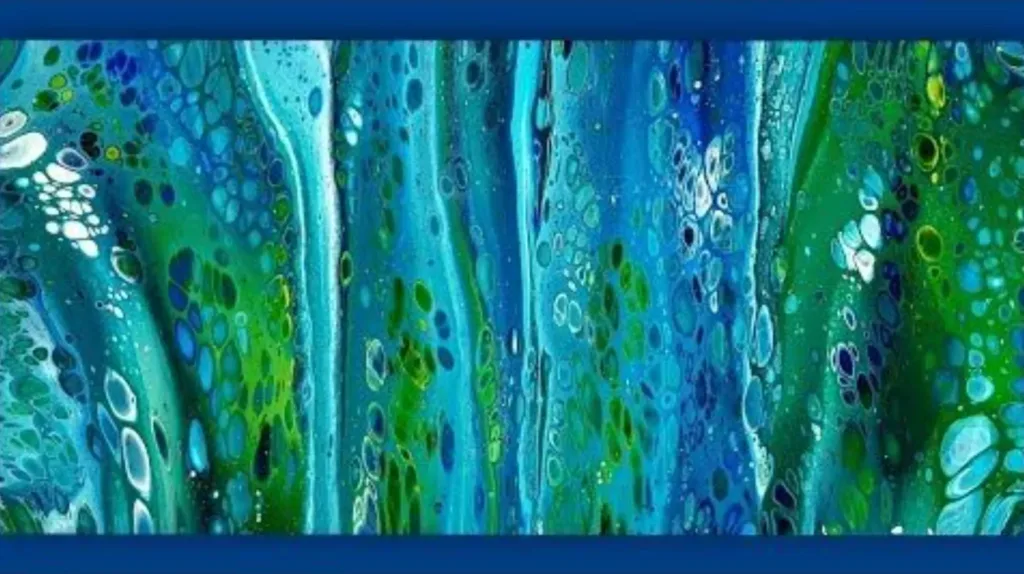
Abstract Painting with Acrylic Pouring
It is another good option to create abstract art with any of the two (straight pour & dirty pour) acrylic pouring techniques.
Pour white and blue acrylic paints using the straight method and then spread it evenly and then move the canvas to spread the color in all directions.
Paint Loose Abstract Flowers
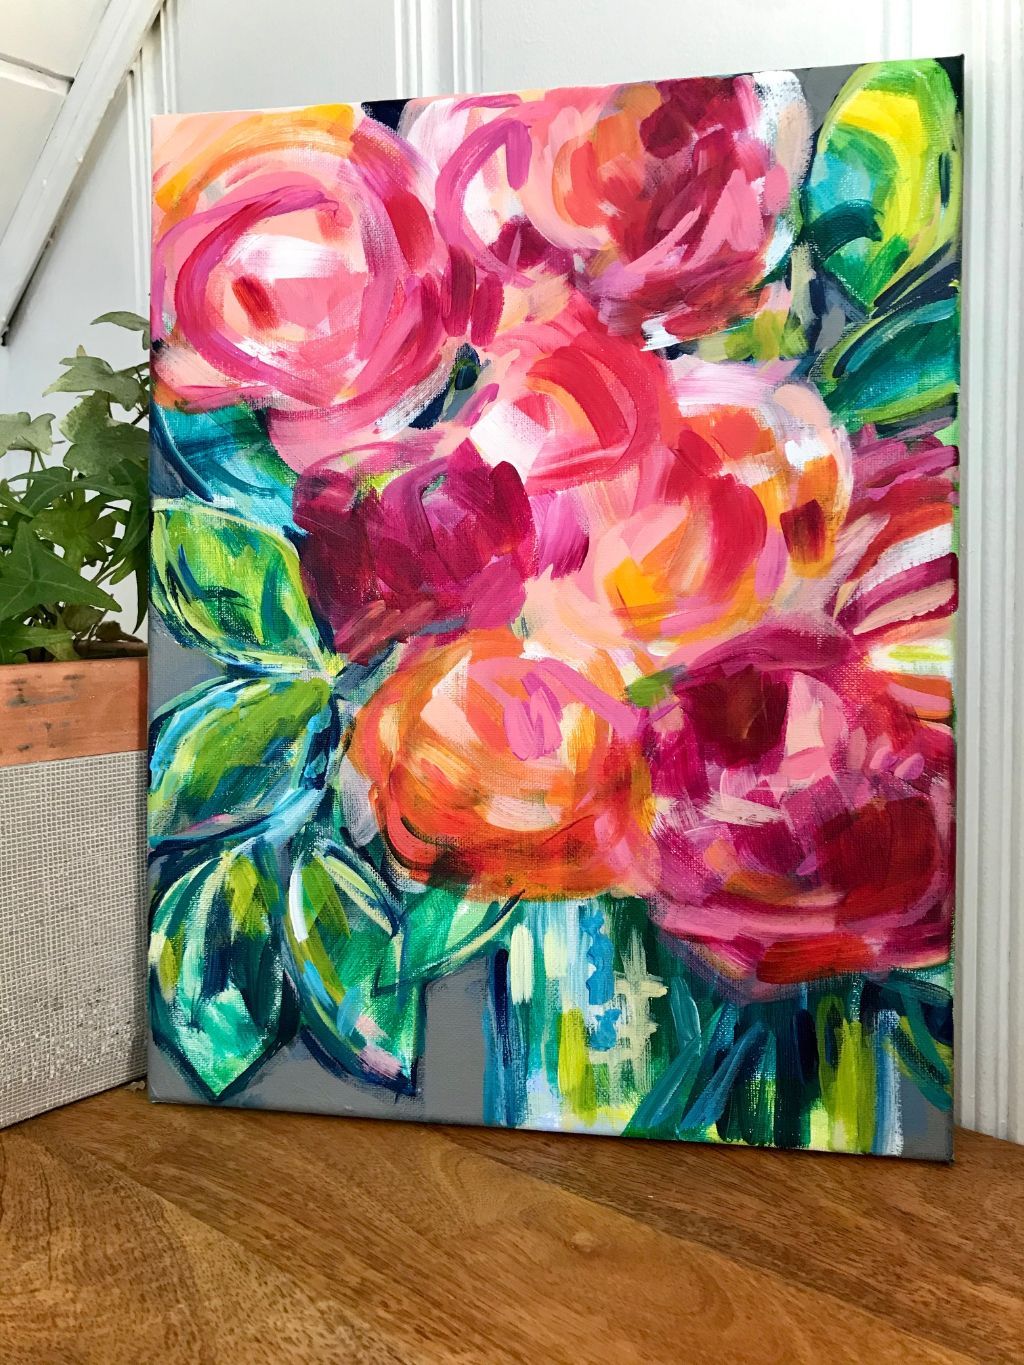

With the help of different colors and several different brushes of different sizes, you can build layers in your flower and allow every single layer to dry first before moving to another layer.
Use a variety of dark, medium, and light colors to add contrast, never paint perfect circles, overlap your flowers and leaves, and use different tools to add texture in your painting such as a palette knife.
Paint an Abstract Landscape

When you paint a landscape in an abstract style, you get the freedom to use bold brushstrokes with more expressive color options.
Use simple landscape photos to get inspiration and add a personal abstract twist to create an artistic paragon.
Paint Color Block Design
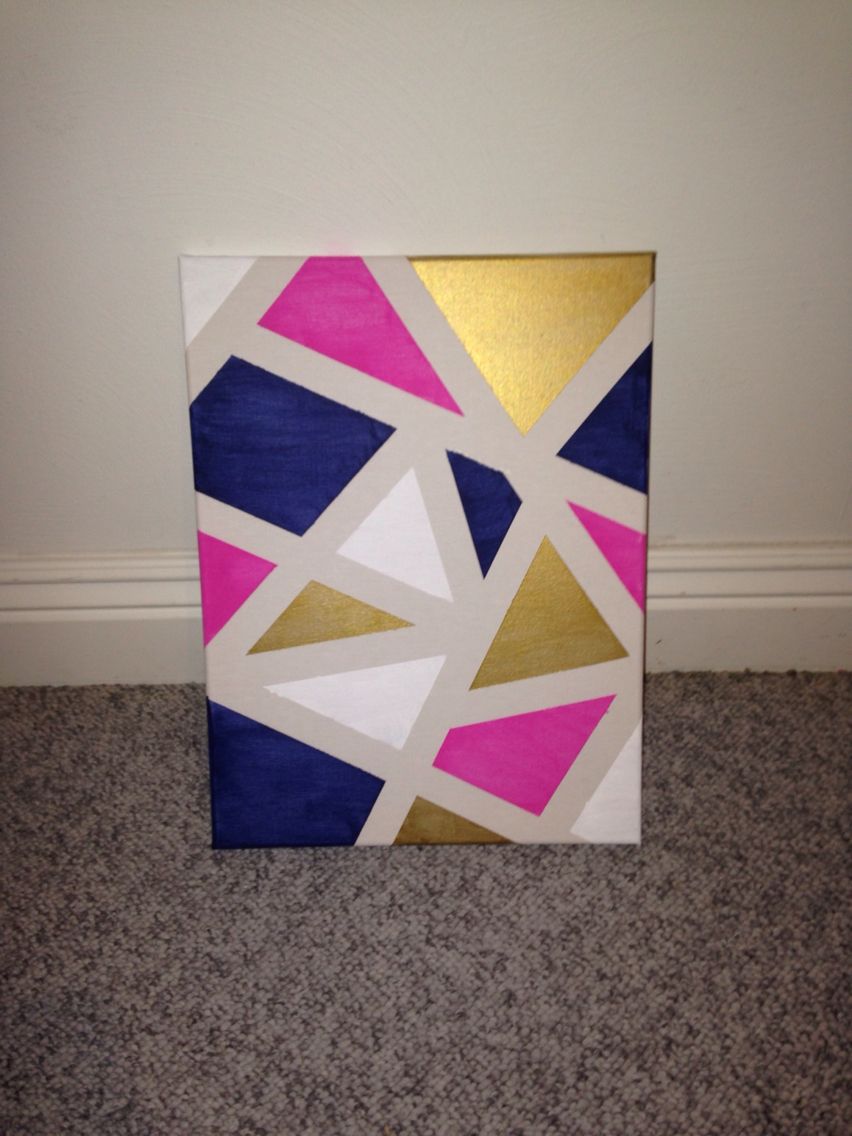

With only a few acrylic paints and masking tape, it is a great way to create a wonderful masterpiece of art having geometrical shapes.
This color block design technique is the best way to improve your painting skills.
Colorful Landscape Painting
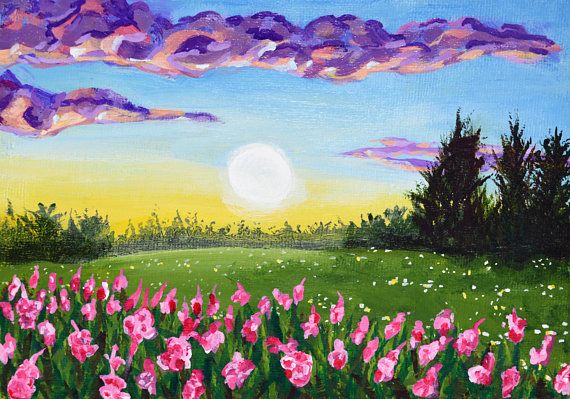
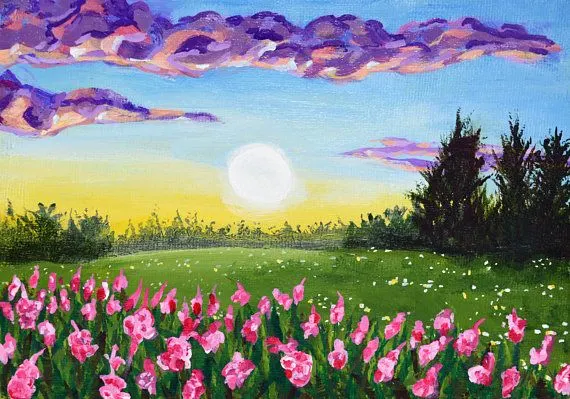
Paint vivid images of nature, beautiful trees, blooming flowers, and colorful landscapes, and don’t worry there is no need for impressive drawing skills.
A palette knife is all that is needed to give texture to a boring landscape and to add sharp highlights to a blazing sunset.
Painting with all this color and variety from nature makes it one of the most beautiful acrylic painting ideas you can create.
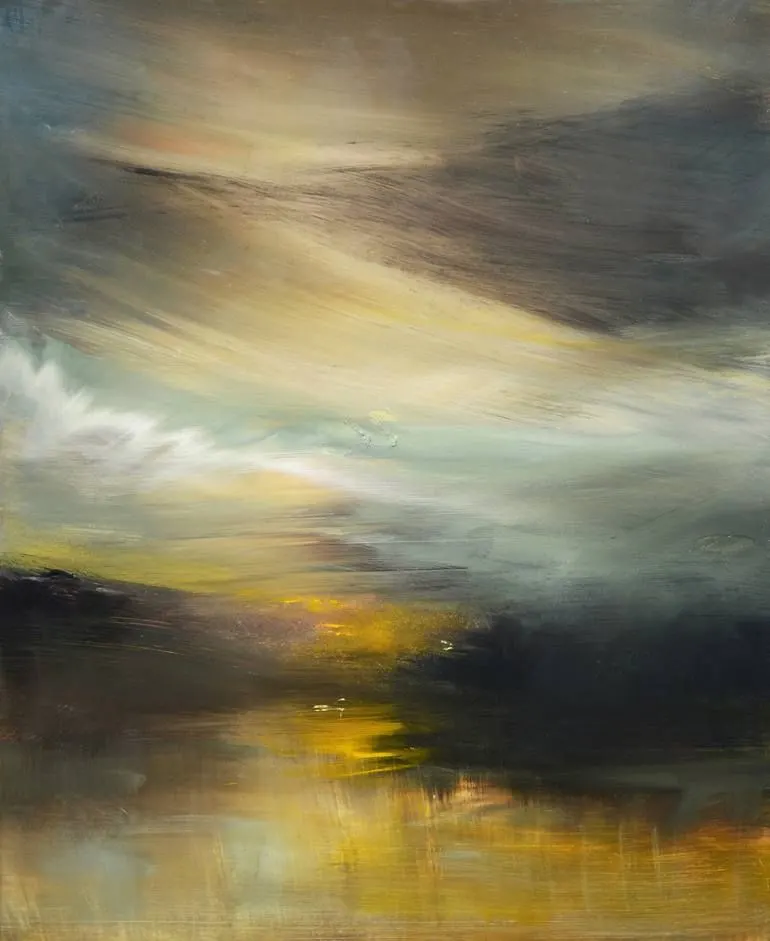
Sunset in a Desert
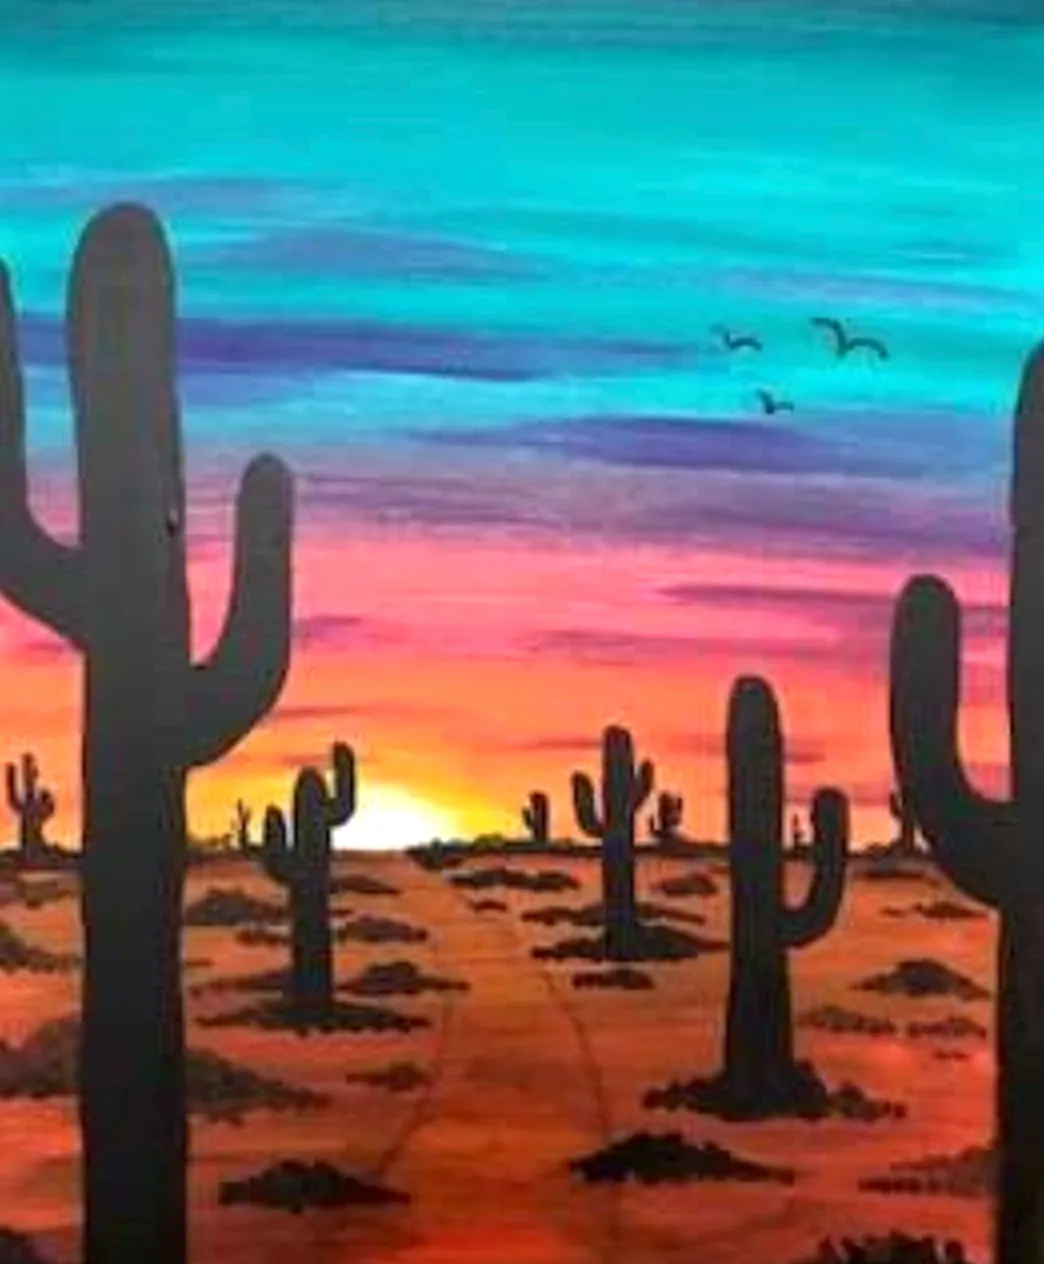
Sunset is so magical that it covers everything with a dull golden light turning everything into black.
Sun setting in a desert looks so alone and sad but this sad beauty mesmerizes everyone.
It is an easy acrylic painting project in which blending two colors never looks streaky.
A Silhouette Acrylic Painting
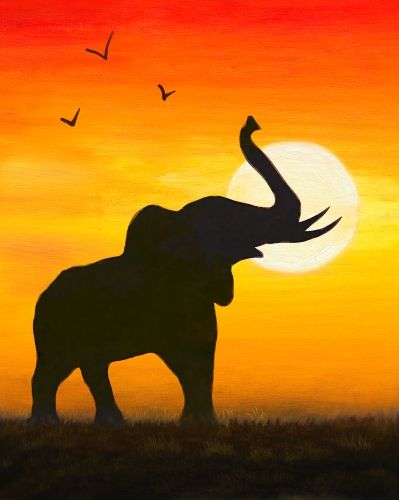
Silhouette painting is basically about painting a light-colored background and then creating a figure in any dark or black color in front of it.
The only difficult task in this canvas art is the creation of a featureless dark object that must look like what it is.
Landscape Painting with the Sunrise

Acrylic painting is a powerful medium having abilities to display colors, details, and shades of landscapes.
As a beginner, this is a perfect start to paint a sunrise landscape with a tree without leaves.
The depth and color shades displayed in this painting are phenomenal.
Get your Inspiration from the Beach

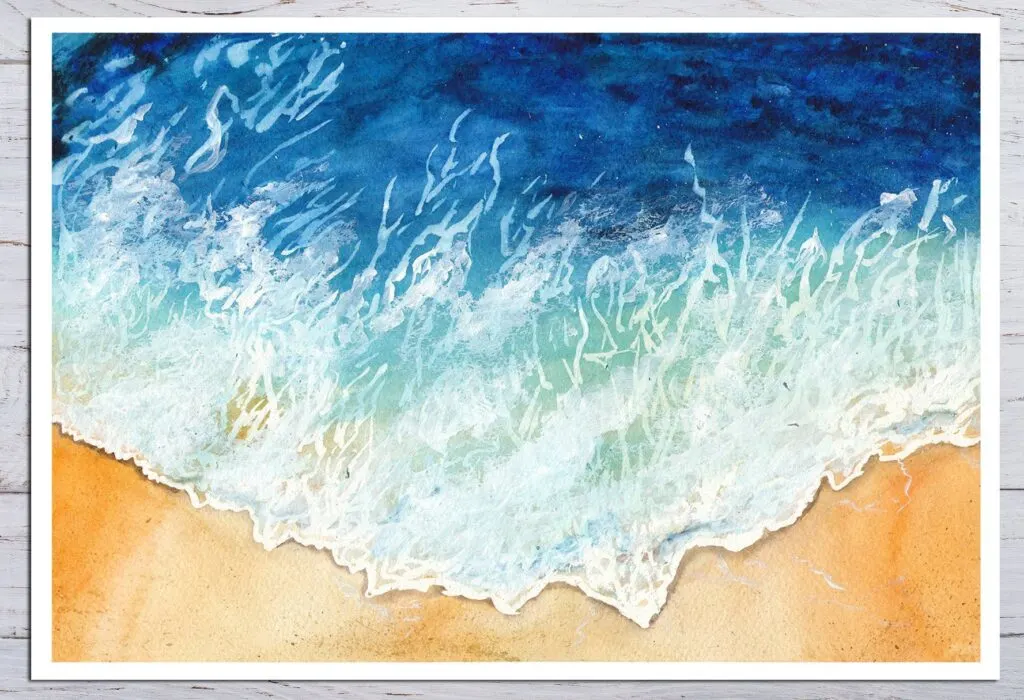
As a beginner, you can easily layer up your canvas with the blue tones of a sea to display flowing water.
Painting sea waves require no photo-realistic details, using white acrylic paint to create a sense of waves crashing on the beach.
Take liberties to add reflections in the water and blend colors together while painting water.
Learn Gold Leaf Art

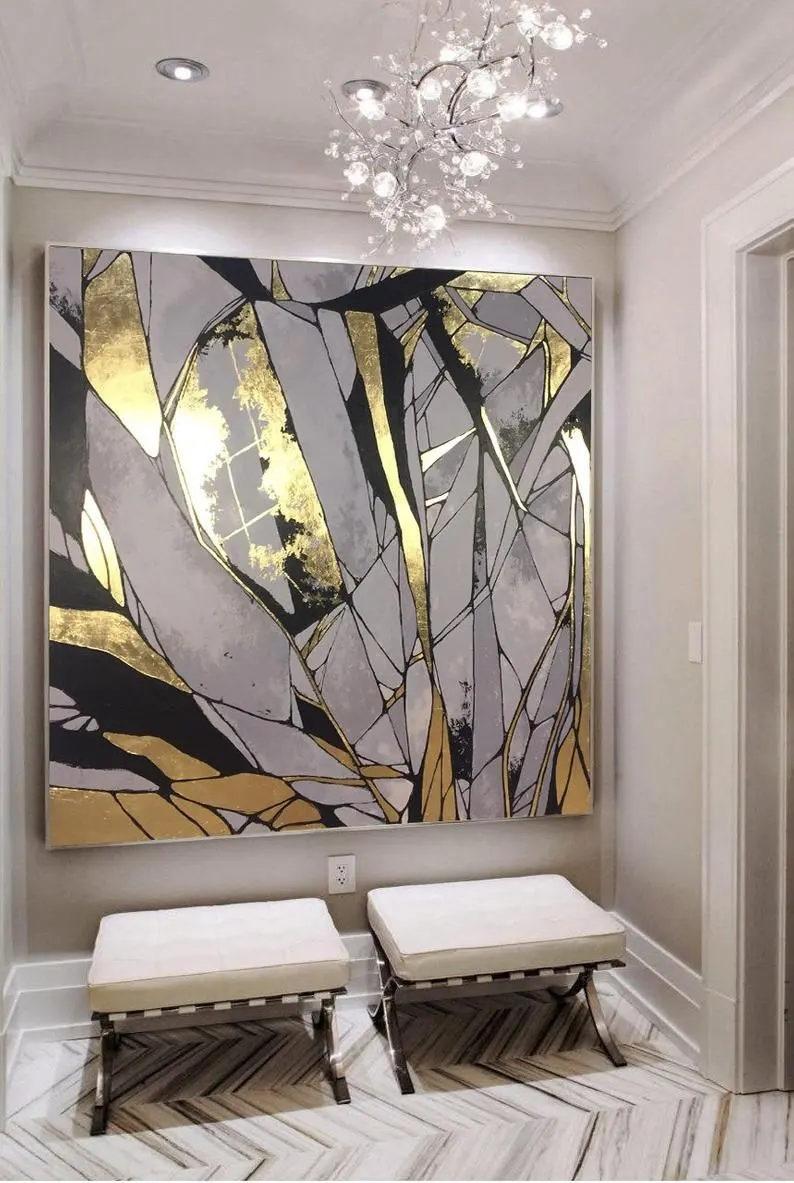
To add a unique value to the artwork gliding gold leaf is added to acrylic painting.
The adhesive is required to paste this gold foil that provides a stunning golden effect to an acrylic painting.
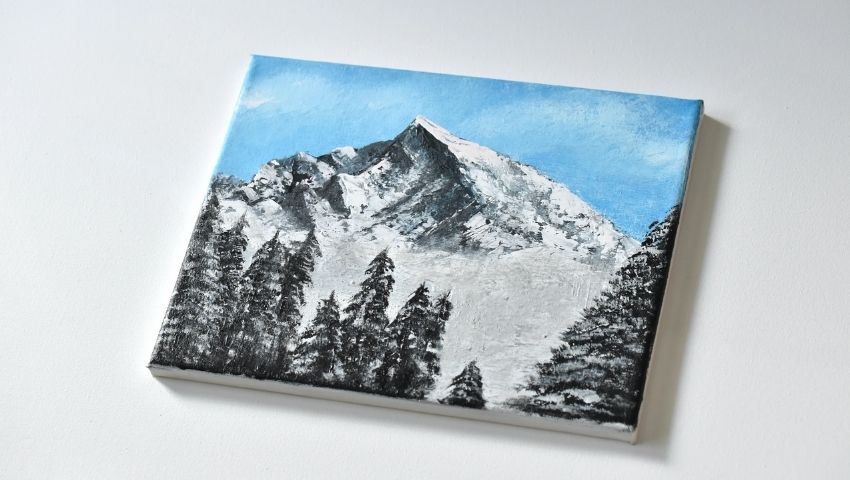
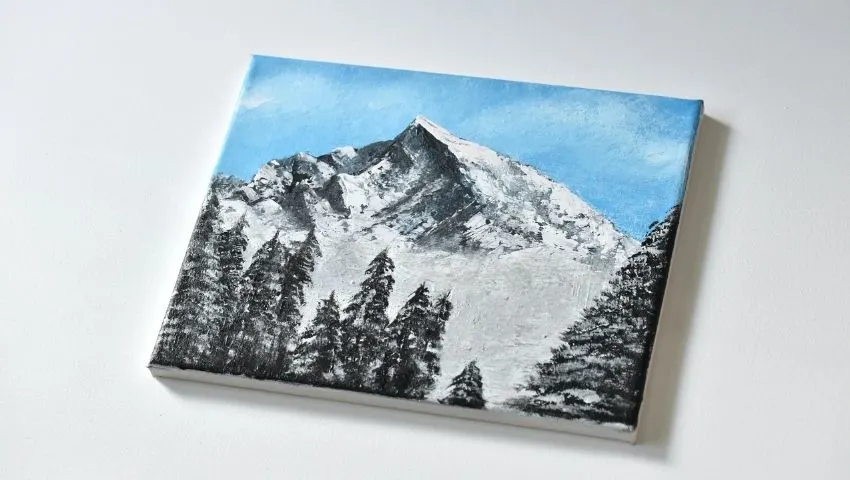
Paint a Range of Mountains
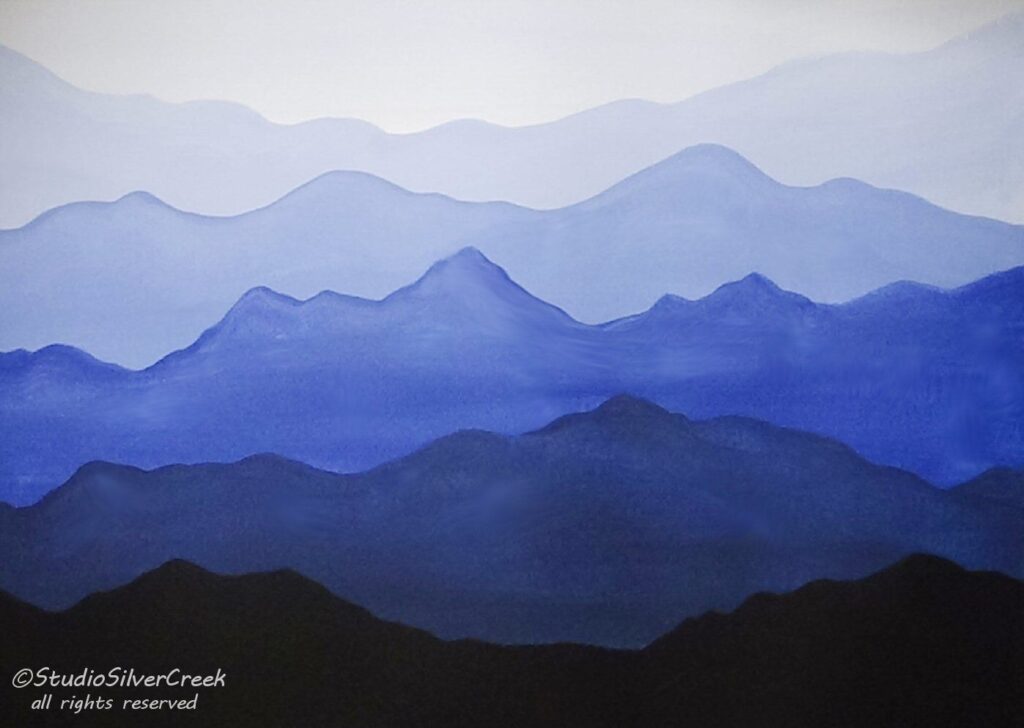
This is also one of the easiest acrylic painting projects on canvas for beginners.
These misty mountains range with a maximum smooth transition of color gradients and the exceptional resolution looks so realistic.
Paint a Galaxy
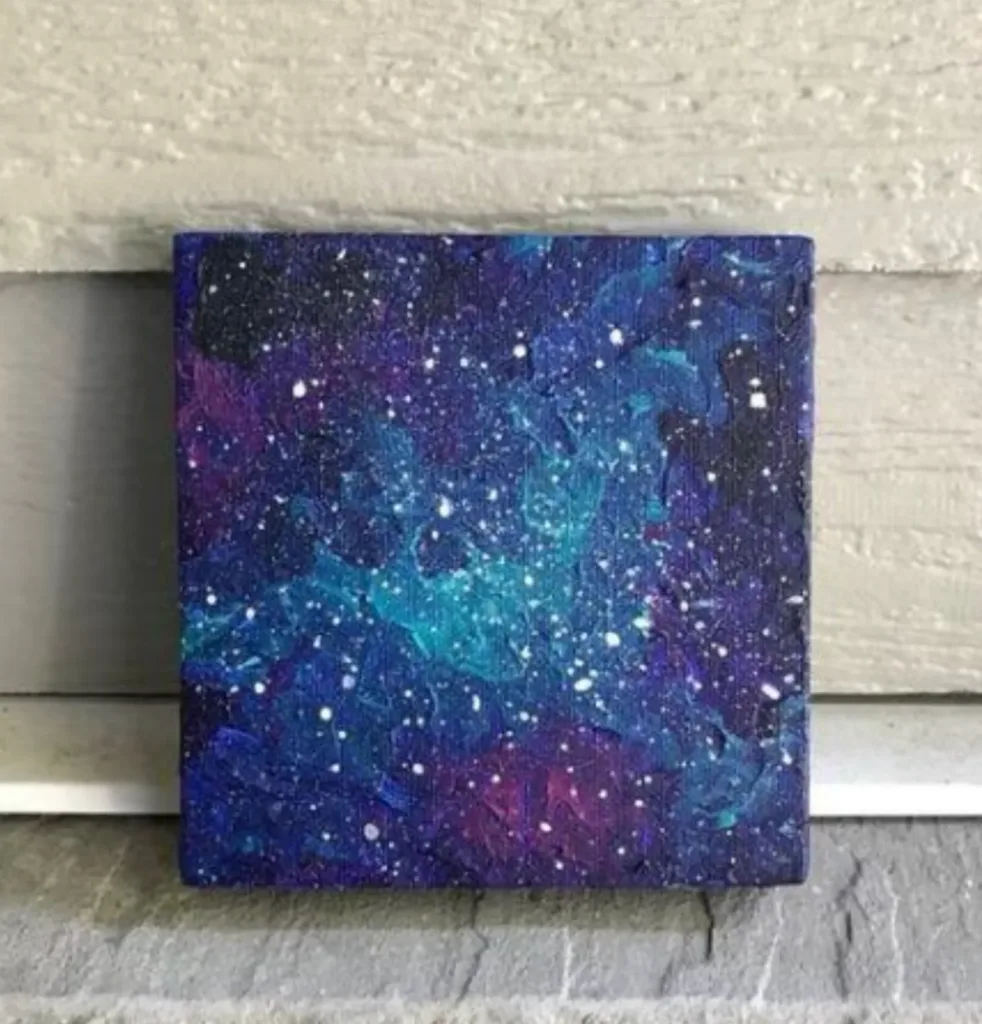
Another easy acrylic project on canvas for beginners is painting a galaxy.
It is so easy to paint a galaxy on a black canvas by blending blue, grey, white, maroon, green, and purple acrylic paints and it looks amazing.
Try Sponge Painting

As a beginner sometimes you feel holding paintbrushes is a hectic task.
You can satisfy your artistic skills with something creative like a sponge.
Use a wet sponge to dip in acrylic paints to create your very first artistic wonder.
Paint a Waterfall on your Canvas
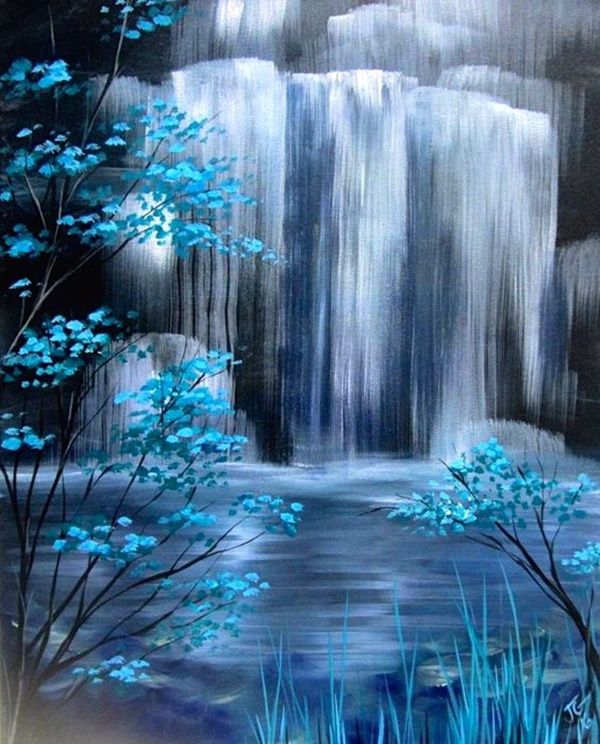

Creating a waterfall painting involves the perfect blending of white colors and their different shades as we hardly observe any other color in a waterfall.
A lot of practice provides you the right grip to paint an amazing waterfall.
Paint Using the Dripping Technique

This technique is ideal to implement with a toothbrush.
You drop colors on your canvas using your thumb to achieve the natural texture of acrylic color drops.
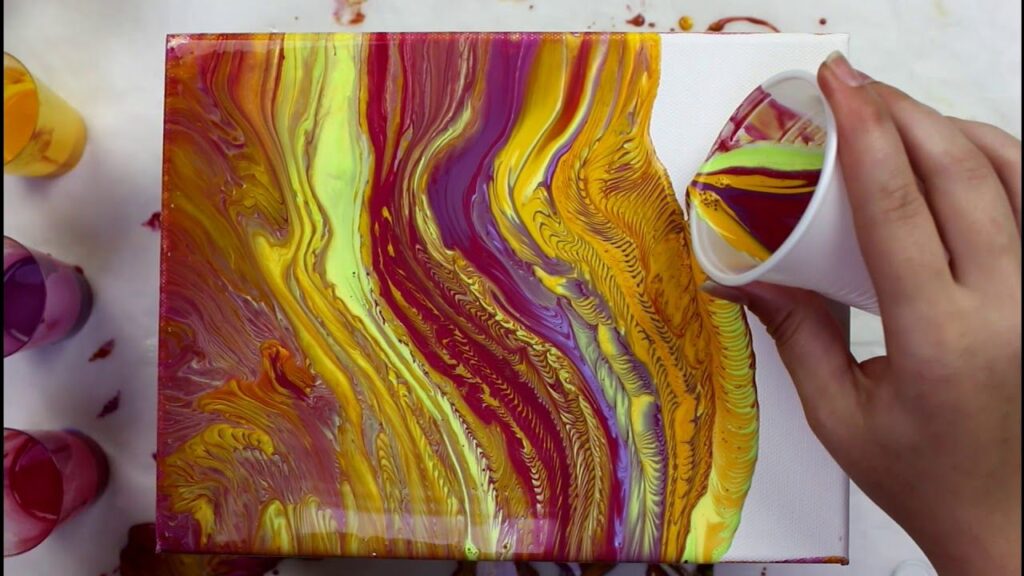
Try Dirty Pouring Method

Rather than mixing required colors in separate containers pour them all in a single container.
Pour these acrylic colors onto your canvas without mixing them.
It gives you more variety of colors on your canvas to create an abstract piece of art.
Flip Cup Abstract Art
Adopt the same dirty pouring technique to have colors in a single container, rather than pouring the color on your canvas flip the container/cup quickly, and let it flipped for a few minutes.
Finally, lift the container off and let the color flow naturally on your canvas.
Create Rock Painting
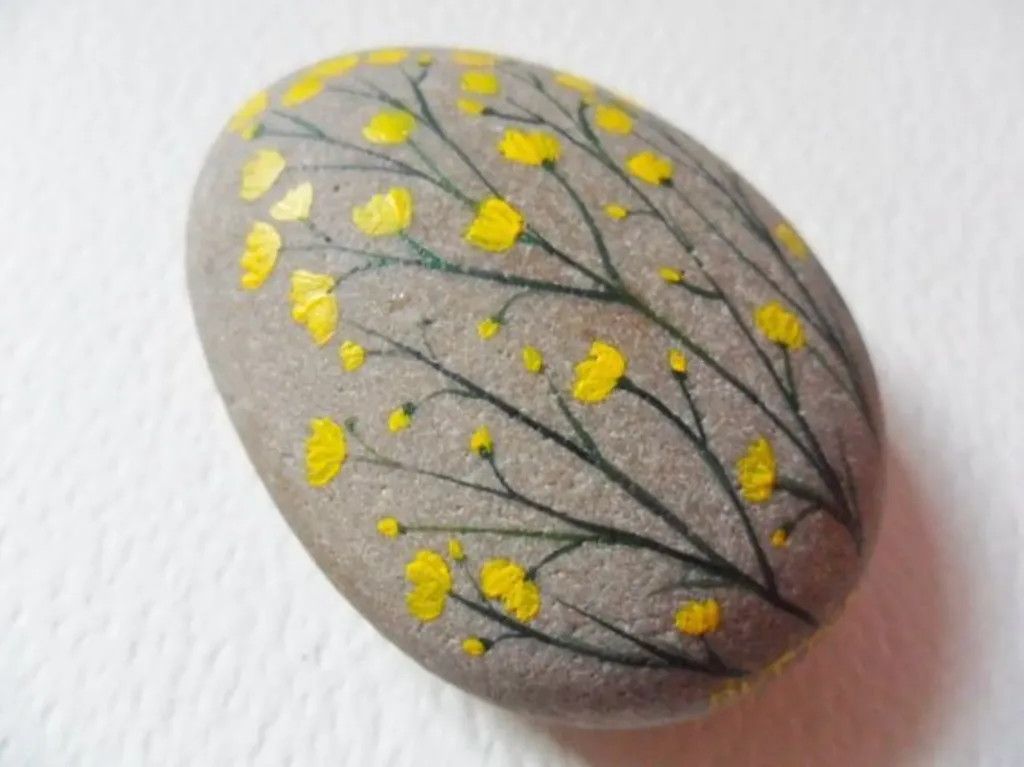
Painting rocks is a broad, nice, and basic approach.
Use small rocks as your canvas and with the help of acrylic paints use rocks to express your inner artistic skills gracefully.
Paint Lavenders with Cotton Swabs


This is the best technique to paint beautiful lavenders on your canvas using cotton swabs.
This technique is easy and effective to achieve instant success in acrylic painting as a beginner.
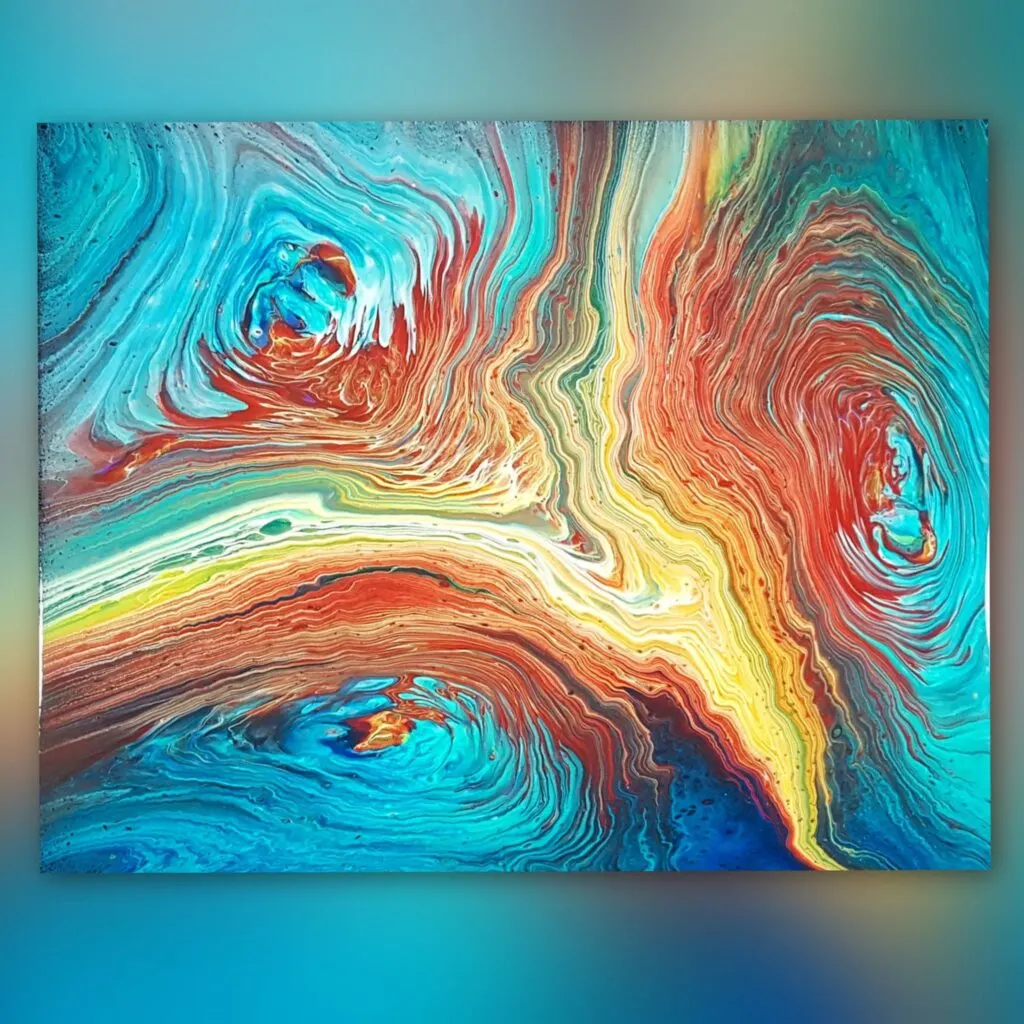
Agate and Malachite Painting Project
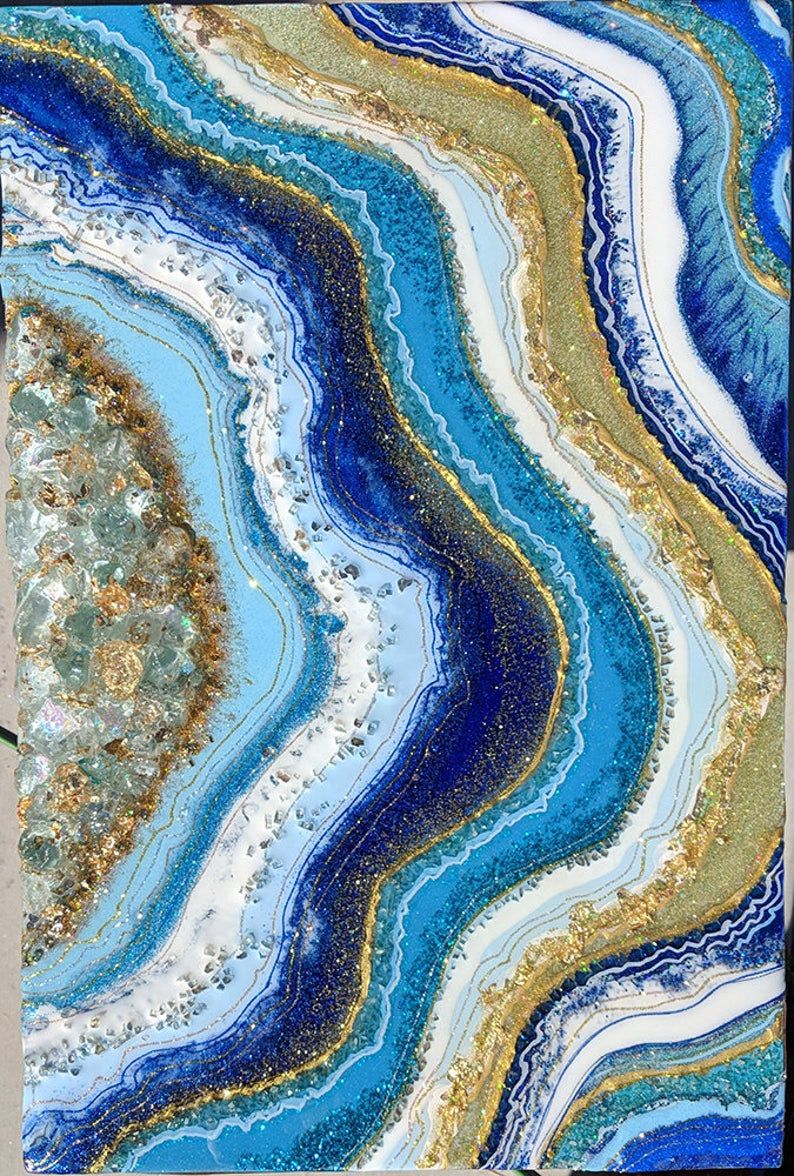
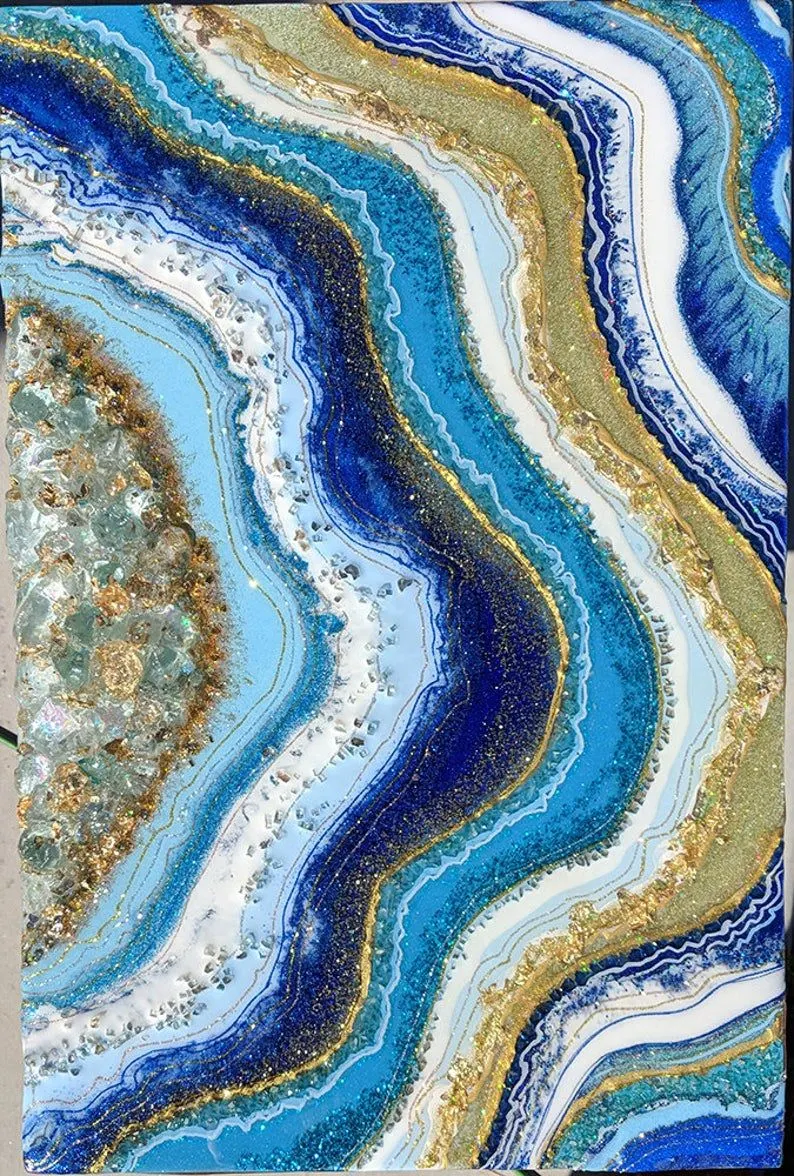
This project is only for painting lovers who love to get dirty in colors.
Create these patterns on your canvas with the help of a cardboard piece.
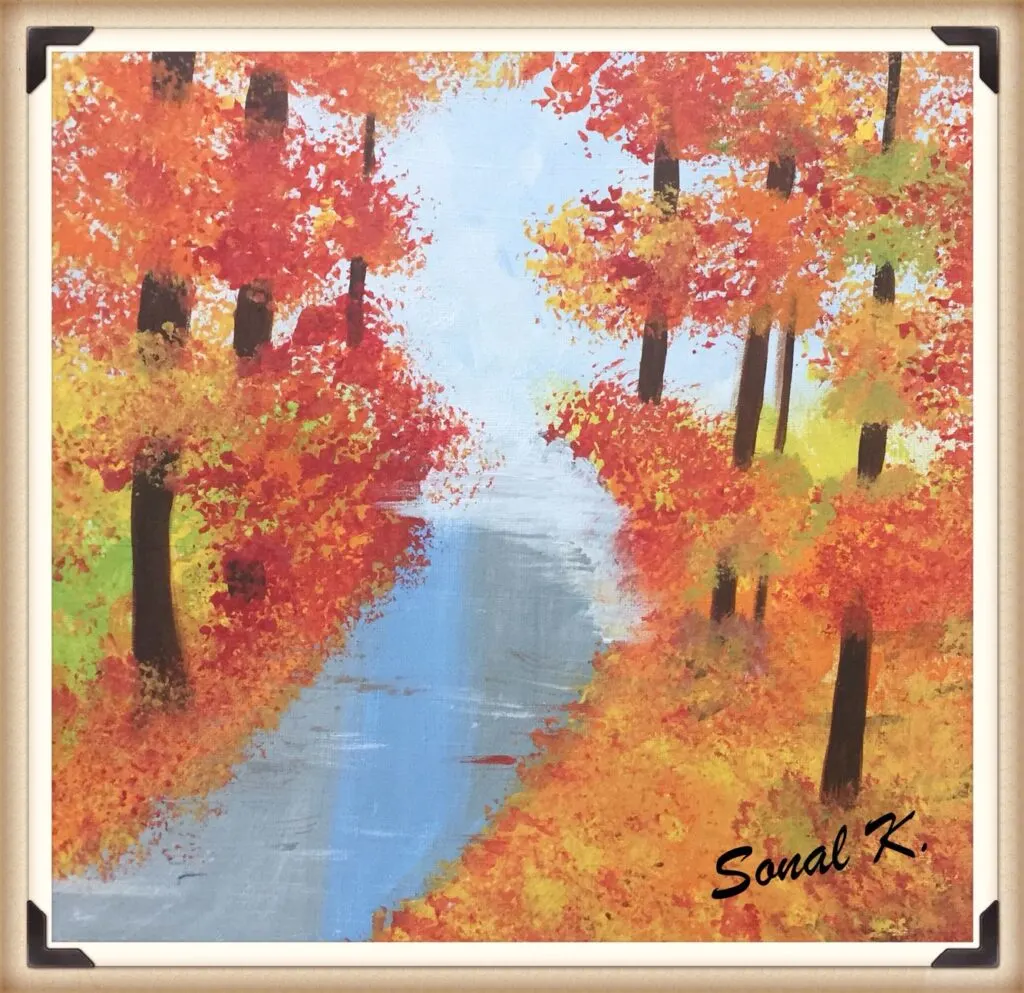
Autumn Painting
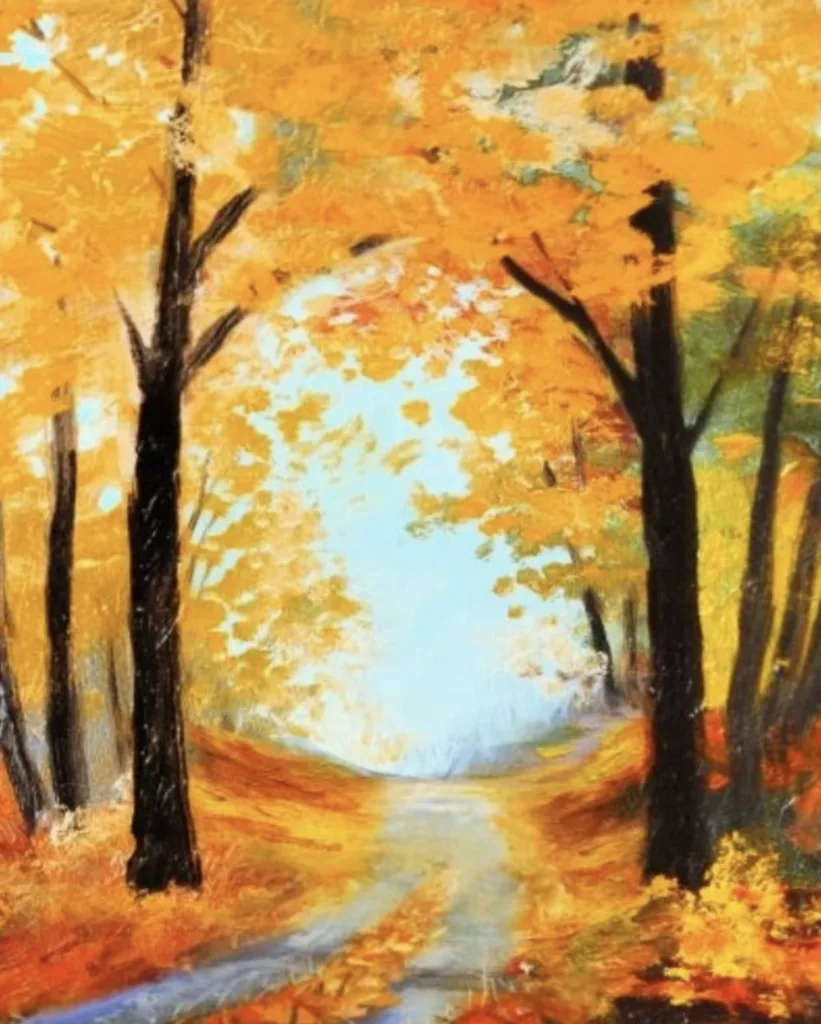
Have you tried creating the autumn season with your acrylic skills?
If not then try it now, as it can be one of the masterpieces that you have always been trying to create.
The landscape view will refresh you every time you’ll look into it.
Vase and Flowers
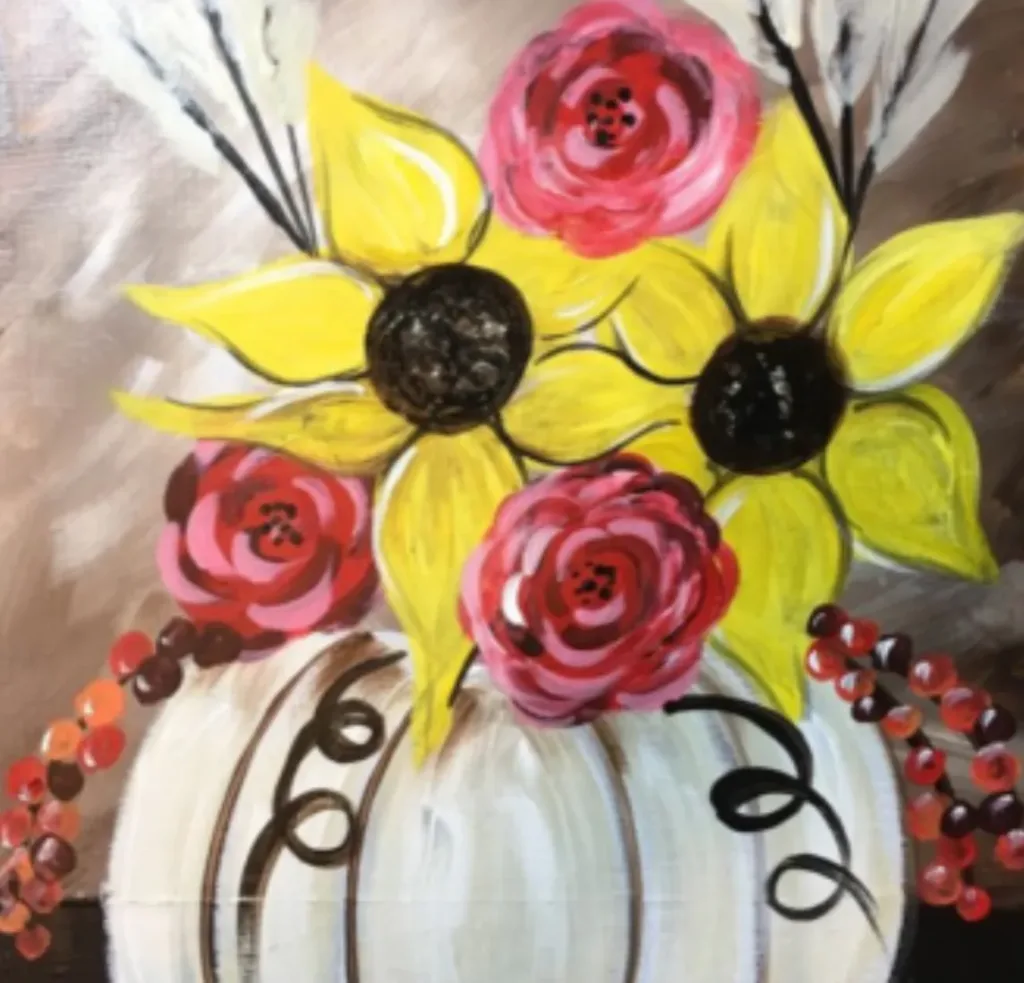
As a beginner in the acrylic painting style, you don’t have to limit your imagination.
You can create a beautiful vase using the creativity and skill you possess and enjoy the freshness that comes along.
Orca Whale Out of the Water
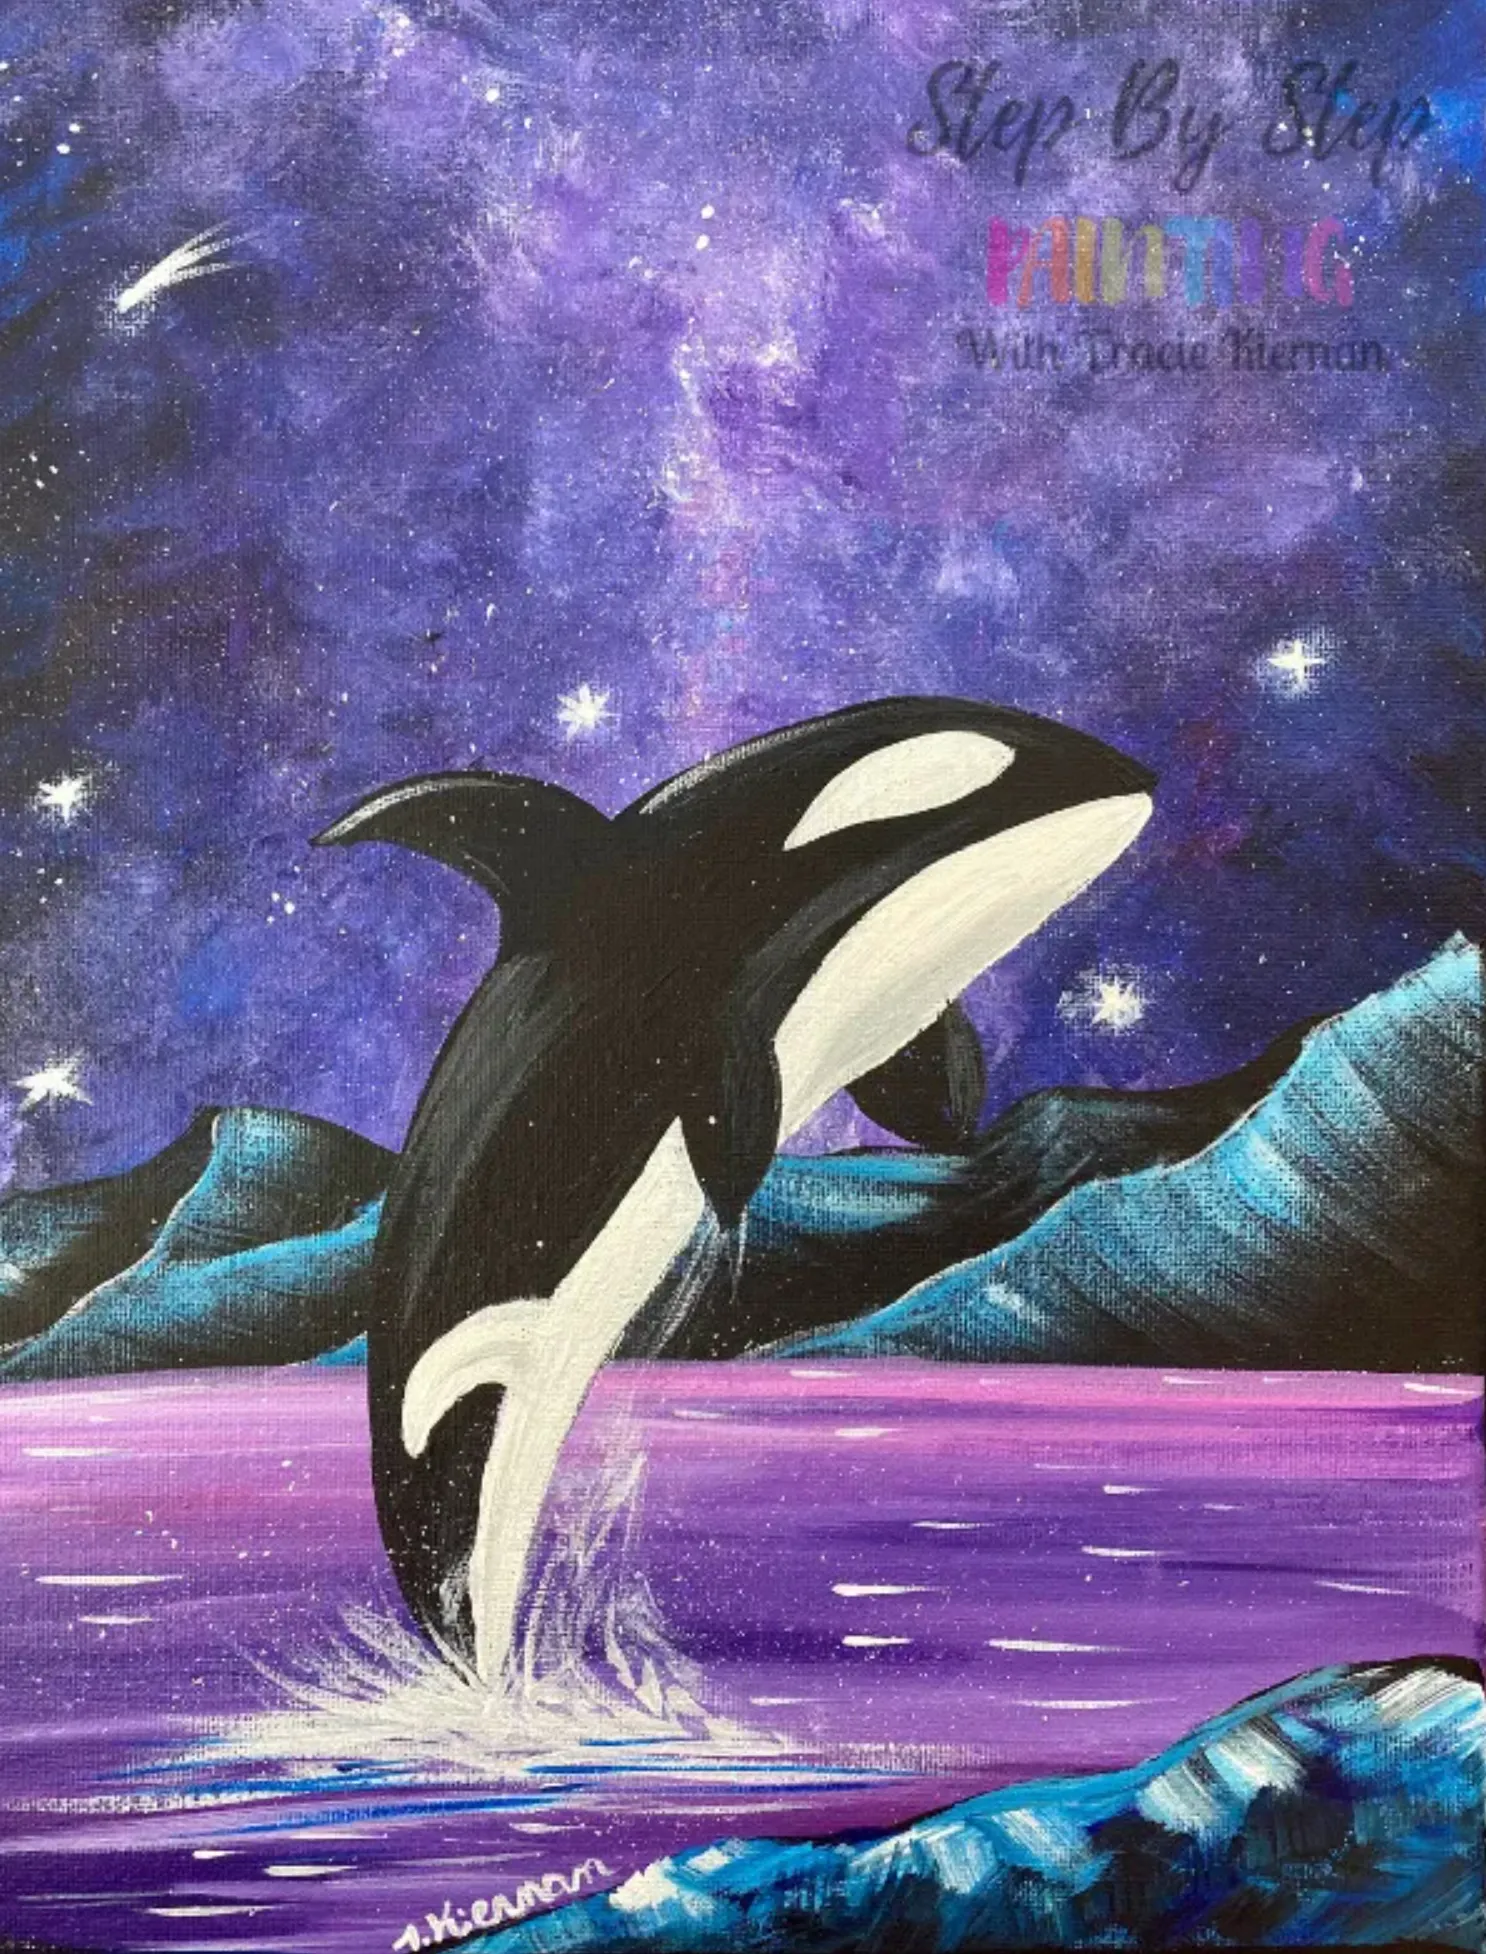
Orca Whale out of the water seems difficult to paint.
But you don’t have to get into it half-handed.
Learn the skill and you’ll be able to create something great.
Koi Fish
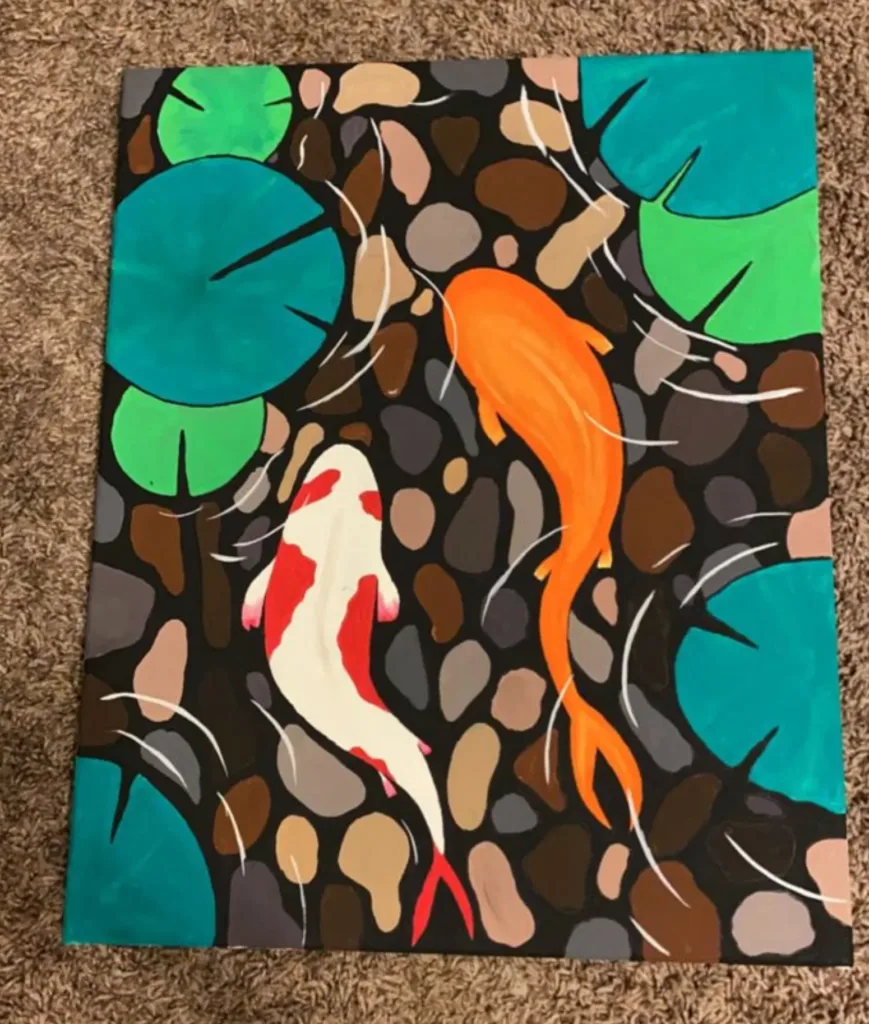
Another wonderful option you have in the acrylic painting style is the Koi Fish.
These species are different from the normal fish, so you’ll have a different piece in your collection.
Sunflowers in Acrylic Style
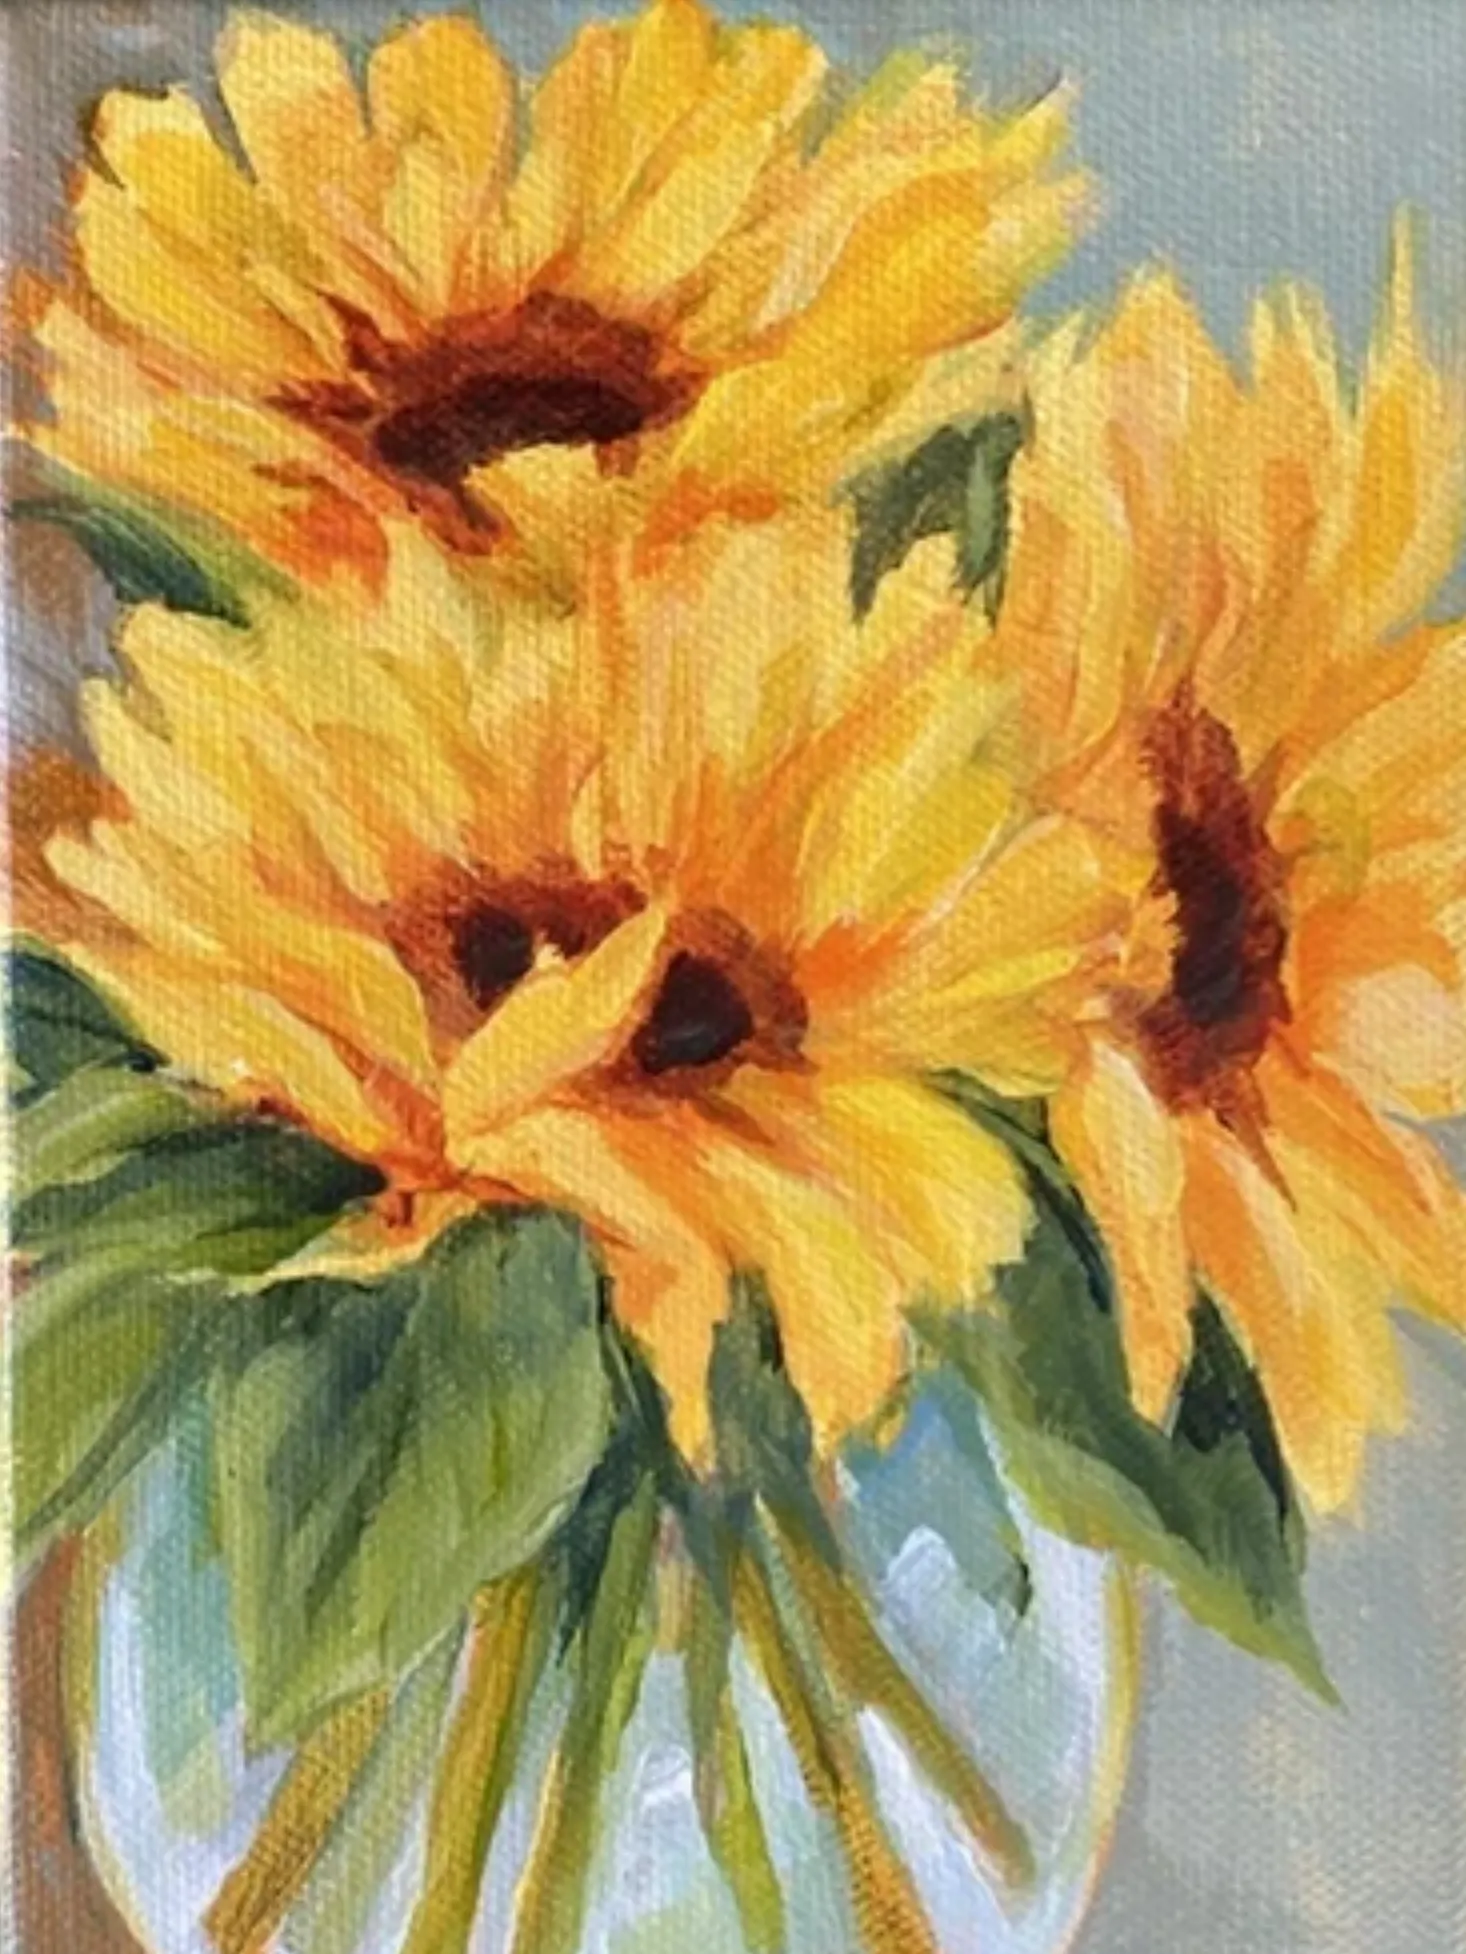
Acrylic paint offers you an opportunity to create amazing sunflowers with great ease (only if you know the technique).
White Tulips
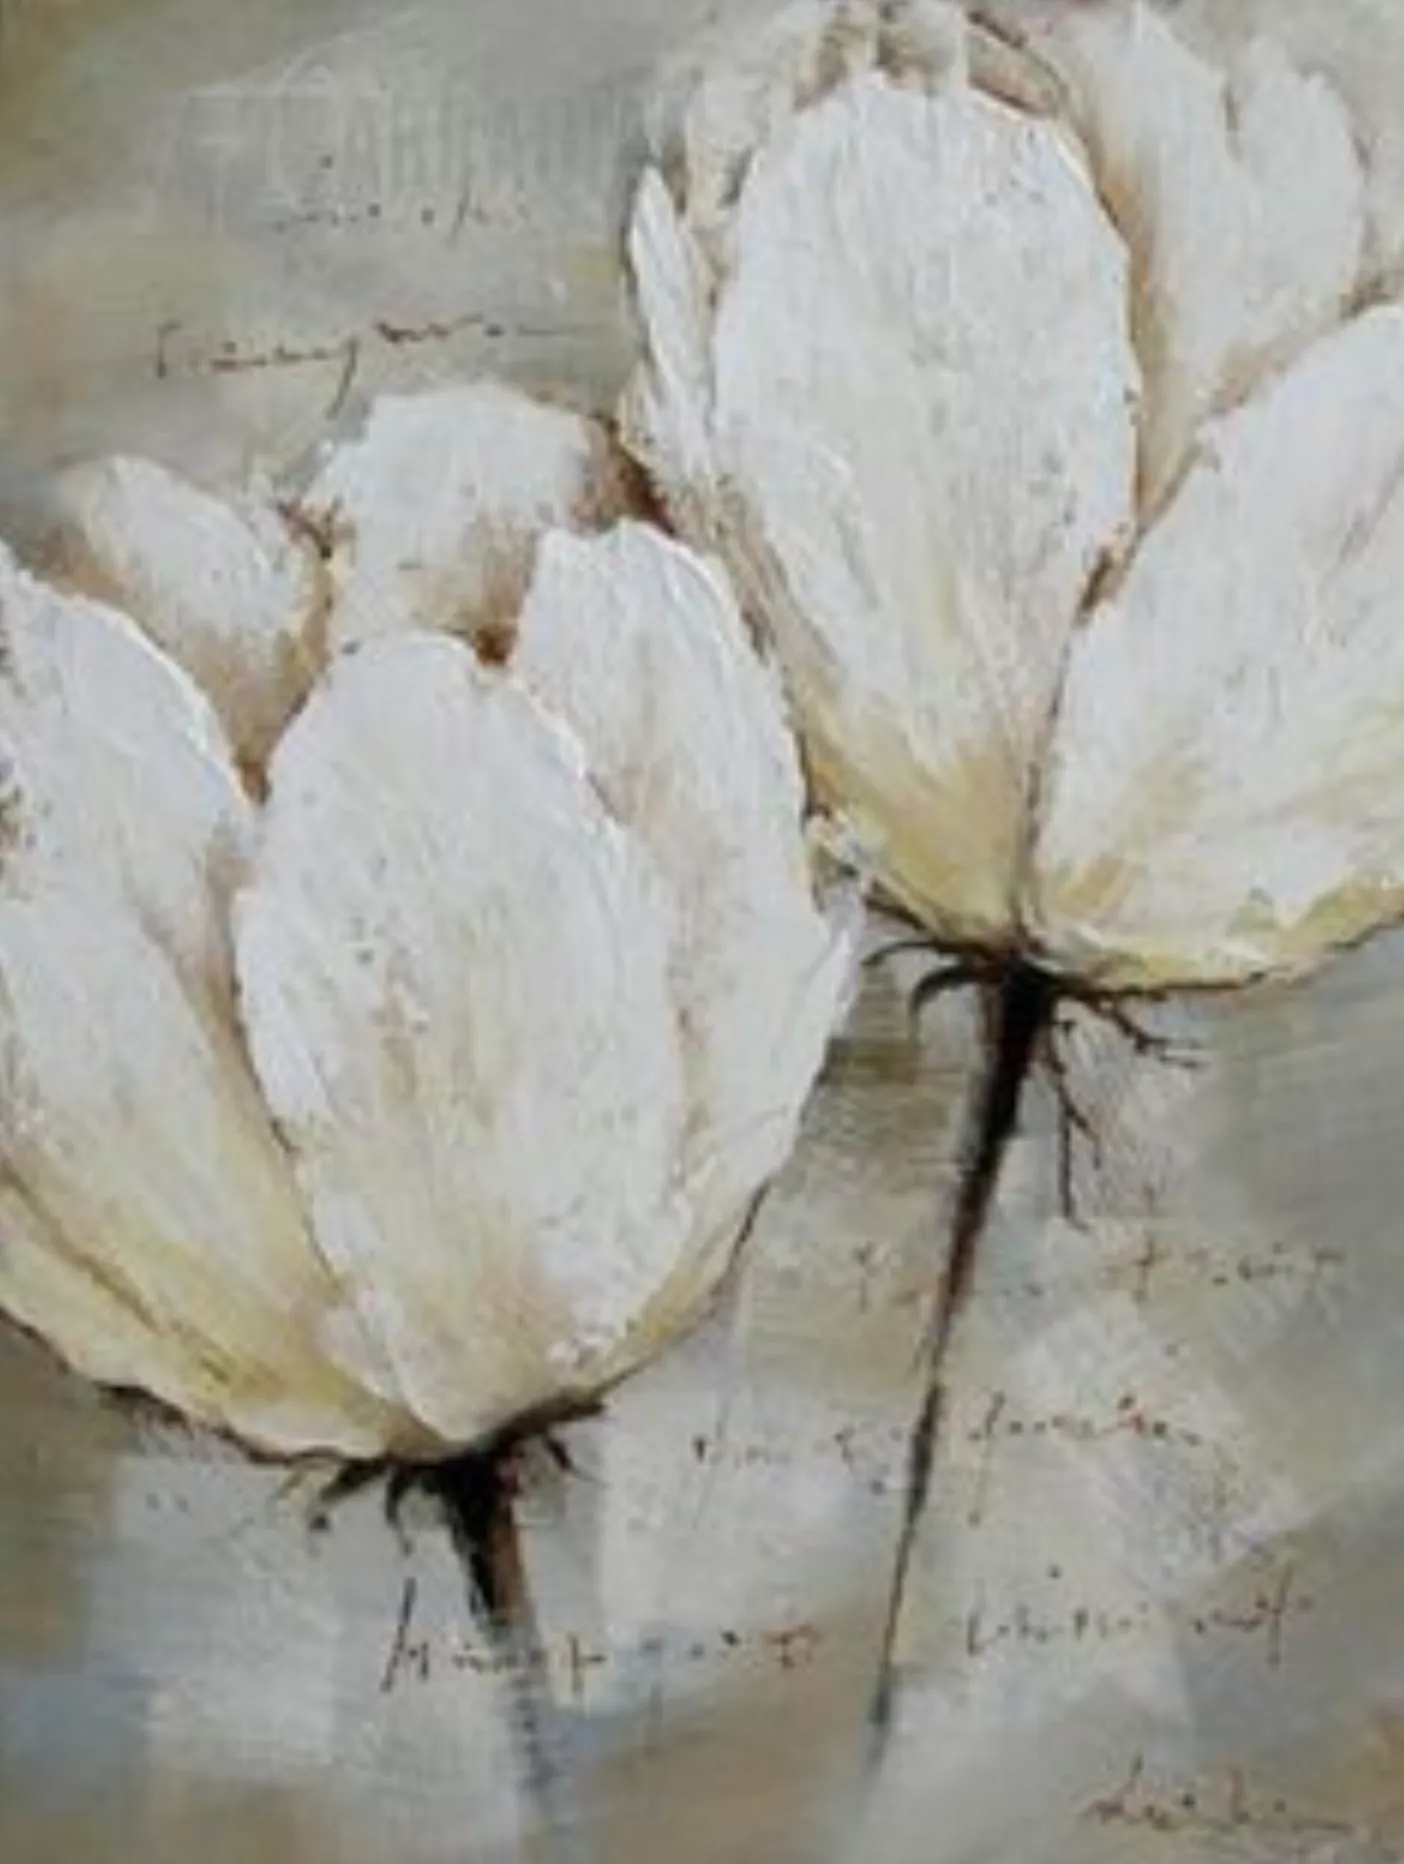
White is the color of peace.
You can give this color a better meaning by painting the white tulip on your canvas.
You’ll definitely love your beautiful flowers.
Paint a Serious Owl
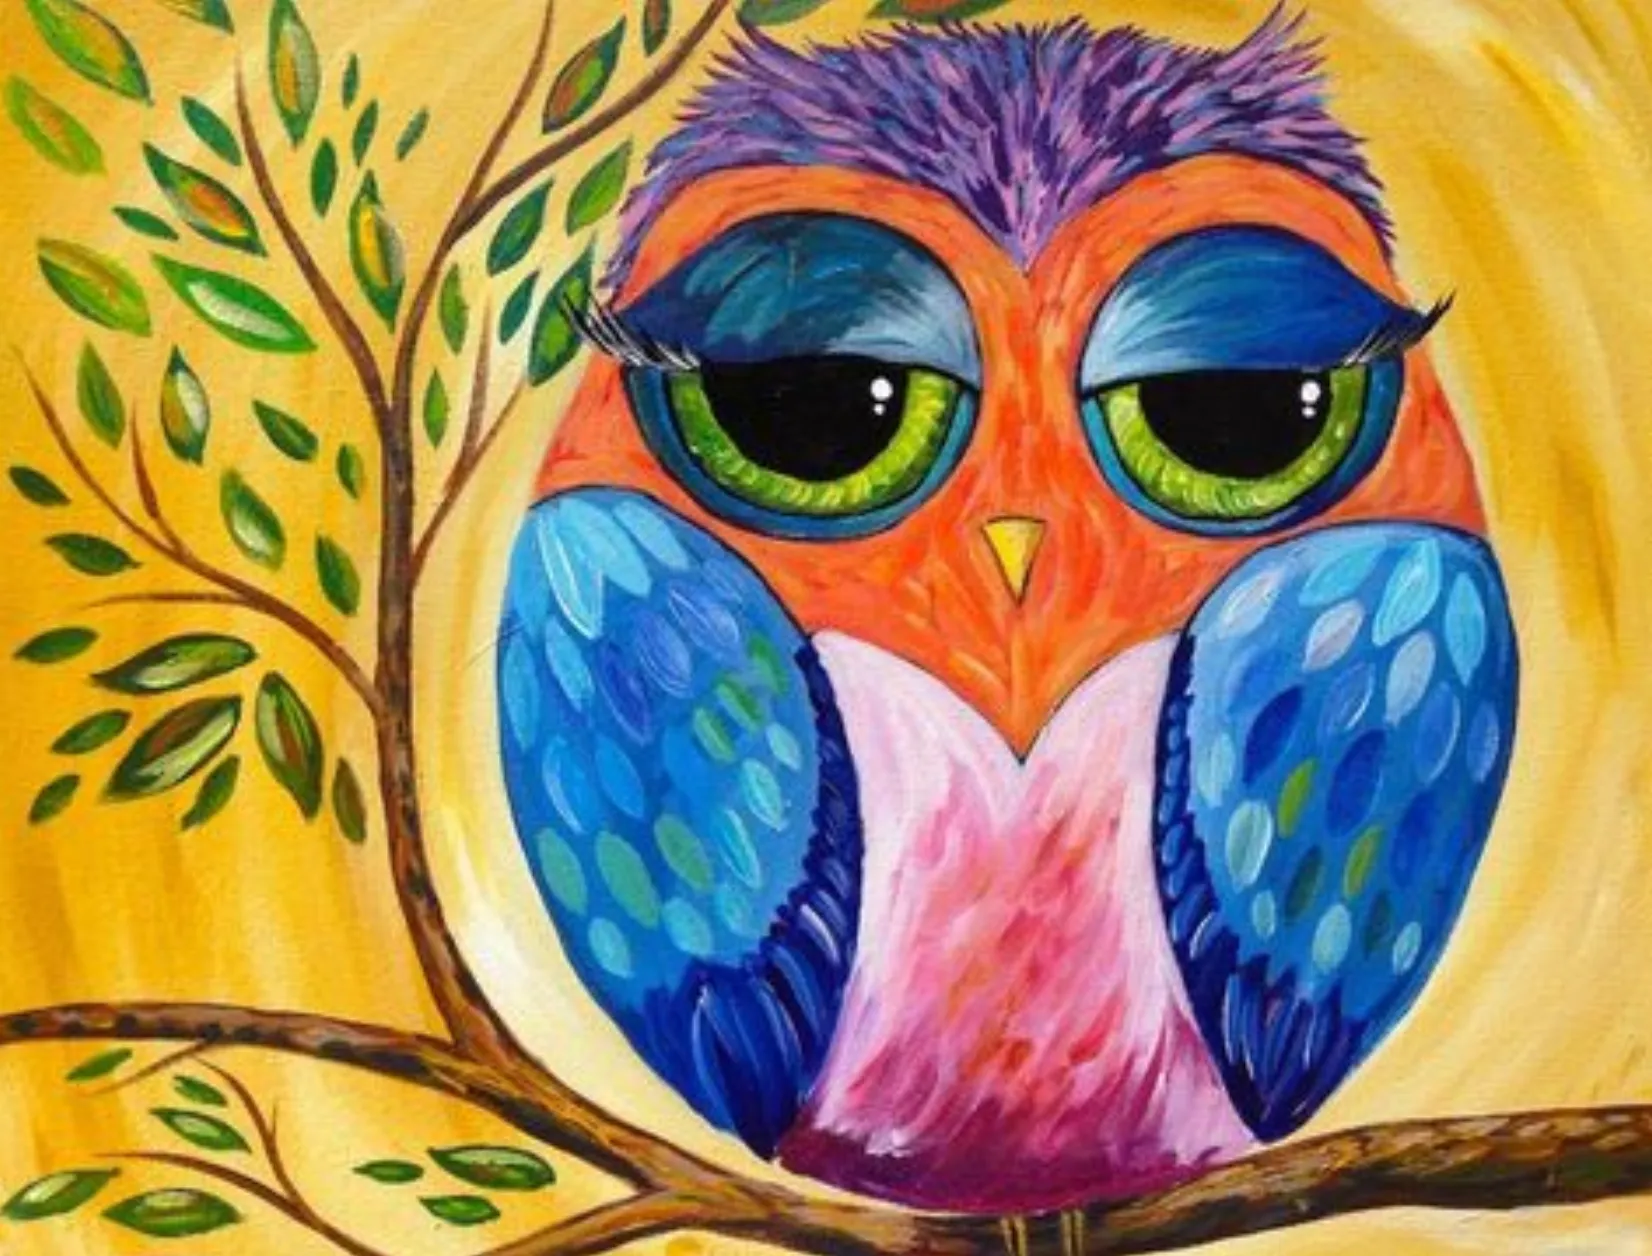
You can paint a serious owl as a beginner with the acrylic painting style.
Brown is the color you must have to start with this painting.
Make your own Peacock Feathers
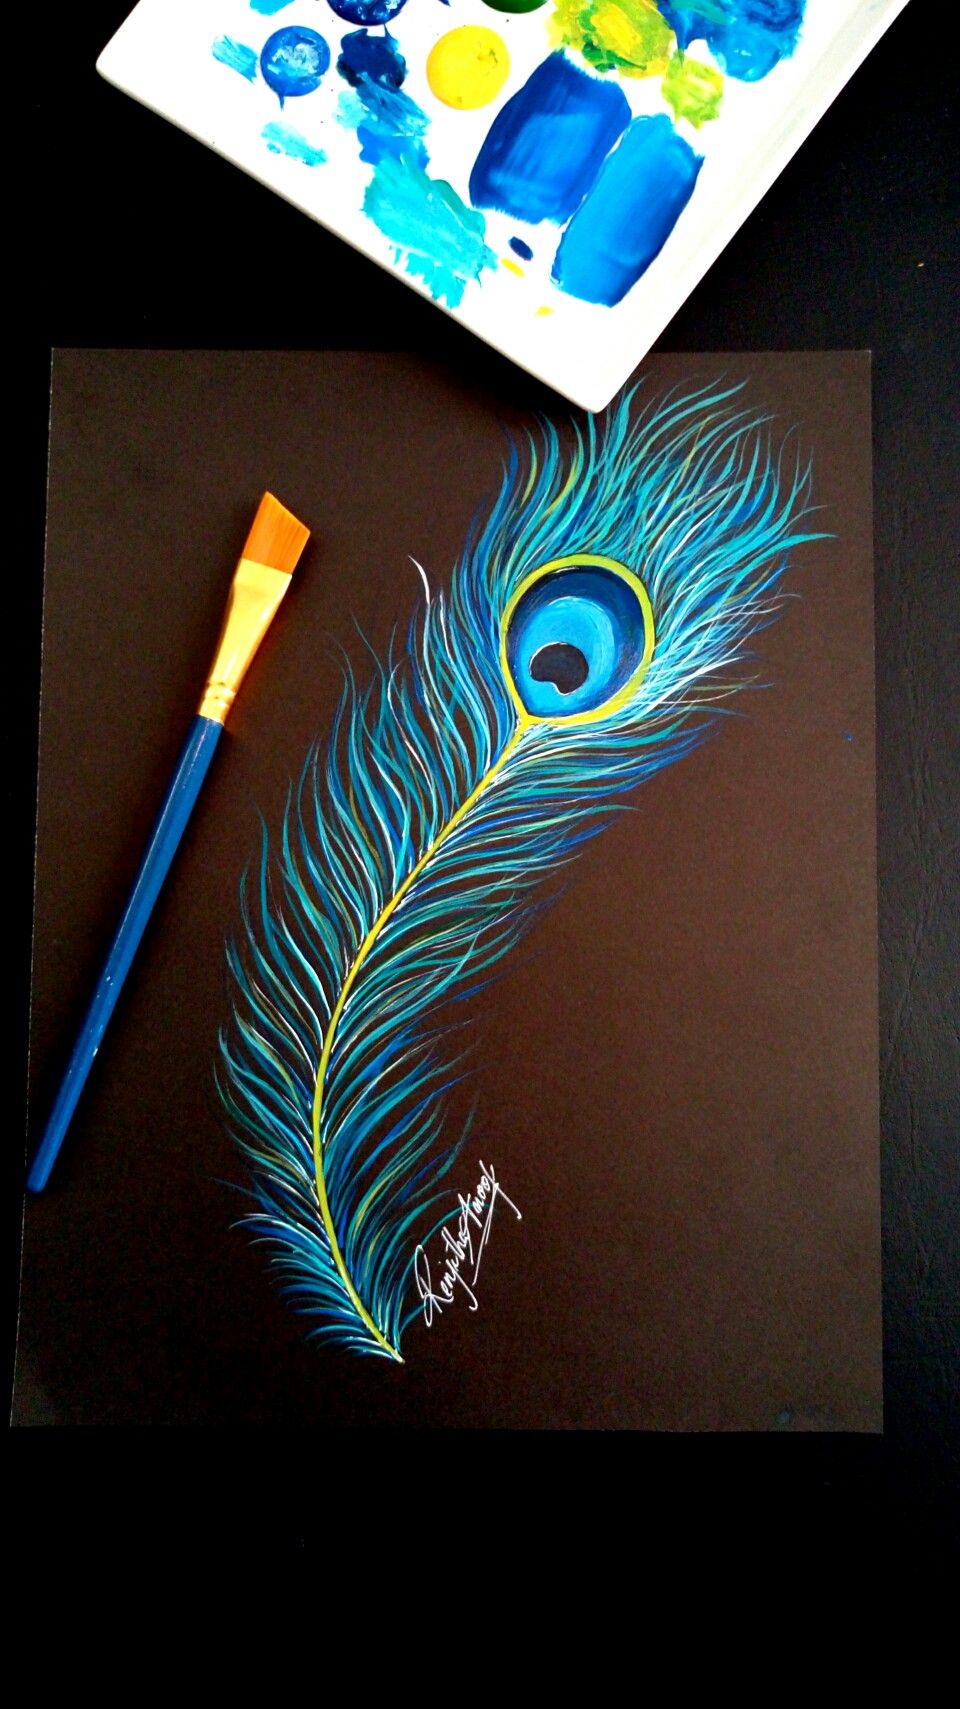
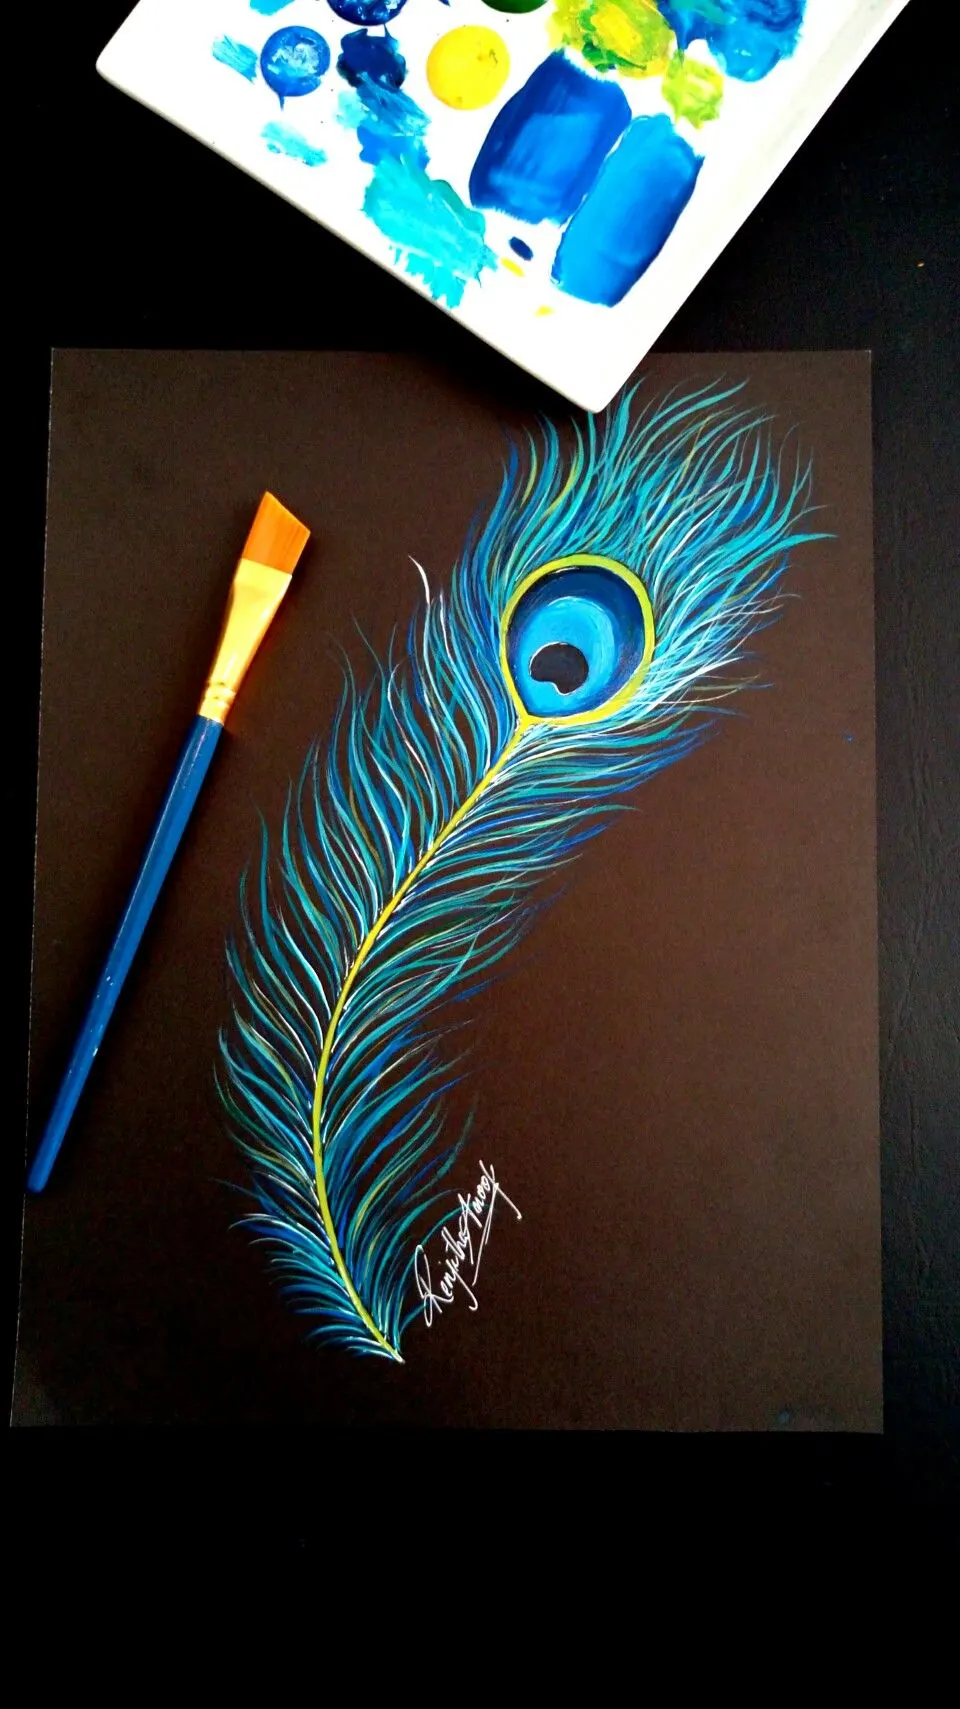
Even if you can’t get your complete peacock, you can definitely go for the peacock feathers.
Painting them solely would be comparatively easier for the beginners than getting to the entire peacock.
Monochromatic Butterfly with Warm Colors
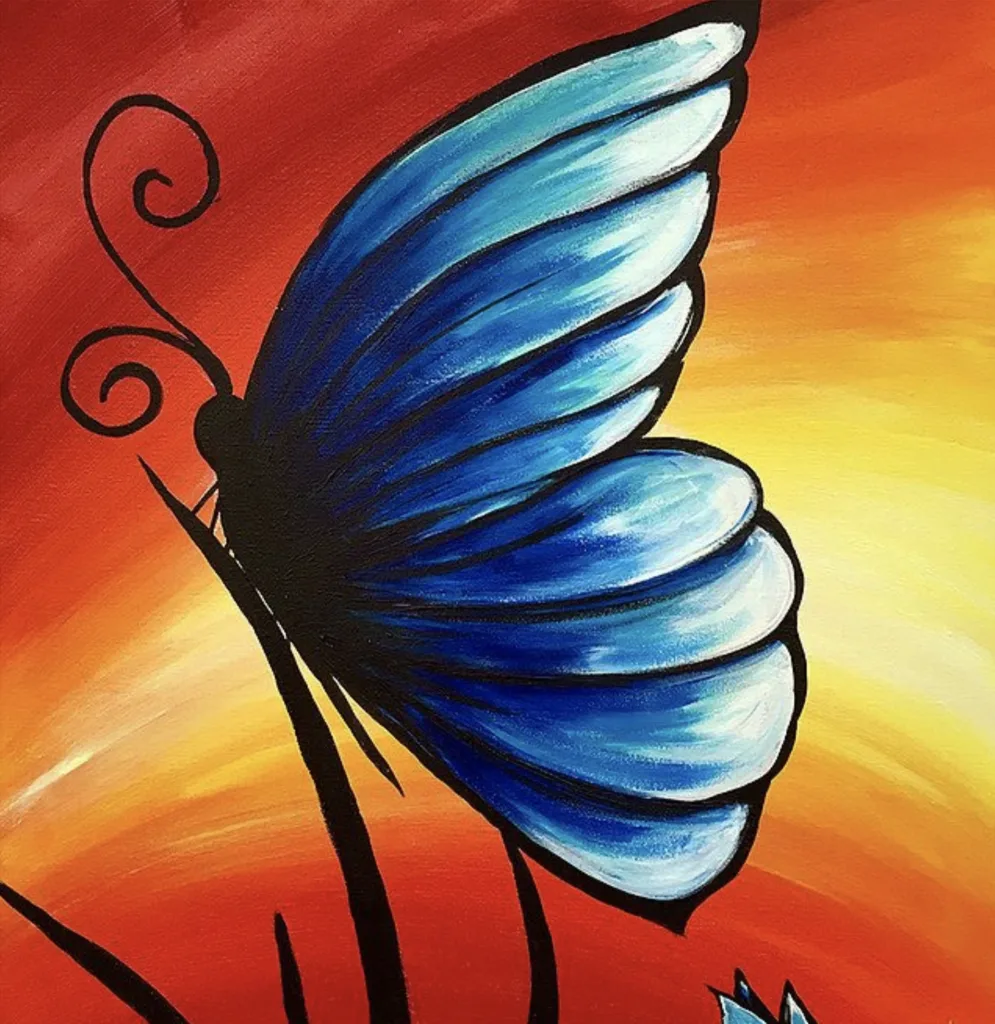
Most butterflies are of different colors but you can paint monochromatic butterflies with the acrylic painting style.
Bordering it with black could be one of the best options to go with.
Sailing Away
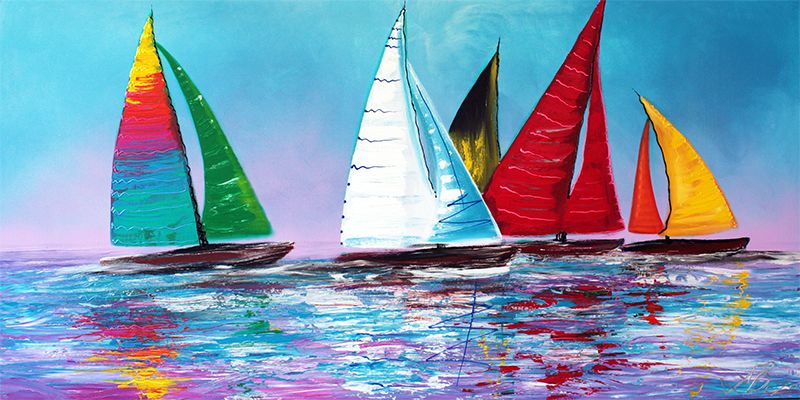

Sailing away portrays the story of the departing boat.
The fine finish of the painting idea might take a while, but you can give it a try.
Start Experimenting with Portraits

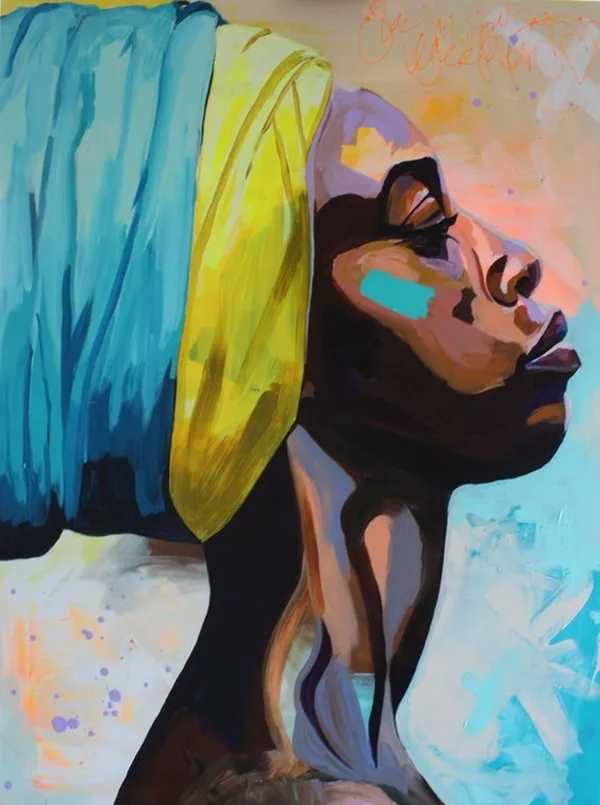
Not every artist can be good with portraits, especially in the acrylic painting style.
However, it can be a great starting point for beginners.
Underwater Scene
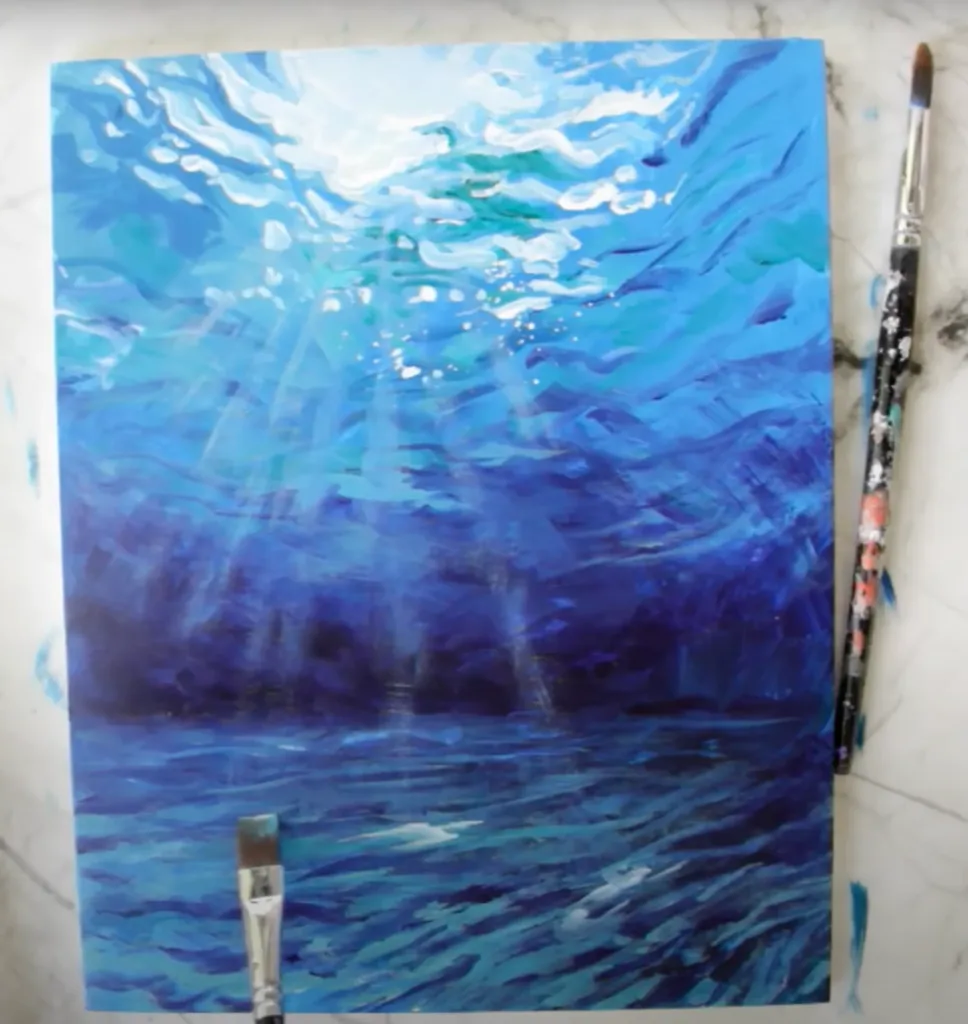
If you want to go under the sea, then painting an underwater scene can be a great choice to have.
To keep it simple, you don’t have to have any sea creatures.
Only paint water in your underwater painting.
Create autumn trees with a palette knife
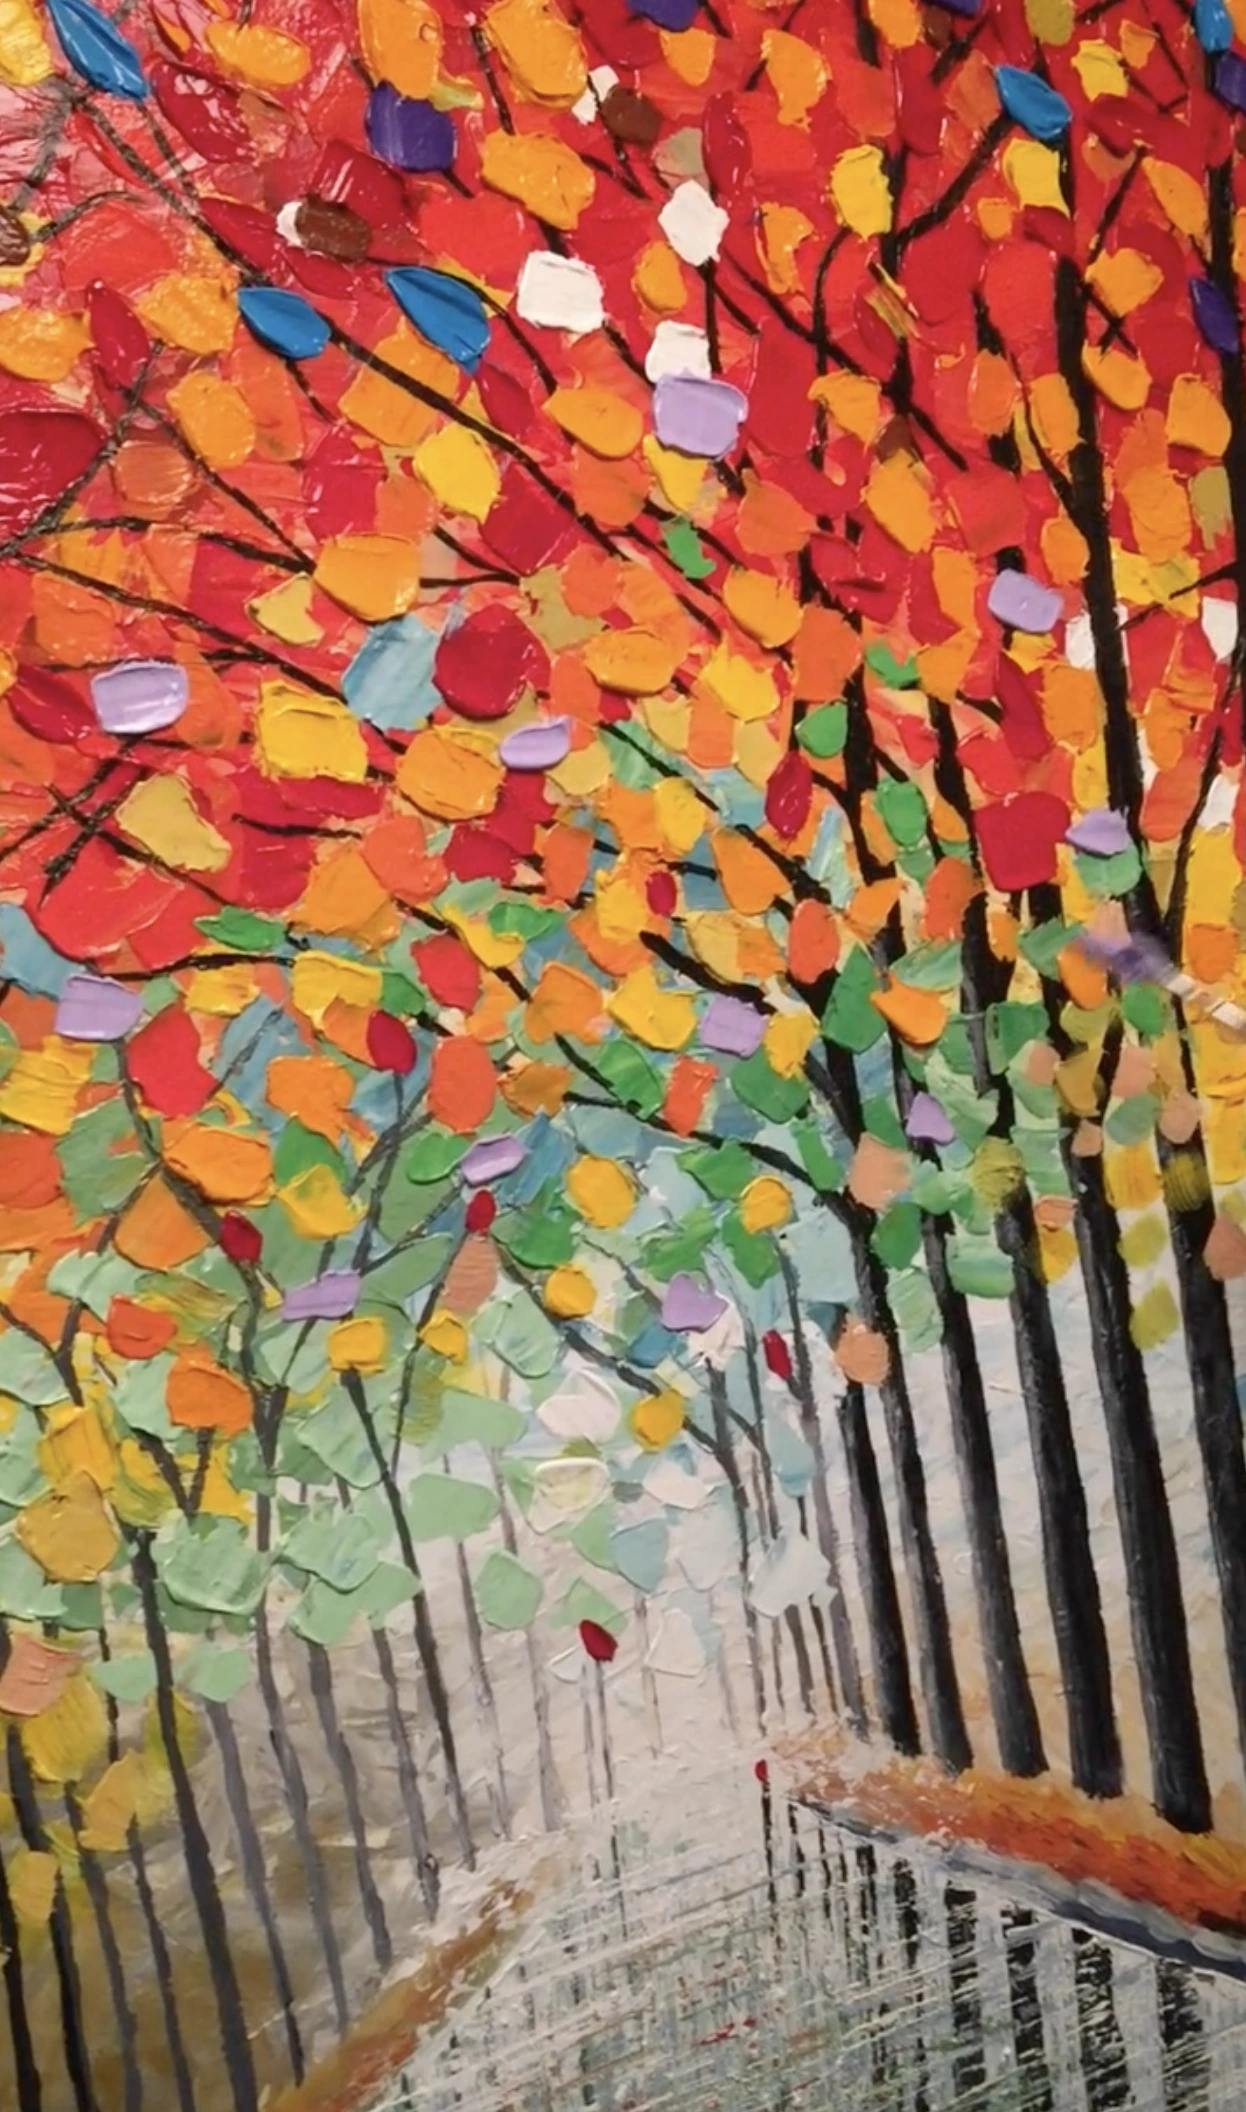
Using a palette knife is a technique that not everyone can specialize in.
You can use these unique knives for creating autumn trees.
Heart Acrylic Painting
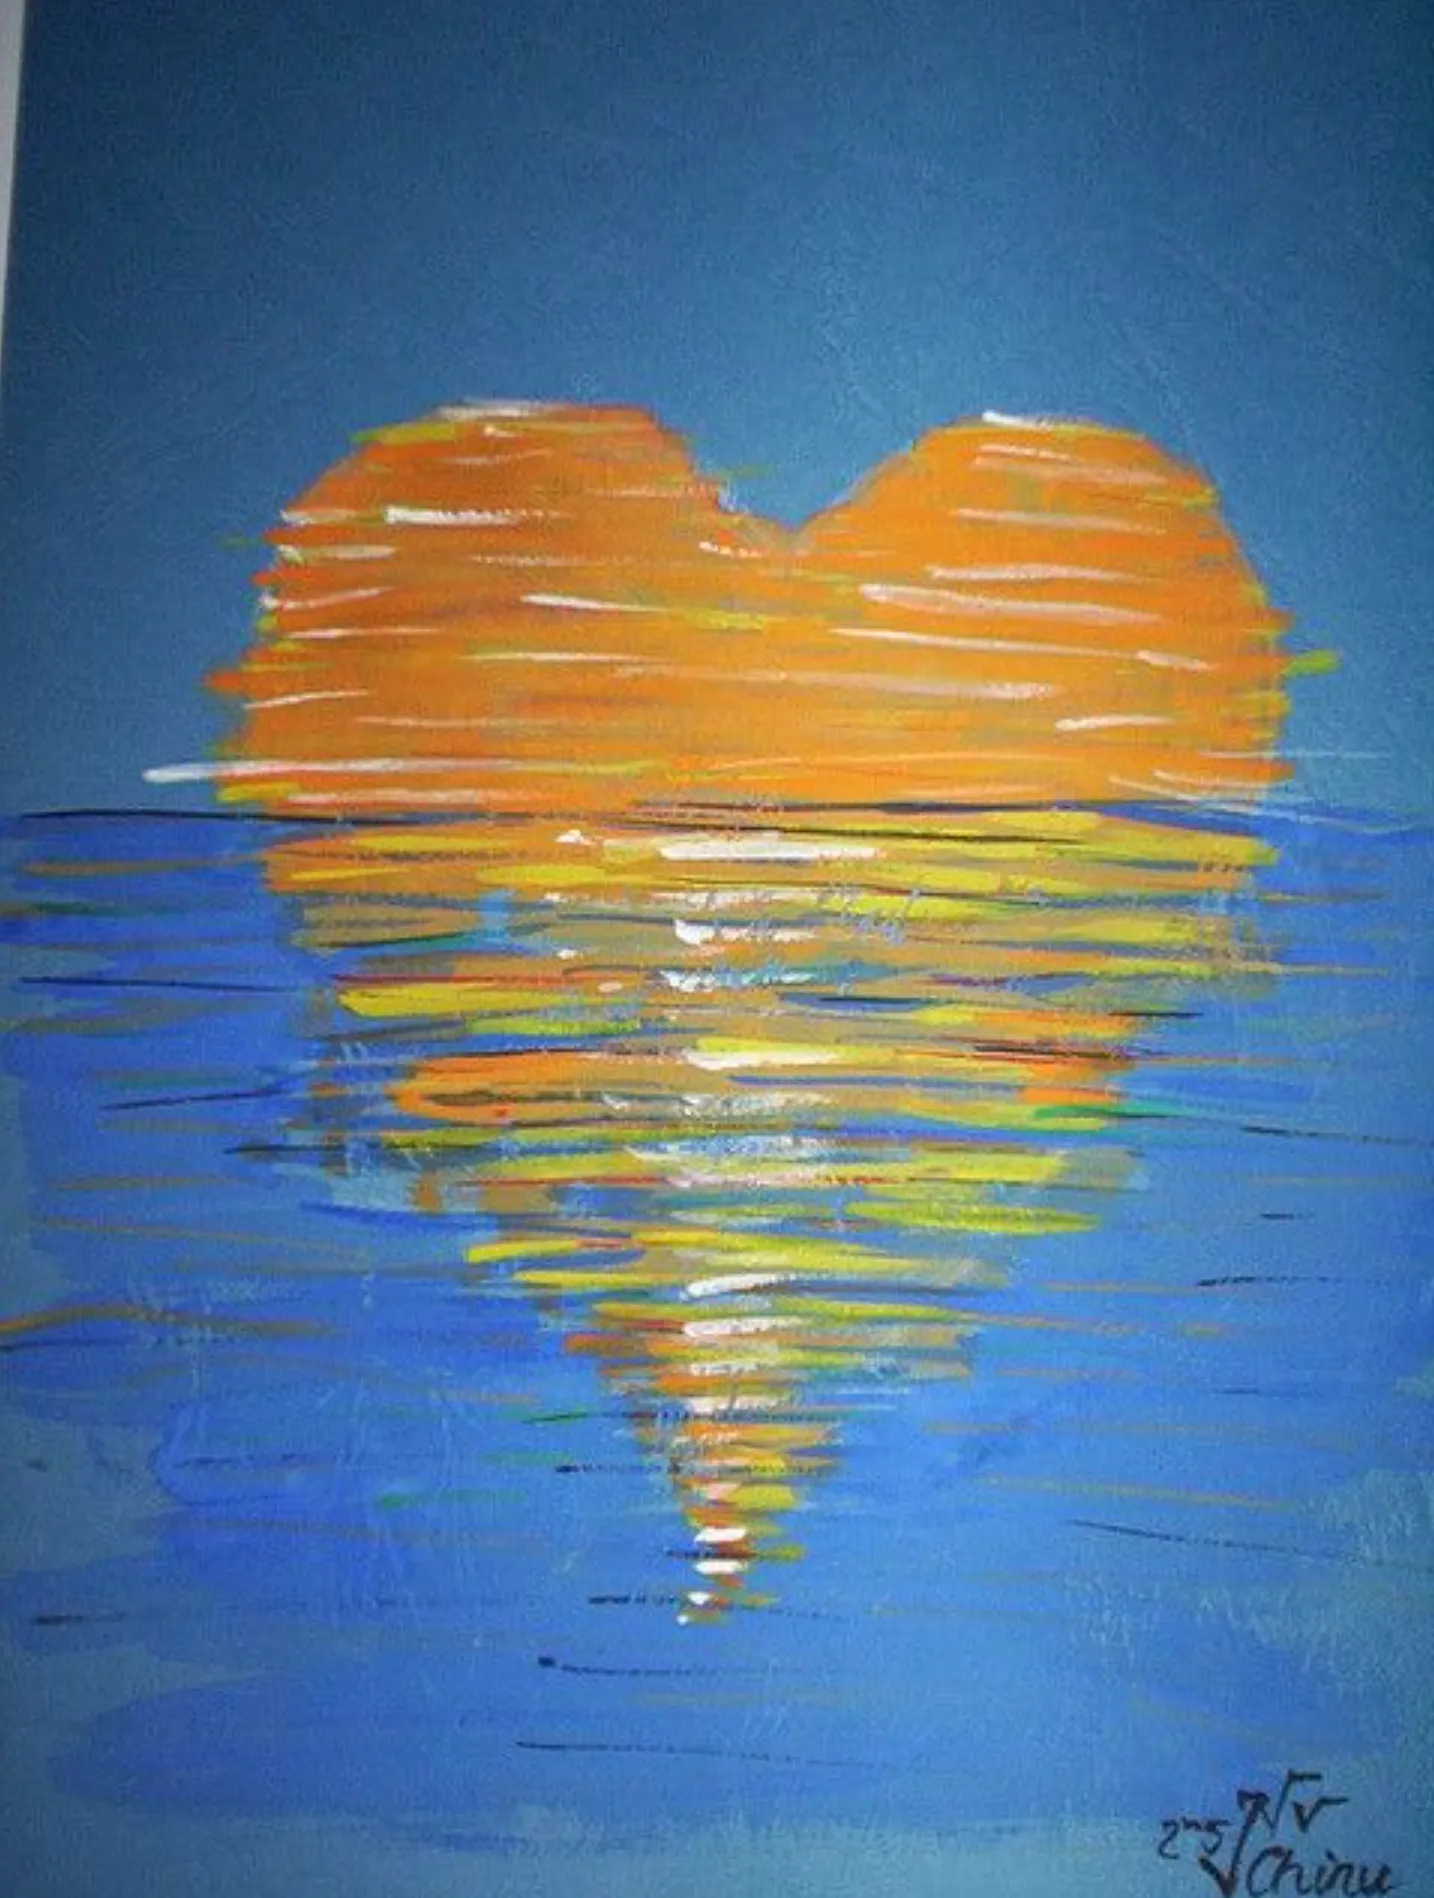
Your heart painting does have to be red particularly, you can create it with any color you like.
So go ahead and choose your color.
Guided Project Walkthroughs
Below are two beginner‑friendly projects written step‑by‑step so you can follow along in real time.
Project 1: Sunset Silhouette
| Step | Action | Tips |
|---|---|---|
| 1. Prep & Tape | Secure an 8 × 10 in canvas panel to a board with painter’s tape around all four edges. | Gives you a clean white border when tape is removed. |
| 2. Block the Sky Gradient | Working wet‑on‑wet, load a 1″ flat brush with cadmium yellow medium and paint the bottom third. Wipe brush, pick up cadmium orange, overlap and blend upward. Finish the top third with quinacridone magenta. | Horizontal strokes + a light spray of water keep blends smooth. |
| 3. Soften the Horizon | With a clean damp brush, gently sweep across color bands where they meet. | Do this within 3 min so edges stay soft. |
| 4. Dry or Heat‑Gun | Let the gradient dry 5–10 min (or 1 min with a hair dryer on cool). | Must be bone‑dry before adding silhouettes. |
| 5. Draw Silhouette | Lightly sketch a tree line or city skyline with a white charcoal pencil. | Keep shapes simple—no tiny details yet. |
| 6. Paint Silhouette | Use a round #4 brush and carbon black to fill shapes. For trees, dab vertical strokes for trunks, then stipple foliage. | If edges look fuzzy, wait 2 min, then crisp with masking‑tape touch‑ups. |
| 7. Add Foreground Interest | Optional: paint a lone figure or bird on a branch using a liner brush for drama. | Thin black paint with a drop of water for smoother lines. |
| 8. Peel Tape & Varnish | Remove tape while paint is just tack‑free. Once fully cured (24 h), add a gloss spray varnish. | Pull tape back at a 45° angle to avoid tearing. |
Project 2: Galaxy Night Sky
| Step | Action | Tips |
|---|---|---|
| 1. Base Coat | Cover the canvas with a medium layer of mars black. While still wet, sponge patches of phthalo blue and dioxazine purple randomly across the surface. | Natural‑sea sponges give organic cloud shapes. |
| 2. Create Nebula Glow | Mix titanium white with a tiny bit of quinacridone magenta (1 : 10). Dab this mix in swirling streaks; fade edges with a clean, damp sponge. | Keep the center of each nebula brightest. |
| 3. Star Splatter | Load an old toothbrush with thinned white paint (1 part paint : 1 part water). Flick bristles toward the canvas to create fine stars. | Cover your desk with newsprint—splatter travels! |
| 4. Highlight Constellations | Using a detail liner and thicker white paint, dot a few larger stars, then connect with faint lines to suggest constellations. | Vary dot sizes for depth; don’t overdo lines. |
| 5. Foreground Silhouette (Optional) | Paint a black mountain ridge or tree line along the bottom edge to frame the sky. | Use masking tape to keep the horizon crisp. |
| 6. Seal | After 24 h, finish with a matte varnish to unify sheen and protect the splatter texture. | Matte keeps glare off the dark surface. |
Estimated time per project: 45–60 minutes, including breaks for drying.
Next‑Level Tips & Creative Variations
Push beyond the basics by experimenting with texture additives, metallic accents, and mixed‑media pairings. These tweaks elevate simple ideas into gallery‑worthy pieces.
| Technique | What It Does | How to Try It |
|---|---|---|
| Texture Gels & Pastes | Add raised, tactile surfaces for rocks, bark, or abstract relief. | Mix heavy gel or modeling paste 1 : 1 with paint. Apply with a palette knife; sculpt peaks, then let dry overnight before glazing color washes on top. |
| Metallic & Interference Paints | Introduce shimmer that shifts with viewing angle—great for water highlights or galaxy stars. | Layer thin metallic streaks over dry base colors. For a subtle glow, glaze with transparent color over the metallic layer. |
| Dripping & Splatter | Inject energy and spontaneity—perfect for city lights, rain effects, or action abstracts. | Thin paint with 30 % water; load a liner brush and flick from wrist. Protect surrounding areas with cardboard shields. |
| Palette‑Knife Blends | Create bold, chunky color transitions that catch light differently than smooth brushwork. | After blocking in shapes, “butter” thick paint across edges with a knife in one‑direction pulls, leaving ridges intact. |
| Collage Elements | Add vintage paper, sheet music, or fabric scraps for dimension and narrative. | Seal collage pieces to the canvas with matte medium, let dry, then integrate with translucent paint glazes. |
| Glitter & Mica Flakes | Give star fields, snowy scenes, or fairy‑light effects a real sparkle. | While paint is still tacky, sprinkle fine glitter lightly; tap off excess once fully dry and seal with gloss varnish. |
| Subtractive Stenciling | Lift wet paint through a stencil for sharp negative shapes. | Lay a plastic stencil over the freshly painted area; press a damp sponge to remove paint, revealing the color underneath. |
| Acrylic Skin Overlays | Peel thin dried layers to collage later for stained‑glass effects. | Spread leftover paint on a sheet protector, dry overnight, peel, cut shapes, and adhere with gloss medium onto new work. |
Pro Tip: Introduce only one new variation per painting session. That way, you’ll isolate what works (and what needs tweaking) without overcomplicating your learning curve.
Troubleshooting Common Acrylic Issues
| Problem | Likely Cause | Quick Fix |
|---|---|---|
| Streaky Coverage | Using a brush that’s too dry or stiff; thin paint layer over a highly absorbent surface. | Dampen brush slightly, load more paint, and apply in criss‑cross strokes. Add a drop of glazing medium for smoother flow. |
| Muddy Colors | Over‑mixing complementary hues on the palette or canvas. | Clean brush between color families; mix on palette, then layer rather than blend if tones start dulling. |
| Paint Dries Too Fast | Low humidity, warm room, or thin application in direct airflow. | Mist the palette and canvas lightly every few minutes; add 5 % retarder or slow‑dry medium to paint. |
| Cracking / Crazing | Thick impasto layer drying over a still‑wet, thinner underlayer. | Let each layer dry touch‑hard before adding heavy‑body paint; mix a bit of flexible gel into thick layers to reduce tension. |
| Peeling or Flaking | Painting on an un‑primed, oily, or dusty surface. | Always work on gessoed canvas/paper; wipe surfaces with a lint‑free cloth before painting. |
| Cloudy Varnish Finish | Applying water‑based varnish in high humidity or over paint not fully cured. | Wait 72 h (or manufacturer’s recommendation) before varnishing; ensure room is under 60 % humidity; apply thin, even coats. |
| Visible Brush Hairs | Old or low‑quality brushes shedding into wet paint. | Remove stray hairs with tweezers while paint is wet; invest in mid‑grade synthetic brushes and clean them gently to prolong life. |
| Lifted Layers When Glazing | Layer beneath wasn’t completely dry or glaze is too watery. | Dry with a hair dryer on cool for 2 min, then let stand 10 min; use medium‑rich glazes (≤ 30 % water) and soft strokes. |
| Uneven Sheen (Glossy Patches) | Mixing different paint brands/mediums or inconsistent thinning. | Once painting is finished and fully dry, apply an isolation coat (2 : 1 gloss medium : water) before final varnish to unify sheen. |
Tip for Future Sessions: Keep a notebook of problems and fixes encountered. Over a few paintings, patterns emerge—helping you fine‑tune technique and avoid repeat mistakes.
How to Clean Acrylic Paint Brushes
Here’s a guide on how to clean acrylic paint brushes.
How to Seal an Acrylic Painting
Learn how to seal acrylic paintings with the right varnish and techniques to protect your artwork from dust, UV damage, and fading for years to come.
Conclusion
It is quite easy to learn how to use acrylic paints.
Certain acrylic painting techniques can be developed over time such as merging several colors or working with messy or clean paints.
But the above techniques will surely help you get started as a beginner.
Before applying these techniques, you must have suitable materials needed for acrylic painting.
Get the best paper and brush for acrylics.
So, what are you waiting for now?
Grab your canvas or an art journal, apply these painting techniques, and have some fun in creating a masterpiece. Happy Painting!
Frequently Asked Questions
How do I thin acrylic paint without weakening it?
Mix in up to 30 % clean water for a fluid feel, or use an acrylic glazing medium (recommended) to retain pigment strength and adhesion while increasing transparency.
How long should I wait between layers?
A thin layer feels touch‑dry in 10–20 minutes, but give it at least 30 minutes before over‑painting to avoid lifting. Heavy impasto needs several hours.
Can I mix different brands—or student and artist grades—in one painting?
Yes. Acrylic binders are chemically similar across brands; just note that student colors contain more filler, so adding a bit of artist‑grade pigment boosts vibrancy.
My paint keeps drying on the palette—what can I do?
Mist the palette every 5 minutes with a spray bottle, use a stay‑wet palette with a damp sponge and parchment layer, or add a few drops of slow‑dry (retarder) medium.
Do I need gesso on a “pre‑primed” canvas?
Most store‑bought canvases have a basic factory gesso, but an extra hand‑brushed coat smooths texture and improves paint grip—worth the two‑minute effort.
Can I paint acrylics outdoors?
Absolutely. Fast drying helps in plein‑air sessions. Keep a fine‑mist sprayer handy and shade your palette to slow evaporation in hot, windy conditions.
How do I remove dried acrylic from clothing?
While still wet, flush with cold water and mild soap. Once dry, dab isopropyl alcohol on the stain, scrub gently with a toothbrush, then launder as usual.
Which brushes are best for acrylics?
Synthetic nylon or taklon brushes resist water damage and snap back well. Flat‑, filbert‑, and round‑tip sets cover most techniques from blocking to detail work.
My varnished painting sticks to the glass when framed—how do I prevent that?
Allow the varnish to cure a full week, then add spacers or a mat so the artwork never touches the glazing. Alternatively, frame without glass for a canvas piece.
Are acrylic paints safe for kids?
Most student‑grade acrylics are non‑toxic (look for ACMI AP seal). Still, supervise young painters, avoid ingestion, and wash hands after use to be safe.