

Do you think drawing a dragon is hard? Many people are initially hesitant on learning how to draw a dragon because they think it’s not easy.
Don’t worry, we’re going to show you how to draw a realistic dragon step by step without it being a chore.
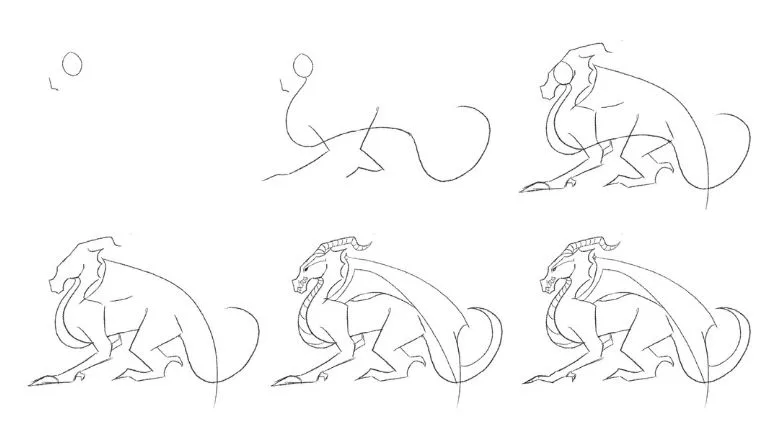
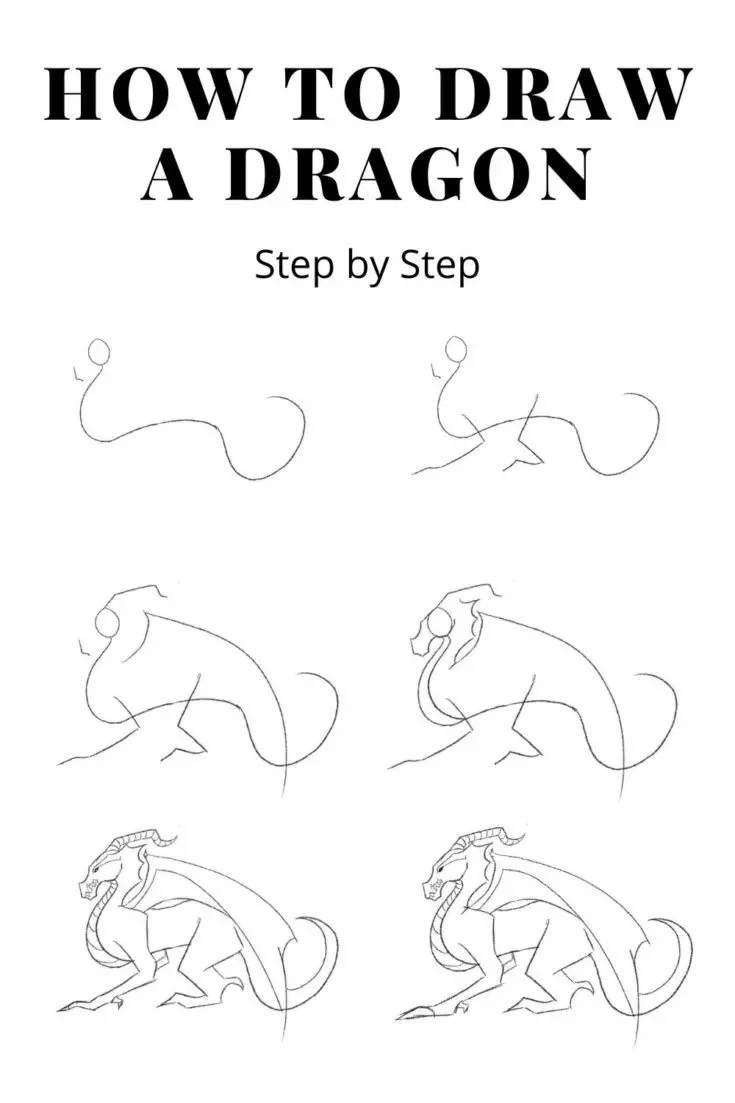
Did you know you can become a master at drawing dragons in no time by following these 12 steps? These visuals will help make the process of how to draw a dragon completely simple that anyone can follow.
Let’s get started on how to draw a dragon!
DISCLOSURE: This post contains affiliate links, meaning I get a commission if you decide to make a purchase through my links, at no cost to you. I only recommend products that I’ve used or really like. Please read my disclosure for more info.


Have the right drawing Tools
Before we get started, it’s important to have the right drawing tools. Having the right tools for the drawing will help your drawing process.
You’ll need a minimum of a set of pencils, paper, and an eraser for the how to draw a dragon step by step guide. I’d recommend these drawing tools:
Step 1: Drawing a dragon’s head

Drawing a European dragon is not as hard as it looks! Let’s jump right into how to draw a dragon head.
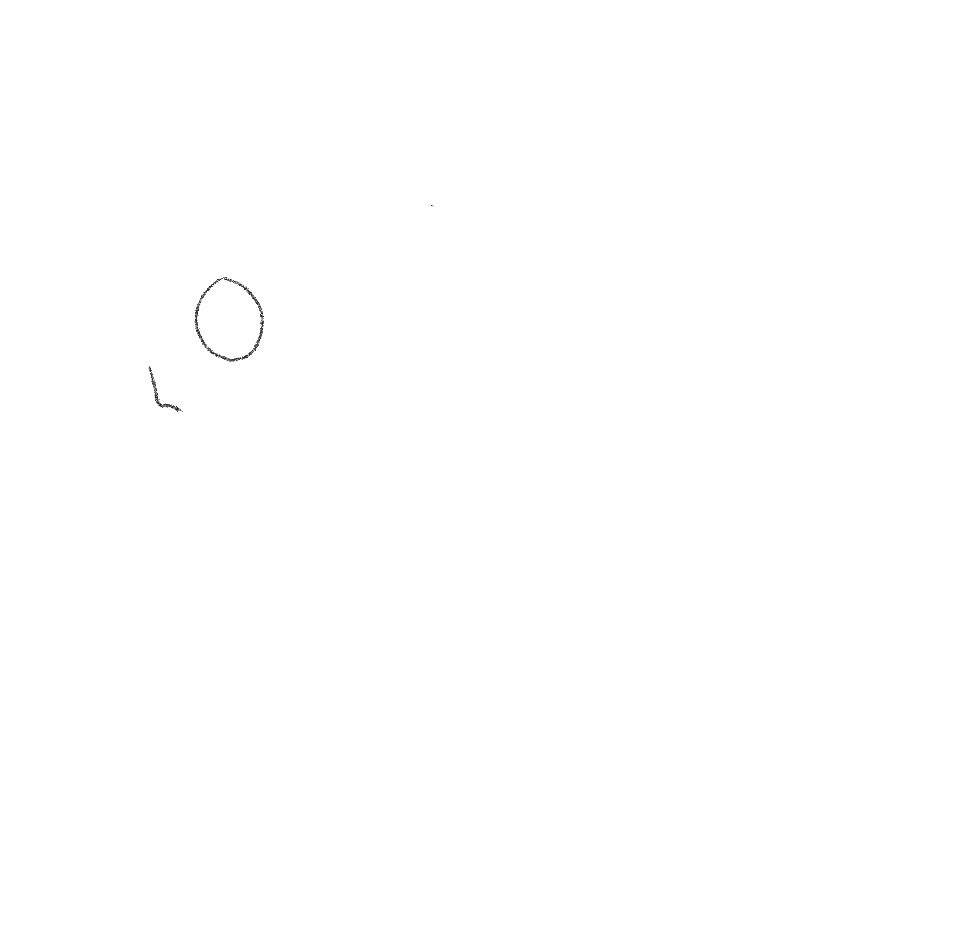
First, you want to start with the head shape.
For the how to draw dragon step by step, the head is a great place to start.
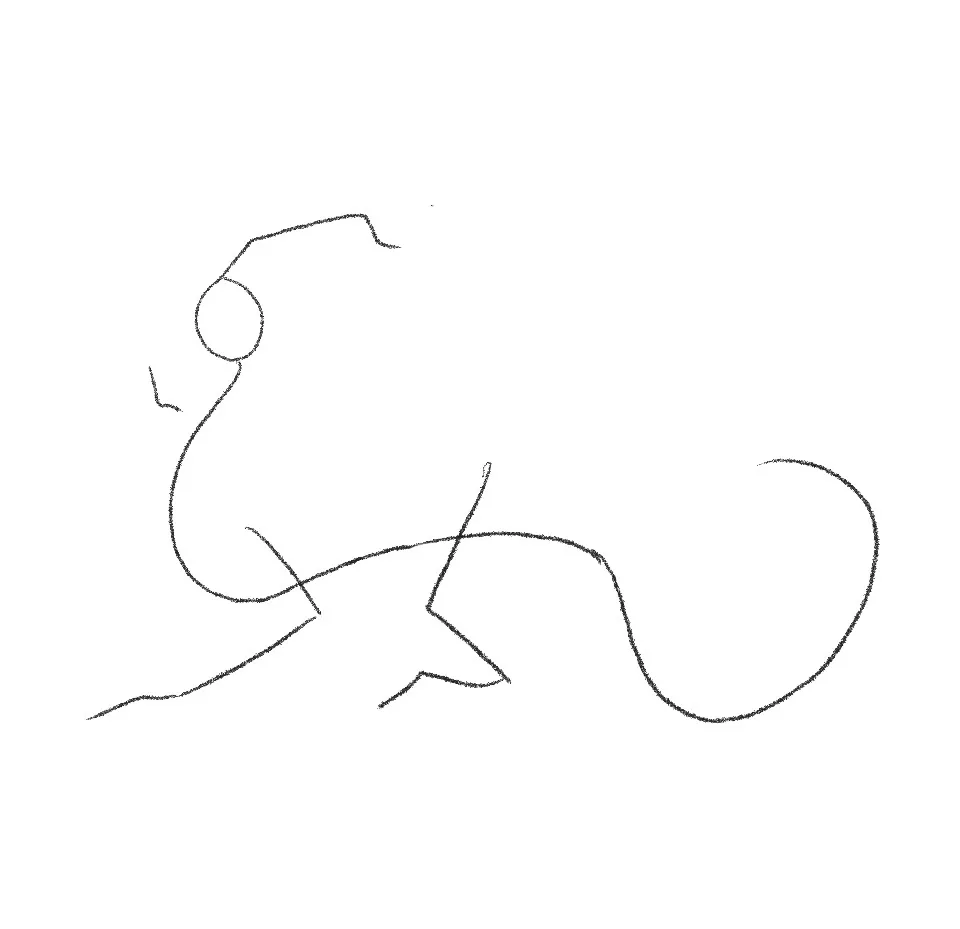
Create a circle – this will be your head, and then to the bottom left create a carrot as this is going to guide you where to place the snout.
Step 2: Draw line for dragon’s body

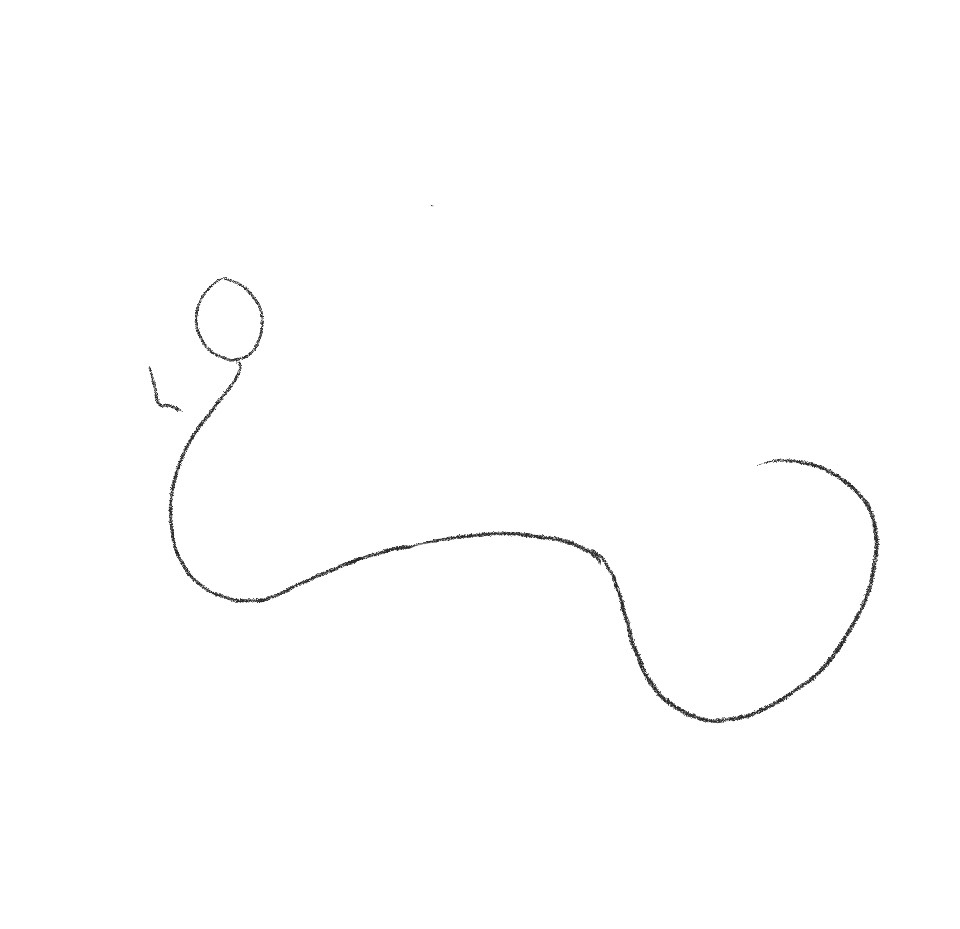
The next step for an easy dragon drawing step by step is getting the line of the body. This is the next step for how to sketch a dragon.
Starting from the middle-bottom of the circle we’re going to draw a squiggly line in a vague shape of a “W”.
Don’t make it pointy like a W though, the edges should be round and fluid – just use the idea of a W for the general idea of where the peaks and dips should be.
This is going to guide the body.
Step 3: Draw line for dragon’s legs
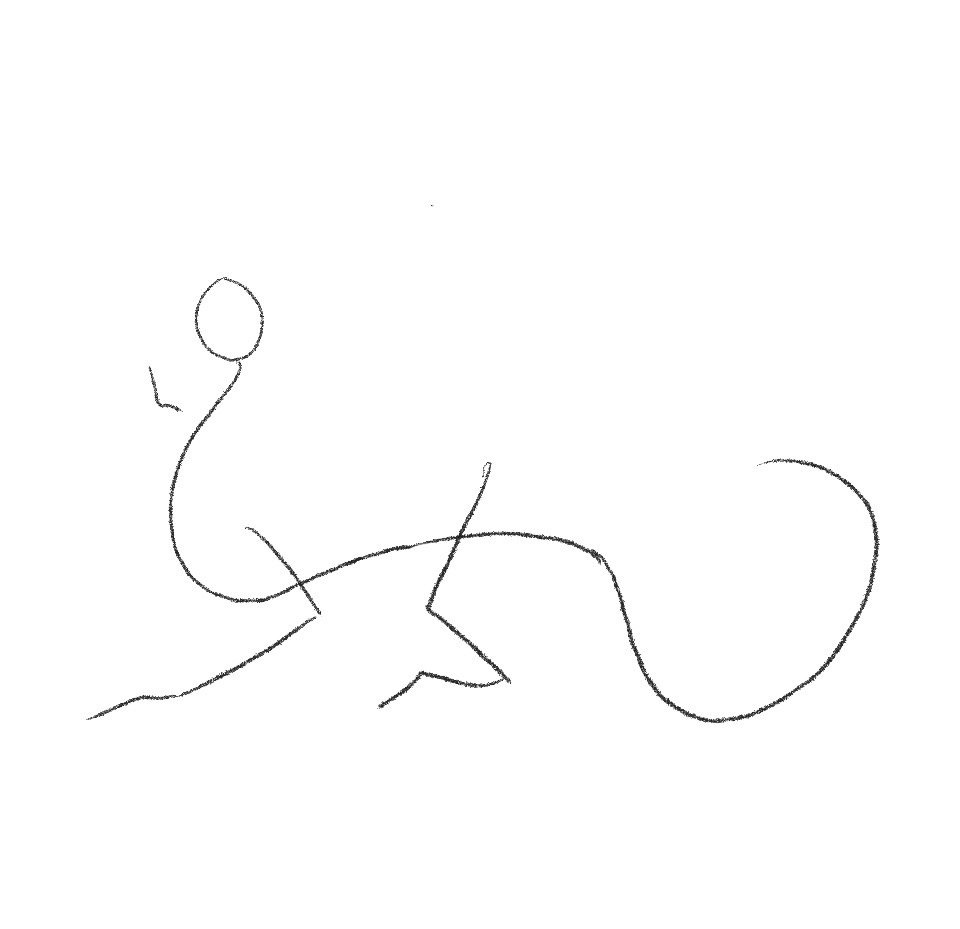

Now we’re going to outline where the legs are. Here is where things get a bit tricky when considering how to sketch a dragon.
Starting on how to draw dragon legs, the front leg will be shaped mostly like a > symbol with the point being the elbow.
Then add a little line extending into the ground for the paw, make sure it has a slight lift from the end of the > to account for the wrist!
For the hind leg, we’re going to create a line in the opposite shape: < with the point being the knee!
Now for the back foot create a smaller line going outwards at the stopping point of your leg line so a small > can be seen.
From there create a downward line for the claw!
There you have it, a step by step drawing dragon legs!
Step 4: Draw dragon’s horn

Now we’re going to go back up to the head for the horns!
The horns are a crucial step for how to draw a realistic dragon step by step.
At the top of the circle create a small upwards line, then swoop that line into a downward arc and finally a little flourish back towards the top.
Be sure to make that line have some edges so it’s not a smooth curling line – we want some angular shape to the horns when we do a step by step drawing of a dragon.
You can make these horns as large as you like, but try to remember that horns have weight and the size of the head needs to be large enough to support them!
Step 5: Draw dragon’s wings
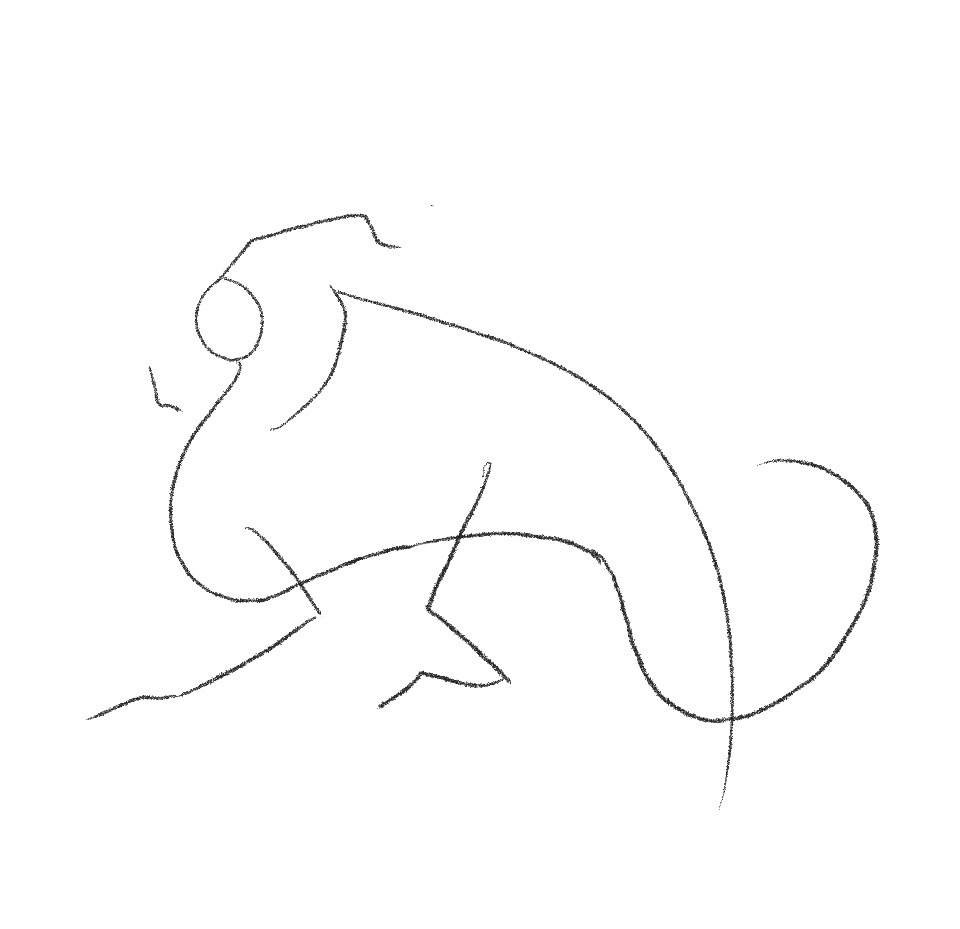

Time for wings!
When learning how to draw a dragon step by step, the wings can be one of the most counterintuitive parts to proportion and place.
Find where you started the front leg line and giving plenty of space between that and the start of your wing you’re going to draw a line upwards at a slight angle.
Then connect that line to a curved line going down to guide where the wing is going to fold over itself, it’s okay if it crosses over the tail line!
Step 6: Drawing shape of the dragon


Time to start building the shape of the dragon!
For our step by step dragon drawing, once again we’re going to start at the head.
From the top of the circle continue the horn line to extend past the circle just a little bit, then you’re going to dip that line all the way to the snout where you’ll connect it in a slight peak.
This dragon has a very angular style as you can start to see! You can change it up to be your own way after you’ve learned a bit more about how to draw dragons.
From the peak, come down on an angle to create it’s top lip.
Now, the bottom lip comes to close just below the top lip due to the way the teeth close in on each other, so you’re going to want to come in a bit with your line before adding the squared-off chin.
This will give you a more “natural” look to the jaw. Finally, in an upward arc, you’ll connect the jaw to the circle.
And that’s how to draw a dragon easy.
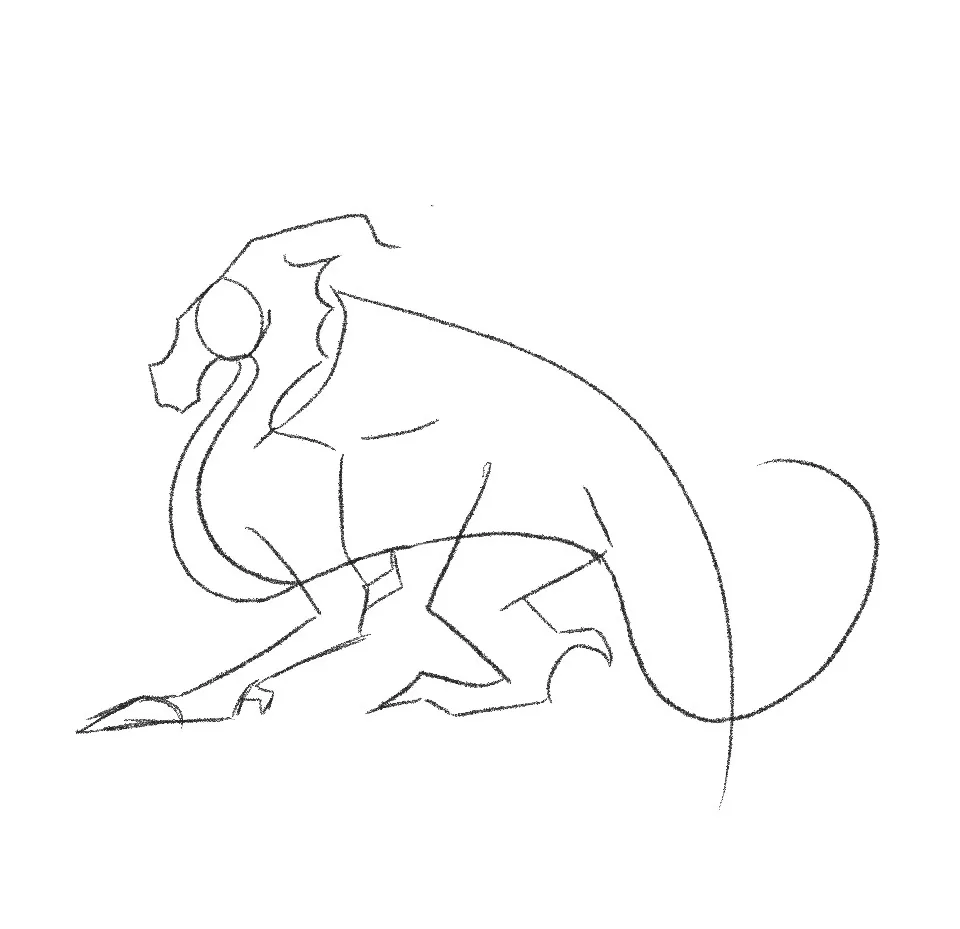
Step 7: Add dragon’s flared scales

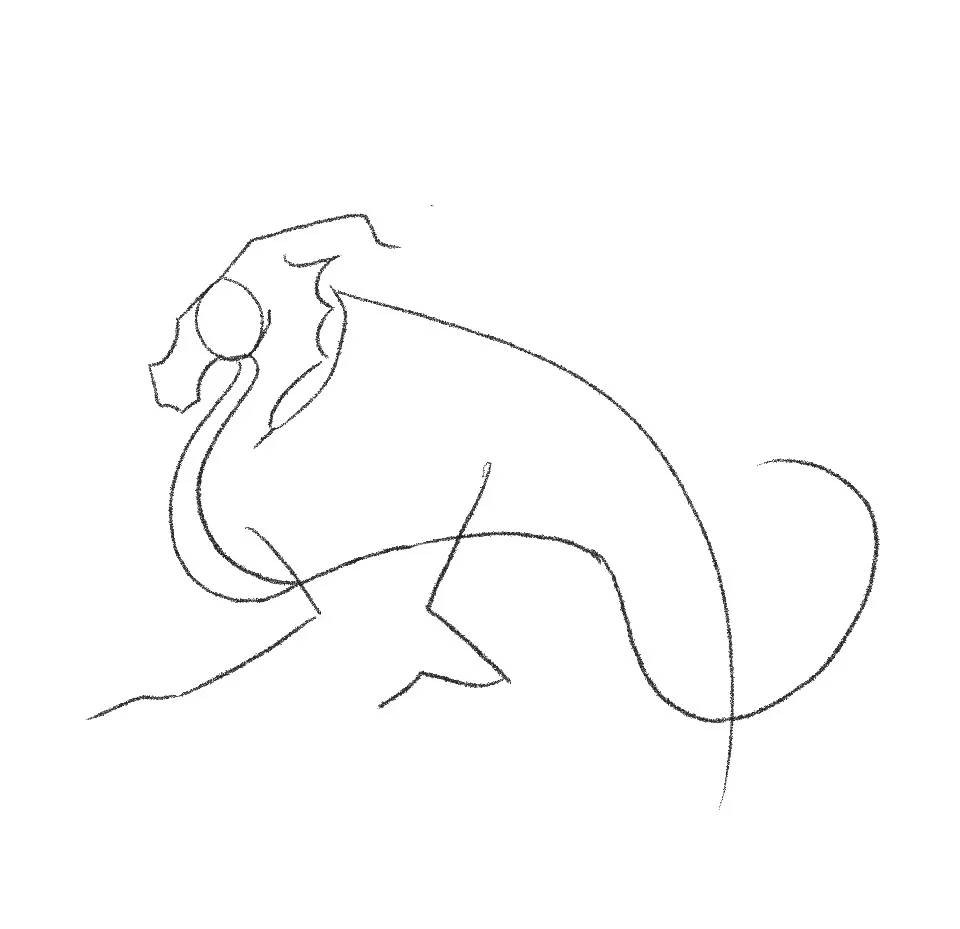
At the back of the circle, we’re going to add flared scales!
This is an easy part of how to draw a dragon step-by-step.
Create a batwing-like shape with the peaks facing right.
Then, at the circle of the head, extend a small line upwards from the bottom of the circle to show where the jawline meets the neck.
Finally, let’s start fleshing out the body of the dragon step by step.
This is one of the more important steps to draw a dragon.
Create a backward S shape with a second line starting under the jaw of the dragon, make sure the bottom is wider than the top to keep perspective in mind.
Finally, make a little connecting line for the wing joint to help guide where the shoulder will begin.
Not bad for drawing a dragon step by step, right?
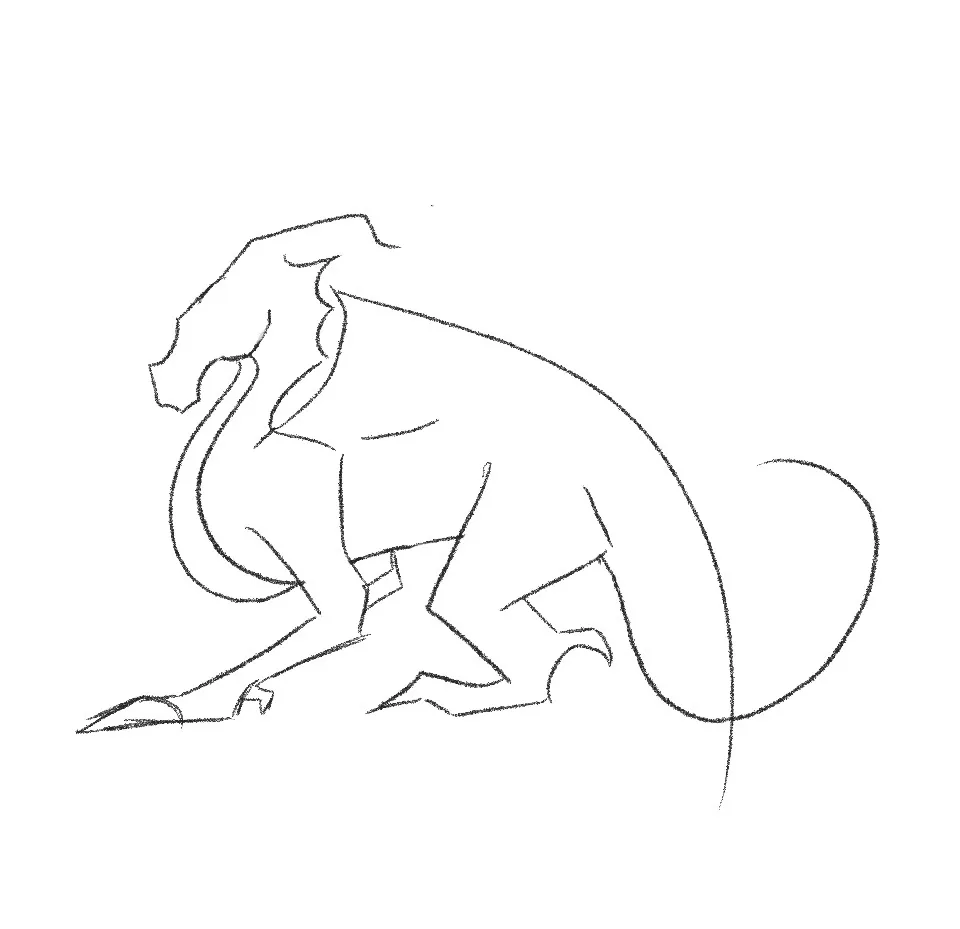
Step 8: Draw the dragon’s legs, shoulders, and feet
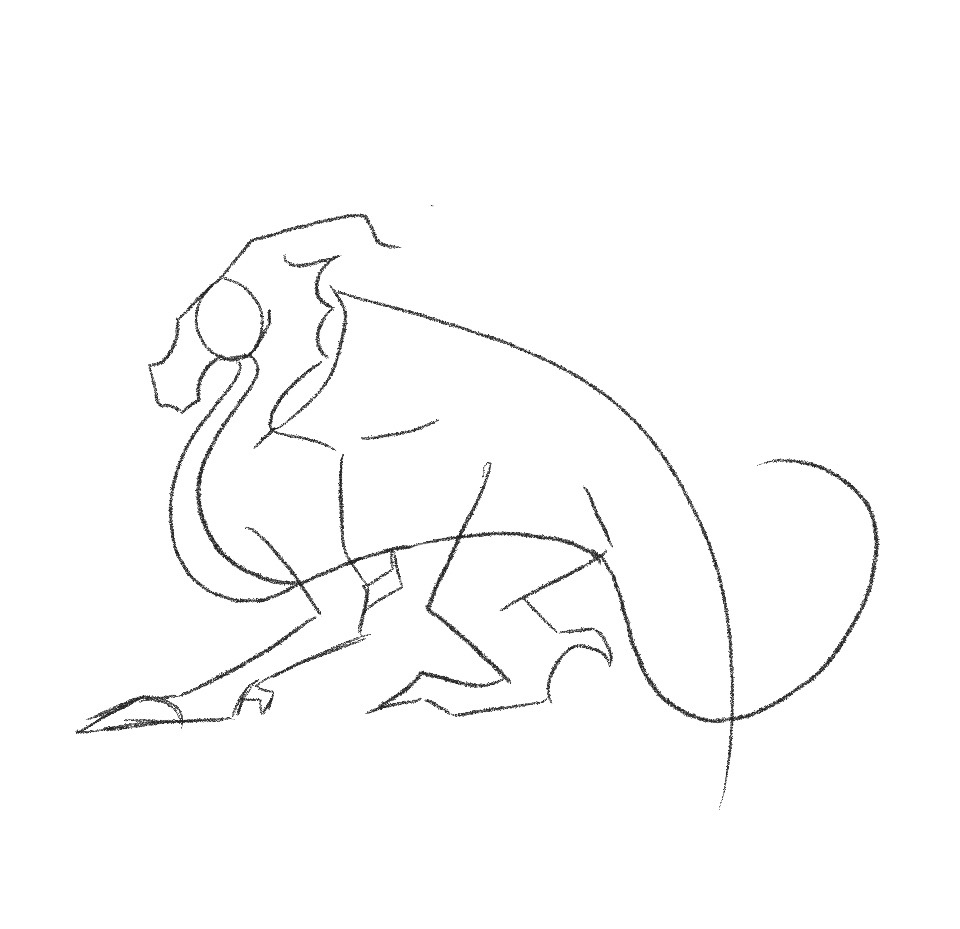
Now, let’s cover an easy dragon drawing step by step for the limbs.
Drawing the drawing legs
One of the steps to draw a dragon is its legs.
Starting from the front leg, find the shoulder line you just made in the previous step.
Create a line going the opposite way, not too long but large enough to have some muscle on this dragon, he’s big!
So his body should reflect that.
Take into consideration how your own arm looks, the shoulder flows into the tricep/bicep, then you have your elbow flowing into your forearm.
It’s the same theory here!
It’s the same theory here! That’s how to draw dragon legs and feet!
Drawing the dragon shoulder
Next step for how to draw a dragon step-by-step, the shoulder.
Create a nice large shoulder with a triangle shape going downwards toward the peak of the > symbol from earlier steps; you’re going to close the width as you go down.
Once you get to that peak come out in a V shape to the right ending with a little tick inwards (this is your elbow claw), then come back into the elbow so your claw is shaped like an upsidedown L.
Now with a slight flick back to the right (very small), we’re going to bring the line in the same direction as the guideline.
And there you have the dragon drawings step by step for the dragon’s shoulder.
Now it’s time for the dragon foot
For the foot, we’re going to start with another claw – think of the type of extra claws wolves and dogs have. It’s not the easiest part of how to draw dragons, but some reference photos should help.
Create a small claw then from the bottom of it extend slightly downwards now bring that line horizontally across to meet where you planned out your feet!
I like to create an arc on the foot here to remind myself where the “fingers” will be later – this is optional
Time for the back leg now!
Ok, there’s one last part to how to draw dragon legs and feet, the back legs.
With the same theory as the front leg, find the beginning of the line you created earlier.
This time we’re going to create sort of a “butt” looking muscle.
Consider it a second shoulder, but for the hind legs!
This will be much wider and larger than the front legs as the dragon carries its center of balance in the back. This is the next part of our step by step drawing dragon journey.
Create a triangle with the point facing towards the tail a good distance from the beginning of the guideline, we want a beefy leg here.
The ending of that triangle line should be a little bit away from the point from the < line we made earlier.
This is the knee! Now match the direction of the line going towards the right, but don’t go too far!
We need to create a heel claw!
For this one, you’ll want the underside of the claw to be an arc going downwards into the foot.
Now finish off your foot with a few lines matching the guideline from earlier.
You’ve now finished the major step by step drawing of a dragon!
Step 9: Erase overlapping lines
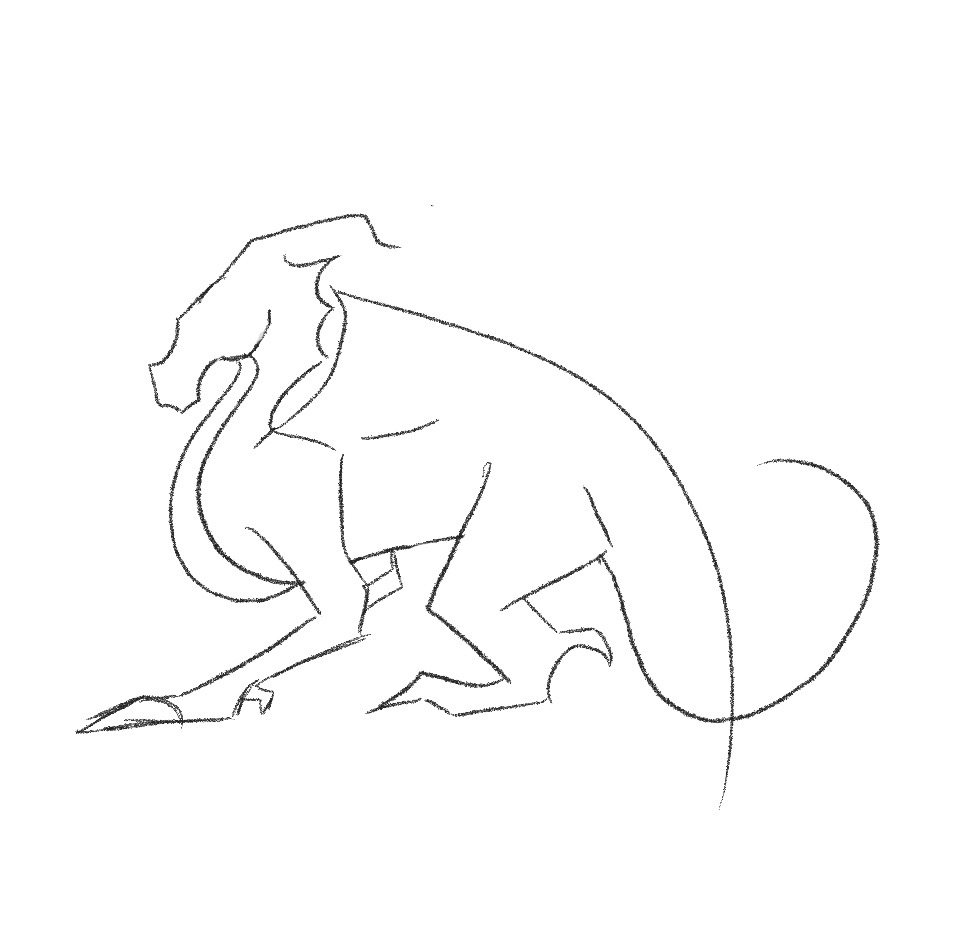
This one is an easy one: Erase overlapping lines!
Erase the circle from the head and the lines that cut through the legs from the body.
We don’t need those anymore.
See, that’s how to draw a dragon easy (just kidding!). Still, this is one of the easiest parts of doing dragon drawings step by step.
Step 10: Add more details
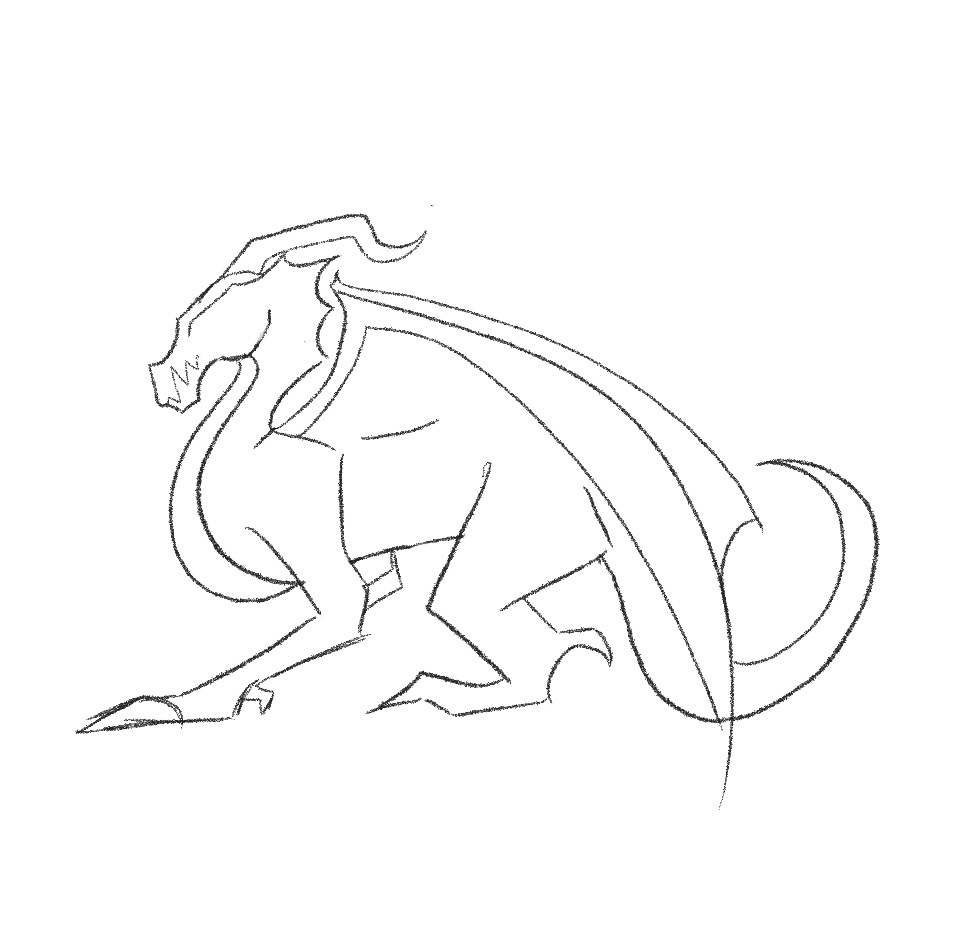

Okay now, let’s get a bit more details in our step by step dragon drawing.
Close off the tail line with a matching line above it going from a wider width to a point with a smaller width.
From the top flare on the head (the largest one) we’re going to extend that line for the eyebrow ridge, be sure to give this some angular shaping – it should not be a straight line.
Still, at the head, let’s move on to teeth.
Where the top lip meets the bottom lip create some varying sized triangles up and down going inwards towards the back of the head but not too far!
A few will do it. Now close off the horn with a wider base and slimmer point.
WINGS! One of the most iconic parts of how to draw a dragon.
This is the tricky part as it involves a bit of perspective.
From the connection to the shoulder, create a second line matching the direction underneath it.
Follow the direction of the curved line getting wider at the base.
Now add another, smaller and shorter, curved line on the other side of this closed arc adding a little flick at the point where they meet for the wing joint! That’s how to do the details of your dragon drawing step by step!
Step 11: Drawing details of dragon’s face

Almost there! Add the underside of the eyebrow ridge, getting wider as you go towards the back of the head when learning how to draw a dragon head.
Don’t connect it to the head flares!
Under that defined ridge create an almond shape and fill it in – that’s your eye!
Close off the teeth by connecting the open points on the triangles of the dragon step by step.
Add some ridgelines to the horns and that little backward “S” shape on the chest (make sure the lines get bigger as you go towards the legs).
While details aren’t the most important part of drawing a dragon step by step, it’s important to care about each aspect of the drawing in its own right.
Finally, close that space on the back of the dragon with an upwards arc to form the inner wing and erase the line that cuts through the back of the wing starting at the wing joint!
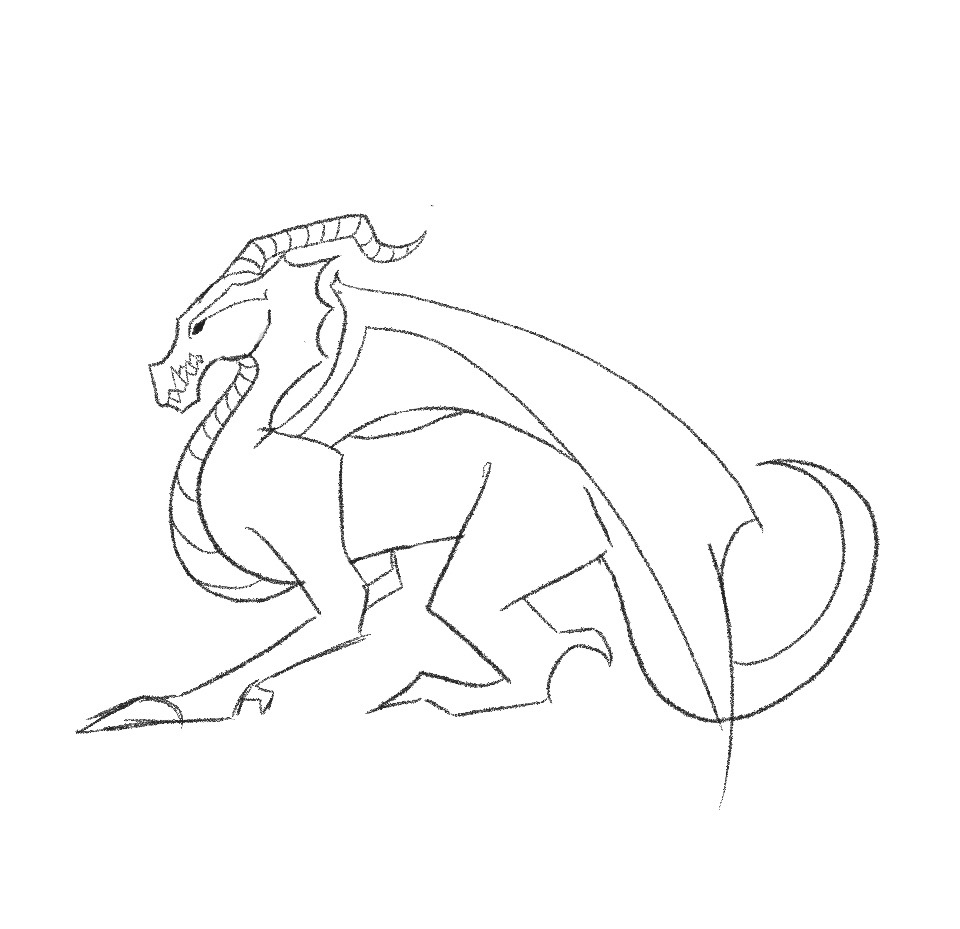
Step 12: Refining the dragon’s feet
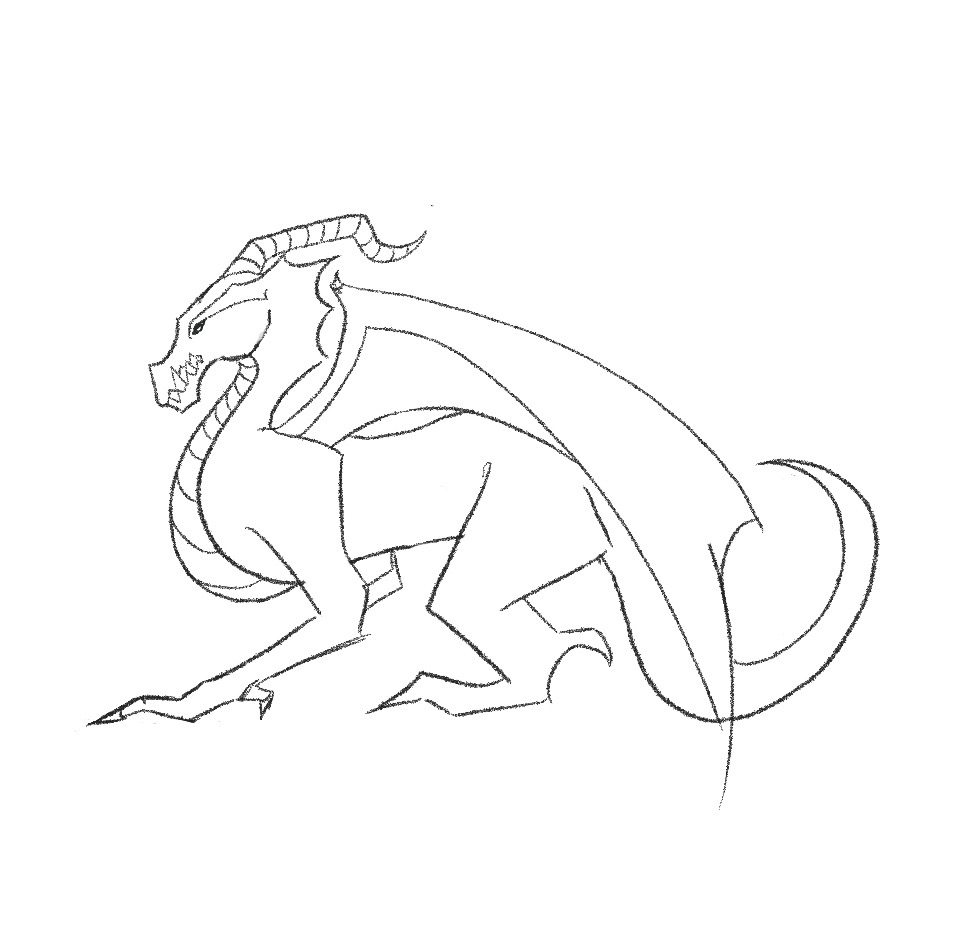

Refine the feet of your dragon drawing step by step!
Using the guideline for how to draw dragon legs placed earlier, shape those claws in whatever way you see fit – the beautiful thing about dragons is that no two are the same and you can essentially shape them however you want so long as you keep in mind anatomy, weight, and general function!
There you go, you’ve learned how to draw dragon step by step! Your very own dragon!
I’d like to thank Carolyn for sharing her process.
Be sure to check out her social @ClazDesign if you enjoyed her illustrations.
She also has some amazing prints and illustrations available in her shop.
Other Step by Step Drawing Topics to Help You
- How to Draw a Rose (7 Easy Steps)
- How to Draw Dogs – Easy Step by Step Tutorial for Cute Dogs
- How to Draw Realistic Trees Like a Pro
How to Draw a Dragon Printable Guide

Step-by-step instructions on how to draw a dragon.
Materials
- Pencil
- Paper
- Or tablet and stylus
Tools
- Pencil
- Paper
- Or tablet and stylus
Instructions
- Step 1: Drawing a dragon’s head. Drawing a European dragon is not as hard as it looks! First, you want to start with the head shape. Create a circle - this will be your head, and then to the bottom left create a carrot as this is going to guide you where to place the snout.
- Step 2: Draw line for dragon’s body. Starting from the middle-bottom of the circle we're going to draw a squiggly line in a vague shape of a "W". Don't make it pointy like a W though, the edges should be round and fluid - just use the idea of a W for the general idea of where the peaks and dips should be. This is going to guide the body.
- Step 3: Draw line for dragon’s legs
Now we're going to outline where the legs are. Here is where things get a bit tricky. The front leg will be shaped mostly like a > symbol with the point being the elbow. Then add a little line extending into the ground for the paw, make sure it has a slight lift from the end of the > to account for the wrist! For the hind leg, we're going to create a line in the opposite shape: can be seen. From there create a downward line for the claw! - Step 4: Draw dragon’s horn
Now we're going to go back up to the head for the horns! At the top of the circle create a small upwards line, then swoop that line into a downward arc and finally a little flourish back towards the top. Be sure to make that line have some edges so it's not a smooth curling line - we want some angular shape to the horns. You can make these horns as large as you like, but try to remember that horns have weight and the size of the head needs to be large enough to support them! - Step 5: Draw dragon’s wings
Time for wings! Find where you started the front leg line and giving plenty of space between that and the start of your wing you're going to draw a line upwards at a slight angle. Then connect that line to a curved line going down to guide where the wing is going to fold over itself, it's okay if it crosses over the tail line! - Step 6: Drawing shape of the dragon
Time to start building the shape of the dragon! Once again we're going to start at the head. From the top of the circle continue the horn line to extend past the circle just a little bit, then you're going to dip that line all the way to the snout where you'll connect it in a slight peak. This dragon has a very angular style as you can start to see! From the peak, come down on an angle to create its top lip. Now, the bottom lip comes to close just below the top lip due to the way the teeth close in on each other, so you're going to want to come in a bit with your line before adding the squared-off chin. This will give you a more "natural" look to the jaw. Finally, in an upward arc, you'll connect the jaw to the circle. - Step 7: Add dragon’s flared scales
At the back of the circle, we're going to add flared scales! Create a batwing-like shape with the peaks facing right. Then, at the circle of the head, extend a small line upwards from the bottom of the circle to show where the jawline meets the neck. Finally, let's start fleshing out the body. Create a backward S shape with a second line starting under the jaw of the dragon, make sure the bottom is wider than the top to keep perspective in mind. Finally, make a little connecting line for the wing joint to help guide where the shoulder will begin. - Step 8: Draw the dragon’s legs, shoulders, and feet
Drawing the dragon legs. Starting from the front leg, find the shoulder line you just made in the previous step. Create a line going the opposite way, not too long but large enough to have some muscle on this dragon, he's big! so his body should reflect that. Take into consideration how your own arm looks, the shoulder flows into the tricep/bicep, then you have your elbow flowing into your forearm. It's the same theory here!
Drawing the dragon shoulder. Create a nice large shoulder with a triangle shape going downwards toward the peak of the > symbol from earlier steps; you're going to close the width as you go down. Once you get to that peak come out in a V shape to the right ending with a little tick inwards (this is your elbow claw), then come back into the elbow so your claw is shaped like an upsidedown L. Now with a slight flick back to the right (very small), we're going to bring the line in the same direction as the guideline.
Now it's time for the dragon foot. For the foot, we're going to start with another claw - think of the type of extra claws wolves and dogs have. Create a small claw then from the bottom of it extend slightly downwards now bring that line horizontally across to meet where you planned out your feet! I like to create an arc on the foot here to remind myself where the "fingers" will be later - this is optional
Time for the back leg now!. With the same theory as the front leg, find the beginning of the line you created earlier. This time we're going to create sort of a "butt" looking muscle. Consider it a second shoulder, but for the hind legs! This will be much wider and larger than the front legs as the dragon carries its center of balance in the back. Create a triangle with the point facing towards the tail a good distance from the beginning of the guideline, we want a beefy leg here.
The ending of that triangle line should be a little bit away from the point from the - Step 9: Erase overlapping lines
This one is an easy one: Erase overlapping lines! Erase the circle from the head and the lines that cut through the legs from the body. We don't need those anymore - Step 10: Add more detailsOkay now let's get a bit more details. Close off the tail line with a matching line above it going from a wider width to a point with a smaller width. From the top flare on the head (the largest one) we're going to extend that line for the eyebrow ridge, be sure to give this some angular shaping - it should not be a straight line.
Still, at the head, let's move on to teeth. Where the top lip meets the bottom lip create some varying sized triangles up and down going inwards towards the back of the head but not too far! A few will do it. Now close off the horn with a wider base and slimmer point.
WINGS! This is the tricky part as it involves a bit of perspective. From the connection to the shoulder, create a second line matching the direction underneath it. Follow the direction of the curved line getting wider at the base. Now add another, smaller and shorter, curved line on the other side of this closed arc adding a little flick at the point where they meet for the wing joint! - Step 11: Drawing details of dragon’s face
Almost there! Add the underside of the eyebrow ridge, getting wider as you go towards the back of the head. Don't connect it to the head flares! Under that defined ridge create an almond shape and fill it in - that's your eye!
Close off the teeth by connecting the open points on the triangles.
Add some ridgelines to the horns and that little backward "S" shape on the chest (make sure the lines get bigger as you go towards the legs)
Finally, close that space on the back of the dragon with an upwards arc to form the inner wing and erase the line that cuts through the back of the wing starting at the wing joint! - Step 12: Refining the dragon’s feet
Refine your feet! Using the guideline placed earlier, shape those claws in whatever way you see fit - the beautiful thing about dragons is that no two are the same and you can essentially shape them however you want so long as you keep in mind anatomy, weight, and general function!
There you go! Your very own dragon!
Draw a Dragon Easy FAQ
How do you draw a dragon body step by step?
To draw a dragon body step by step, start by sketching a basic skeleton with an elongated body, legs, and a tail.
Add details such as wings, scales, and a fierce expression. Refine your sketch, erase guidelines, and finalize the drawing with inking or shading.
How do you draw a simple detailed dragon?
For a simple detailed dragon, first draw a basic outline of the dragon’s body, head, and wings.
Then, add smaller details like scales, claws, and facial features. Keep the overall design simple, but use intricate patterns and textures to give it a detailed look.
How do you draw a cute big dragon?
To create a cute big dragon, begin by sketching a round, chubby body with short legs and a short tail.
Give the dragon a large, expressive head with big eyes and a friendly smile. Add smaller wings, and finish the drawing by emphasizing the cute features and adding some light shading.
Derek Armstrong
Tuesday 28th of June 2022
Could you please create a tutorial on “ How to Draw a Skeksis “ from the Dark Crystal on July 5,2022?
Jae Johns
Thursday 7th of July 2022
Thanks for the suggestion.