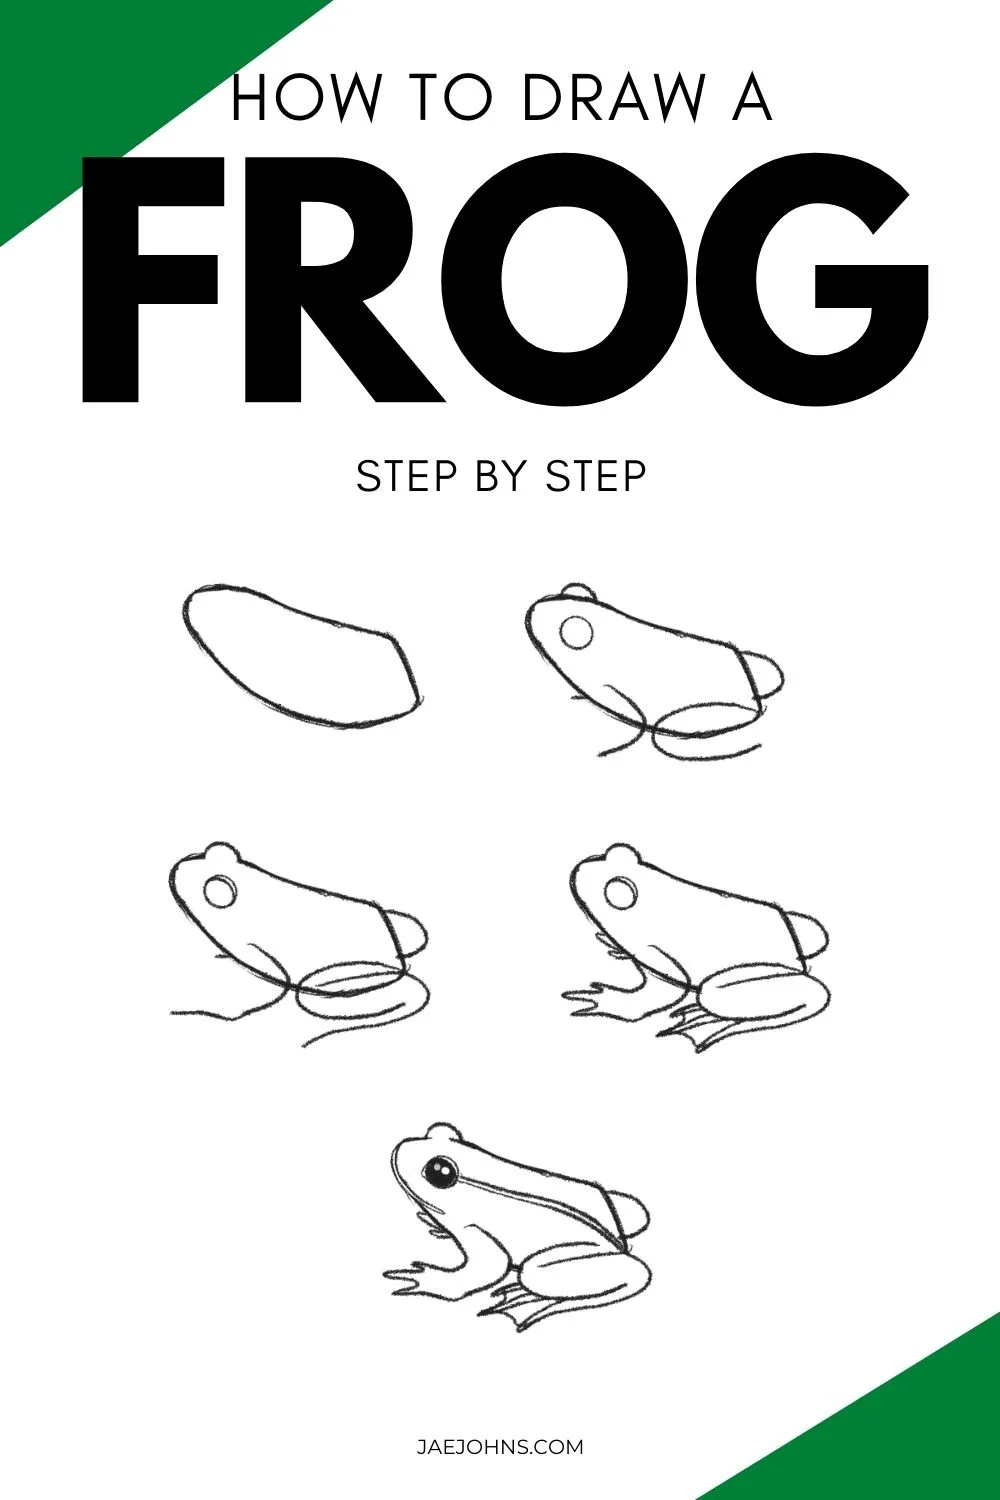
Do you think knowing how to draw a frog is hard? Many people avoid drawing animals because they think it’s not easy.
Do you know you can be a total pro at drawing a frog and it only takes 10 extremely simple steps to do so.
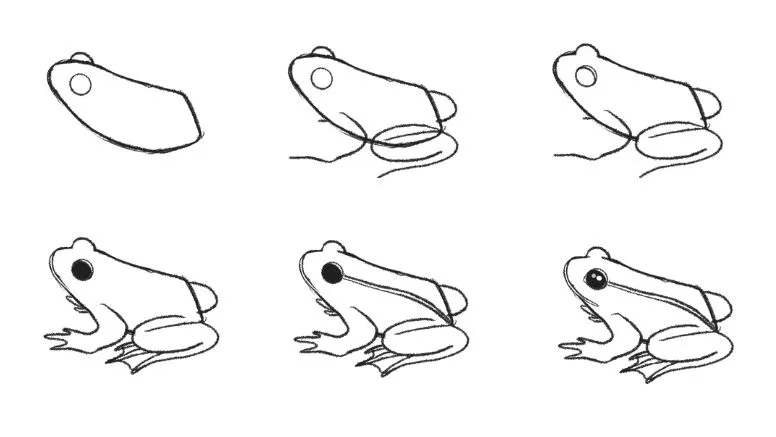
These step by step pictures will make it simple for anyone to know how to draw a frog.
Drawing supplies you need
You can use any paper and pencil to draw this, but you can click this link to my other article on the best tools for drawing.
Step 1: Draw jelly bean for frog body
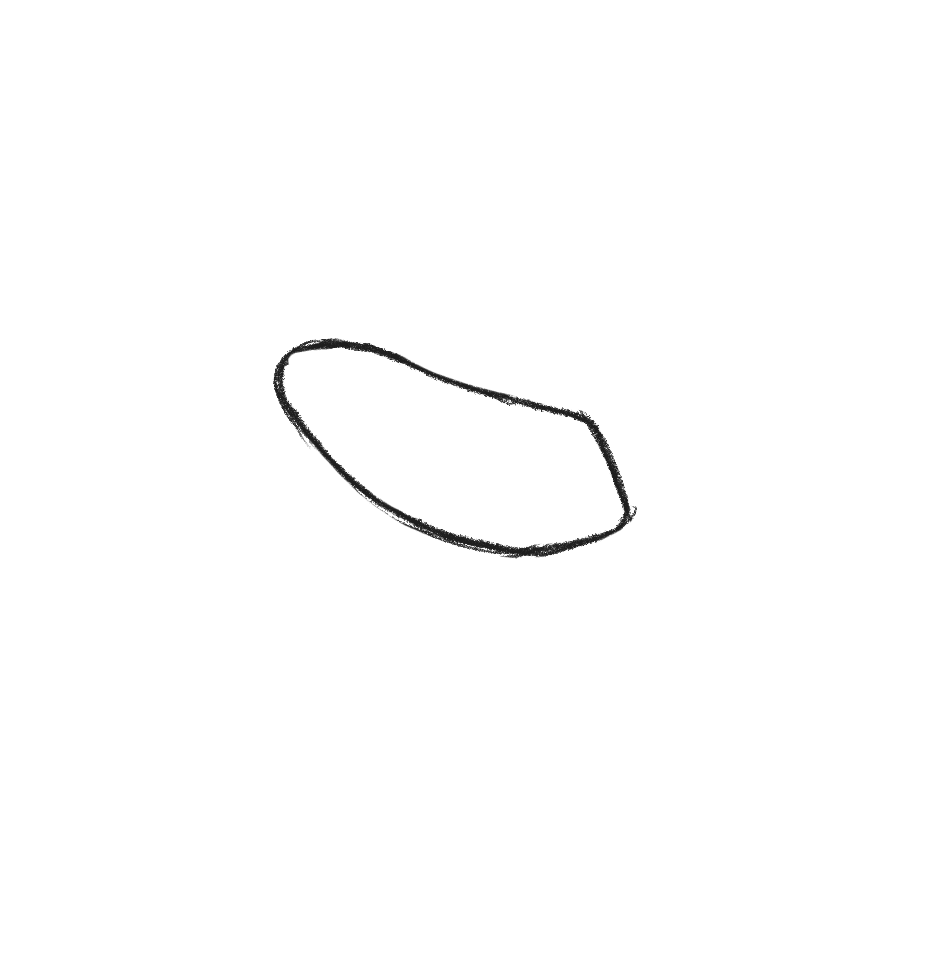
Let’s start with a jelly bean.
Make sure this jelly bean has a sharper end and a rounded end, this will guide us for the head and the bottom!
Step 2: Sketch in circles for frog’s eyes

At the rounder end make a half-circle on top of the upper line.
Then a little bit away from that, inside the shape, make a second circle.
Step 3: Sketch in frog legs
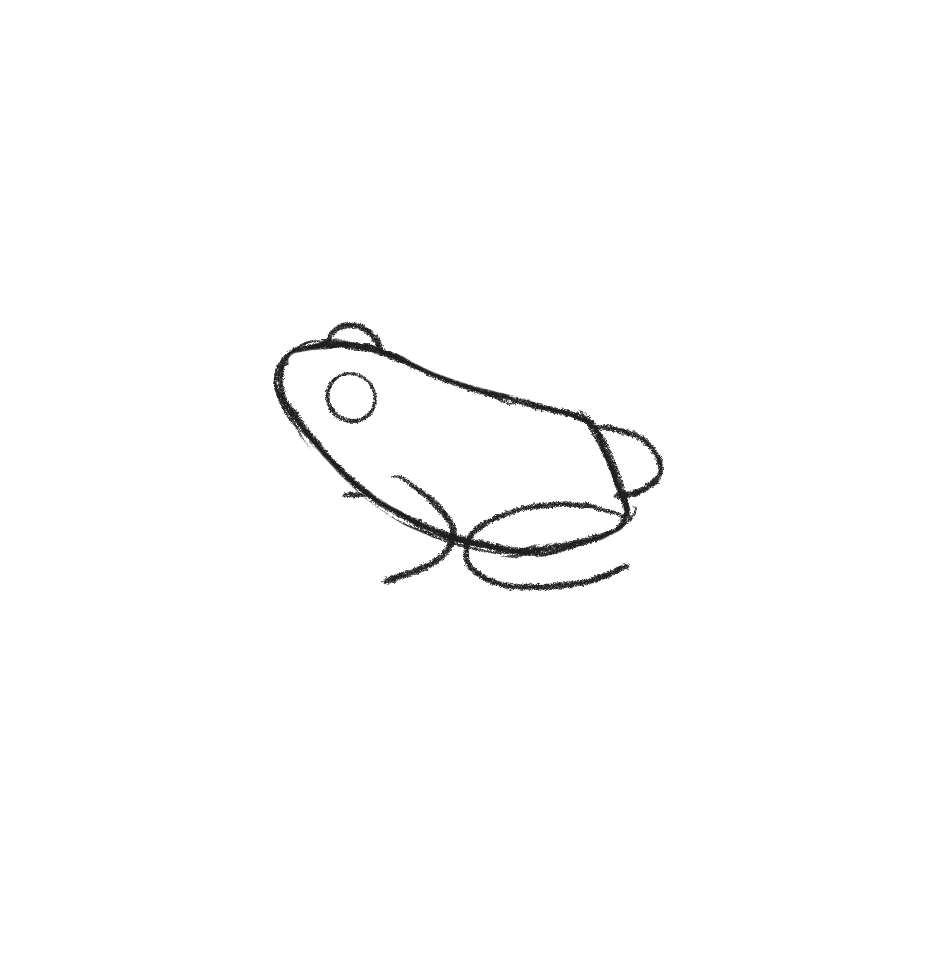
Going back to the bottom we’re going to create a long “C” shape starting at the pointed end of the jelly bean shape.
Then, above that where the body shape has a sharper downturn, we’ll make a half-oval.
Further up the body, we’ll make a half oval again, and then a small line below the bottom of the jelly bean body shape.
Like in many other animal illustrations we’ve done, this will guide our legs.
Step 4: Continue to draw frog legs
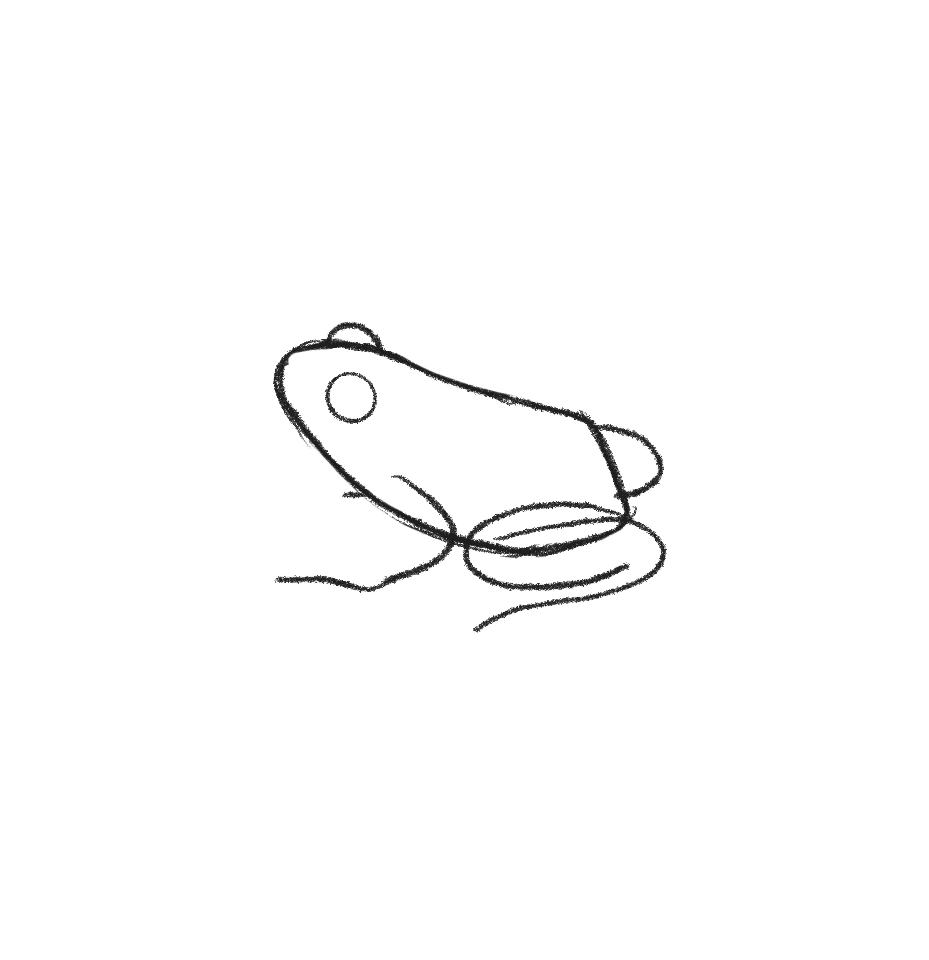
A little bit less than half the way to the center of that elongated C shape (for the back leg) we’re going to make another C shape going the opposite direction.
This will show where the frog’s knees bend in the hind legs.
After we complete that, extend the front leg guideline we drew without using fully straight lines
Step 5: Erase unneeded lines on frog eye
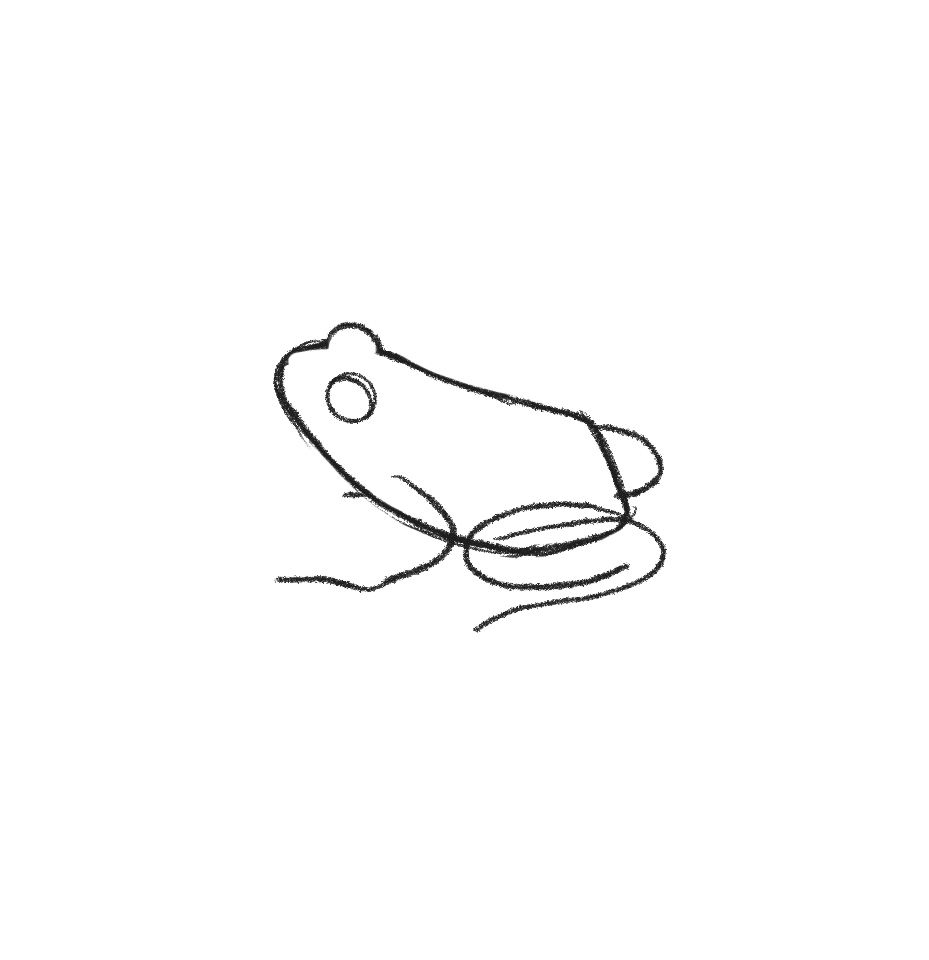
Erase the overlap on the crescent moon shape to the eye!
Step 6: Erase unneeded lines on frog legs
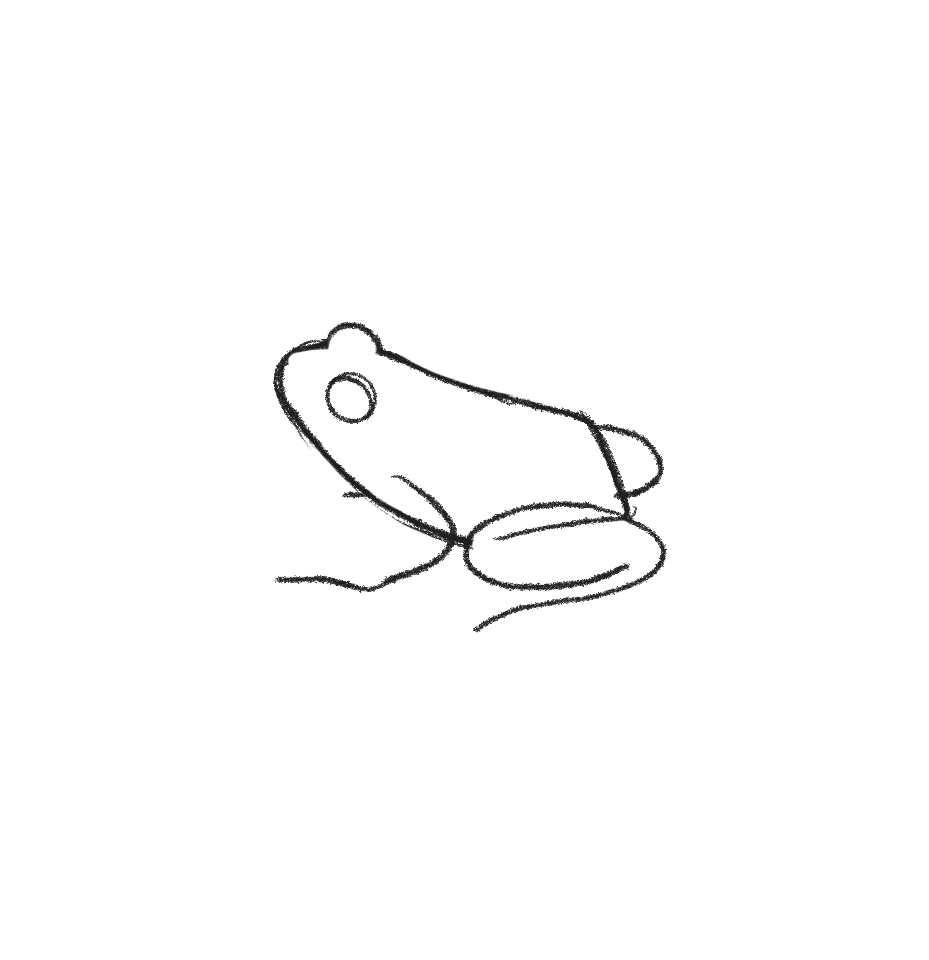
Erase the overlap on the hind leg closest to us!!
Step 7: Draw the frog’s feet
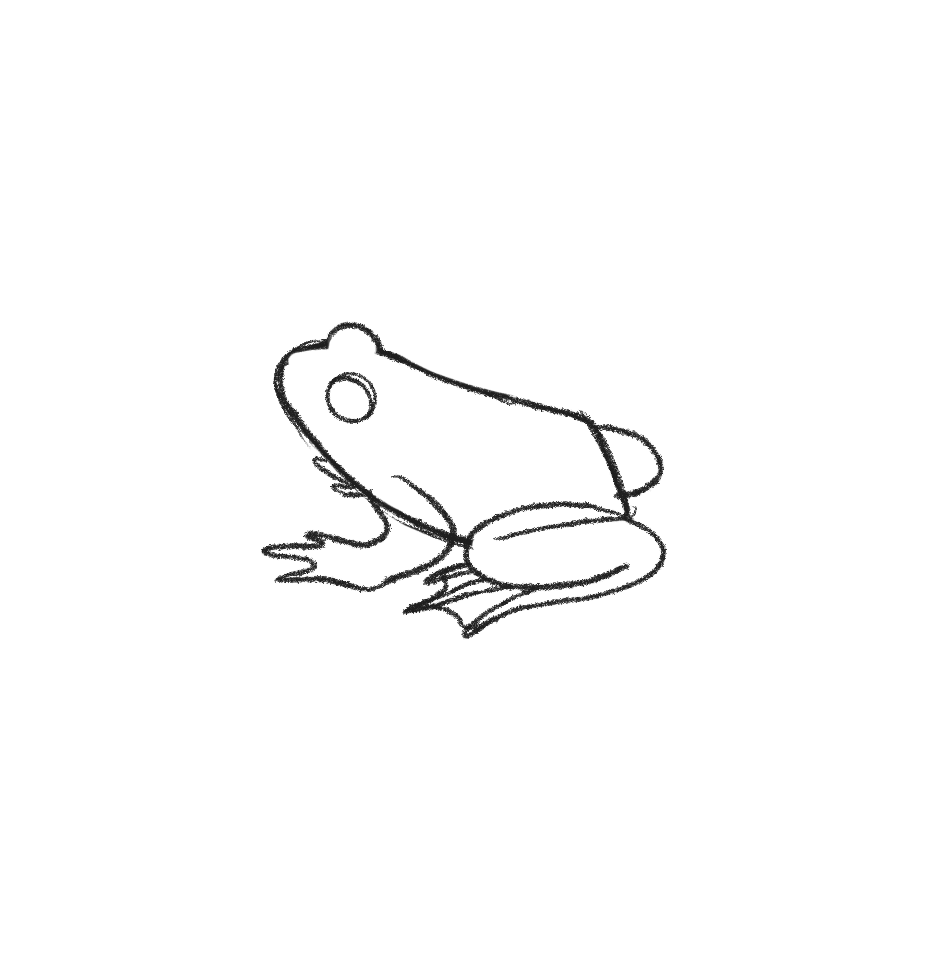
Now for the feet.
For the hind leg make a batwing shape.
Then at the peaks create a “stem” sort of shape for the toes.
Frogs have webbed feet in the back so we want to be sure to show that.
For the front feet, we’ll just need 3 toes with the middle toe longer than the others!
Step 8: Fill in frog’s eye
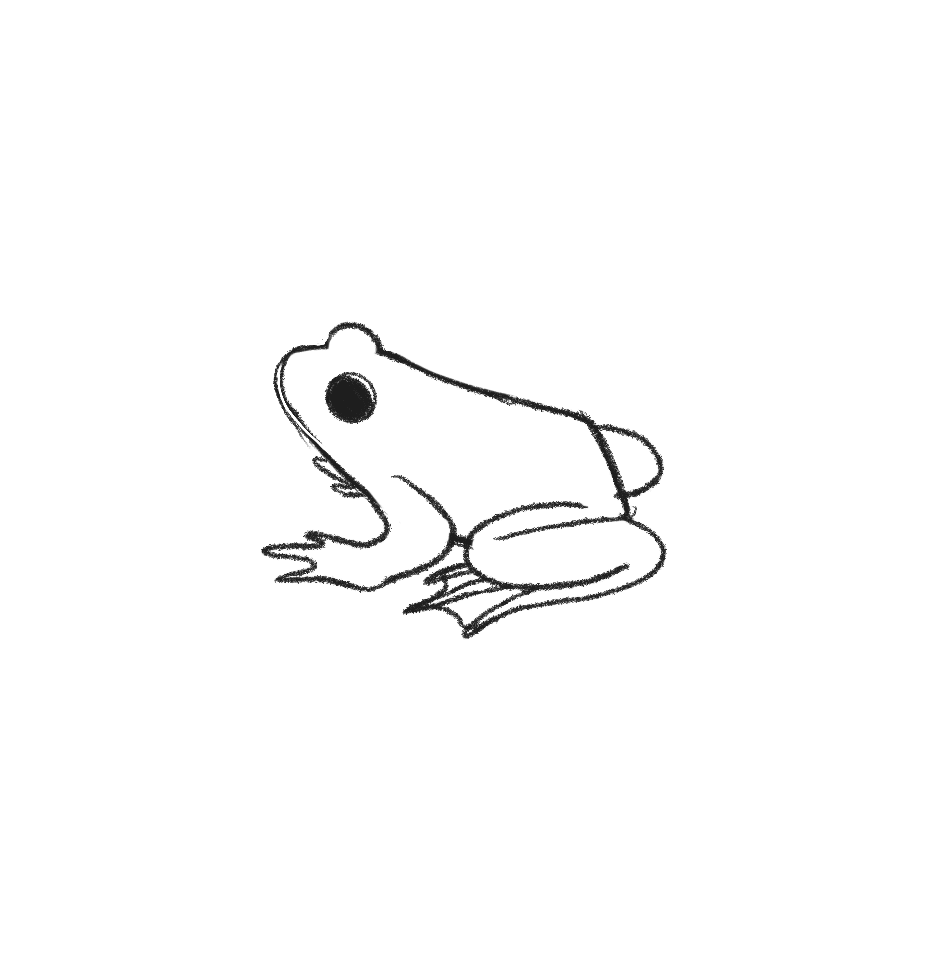
Fill in that eye! Erase the front leg overlapping lines!
And add just a little bit of “lips”!
Step 9: Draw frog stripes on its back
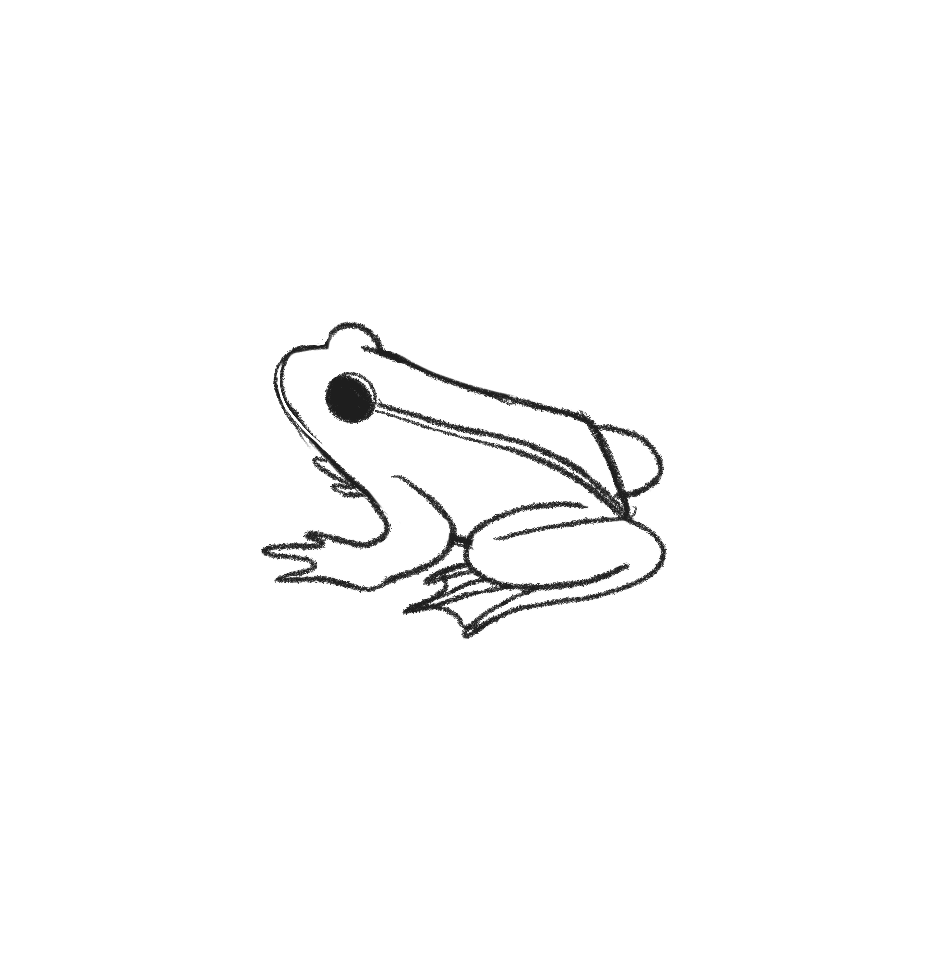
Now it’s time for the details.
On the back from about the midpoint of the closest eye create two lines almost like racing stripes that extend to the point of the frog’s bottom.
Step 10: Add highlights in the frog’s eye
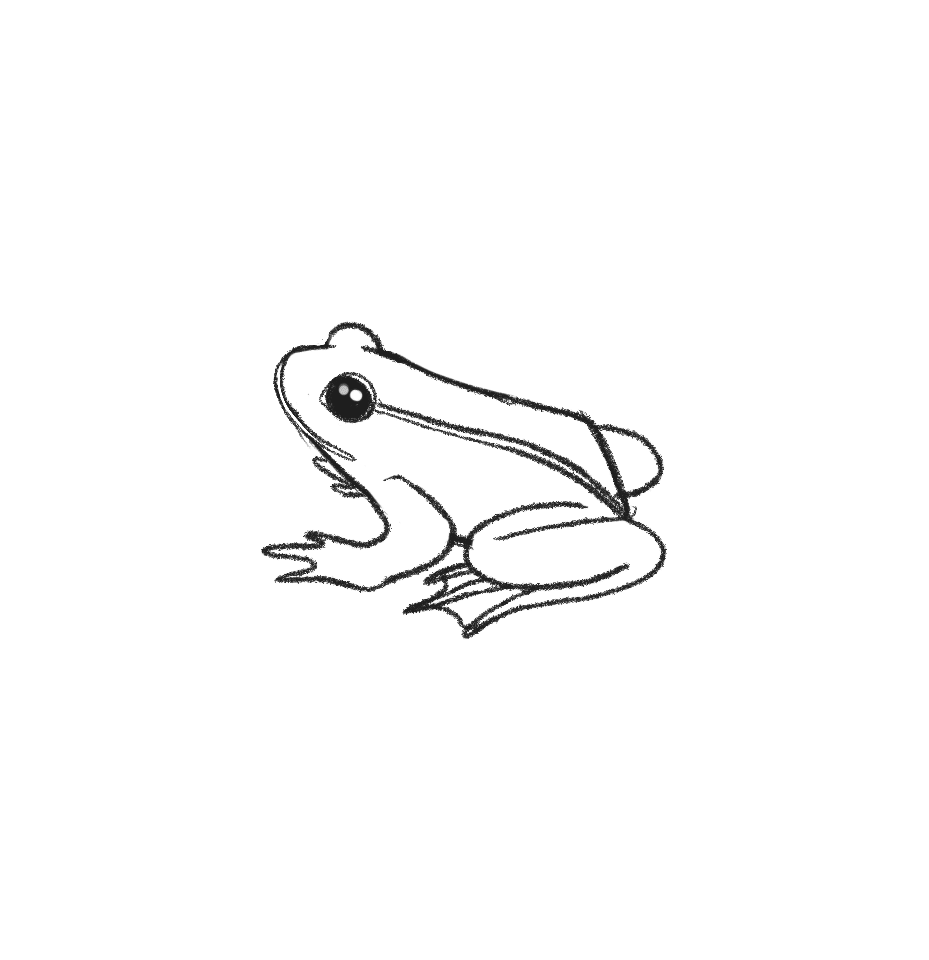
Now add a tear duct in a little triangle shape at the front of the closest eye and put in some highlights.
There you go! A cute little frog.
Learning how to draw a frog is easy, and anyone can do it!
Other related drawing topics to help you draw:
- How to Draw a Deer (Easy Step by Step with Pictures)
- How to Draw a Dolphin (9 Easy Steps with Pictures)
- Does Tracing Help Improve Drawing?
- How to Draw a Dragon (Step by Step with Pictures)
- How to Draw Dogs – Easy Step by Step Tutorial for Cute Dogs
This process is shared by Carolyn. Thank you for sharing.
Check out her social @ClazDesign if you liked her drawings.
In her shop, she also has amazing prints and other illustrations.
How to Draw a Frog Printable Guide
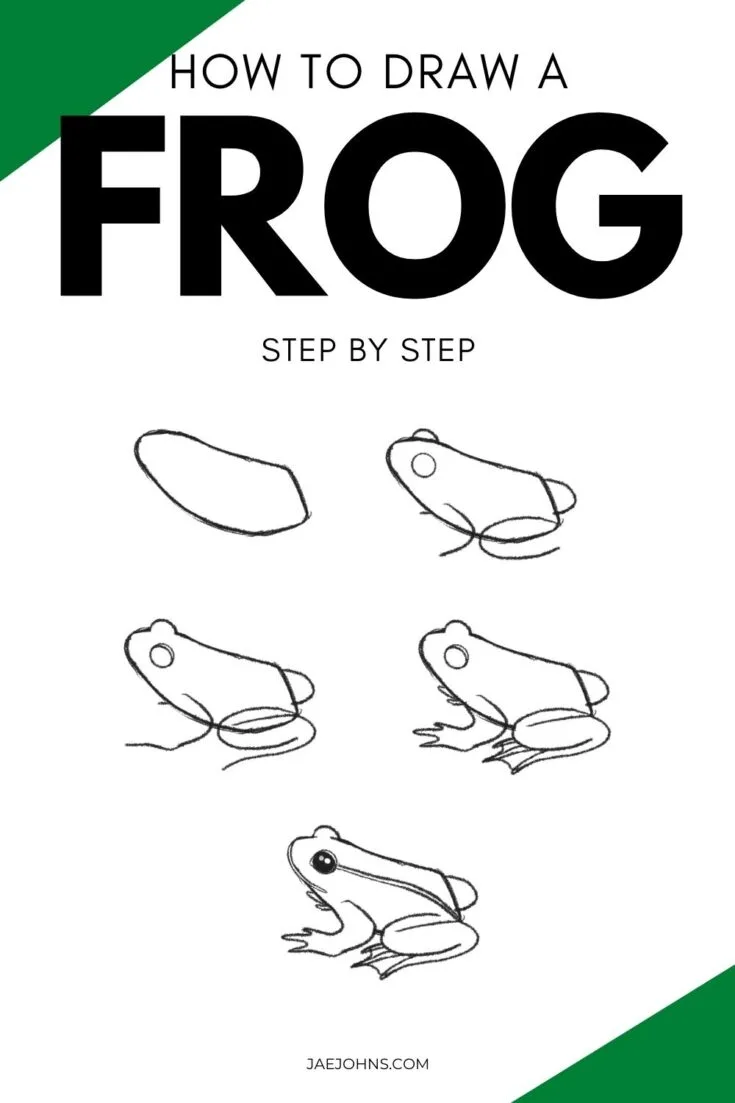
Step-by-step instructions on how to draw a frog.
Materials
- Pencil
- Paper
- Or tablet and stylus
Tools
- Pencil
- Paper
- Or tablet and stylus
Instructions
- Step 1: Draw jelly bean for frog body. Let's start with a jelly bean. Make sure this jelly bean has a sharper end and a rounded end, this will guide us for the head and the bottom!

- Step 2: Sketch in circles for frog’s eyes. At the rounder end make a half-circle on top of the upper line, then a little bit away from that, inside the shape, make a second circle.

- Step 3: Sketch in frog legs. Going back to the bottom we're going to create a long "C" shape starting at the pointed end of the jelly bean shape. Then, above that where the body shape has a sharper downturn, we'll make a half-oval.
Further up the body, we'll make a half oval again, and then a small line below the bottom of the jelly bean body shape. Like in many other animal illustrations we've done, this will guide our legs.
- Step 4: Continue to draw frog legs. A little bit less than half the way to the center of that elongated C shape (for the back leg) we're going to make another C shape going the opposite direction. This will show where the frog's knees bend in the hind legs. After we complete that, extend the front leg guideline we drew without using fully straight lines.

- Step 5: Erase unneeded lines on frog eye. Erase the overlap on the crescent moon shape to the eye!

- Step 6: Erase unneeded lines on frog legs. Erase the overlap on the hind leg closest to us!!

- Step 7: Draw the frog’s feet. Now for the feet. For the hind leg make a batwing shape than at the peaks create a "stem" sort of shape for the toes. Frogs have webbed feet in the back so we want to be sure to show that.
For the front feet, we'll just need 3 toes with the middle toe longer than the others!
- Step 8: Fill in the frog’s eye. Fill in that eye! Erase the front leg overlapping lines! And add just a little bit of "lips"!

- Step 9: Draw frog stripes on its back. Now it's time for the details, on the back from about the midpoint of the closest eye create two lines almost like racing stripes that extend to the point of the frog's bottom.

- Step 10: Add highlights in the frog’s eye. Now add a tear duct in a little triangle shape at the front of the closest eye and put in some highlights. There you go! A cute little frog.

Frog Drawing FAQ
How do you draw a simple frog for beginners?
To draw a simple frog for beginners, follow a step by step frog drawing guide. Start with an oval for the body, add two large circles for the eyes, and then create the limbs with basic shapes.
Finish by adding details like webbed feet and a smiling mouth.
How do you draw a silly frog?
To create a silly frog, use the how to draw a frog easy method, but exaggerate the features.
Make the eyes extra large and goofy, give the frog a wide, silly grin, and add playful details like a long, curled tongue or a funny hat.
How to draw a horned frog?
Drawing a horned frog involves following a frog drawing step by step process with some unique features.
Begin with a rounded triangular body shape, add two small horn-like protrusions above the eyes, and draw a wide, flat mouth. Don’t forget the texture of its body and the sturdy limbs.

Daniel
Wednesday 12th of October 2022
I NEED HELP ON DRAWING A FROG
Jae Johns
Thursday 13th of October 2022
Did you follow the steps?