

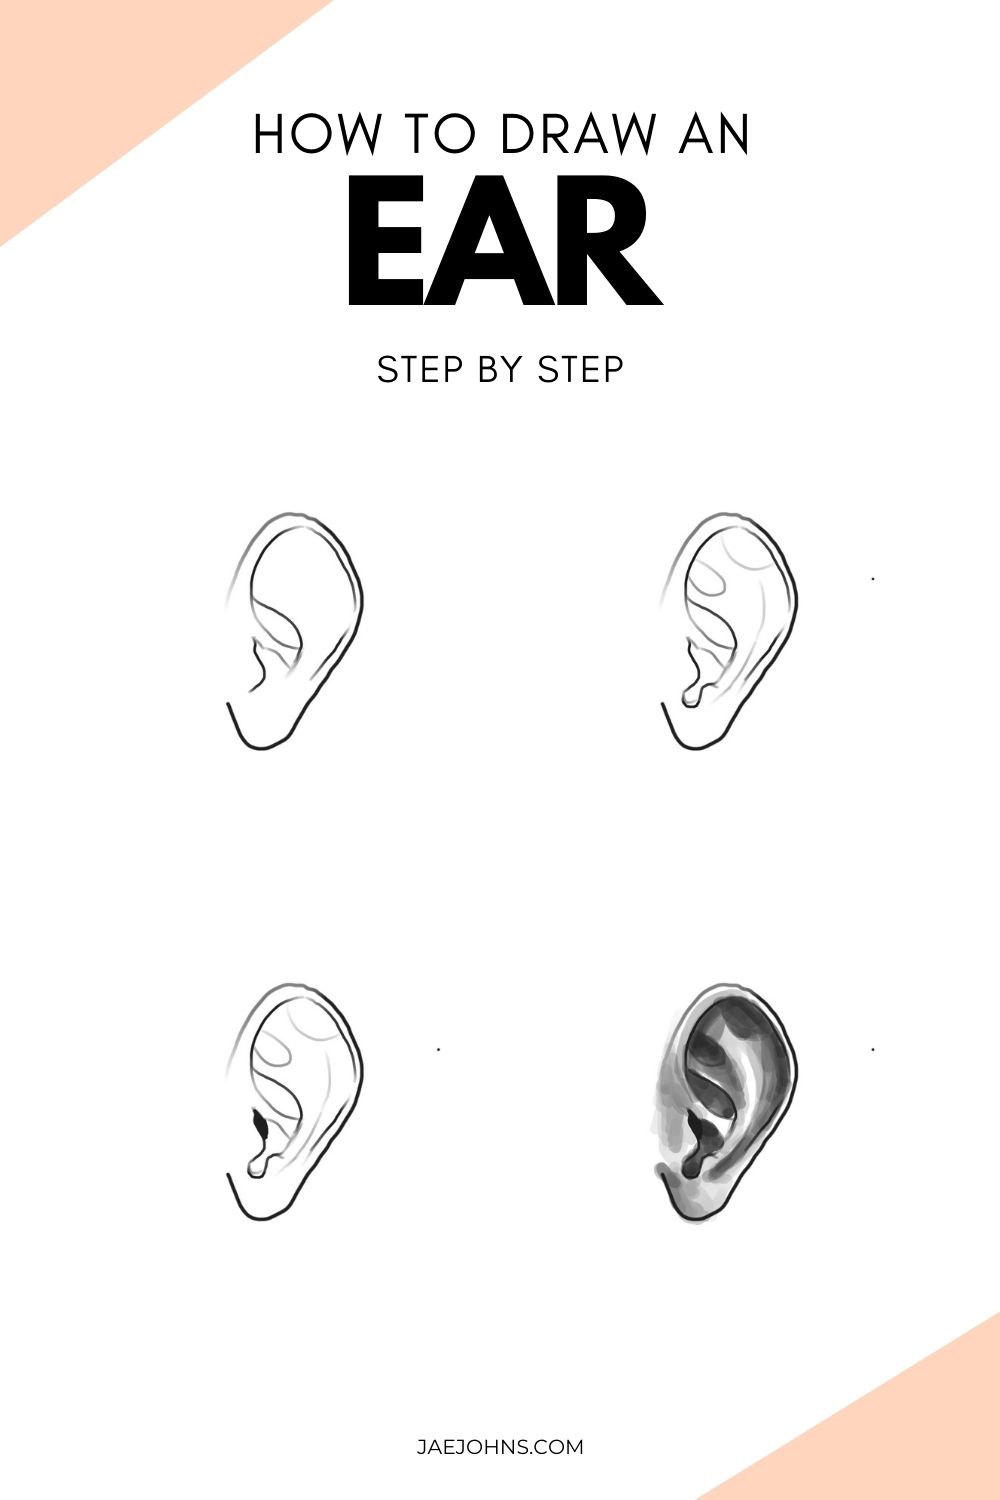
Do you want to learn how to draw an ear? An ear may look all weird, especially the details inside an ear but it’s pretty simple.
You can make an incredible ear drawing in less than 10 minutes.
One of the great things that makes drawing an ear easy is that no one really stares at an ear.
By drawing something that resembles an ear, then you’ll be on the right track.
Follow these step by step visuals and you’ll be able to draw an ear in minutes!
These visuals will help you become a pro at drawing ears, and teach you how to draw ears step by step.
Let’s get started!
Drawing supplies needed to make an ear drawing easy
You can use any drawing supplies to draw an ear, but here are the best tools for drawing.
Much like drawing an eye, shading is going to be the star of the show for an ear, so make sure to work with a round brush if you’re on digital, or a pencil!
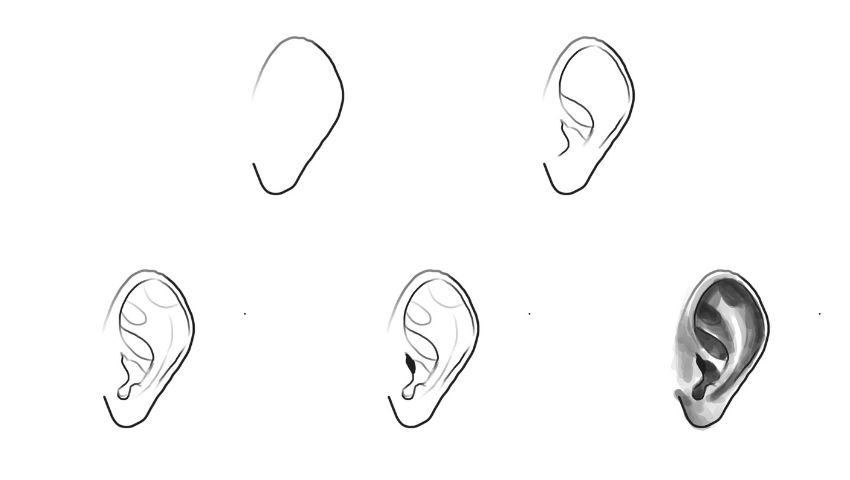
Step 1: Start with a sweet potato-like shape

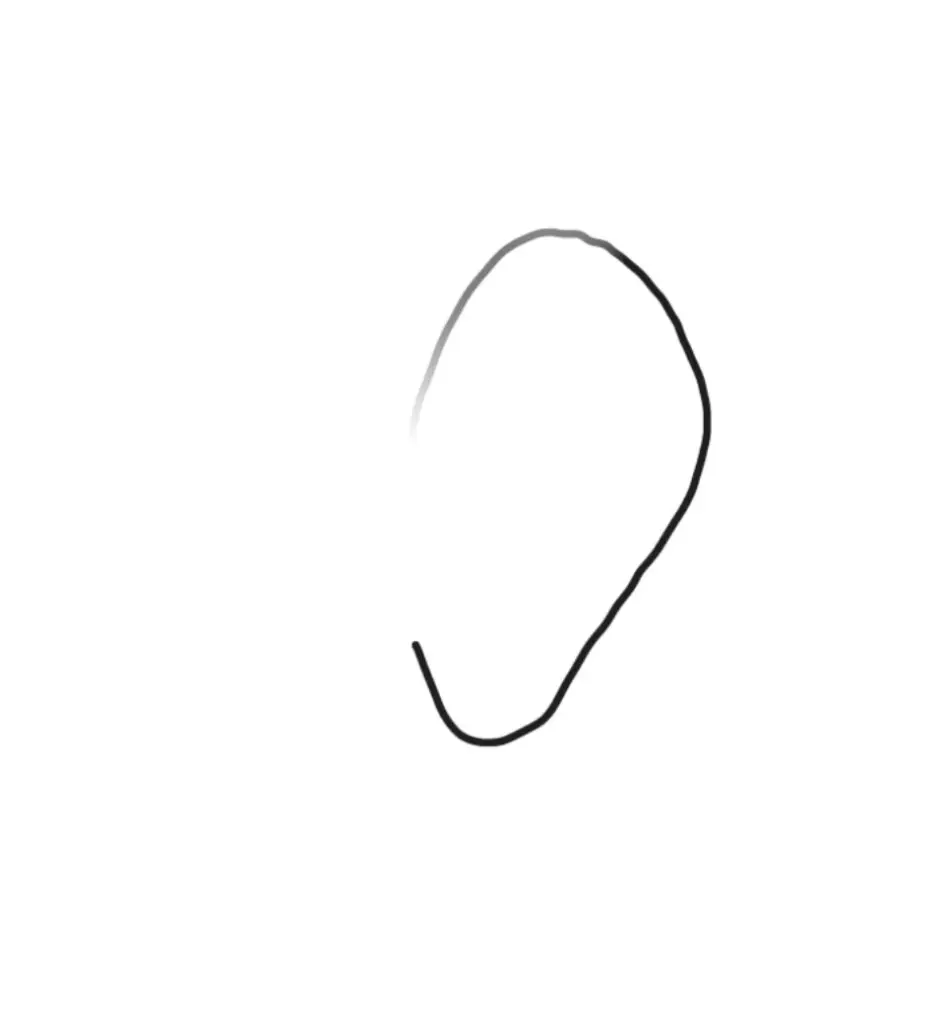
We’re going to start with a shape reminiscent of a sweet potato.
Wider at the top and thinner at the bottom with no sharp edges.
Do not close the shape all the way, leave a gap on the left!
These first two ear sketches in step 1 and step 2 are important to help you create a simple ear drawing.
Step 2: Draw a half heart-like shape on the inside


At the top of the shape create another line in a shape like one side of a heart.
In my example, I lightened up on my pressure so there are some gaps, you can do this or just make a light line without any breaks.
Step 3: Add curved lines within the inner ear


Time to start mapping out the general shape of the ear.
At the widest of the line you just made, closest to the gap we left in the original sweet potato shape, we’re going to curve the line towards the back of the ear.
Stop about 1/3 of the way in and then create a downward curving line to cut that off and create an almond shape.
Now, below that let’s create the cartilage!
At the bottom part of the gap we left in step 1, make a little mountain and extend the top line just a little bit.
At that extension, we’re going to then bring a final line inward to follow the bottom line of the almond shape we made.
Step 4: Draw a u-shape above the almond shape in the ear

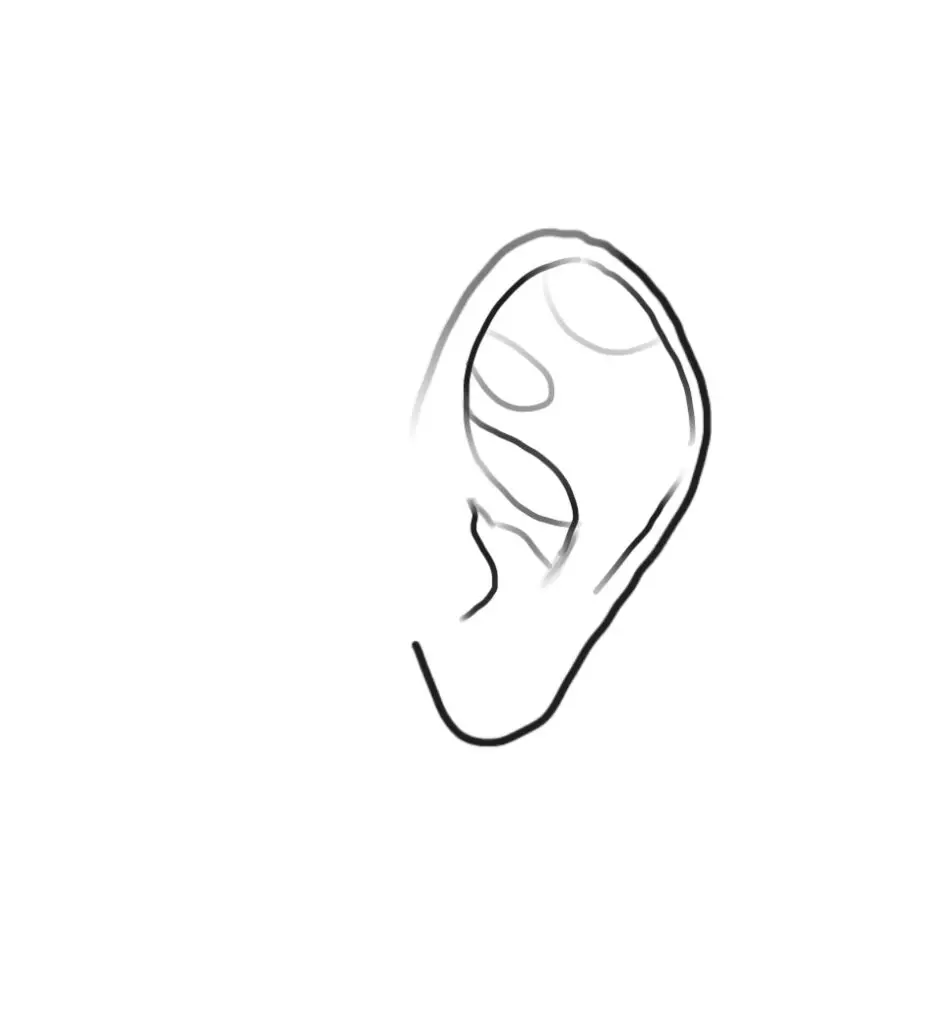
Now let’s block off some shading areas. 2 lines in a “u” shape at the top of the ear and right above the almond shape from the last step. Make these lines very light!
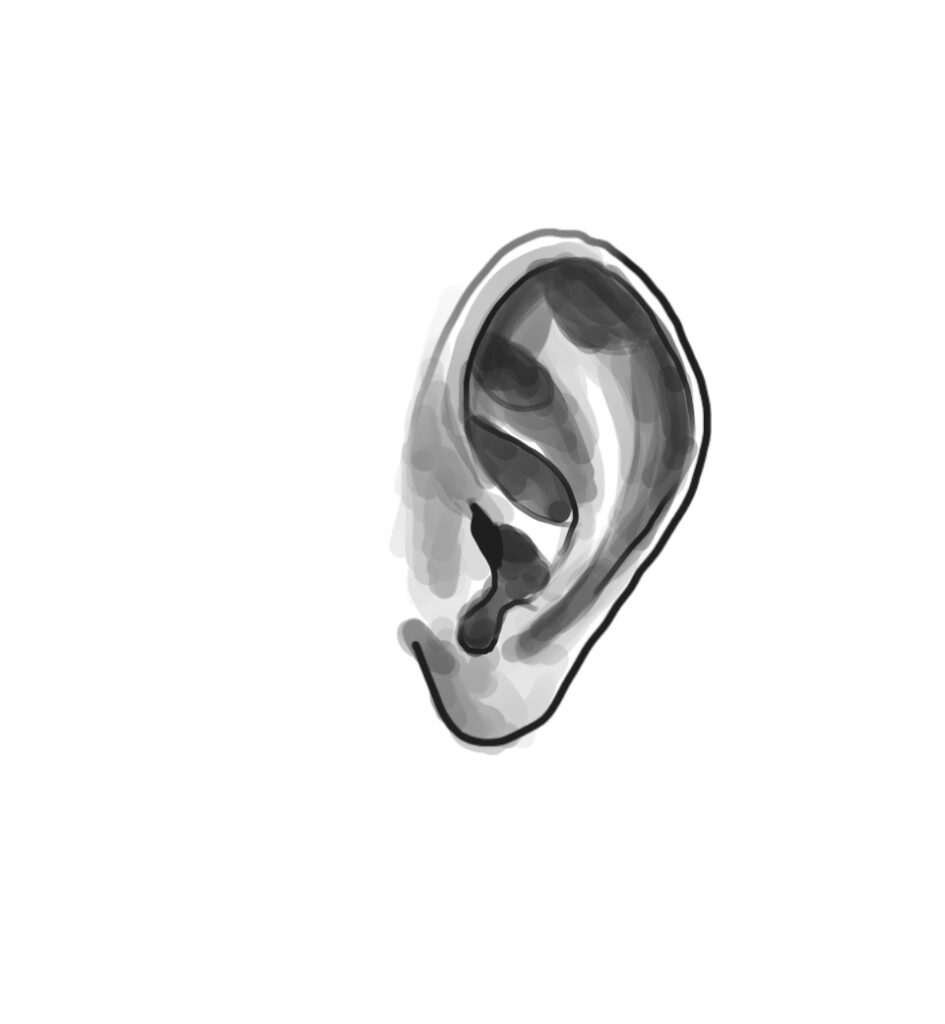
Step 5: Draw curve line between almond shape and back of the ear


Now, we’ll make the final shading guideline and close off the ear hole.
Let’s start with the shading line!
The space between the almond and the back of the ear creates a very light curved line with the bowl of the line towards the gap of the ear shape.
Now to close off the ear hold we’ll extend the cartilage line we made.
Make a little dip like a tear drop and then bring it back into a smaller mountain-like line to meet the line right next to it.
It should look like a drop of water falling in slow motion
Step 6: Add more space


At the space above the cartilage fill in a little space completely.
Step 7: Add shading

NOW here’s where your ear takes shape.
Take your time shading, and USE REFERENCES!
With the help of a reference, you will be able to see how light and shadow play on the ear to give it its recognizable shape!
Whether you’re learning how to draw a realistic ear or how to draw a cartoon ear, starting your sketch with simple shapes will help you get amazing results in end!
Other related topics to help you draw:
- Top 10 Tips to Sketching Faces Better
- 10 Tips for Drawing People for Beginners
- 11+ Top Tips for Drawing Portraits Like an Expert
Thank you Carolyn for this amazing step-by-step process. You can view her social @ClazDesign if you enjoyed her illustrations. Check out her shop where she has amazing illustrations.

How to Draw an Ear Printable Guide


How to draw an ear.
Materials
- Pencil
- Paper
- Or tablet and stylus
Tools
- Pencil
- Paper
- Or tablet and stylus
Instructions
- Step 1:
We're going to start with a shape reminiscent of a sweet potato. Wider at the top and thinner at the bottom with no sharp edges. Do not close the shape all the way, leave a gap on the left!

- Step 2:
At the top of the shape create another line in a shape like one side of a heart. In my example I lightened up on my pressure so there are some gaps, you can do this or just make a light line without any breaks.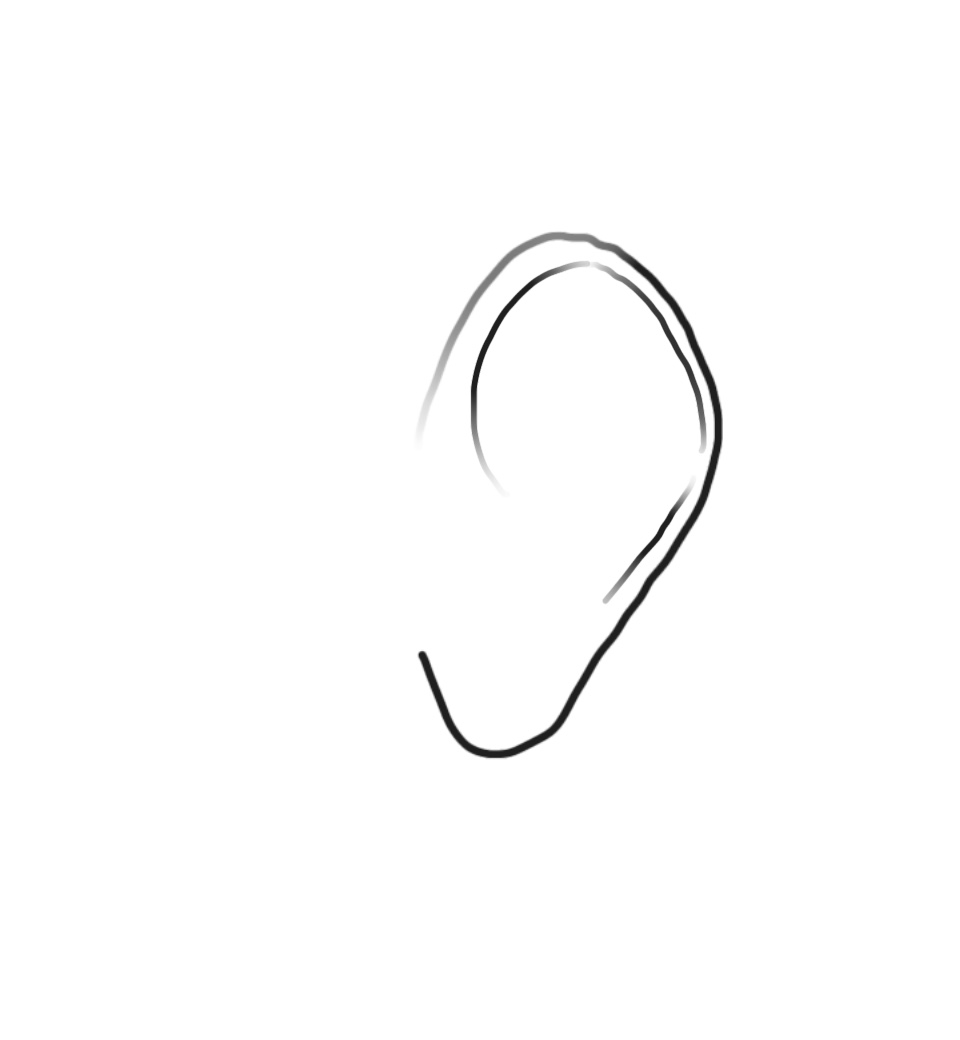

- Step 3:
Time to start mapping out the general shape of the ear. At the widest of the line you just made, closest to the gap we left in the original sweet potato shape, we're going to curve the line towards the back of the ear. Stop about 1/3 of the way in and then create a downward curving line to cut that off and create an almond shape.
Now, below that let's create the cartilage! At the bottom part of the gap we left in step 1, make a little mountain and extend the top line just a little bit. At that extension, we're going to then bring a final line inward to follow the bottom line of the almond shape we made.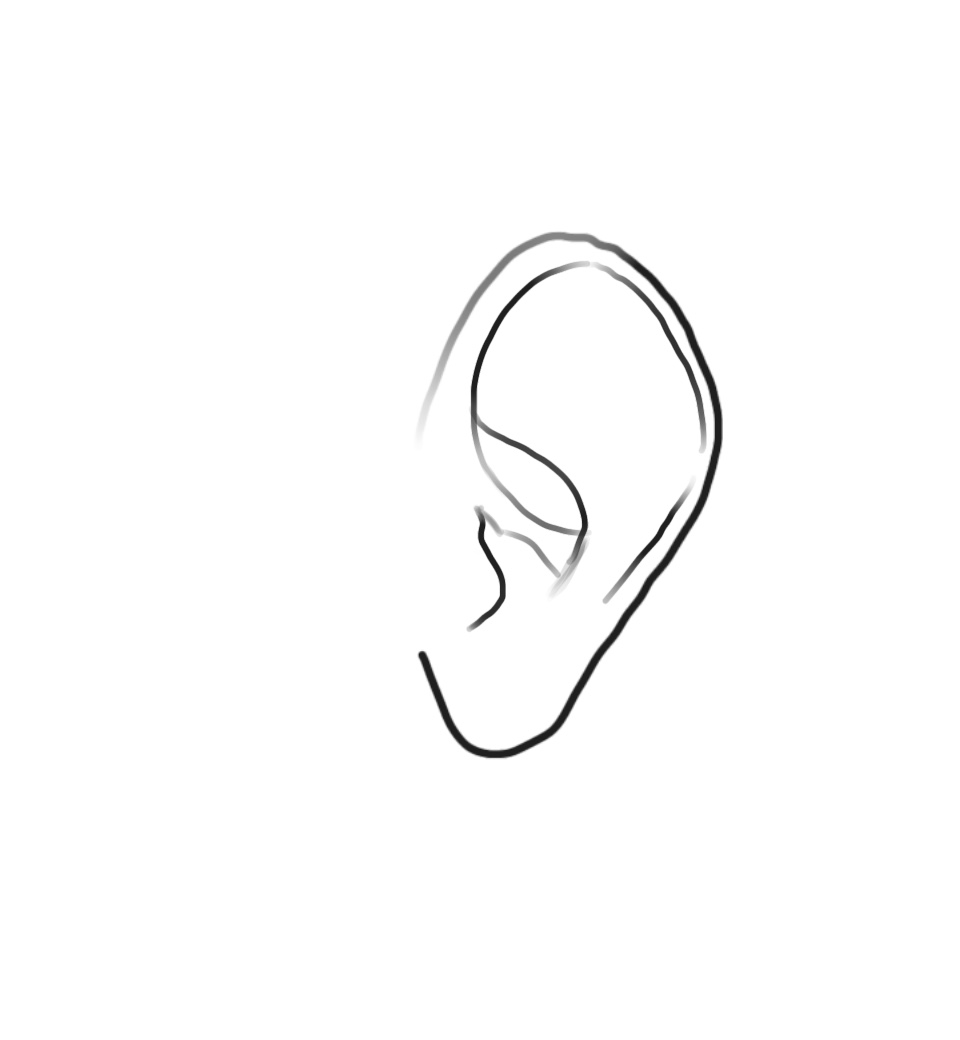

- Step 4:
Now let's block off some shading areas. 2 lines in a "u" shape at the top of the ear and right above the almond shape from the last step. Make these lines very light!

- Step 5:
Now, we'll make the final shading guideline and close off the ear hole. Let's start with the shading line! The space between the almond and the back of the ear creates a very light curved line with the bowl of the line towards the gape of the ear shape.
Now to close off the ear hold we'll extend the cartilage line we made. Make a little dip like a teardrop and then bring it back into a smaller mountain-like line to meet the line right next to it. It should look like a drop of water falling in slow motion.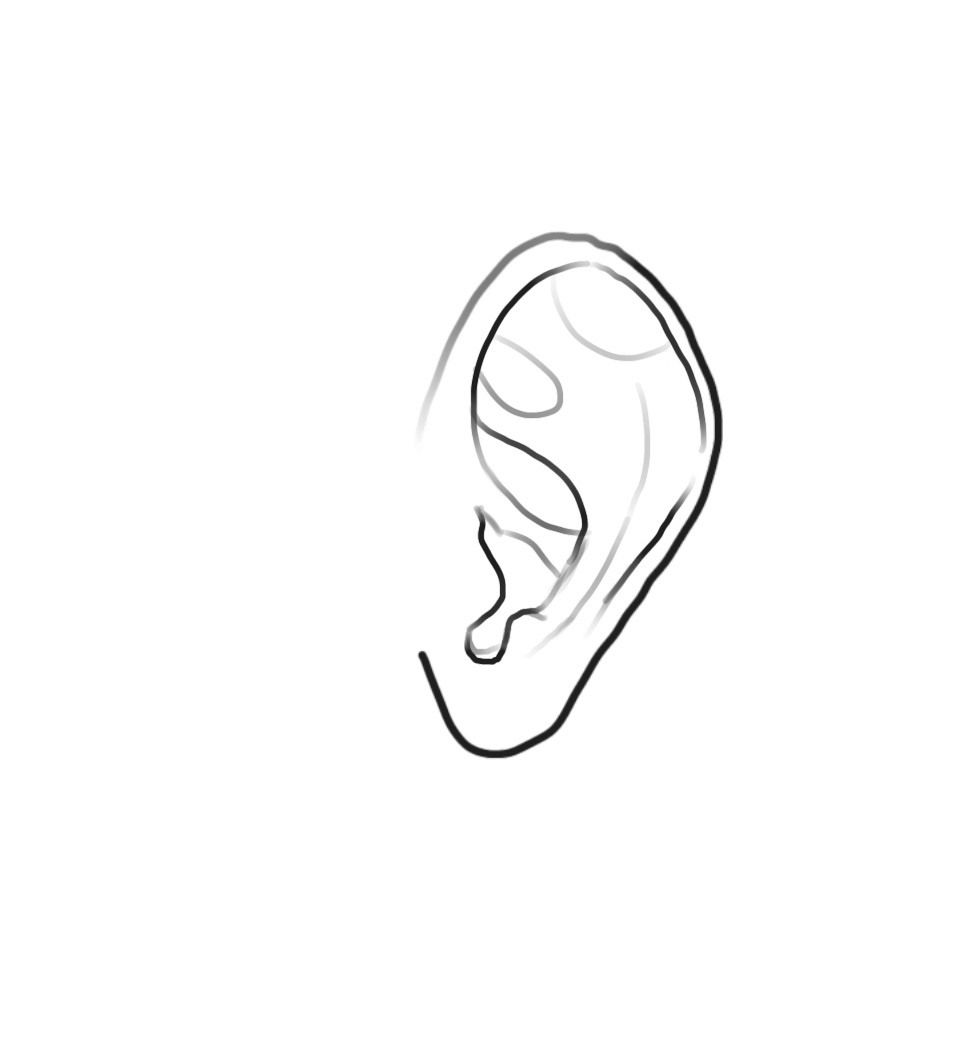

- Step 6:
At the space above the cartilage fill in a little space completely.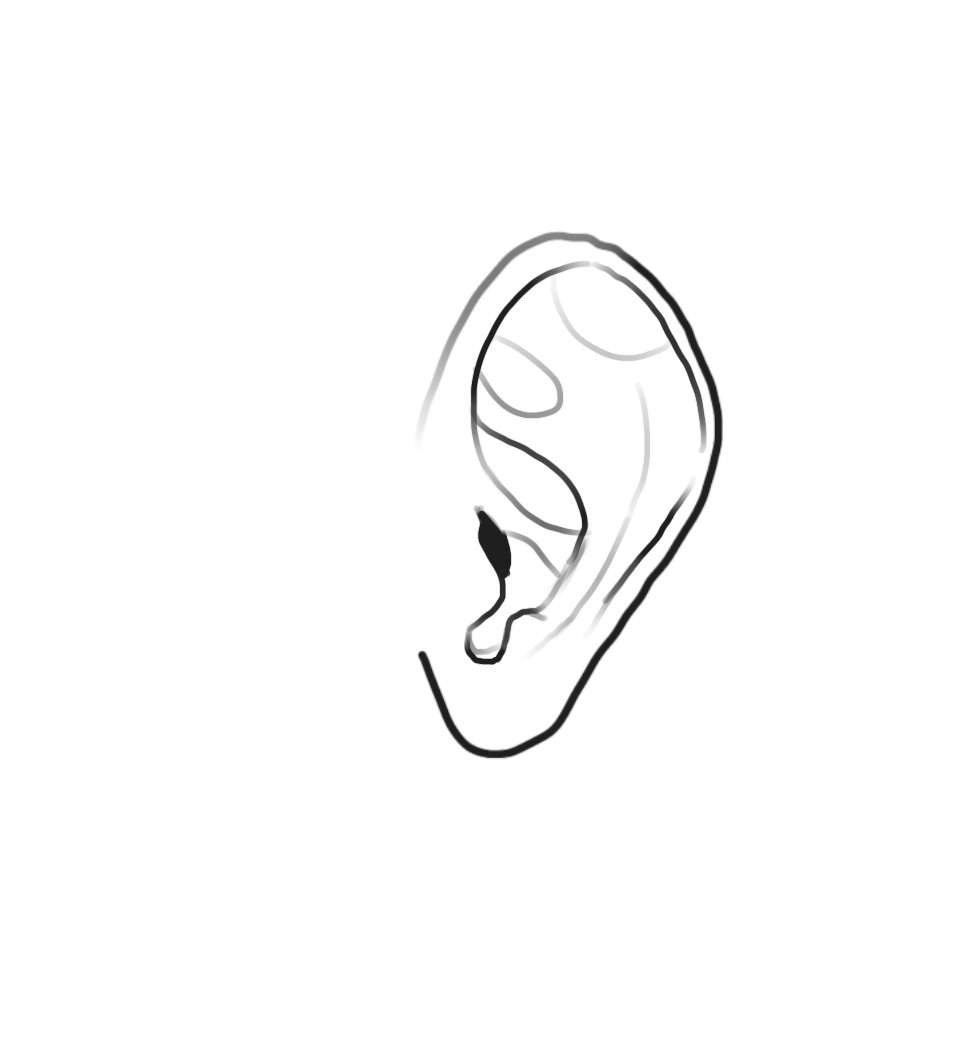

- Step 7:
NOW here's where your ear takes shape. Take your time shading, and USE REFERENCES!
With the help of a reference, you will be able to see how light and shadow play on the ear to give it its recognizable shape!
