

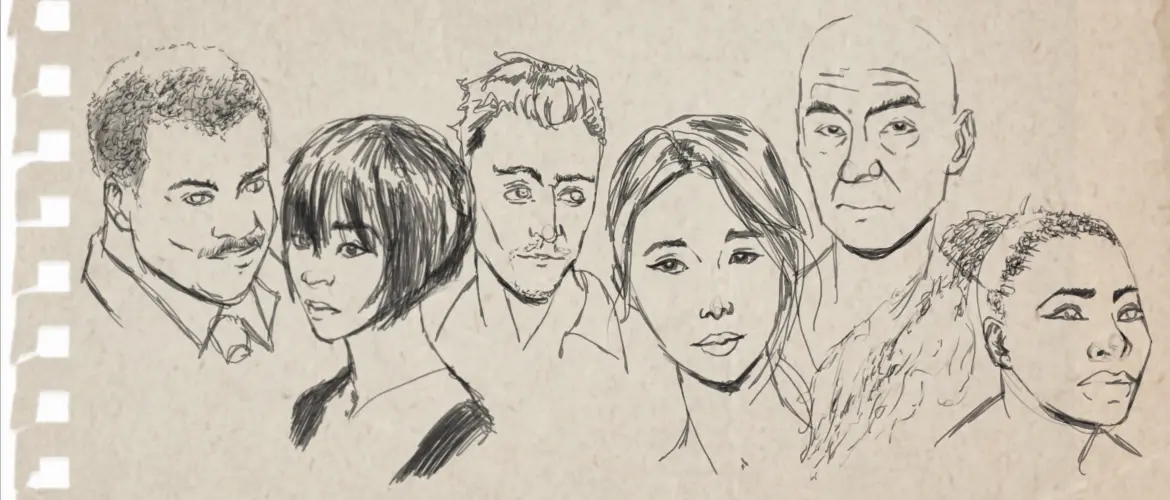
So, you want to learn some techniques for sketching faces as the lack of sketching tips is holding you back to improve your sketches.
No worries as today, I dish out tips that’ll help you know how to draw faces better.
Do you know sketching faces is a great way to develop artistic skills?
Yes, you heard me right! Every facial feature is different and it becomes a different experience when you start drawing them.
So, having a basic understanding of drawing faces is essential to draw varied facial features.
Once you have a basic understanding, you can easily learn how to draw a face showing different expressions.
To draw a portrait, it is essential to know how to draw facial features such as eyes, nose, mouth, cheeks, ears, etc.
Once you come to know how to draw the facial features, it becomes easy to draw an entire face.
Most artists do not fully understand the relationship of one facial feature with another in terms of size and placement.
As a result, they cannot be able to draw faces that look realistic.
Therefore, it is important to understand the relationship of one object with another.
This is a critical thing to know in order to know how to get better at drawing faces.
Essential Materials & Workspace Setup
Before you tackle proportions or practice drills, dial in the right tools and environment—this alone can halve your frustration and accelerate improvement.
Core Sketching Tools
- Graphite pencil set (HB–6B) – HB for construction lines; 2B–4B for mid‑tones; 6B for rich darks.
- Mechanical pencil (0.3–0.5 mm) – Keeps crisp lines for fine details like eyelashes and hair strands.
- Kneaded eraser – Lifts graphite gently to soften highlights without damaging paper fibers.
- Vinyl/block eraser – Erases large areas cleanly when you need a hard reset.
- Blending stumps or tortillons – Smooth subtle transitions on cheeks and eye sockets; avoid fingers (adds skin oils).
- Sketchbook or loose sheets, 70–100 lb (100–150 gsm) – Heavy enough for repeated erasing and light washes.
- 12″ ruler or proportional divider – Checkpoints for aligning features accurately (eye line, nose base, mouth corners).
- Small mirror – Instant live reference for angles, expressions, and lighting studies.
Optional but Helpful Add-ons
- White charcoal or gel pen – Pop specular highlights on eyes and lips.
- Light tablet/tracing pad – Refine loose thumbnails without redrawing the whole head.
- Adjustable desktop easel – Keeps paper at 15–30° so perspective distortion is minimized.
Digital Alternatives
- Tablet + pressure-sensitive stylus (iPad + Apple Pencil, Wacom, etc.) – Infinite undos, symmetry guides, and quick layer adjustments.
- Sketching apps (Procreate, Clip Studio Paint, Krita) – Customizable pencil brushes and built-in perspective grids.
Setting Up Your Workspace
- Neutral lighting – Use a daylight-balanced (5000–5500 K) lamp angled at 45° to minimize glare and cast consistent shadows.
- Ergonomic posture – Chair height lets elbows rest at ~90°; keep shoulders relaxed to avoid fatigue during long studies.
- Reference board – Pin printed photos or place a second monitor nearby so you’re not glancing off into extreme angles.
- Declutter zone – Keep only current tools on the desk; visual noise can distract when measuring delicate proportions.
- Timer – A simple kitchen timer or phone app for structured practice blocks (e.g., 5-minute warm-ups, 25-minute main studies).
With the right materials at hand and a comfortable, well-lit setup, you’ll spend less time fighting smudges or bad posture—and more time mastering the nuances of facial anatomy.
Important Thing to Know Before Sketching Faces
So, before I get into details for drawing an entire face, I think that you must first learn how to draw facial features individually.
Because in this way, you can get to know how each facial feature should look and how you can capture it in your drawings.
One thing that must be considered is whatever the facial feature you are drawing, you must use good-quality sketching pencils.
You need to know whether you will need soft or hard pencils.
H pencils are usually harder and B pencils are soft.
So, it is better to decide earlier which pencils will better suit your drawings.
Here is an ultimate guide for sketching faces.
Today, I am going to discuss the top ten tips by which you can draw facial features better, from basic drawings to drawing different faces.
I have also shared a step-by-step tutorial for drawing the features of a basic male and female face separately as the proportions are different for male and female faces.
So, whether you want to kick start your sketching journey or just need some technical information, I have something for you.
From drawing each facial feature to sketching an entire face, this guide has it all.
So, without waiting anymore, let’s take a deep dive into sketching faces better.
What is Sketching and Why It Is Considered a Good Hobby?
In terms of art, sketching is a great way of refining your art skills.
A sketch may be a rough description that lacks detail, a quick drawing that has to be completed in a certain time frame, or a simple drawing in which an artist may explore something new.
According to most people, sketching is a good hobby that everyone must acquire.
Because it may not only improve the observational skills of a person but also helps an artist to bring confidence into his drawings.
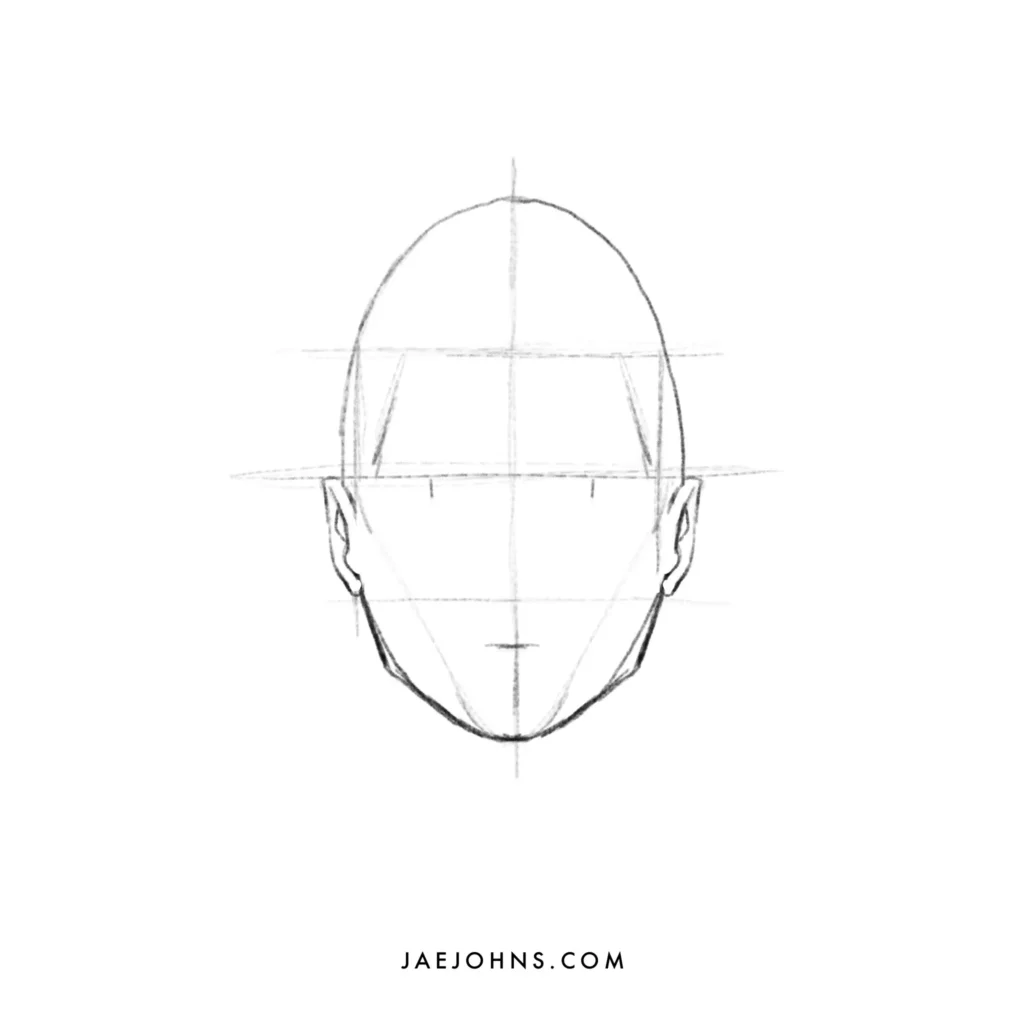
Breaking the Head Into Simple Forms
Before detailing eyes or noses, simplify the skull into basic volumes. This construction‑first approach keeps proportions consistent from any angle.
1. Start With a Sphere
- Lightly sketch a sphere for the cranial mass.
- Imagine the sphere as a 3‑D object—draw faint latitude/longitude lines to feel its roundness.
2. Slice the Side Planes
- Trim off ⅛–¼ of each side to create flat “ear panels.”
- This instantly sets the head’s true width and gives you anchor points for ears.
3. Establish the Primary Axes
- Vertical axis – Runs down the center of the face; tilting it controls head pitch.
- Horizontal brow line – Sits halfway between crown and chin on a neutral, upright head.
- Add a third hairline guide above and a nose base line below to lock key thirds.
4. Add the Jaw Wedge
- From the side‑plane edges, angle two lines downward to form the jaw hinges.
- Draw a gentle curve or angular wedge to meet at the chin point.
5. Cross‑Contour for Tilt & Turn
- Wrap curved guide lines around the form—these “latitude” arcs help place eyes, nose, and mouth on curved surfaces.
- For a ¾ view, shift the center axis toward the far side and compress features on the receding half.
6. Locate the Ear Block
- Ears start roughly at the brow line and end near the nose base.
- Drop a vertical guideline from the side‑plane corner to position them quickly.
Quick Tips
- Light construction first: Keep initial lines faint so they don’t muddy later shading.
- Mirror check: Flip your drawing (or canvas) horizontally to spot proportion slips.
- Practice tilts: Rotate the sphere forward/back and side to side—add facial thirds on each to build muscle memory.
Mastering this sphere‑plus‑planes framework makes every subsequent facial feature easier to place—no more “floating” eyes or misaligned jaws.
Easy Tips to Know How to Sketch a Face
The following are some simple and easy tips by which you can draw faces, no matter you are a beginner or an expert artist.
These tips will surely help you develop your freehand drawing along with your ability to see tones and colors in different things and are essential to know how to sketch a face.
Knowing how to sketch faces can also give you so much more confidence in being able to draw people in general.
Take a Class in Drawing Faces
The first and foremost tip for drawing faces is to take a class that may teach you how you can draw faces perfectly.
It means that you need to learn how each facial feature looks and work.
For example, if you are drawing an eye, you must learn different components of an eye.
I do not mean that you should learn what they are called.
But having a basic understanding of the components of an eye will surely help you to draw realistic eyes.
Moreover, taking a class in sketching faces will definitely help you to draw and sketch better, for example, you can know:
- Learn how to see different facial features
- How to draw what you can see
- How to construct an entire scene (in the case of figure drawing)
- Learn to draw shapes and values
- How to add details into the shapes
- how to make a connection between each facial feature
- Be able to measure proportion, size, and space correctly
In this way, you can not only improve your observational skills but you can also develop your own style of sketching.
Sketching the Front View of the Nose
Most artists think that drawing a nose is a complicated task.
But the thing is if you break the nose drawing into sections, it will be easier for you to draw.
You can use different shapes and forms that may guide you to create the shape of the nose from different angles, profile view, or straight-on/front view).
- For sketching the front view of the nose, it is always recommended to use the grid method. The grid method may assist you to create a line drawing of the nose. For drawing realism in the front view of the nose, you must use a good-quality sketching pencil, smooth paper, an eraser, and a blending stump. Note: Make sure to keep the pencil strokes light so you can erase them afterward.
- Once you have created the basic structure of a nose using a pencil, it is time to add light and dark tones. Be sure to remove the grid lines before adding light and dark shades.
- Dark shades should be added in the nostrils, at the lower side of the nose, and around the nose tips and bridge. Whereas light colors should be added at the rim of the nostrils, on both edges, and at the tip/ball of the nose.
- After adding light and dark shades, you must blend them to give a smooth effect to your sketch. This will create an airy as well as shadowy aspect in your drawing, adding soft touch as well. You can use a stump for blending or an eraser can also work fine to dab on the areas which appear too dark.
- To make the nose look real, blend the dark shades in the lighter shades. You can leave skin tones light or dark, it is up to you. You can experiment with shading here to achieve unique nose shapes.
Sketching the Profile View of the Nose
The process of sketching the profile view of the nose is a bit similar to that of the front view.
- First, using a grid method, draw the shape of the nose from a side angle. If it seems difficult for you, you can draw the shape of a nose by drawing two circles (for the nostrils) and one triangle (for drawing the bridge of the nose). As it is a side view of the nose and one nostril should be visible, try to make the shape of the nostrils in between the two circles.
- Once the shape is drawn, remove unnecessary lines, circles, or triangles. Add light and dark shades using a good sketching pencil.
- Light tones should be used at the tip of the nose whereas black tones should be added in the nostril area along with the edges. Never shade the full area as it is better to leave some areas highlighted. You can also keep the details light, hence adding only what is needed.
- To make the edges of the nose look clear, always use the dark shade in the background.
- The last step is blending. To add a smooth touch to the sketch and make the skin look less harsh, apply blending in a circular motion.
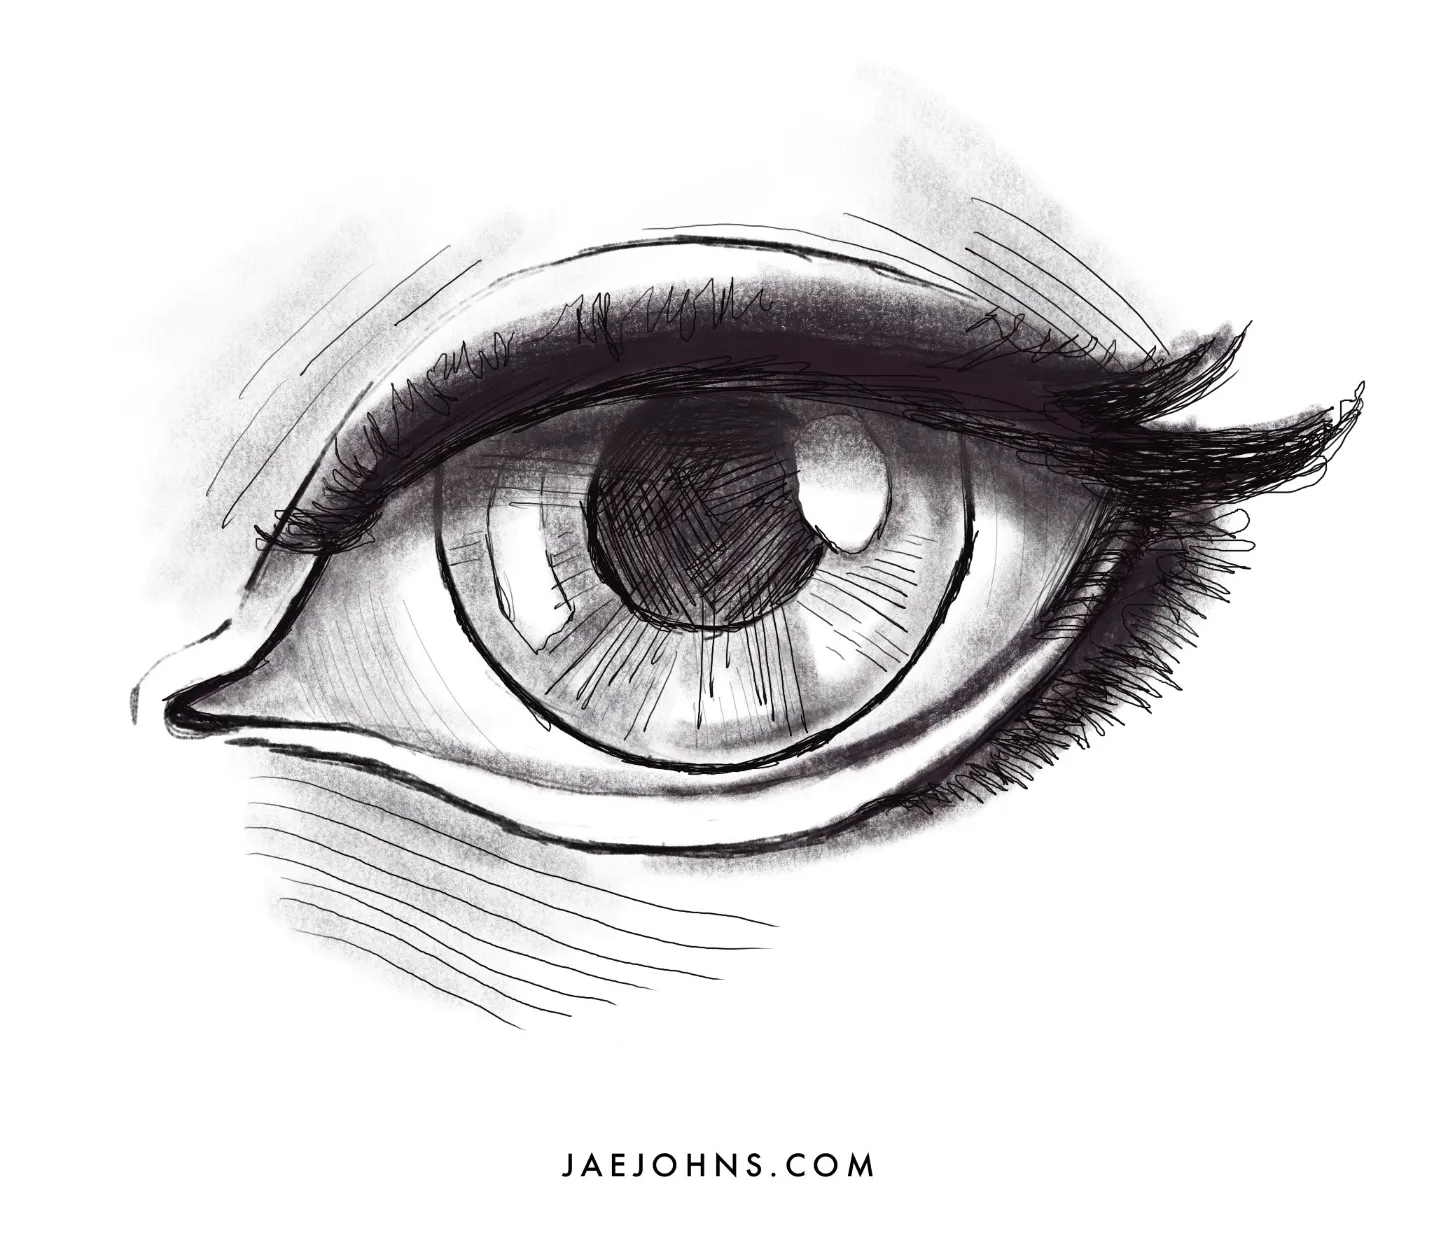
Drawing a Realistic Eye
Another important tip for how to draw a face shape is to learn to draw an eye that looks realistic.
Follow the step-by-step instructions mentioned below to draw a realistic eye:
- At first, to create a line drawing of an eye, use a grid method. At this point, you must know the shape of the iris, pupil along other parts of an eye.
- Once you have drawn the eye with an HB pencil, carefully remove the grid lines using an eraser. Just make sure that the outline of the eye is not too dark because, in the end, result, you need to prevent the outline from showing.
- Now make perfections in your drawing by adding the shaded effects in certain areas.
- Draw a small circle for the pupil and a big circle for the iris. Use a pencil to create wheel-like strokes in the iris that go outward. To create the reflection of light, leave one side of the pupil open. To make the pupil look open on one side, you may use a circle, square, or an oval shape.
- Add darker shades at the corner of the eye to give it a smooth shape.
- Once you are done with the shading, you must blend them to fill any white space left. Make sure that the line strokes coming out of the pupil are still visible in the final result.
- In the end, draw eyelashes using curved lines instead of straight lines. To make sure that they look real, use a thin pencil. You can draw thick and long eyelashes to give a feminine look to the character of your drawing.
- In addition, shade the area around the eyes as well to make the shaded areas look lightened and the highlighted areas pop. To add depth to an eye, you can also make the shades go dark.
Use a Line Drawing Method for Sketching Lips
Sketching lips using a line drawing method is no difficulty at all.
You must know exactly the shape of the lips.
There are many mistakes that beginner artists make when they first try to sketch the lips, for example, not defining hard edges or considering the right angle.
- To sketch lips, the first step is to draw lines (using a grid method). Keeping in view the shape of the lips, sketch them using a mechanical pencil.
- Remember, the upper lip is usually smaller and appears darker than the lower lip because the angle of the upper lip is inwards and that of the outer lip is outwards.
- Once you have finished drawing the lips, draw some lip wrinkles, apply the dark patterns in certain areas (outer edge, lower lip, and bottom of the lips) and blend them using a blending stump or tissue paper. Never draw the lip wrinkles too dark otherwise they will look unnatural.
- Make sure to blend the light and dark shades at the corners appropriately to create a realistic look to the lips. As you are blending the lips, just be careful with the lip wrinkles. They should not disappear.
Whether you are drawing male lips or female lips, you can show certain areas on the lower lip shiny and moist but make sure that you have determined earlier from where the light is coming.
Sketching Smiling Lips
So, you are a beginner and want to know how to draw a face for beginners?
Apart from sketching eyes, nose, and lips, you should also learn to sketch smile lips.
Sketching smile lips is super easy once you know the basic sketching tips and techniques.
Most artists draw teeth but they look creepy or dark.
Therefore, proper shading effects should be added in both lips and teeth so that they may look good in the overall face sketch.
To sketch smiling lips, I always suggest using a line drawing method instead of drawing shapes first and then draw lips.
- First of all, start drawing the lips (with vertical lines, diagonal lines, or curves) using a grid method as mentioned earlier. As you are drawing the smile lips, so you must draw teeth as well. Draw teeth in perfect shape as well as size to make the whole drawing look appealing.
- When you are drawing teeth, just make sure that there is no hard or dark line between the teeth otherwise it will look odd. Make the lines separating each tooth subtle.
- As teeth should look dimensional, so it is important to add some shading effects in them using an HB pencil, instead of leaving them just white. HB pencil is always recommended to use at this step as it may prevent you from shading dark!
- Once you have completed drawing lips and teeth, erase all guidelines and apply the dark and light tones.
- Start shading the lips first instead of teeth. Also, add some effects of shading in the gum line or at the edges of the teeth. The upper lip should appear darker than the lower lip. For this, apply some light colors at certain portions of the lower lip to make them look shiny and glossy. Plus, the inside of the mouth should also appear dark from the sides and light from the middle to show the tongue.
- After adding the shading effects, blend the lips and teeth as much as you can!
Note: Never draw teeth that look the same.
There is a bit of difference in each tooth.
So, it is better to make them slightly different from each other in terms of size and alignment.
Drawing Eyes, Nose, and Lips together Using a Grid Method
Once you have learned how to draw an eye, nose, and lips, it is time to draw them together.
This is another useful technique if you want to step into the field of sketching faces.
The grid method is always considered the best method in the case of face drawing as it may aid an artist to draw facial features perfectly, keeping in view the right shape, size as well as placement.
Before sketching eyes, nose, and lips, keep in view some important facts that may guide you through the whole drawing.
- Using a grid method, create a line drawing of eyes, nose, and lips.
- For drawing eyes, the space between the eyes should be as much as that of the width between the eyes. It should not be too much or too little. Moreover, the iris and the pupil should be the same in both eyes. This will allow you to draw eyes looking in the same direction.
- To sketch a nose, draw a vertical line down from the corner of the eyes. These vertical lines will become the edges of the nose. To draw lips, you can draw simple lips or smiling lips.
- Once you are done with the drawing of the eyes, nose, and lips, you need to erase the grid lines.
- Apply light and dark tones in different areas. For example, dark tones should be added at the corner of the eyes, around the lips, or at the nostrils. Highlight some areas such as the nose tip as well as some portion of the lower lip.
- For completing the eyes first, as you have to leave one side of the pupil open, apply this strategy for both eyes so that they look the same.
- Draw eyebrows with a mechanical pencil and then shade the area so that the hair on the eyebrows may look visible.
- The last step is blending with the blending stump. It is one of the most important steps as it may make or break your sketching. Remember, white tones should always be added to enhance the beauty of the artwork.
Do remember that the eyes of your character are very important to convey the right emotion.
Therefore, along with the proper shape of the eyes, shading in the eyes is also crucial to give them life.
Drawing Ears from the Front
Ears are one of the facial features that are difficult to draw because they have a unique shape.
They are, in fact, made up of many small as well as intricate shapes.
For drawing ears, you must learn sketching them from different angles.
Because at times, when you are drawing faces, you need to make only the earlobe visible, hiding the rest of the ear with hair.
And at other times, you may need to draw a side view of the ear, hence showing all the complexities of the ear.
Just like other facial features, the grid method also works well for ears, no matter whether you are drawing ears from the front or from the side.
- In the first step, create a line drawing of an ear.
- Once you have completed drawing the shape of the ear, it is time to sketch the ear for the purpose of adding depth at certain areas. Note: The outline of the ears should be made with shading rather than a clear outline of a pencil. Making an outline of the ear will make it appear natural!
- Before shading, remove unnecessary grid lines using a soft eraser. This will definitely give a neat look to your sketch so you can start shading the areas.
- Now where to apply darks? As the outer ear always overlaps the inner ear, so the area where the outer ear is overlapping the inner ear should be shaded dark. Moreover, darks should also be applied around the edges as well as the earlobe.
- Where to apply highlights? The skin of the ear is a bit oily as compared to other parts of the face. Therefore, to make it look different, you should apply highlights in that area, keeping the whole area looks bright.
- For lifting out the highlights, you may use an eraser otherwise blending stump will work fine.
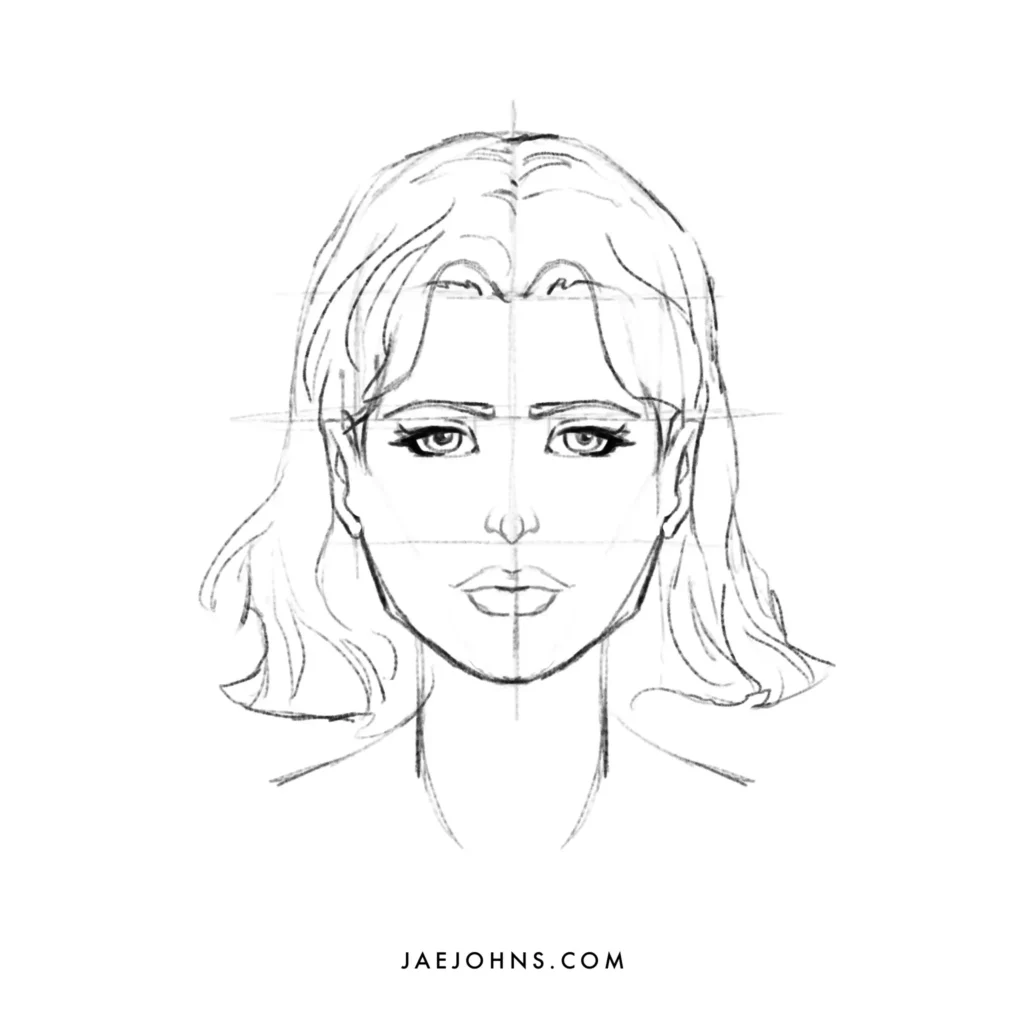
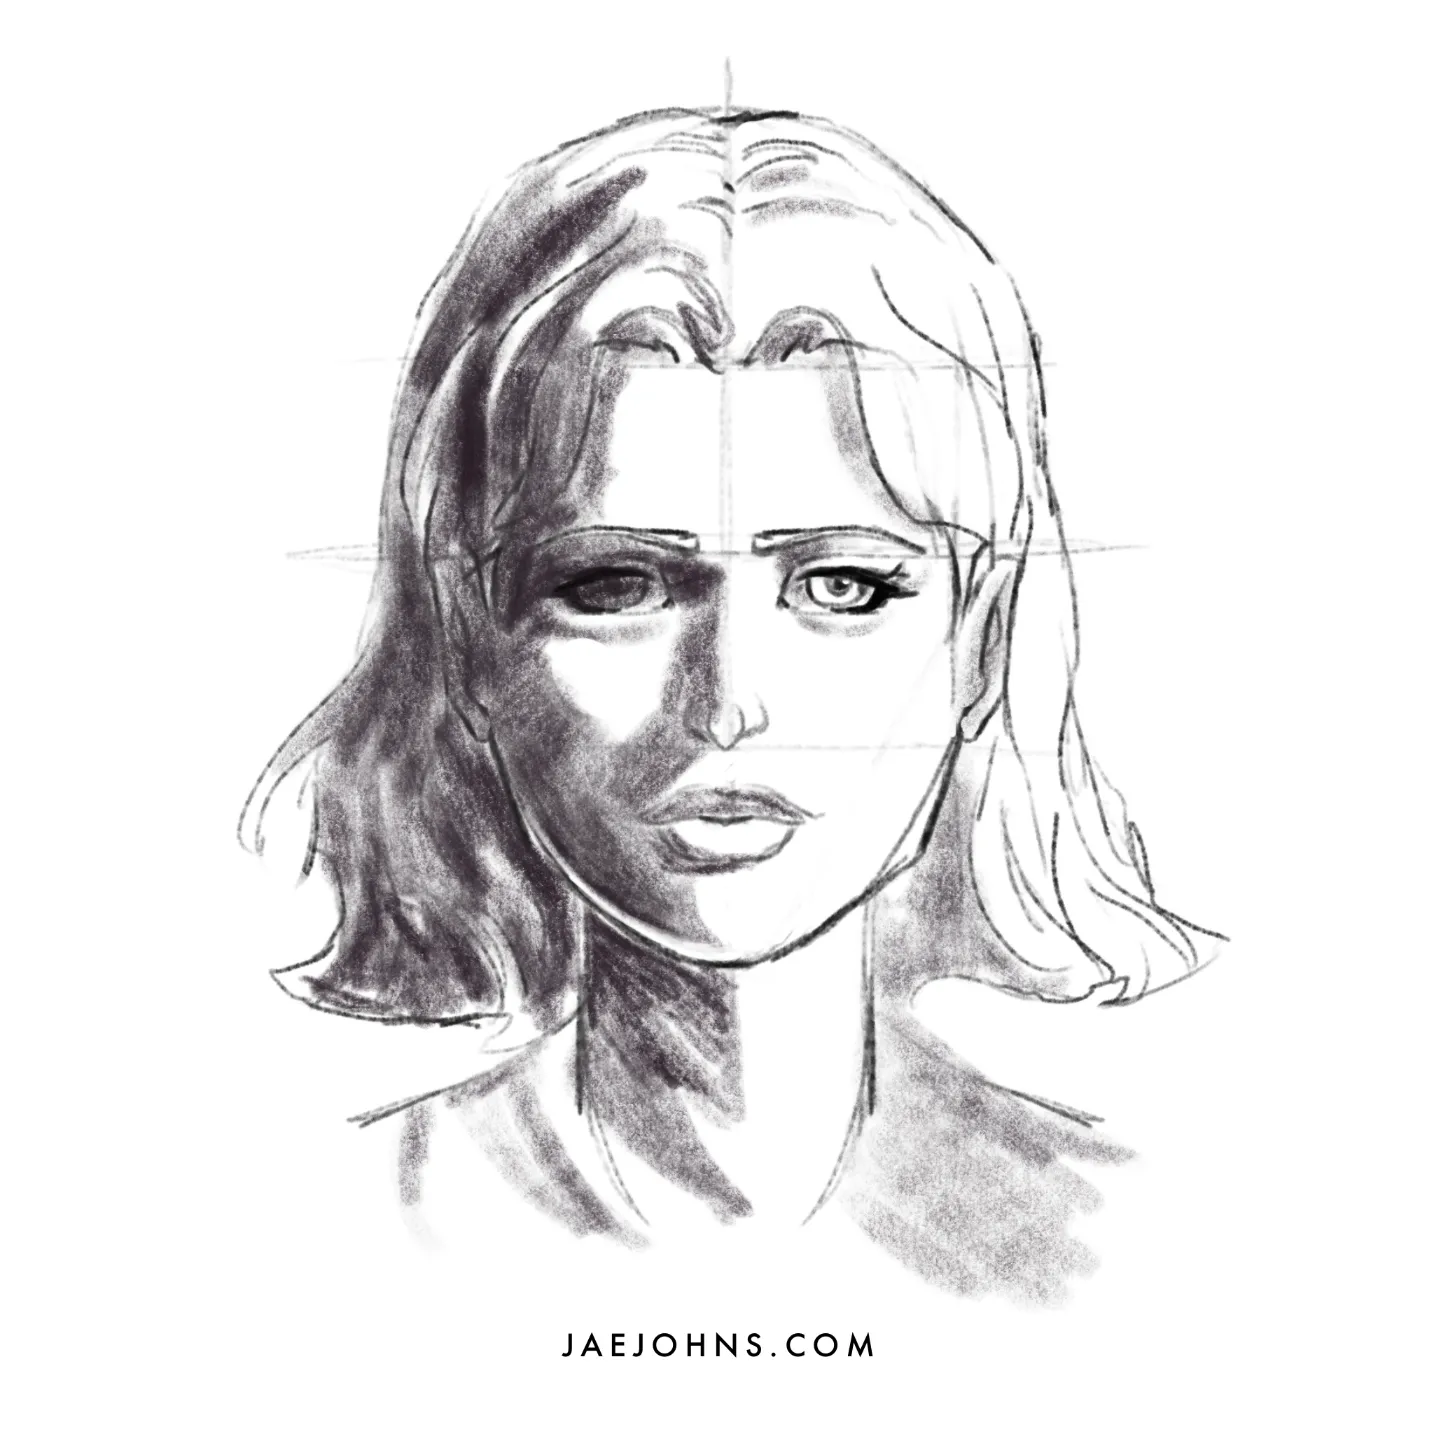
Draw an Entire Face
Once you have learned how to sketch facial features separately, it is time to draw an entire face.
Never start drawing a portrait unless and until you learn to draw the facial features separately.
Practice first and then draw an entire face.
This technique will definitely assist you in sketching faces better.
Always start sketching the face by drawing the eyes first.
By doing this, you can create a connection with the subject of your drawing.
After that, start drawing a nose, lips, and then ears respectively.
- First of all, using a grid method, draw the face of a male or female. For this, draw a large circle and a small horizontal line below the circle at some distance. This horizontal line will help you draw a chin. Draw a vertical line starting from the center of the circle and touching the horizontal line. Then, to create a jawline, sketch lines from both sides of the circle, meeting the horizontal line below.
- Whether you are drawing a face with some shapes or you are using a line drawing method, you must create such a drawing of a face that looks convincing.
- Note: You can use a ruler method or a not ruler method for adjusting the height of the face or for drawing eyes, nose, lips, and ears. Be very careful with every shape you draw as each shape will collectively create an entire face. You can use different measurements to give proportions to each face type. Once you are finished with the drawing phase, start shading.
- Shading plays an essential role in drawing an entire face. Using the five elements of shading, apply, and dark and light shades in your sketch to make it look real as well as captivating. Start adding light and dark tones from the eyes to the nose and lips to create a triangle of shading.
- You can apply dark shades across the entire face to create the edges. After drawing ears, start drawing hair with the help of long brush strokes.
- Now here comes the blending part which is usually the most important part of sketching faces. As you did blending in the facial features, similarly, apply blending also in each facial feature, hence blending should be applied over an entire face to give it a smooth yet real touch.
- Leave some parts highlighted such as the tip of the nose, middle of the lower lip, and the eyes. You may also use a kneaded eraser to leave some portion white to make them look more highlighted.
Remember, sketching a face is just like sketching any other subject matter.
At times, it may be a bit challenging not only for the beginner artists but for the experts as well.
Therefore, it is always recommended to learn facial features separately.
Because once you learn drawing features separately, it will be much easier for you to draw an entire face.
Moreover, good observation skills and correct mark-marking is also very crucial for sketching faces better.
Create Interest in Your Subject by Controlling Edges
The last important tip for sketching faces better is to create interest in your drawings by controlling the edges.
There are mainly four techniques to define the edges of an object.
These may include hard edge, soft edge, lost edge, and undefined edge.
Hard and soft edges are used to give borders to an object.
To give a thick border, a hard edge is used and for a thin border, you must use a soft edge.
At places where you want to give a merged effect between the object and the background, lost and undefined edges work well.
To create interest in your face sketch, you may use all four types of edges.
Get Your Proportions Right
Before you start gettin’ into the details, make sure you got the basics down. I’m talkin’ about proportions and symmetry.
Use a ruler or grid to measure the distances between the eyes, nose, mouth, and ears so you can make sure everything’s balanced and in its place.
Light and Shadow: Your New BFFs
Light and shadow can make or break your portrait. Observe how the light falls on your subject and use it to make the curves and contours pop.
Pay attention to the shadows under the eyes, nose, and chin, and the highlights on the cheekbones and forehead. You’ll be amazin’ yourself with how real it looks.
Mix It Up with Different Pencils and Techniques
Different pencils and techniques can give you a variety of textures and effects that make your drawings come to life.
For example, use a soft, graphite pencil for shading, a harder lead for fine lines, or a charcoal stick for bold, dramatic strokes. Experiment and find what works best for you.
Make Those Eyes Pop
Eyes are the windows to the soul, man. When you’re drawing eyes, focus on the shape, size, and placement of the pupils, irises, and lids.
And don’t forget the reflections and highlights that add depth and dimension.
Mouths and Lips: A Whole New Level
Mouths and lips can add so much expression to your portraits. Pay attention to the shape, size, and placement of the lips, as well as the lines and wrinkles that give the mouth character.
Don’t be afraid to try different techniques like cross-hatching or stippling to create different textures.
Give ‘Em Some Character with Hair and Clothes
Hair and clothes can add so much personality to your portraits. When you’re drawing hair, focus on the texture, length, and style, and the highlights and shadows that give it volume.
With clothes, think about the folds, wrinkles, and patterns that give it movement and depth.
Practice Makes Perfect
It’s true, man. The more you draw, the better you’ll get.
You’ll develop your own unique style and techniques, and you’ll become more confident with each drawing. Don’t be afraid to experiment, make mistakes, and try new things.
Keep practicing and you’ll be amazin’ yourself in no time.
Drawing Faces From Different Angles & Perspectives
Changing the head’s tilt or turn adds instant life to your portraits—but it also multiplies placement challenges. Use these guidelines to keep features accurate no matter how the skull rotates.
1. Anchor the Head’s “Box” in 3‑D
- Sketch a light cuboid (or “masked box”) around the sphere/jaw combo.
- The box gives you true top, bottom, and side planes—great for extreme up‑shots or down‑shots.
2. Re‑establish the Center Axis
- Draw a curved vertical line wrapping the face to mark the midline.
- Wherever this arc lands, split the face into equal left/right masses—even in ¾ views.
3. Adjust the Facial Thirds on a Curve
- Brow, nose base, and chin lines bend around the surface.
- Compress the far side: the farther it turns away, the thinner that plane becomes.
4. Common Angles & Key Landmarks
| Angle | Landmarks to Watch | Quick Check |
|---|---|---|
| Front (0°) | Equal eye spacing; ears barely visible. | Both eyes same width. |
| Three‑Quarter (≈ 45°) | Near eye wider; far cheekbone tucked. | Align far eye corner to near nostril. |
| Profile (90°) | Ear centers on head’s mid‑third; nose tip projects. | Angle of forehead to chin ≈ straight line. |
| Up‑Shot (worm’s‑eye) | Under‑planes of nose/lips visible; chin overlaps neck. | Eye line arches upward like a rainbow. |
| Down‑Shot (bird’s‑eye) | Top plane of forehead/hair dominates; jaw foreshortens. | Ear tops align higher than brow line. |
5. Foreshortening Tips
- Squash & stretch: Near features enlarge slightly, far ones compress.
- Contour wrap: Circle the eye sockets and mouth around the curvature to avoid “sticker‑on” look.
- Shadow cues: Cast shadows steepen on down‑shots, lighten on up‑shots—use them to emphasize depth.
6. Rapid‑Fire Angle Drill
- Draw ten 1″‑wide spheres.
- Randomly tilt/turn each (add arrows for direction).
- Apply thirds, jaw wedge, and quick feature placeholders in under two minutes each.
- Review: correct any asymmetries or drifting axis lines.
Mastering these rotations trains your eye to see the head as a solid object, preparing you for dynamic expressions and action poses.
Capturing Expressions & Emotion
Faces tell stories—subtle eyebrow shifts can signal curiosity, while a tight jaw broadcasts tension. Mastering expressions makes your portraits feel alive.
1. Know the Key Muscle Groups
- Frontalis – Raises the brows; active in surprise, curiosity.
- Orbicularis oculi – Squints eyes; engaged in genuine smiles, disgust.
- Zygomaticus major – Pulls mouth corners up for smiles or laughs.
- Depressor anguli oris – Drags corners down in sadness or disdain.
- Mentalis – Pushes the chin up to show doubt or determination.
2. The Three‑Part “Expression Recipe”
- Eyebrows – Angle, spacing, and height set overall mood in seconds.
- Eyes/Lids – Wide‑open for shock; half‑lidded for calm or skepticism; squinted for anger.
- Mouth – Corners up/down, lips pressed or parted—fine‑tunes intensity.
Quick check: Block the lower half of a reference photo. If you can still read the mood, your brows and eyes are doing the heavy lifting.
3. Expression Scale: Subtle to Exaggerated
| Intensity | Approach | Use Case |
|---|---|---|
| 1–2 Subtle | Shift brows by 2–3°; barely curve lips. | Portrait realism, slow‑burn emotions. |
| 3–4 Moderate | Clear eyebrow arches; cheek muscles engaged. | Editorial illustrations, character sheets. |
| 5 Over‑the‑Top | Push features to edges of anatomical limits. | Comics, animation key frames, caricature. |
4. Warm‑Up Drills
- Mirror Marathon (5 min)
- Cycle through 10 emotions: neutral ➜ happy ➜ angry ➜ sad, etc.
- Sketch only the brows + eyes first, then add mouth shapes.
- Emoji Express (10 min)
- Randomly pick five emojis.
- Translate each into a quick 60‑second face silhouette.
- Thumbnail Tilt & Feel (15 min)
- Draw nine 1″ heads, each with different angle and emotion.
- Forces you to align expression with perspective.
5. Reference & Feedback
- Photo banks: Use sites like Pexels or ArtStation for varied ethnicities and lighting.
- 3‑D apps: Procreate’s FacePaint, Clip Studio’s 3‑D head models—rotate to lock angles.
- Peer critique: Post side‑by‑side with your ref; ask if viewers “read” the intended emotion in 2 seconds.
6. Common Pitfalls
- Floating eyebrows – Not anchored to brow ridge; add a slight shadow beneath.
- Symmetrical smiles – Real smiles are usually asymmetrical; raise one corner a tad higher.
- Dead‑center pupils – Move pupils toward tear duct or outer edge to avoid a staring “deer‑in‑headlights” effect.
Capturing nuanced emotion isn’t about memorizing icons—it’s about understanding how muscle groups interact. Combine this knowledge with solid head construction and your portraits will communicate volumes.
Diversity in Faces: Age, Gender & Ethnicity Considerations
Portrait mastery means representing all faces authentically. Small shifts in proportion, planes, and skin details communicate age, gender cues, and cultural heritage.
1. Age Variations
| Stage | Proportion Shifts | Surface Clues |
|---|---|---|
| Infant (0–2) | Head ≈ ¼ body height; giant cranium; facial features clustered near center. | Almost no visible bone landmarks; cheeks round, eyes appear large. |
| Child (3–12) | Head ≈ ⅕–⅙ body; chin lengthens; eyes still proportionally big. | Softer jawline; subtle eye bags; faint nasal bridge. |
| Teen (13–19) | Jaw and nose grow faster; facial thirds balance out. | Acne textures, sparse facial hair, fuller lips. |
| Adult (20–50) | Stable proportions; brow ridge and cheekbones defined. | Skin elasticity good; laugh lines, slight under‑eye hollows. |
| Senior (50+) | Skull unchanged, but soft tissue thins; ears/nose elongate slightly. | Wrinkles follow muscle pull; temples hollow; age spots. |
Tip: For credible aging, dial texture before exaggerating wrinkles—subtle sag and volume loss sell age better than deep lines alone.
2. Gender Cues (Biological Averages)
- Male‑leaning traits
- Brow ridge more pronounced; forehead slopes slightly backward.
- Wider zygomatic arches; square jaw; chin broader and flatter.
- Thicker neck cylinder and Adam’s apple hint.
- Female‑leaning traits
- Softer brow ridge; forehead more vertical.
- Cheekbones prominent but taper into a narrower jaw; pointed chin.
- Fuller lips; subtler neck tendons.
Use a spectrum, not a binary toggle—blend cues for non‑binary or androgynous characters.
3. Ethnicity & Ancestral Features
| Region/Group (generalized) | Key Landmarks |
|---|---|
| East Asian | Lower nasal bridge; wider bizygomatic width; eye fold variations (monolid, double lid); flatter mid‑face plane. |
| South Asian | Sharper nasal tip; fuller lips; strong brow lines; almond‑shaped eyes. |
| Sub‑Saharan African | Broader nasal wings; pronounced malar (cheek) fat pads; thicker lips; tighter hair curl textures. |
| European | Higher nasal bridge; deeper eye sockets; narrower mandible; varied brow thickness. |
| Indigenous American | Straight nasal dorsum; high cheekbones; slightly broader face; smooth brow ridge. |
Reference real diversity: Use multi‑angle photo sets—avoid relying on a single “representative” image.
4. Practical Study Methods
- Photo grids – Compile 5×5 grids by age bracket or region; sketch silhouettes first, then refine features.
- Overlay tracing – Ghost a basic skull diagram over diverse photos to see how anatomy adapts.
- Texture swatching – Practice micro‑studies of skin pores, freckles, folds, or hair patterns unique to each subject.
5. Respectful Representation
- Avoid stereotypes: Anchor every stylization choice to anatomy or culture, not cliché caricatures.
- Mind context: Historical era, climate, and lifestyle influence facial musculature and markers (e.g., sun‑exposed skin).
- Seek feedback: Show work to people from the depicted groups—adjust respectfully.
Accounting for these nuances enriches your portraits with authenticity and empathy, allowing every viewer to feel seen.
Stylization vs. Realism – Finding Your Balance
Every artist sits on a spectrum between faithful realism and expressive stylization. Understanding the extremes—and how to mix them—helps you shape a unique visual voice.
1. What “Realism” Means in Portraiture
- Anatomical accuracy – Bones, muscles, and fat pads sit where biology dictates.
- Proportional fidelity – Measurements match your reference; no intentional exaggeration.
- Natural textures & lighting – Pores, subtle blemishes, and soft gradients replace graphic outlines.
Goal: Capture a subject so believably that viewers feel they could reach out and touch the skin.
2. Defining Stylization
- Intentional simplification – Reduce complex forms into clear, readable shapes (e.g., anime eyes, comic noses).
- Exaggeration for impact – Enlarge or shrink features to heighten emotion or personality.
- Signature line quality & rhythms – Curves, angles, and line weights become part of your “handwriting.”
Goal: Convey mood or story instantly—even if anatomy bends the rules.
3. The Blend: Realistic Foundations + Stylized Flair
| Aspect | Realism Anchor | Stylized Twist |
|---|---|---|
| Proportions | Keep eye‑to‑eye spacing at one‑eye width. | Shift to 1.5 widths for a softer, youthful look. |
| Line Work | Hidden lines suggested by shading. | Bold outlines for silhouette clarity. |
| Shading | Smooth tonal gradations. | Cell‑shading blocks with hard edges. |
| Color | Natural skin palettes. | High‑chroma accents (e.g., neon rim light). |
4. Finding Your Ratio
- Study your heroes – Collect 5 realistic artists and 5 stylized ones. Note what you like in each.
- Chart preferences – On a 0 – 10 slider (0 = pure realism, 10 = pure stylization), mark where each artist lands; place yourself.
- Experiment sets – Draw the same face three times: realism (0), mid‑mix (5), full stylization (10). Compare clarity, appeal, and comfort.
5. Practical Exercises
- Shape Language Swap (15 min)
- Take a realistic photo. Replace eyes with triangles, nose with a soft square, etc., while maintaining placement.
- Realism Overpaint (30 min)
- Scan a stylized sketch; paint realistic lighting and textures on top to see where lines need correction.
- Stylize From Life (20 min)
- Quick café sketches—exaggerate one feature per person (e.g., tallest hair, widest smile) while holding basic structure.
6. Common Pitfalls
- Over‑simplification – Removing too many planes flattens the face; keep at least three value tiers.
- Feature drift – When exaggerating, re‑measure anchor points (eye line, nose base) to avoid “melting” symmetry.
- Style inconsistency – Mixing a highly rendered eye with flat‑colored cheeks confuses the viewer; decide where detail peaks.
Art thrives on contrasts—by grounding your stylization in sound anatomy, you unlock an endless toolkit for expressive, recognizable faces.
Quick Practice Drills & Timed Sketching Exercises
Short, structured bursts of practice build mileage faster than marathon sessions. Try these bite‑sized drills to sharpen accuracy, speed, and confidence.
1. 60‑Second Warm‑Up Circles (5 min)
- Fill a 5×5 grid with loose spheres—vary sizes and pressures.
- Purpose: Loosen your wrist and calibrate line weight before moving to faces.
2. Speed Lines & Planes (7 min)
- Draw a quick head sphere.
- In 30 seconds, drop the brow, nose, and chin thirds.
- In the next 30 seconds, add side planes and jaw wedge.
- Repeat 5×, focusing on clarity, not detail.
3. Feature Sprints (10 min per set)
- Eyes – 2 min: five different eye shapes from reference.
- Noses – 2 min: profile, ¾, front views.
- Mouths – 2 min: closed, open, smirk.
- Ears – 2 min: front vs. slight turn.
- Brow + hairline – 2 min: experiment with ages and genders.
4. Expression Roulette (15 min)
- Write 10 emotions on slips of paper; pull two at random.
- In 3 minutes each, sketch a thumbnail head merging those feelings (e.g., “surprised + skeptical”).
- Objective: Train muscle memory for nuanced mixes rather than stock expressions.
5. Angle Ladder (20 min)
- Start with a neutral front view.
- Every 4 minutes, tilt or turn the head 15°.
- Climb five rungs: front ➜ 15° up ➜ 30° ¾ ➜ 45° down ➜ profile.
- Focus on keeping facial thirds curved correctly around the form.
6. Value Push (10 min)
- Choose a finished sketch.
- Set a timer for 5 minutes to darken the deepest shadows (ears, nostrils, eye sockets).
- Reset and 5 minutes to lift highlights with a kneaded eraser.
- Teaches decisive contrast without muddy mid‑tones.
7. Weekly Challenge Calendar
| Day | Drill | Time |
|---|---|---|
| Mon | Warm‑Up Circles + Speed Lines | 15 min |
| Tue | Feature Sprints (eyes & noses) | 20 min |
| Wed | Angle Ladder | 20 min |
| Thu | Feature Sprints (mouths & ears) | 20 min |
| Fri | Expression Roulette | 15 min |
| Sat | Value Push on older sketches | 15 min |
| Sun | Free sketch or rest | — |
Pro tip: Keep a sticky note log of times and difficulty ratings (1–5). Gradually shorten timers or add complexity to stay challenged.
Consistent, timed drills build hand‑eye coordination and visual recall, letting you tackle full portraits with greater speed and precision.
Working From References: Photos, Mirrors & 3‑D Models
Good reference use turns guesswork into confident lines—without chaining you to a single image.
1. Photo References
- Shoot your own – A smartphone + indirect daylight = perfect starter photos with consistent lighting.
- Use multi‑angle sets – Front, ¾, and profile views prevent “copy‑paste” errors when you rotate the head.
- Check licensing – Favor public‑domain sites (Unsplash, Pexels) or properly licensed stock.
- Analyze before drawing – Mark the eye line, nose base, and major shadow shapes on a printout or in a paint‑over layer.
2. Live Mirror Studies
- Immediate feedback – Subtle muscle shifts appear in real time, great for expression practice.
- Perspective awareness – Slight head tilts force you to adjust thirds dynamically.
- Setup tip – Place a small mirror beside your paper so your gaze moves only a few degrees—less neck strain, better accuracy.
3. 3‑D Models & Pose Apps
- Posable head apps – ArtPose, MagicPoser, and Clip Studio’s 3‑D mannequins let you rotate to any angle.
- Sculpted skulls & ecorché – Study underlying bone/ muscle planes; helps when inventing lighting.
- Online viewers – Sketchfab or Smithsonian 3‑D scans provide high‑resolution busts you can spin in-browser.
4. Best Practices for Reference Use
- Multiple sources – Combine a photo’s lighting with another subject’s features for originality.
- Thumbnail first – Spend 2 minutes blocking shapes before chasing details; ensures composition cohesion.
- Color & value isolation – Squint or use a grayscale filter to separate light vs. dark masses clearly.
- Reflect & correct – After finishing, flip your drawing horizontally; discrepancies pop out for quick fixes.
5. Avoiding Common Pitfalls
| Pitfall | Fix |
|---|---|
| Mindless tracing | Trace once to study, then redraw freehand from the same reference. |
| Over‑zoom paralysis | View at 25–50 % zoom to keep relationships, not pixels, in mind. |
| Lighting mismatch | Stick to one light setup per study session; mixing confuses form reading. |
6. Reference Drill (15 min)
- 5 min – Photograph your own face under a desk lamp (45° angle).
- 5 min – Sketch the basic planes from the photo.
- 5 min – Turn off photo; use a mirror to refine expression and add fresh details.
Effective reference workflow = observe ➜ analyze ➜ interpret—each stage sharpening your eye and style.
Digital Tools & Apps That Boost Face Sketching
Tablet workflows add speed, flexibility, and infinite “undos” to your facial‑drawing practice. Here’s a focused toolkit and workflow you can slot straight into your routine.
1. Core Sketching Apps
- Procreate (iPad) – Streamlined UI, pressure‑responsive brushes, QuickShape for instant concentric circles or perfect ellipses.
- Clip Studio Paint (Win/Mac/iPad) – Top‑tier pen stabilization, 3‑D head mannequins, and mesh transform for quick proportion tweaks.
- Krita (Win/Mac/Linux) – Free, open‑source; handy brush engines and wrap‑around mode for pattern design.
- Adobe Fresco (iPad/Win) – Live vector + raster brushes, making line‑art scaling painless.
2. Must‑Have Brush Packs
| Purpose | Recommended Brush | Why It Helps |
|---|---|---|
| Construction | “6B Pencil” (Procreate default) | Grainy bite mimics traditional graphite. |
| Inking | MaxPacks Fountain | Variable line width ideal for stylized outlines. |
| Shading | True Grit Halftones | Quick, graphic value shifts without muddy gradients. |
| Texture | Kyle’s Splatter (Photoshop) | Adds pores and freckles in seconds. |
Tip: Name custom brushes by task—“Eye Socket Shadow” or “Skin Texture 20%”—so you jump to them instantly.
3. Game‑Changing Features to Activate
- Symmetry Guides – Toggle vertical mirror for construction, then freehand final pass to avoid “robotic” faces.
- Reference Window – In Procreate’s Canvas → Reference panel, pin a photo side‑by‑side while you draw.
- Perspective Assist – Clip Studio or Procreate’s 3‑D grid keeps jawlines correct in dramatic tilts.
- Liquify/Transform Mesh – Push proportions after the fact; great for testing stylization extremes without redrawing.
4. External Reference & Anatomy Apps
- ArtPose Pro – Fully posable 3‑D model with adjustable lighting and muscle overlays.
- Skelly (Proko) – Simplified skeleton rotation; perfect for block‑in practice.
- Anatomyka – Layered anatomy explorer—toggle skin, muscles, and bones to study underlying structures.
5. Efficient Digital Workflow (20‑Min Cycle)
- 5 min – Rough Block‑In
- Use a large, soft graphite brush at 20 % opacity.
- 3 min – Plane Pass
- Switch to a hard round; carve cheek, brow, and jaw planes with straight strokes.
- 7 min – Feature Focus
- Zoom to 125 % max; refine eyes, nose, and mouth.
- 3 min – Value Pass
- Clip a multiply layer; drop mid‑tones and deepen core shadows.
- 2 min – Highlight & Merge
- Add a screen layer; pop highlights on lips and eyes, then merge visible layers to keep file light.
6. Digital Pitfalls & Fixes
| Pitfall | Quick Fix |
|---|---|
| Endless “Ctrl+Z” loop | Limit yourself to 2 undos per step; timebox each pass. |
| Over‑zooming | Set a max zoom %; back out every 3 minutes to check overall proportions. |
| Brush hoarding | Curate 5–7 go‑to brushes and archive the rest into a “Parking Lot” folder. |
7. Quick Digital Warm‑Up Drill (10 min)
- Open a blank canvas at 2000 px square.
- 3 min – Draw 10 random ellipses with Symmetry on.
- 4 min – Convert three ellipses into full heads with thirds and jaw wedges.
- 3 min – Flick Symmetry off; add unique expressions to each head freehand.
Digital tools should support your fundamentals, not replace them. Keep construction rules front and center, and use tech for what it does best—rapid iteration, clean adjustments, and fearless experimentation.
Next‑Level Tips: Gesture, Flow & Dynamic Head Poses
Static, front‑facing heads feel stiff; adding gesture brings narrative energy and directs the viewer’s eye.
1. Lead With the Line of Action
- Single sweeping curve—usually an S‑ or C‑shape—runs from crown through chin into the neck and spine.
- Draw it first in one confident stroke; it dictates tilt, lean, and overall attitude.
2. Map Rhythm Lines
- Brow → cheekbone → jaw forms a continuous flow; emphasize this arc.
- Hairline → nose bridge → philtrum → chin gives a secondary internal rhythm.
- Keep rhythm lines curved, not angular, to maintain organic movement.
3. Break Symmetry Deliberately
| Gesture Type | How to Push It | Visual Payoff |
|---|---|---|
| Tilt | Drop one side of the brow/nose/mouth slightly. | Suggests curiosity or relaxation. |
| Turn | Compress far‑side features; enlarge near‑side. | Adds depth and ¾ dynamism. |
| Lean | Shift neck off center line; shoulders counterbalance. | Conveys weight, emotion, or motion. |
4. Overlap & Foreshortening
- Layered forms—ear behind jaw, jaw behind neck—create believable depth.
- Foreshorten by squashing distances along the viewer’s line of sight; the nearer chin edge may hide part of the neck.
5. Connect Head to Spine
- Sketch a quick “S” neck column to show where weight rests.
- Align shoulders to oppose the head’s tilt for natural counter‑curves.
6. Gesture Dash Drill (15 min)
- 1 min each—draw 10 thumbnail heads using only line of action + spheres.
- 30 s each—add rhythms and jaw angles.
- 4 min—pick two thumbnails; flesh out full features and shadows, keeping the original flow.
7. Pitfalls & Quick Fixes
| Pitfall | Fix |
|---|---|
| Stiff vertical axis | Curve the centerline—no perfectly straight midlines in gesture sketches. |
| Feature drift | After pushing tilt, re‑measure eye‑nose‑mouth spacing to keep structure intact. |
| Over‑rendering early | Finish gesture lines before shading; detail too soon locks you into stiffness. |
Pro tip: Practice by pausing movies or anime mid‑action—capture the head gesture in 30 seconds, then compare to the next frame to see how professionals maintain flow.
Mastering gesture transforms heads from static likenesses into expressive moments that move the viewer—perfect for comics, storyboards, and dynamic portraiture.
Other featured topics to help you at drawing
Feel free to share in the comments below.
- 8 Tips to Create Simple Flower Drawings (For Beginners)
- Top 10 Tips to Drawing Backgrounds Like a Pro
- The Ultimate List of Skills You Need to Begin Drawing
- Avoid These Things to Improve Your Creative Drawing
- Over 80 Sketchbook Ideas to Make Your Drawings Interesting
Conclusion
So, these are some simple tips and techniques for sketching faces.
By following these tips you will surely know how to draw faces better and become much better, as long as you practice.
I hope that you have learned well how you can sketch facial features including eyes, nose, lips, and ears.
Although direct observation is one of the most crucial things that can assist you to perfect your sketches, you should learn some tips as well for drawing faces better.
The reason is these tips act as the building blocks and will surely assist you to consider the placement as well as the size of the facial features.
The sketching tips will not only help you to experiment with the drawing of faces confidently but will surely improve your drawings.
Most people think that drawing faces is one of the trickiest things to draw.
Drawing faces for beginners is often thought of as challenging.
But the fact is: once you learn the basic skills, you can draw faces very easily.
After learning to draw faces, keep practicing.
This process is just like fitness.
The more you practice your drawing skills, the more it will become easier for you.
So, are you ready to make your portrait sketches pop?
What are you waiting for now?
It is time to grab a sketchbook and pencils and start sketching faces.
Happy Sketching!
Do you know some other tips for drawing faces better?
Frequently Asked Questions
What pencils should I start with for face sketching?
A simple HB for layout, a 2B for mid‑tones, and a 4B–6B for dark accents cover about 90 % of portrait needs. Expand to a full HB–6B set as your value range grows.
How can I improve my proportions quickly?
Break the head into thirds (brow, nose base, chin) and measure each section against the width of one eye. Recheck these guides every few minutes—muscle memory forms faster than you think.
How long should I practice each day?
Consistency beats marathons. Two focused 20‑minute sessions (one drills, one free sketch) will outpace a single unfocused hour.
Is tracing bad for learning?
Tracing once to study shapes is fine—just redraw the same reference freehand immediately afterward to internalize what you observed.
How do I stop my drawings from smudging?
Use 70–100 lb (100–150 gsm) paper, keep a scrap sheet under your hand, and work top‑left to bottom‑right (reverse if left‑handed). Finish with a light spray fixative.
Why do my eyes look “dead”?
Leave a crisp white highlight on the iris where the main light hits, and let the upper lid overlap the iris slightly to create depth.
Digital vs. traditional: which is better for beginners?
Traditional media builds hand control and value discipline; digital speeds up iteration with undo and layers. Start with whichever keeps you practicing daily—skills transfer both ways.
How do I capture a likeness, not just a generic face?
Identify three “hero shapes” unique to your subject (e.g., nose silhouette, eyebrow angle, jaw outline) and exaggerate them by 5–10 %. Small tweaks lock in recognizability.
What’s the best way to learn different ethnic features respectfully?
Study anatomy from diverse multi‑angle photo sets and note structural patterns (nasal bridge height, cheek width, eye‑fold types). Avoid relying on stereotypes or single “representative” images.
How can I add expression without distorting the face?
Tilt brows and adjust eyelids first; tweak mouth corners last. Keep changes within anatomical limits—brow arches rarely exceed 15–20° without veering into caricature.